
This photo frame is full of yarny fun and makes a thoughtful gift. It doesn’t take very long to make and is a great way to use up some extra yarn scraps. In fact, when I made the Sorbetto Baby Blanket, I had some yarn left over…perfect for the photo frame!
*Be sure to scroll down for a complete video tutorial too.
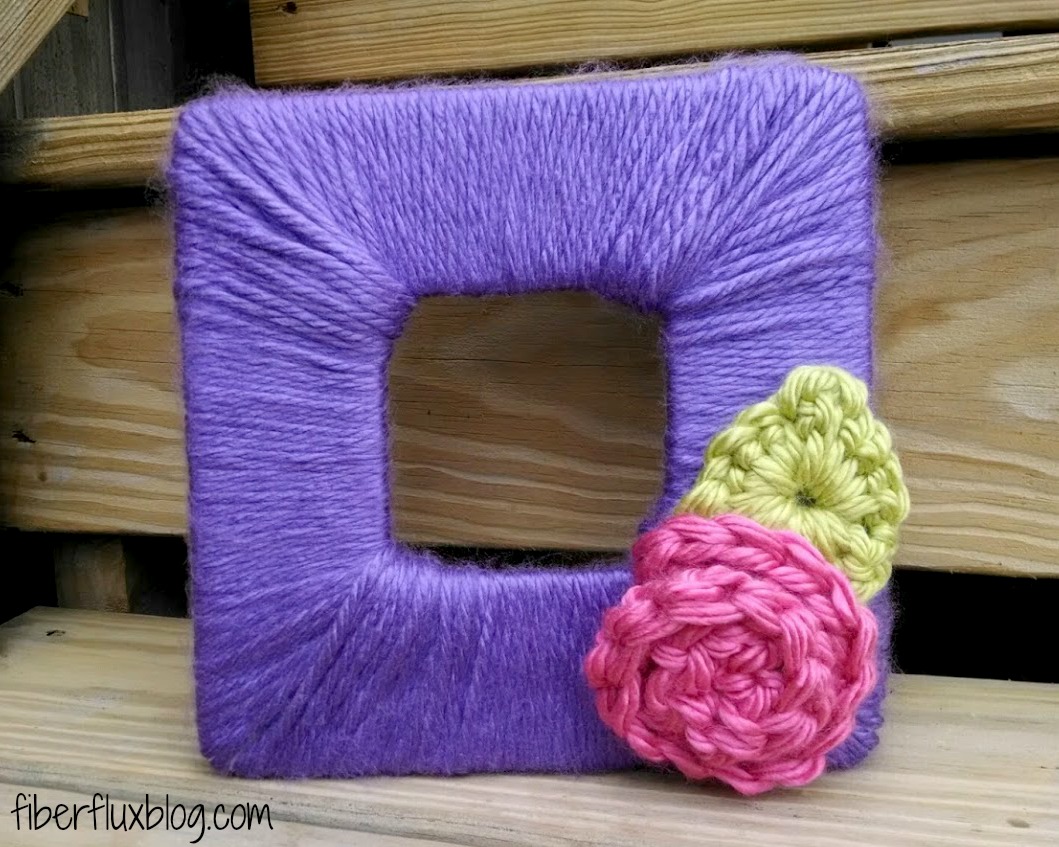
Blooming Photo Frame
By Jennifer Dickerson
Materials:
Note: Any yarn you have on hand can be used for this project. I happened to have lots of bulky yarn, and it does make the project faster. However, definitely use what you may already have. Check yarn label for hook recommendation for your particular yarn.
- 1 skein of yarn for the main part of the frame (yarn shown is Lion Brand’s Hometown USA in Minneapolis Purple)
- Scraps of yarn for rose and leaf (yarn shown is Lion Brand’s Hometown USA in Monterey Lime and Honolulu Pink)
- Crochet hook (again, check yarn label for recommended hook size)
- Tapestry Needle
- Photo Frame (I got mine in the unfinished wood aisle of the craft store)
- Hot Glue Gun or Fabric Glue
- Scissors
- Chop stick, pencil, or dowel rod (optional for hot glue gun users)

Instructions for Photo Frame:
- Take anything out of the center of the frame (sample photo, backing, etc)
- My particular frame uses a dowel rod to hold it up, if you have one too, just put it aside for now.
- Tie yarn around frame and knot, taking care to put knot onto the back of the frame.
- Begin wrapping yarn around the frame, incorporating the yarn tail as you wrap.
- Wrap yarn around entire frame.
- The corners are a little tricky on the square frames! The yarn seems to love sliding around, creating gaps on the frame. Not to worry, there is an easy way to fix them later (see “Finishing & Assembly” section below). Circular frames don’t seem to have this problem.
- After your are finished wrapping, wrap a few more times around the frame so that it overlaps with where you started, hiding any gaps in the yarn.
- Tie together to fasten and secure.
- With a tapestry needle or your fingers, weave in that last tail.
Instructions for Rose:
Click here for a rose photo + video tutorial…
Ch 12
In the 4th ch from the hook, work 2 dc, then work 3 dc in each chain all the way across to the end. Rose will curl naturally. Coil into desired shape, then seam together using remaining tails. Weave in any ends that remain.
Instructions for Leaf:
Click here for a leaf photo + video tutorial…
Ch 4 and join with a slip stitch to form a ring.
Round 1: In the center of the ring, work 6 dc, 4 sc, 1 tr, 4 sc. Join with a slip stitch to close leaf and fasten off. Weave in any ends that remain.
Finishing & Assembly:
- If you have any gaps in between the yarn on the corners, flip the frame over and place a dot of hot glue/fabric glue on the back corner (definitely do not do it on the front or the outer edge where it will be seen)
- Slide yarn over the glue dot to close up the gap (hot glue gun users: a chop stick, pencil, or dowel rod really helps on this part to prevent burning your fingers)
- Glue leaf and rose to the frame any where you like it. (I placed mine along the bottom so it wouldn’t be too top heavy, especually since I used a bulkier yarn)
- Place item in frame…you may have to play with it a bit for it to fit correctly, the yarn kind of covers up the “tray” the photo sits in. I was able to make mine work, but you can use tape, etc to hold it in place if you wish.
- All finished…be sure to make one for you and one for a gift too!
Click below to watch a video on how to make the Blooming Photo Frame:
For more fun projects and pretty patterns, be sure to follow Fiber Flux on Google+, Facebook, Twitter, and Pinterest for the latest updates!
© Jennifer Dickerson 2014
Please note: Patterns are for personal and charity use only. In addition, if you enjoy the pattern, please link to it, but do not copy the pattern to your own website or blog (including other languages). Thank you!


(Affiliate Links)


Best advices gives best ideas
divorce lawyer new jersey
new jersey divorce
Best advices gives best ideas
divorce lawyer new jersey
new jersey divorce