
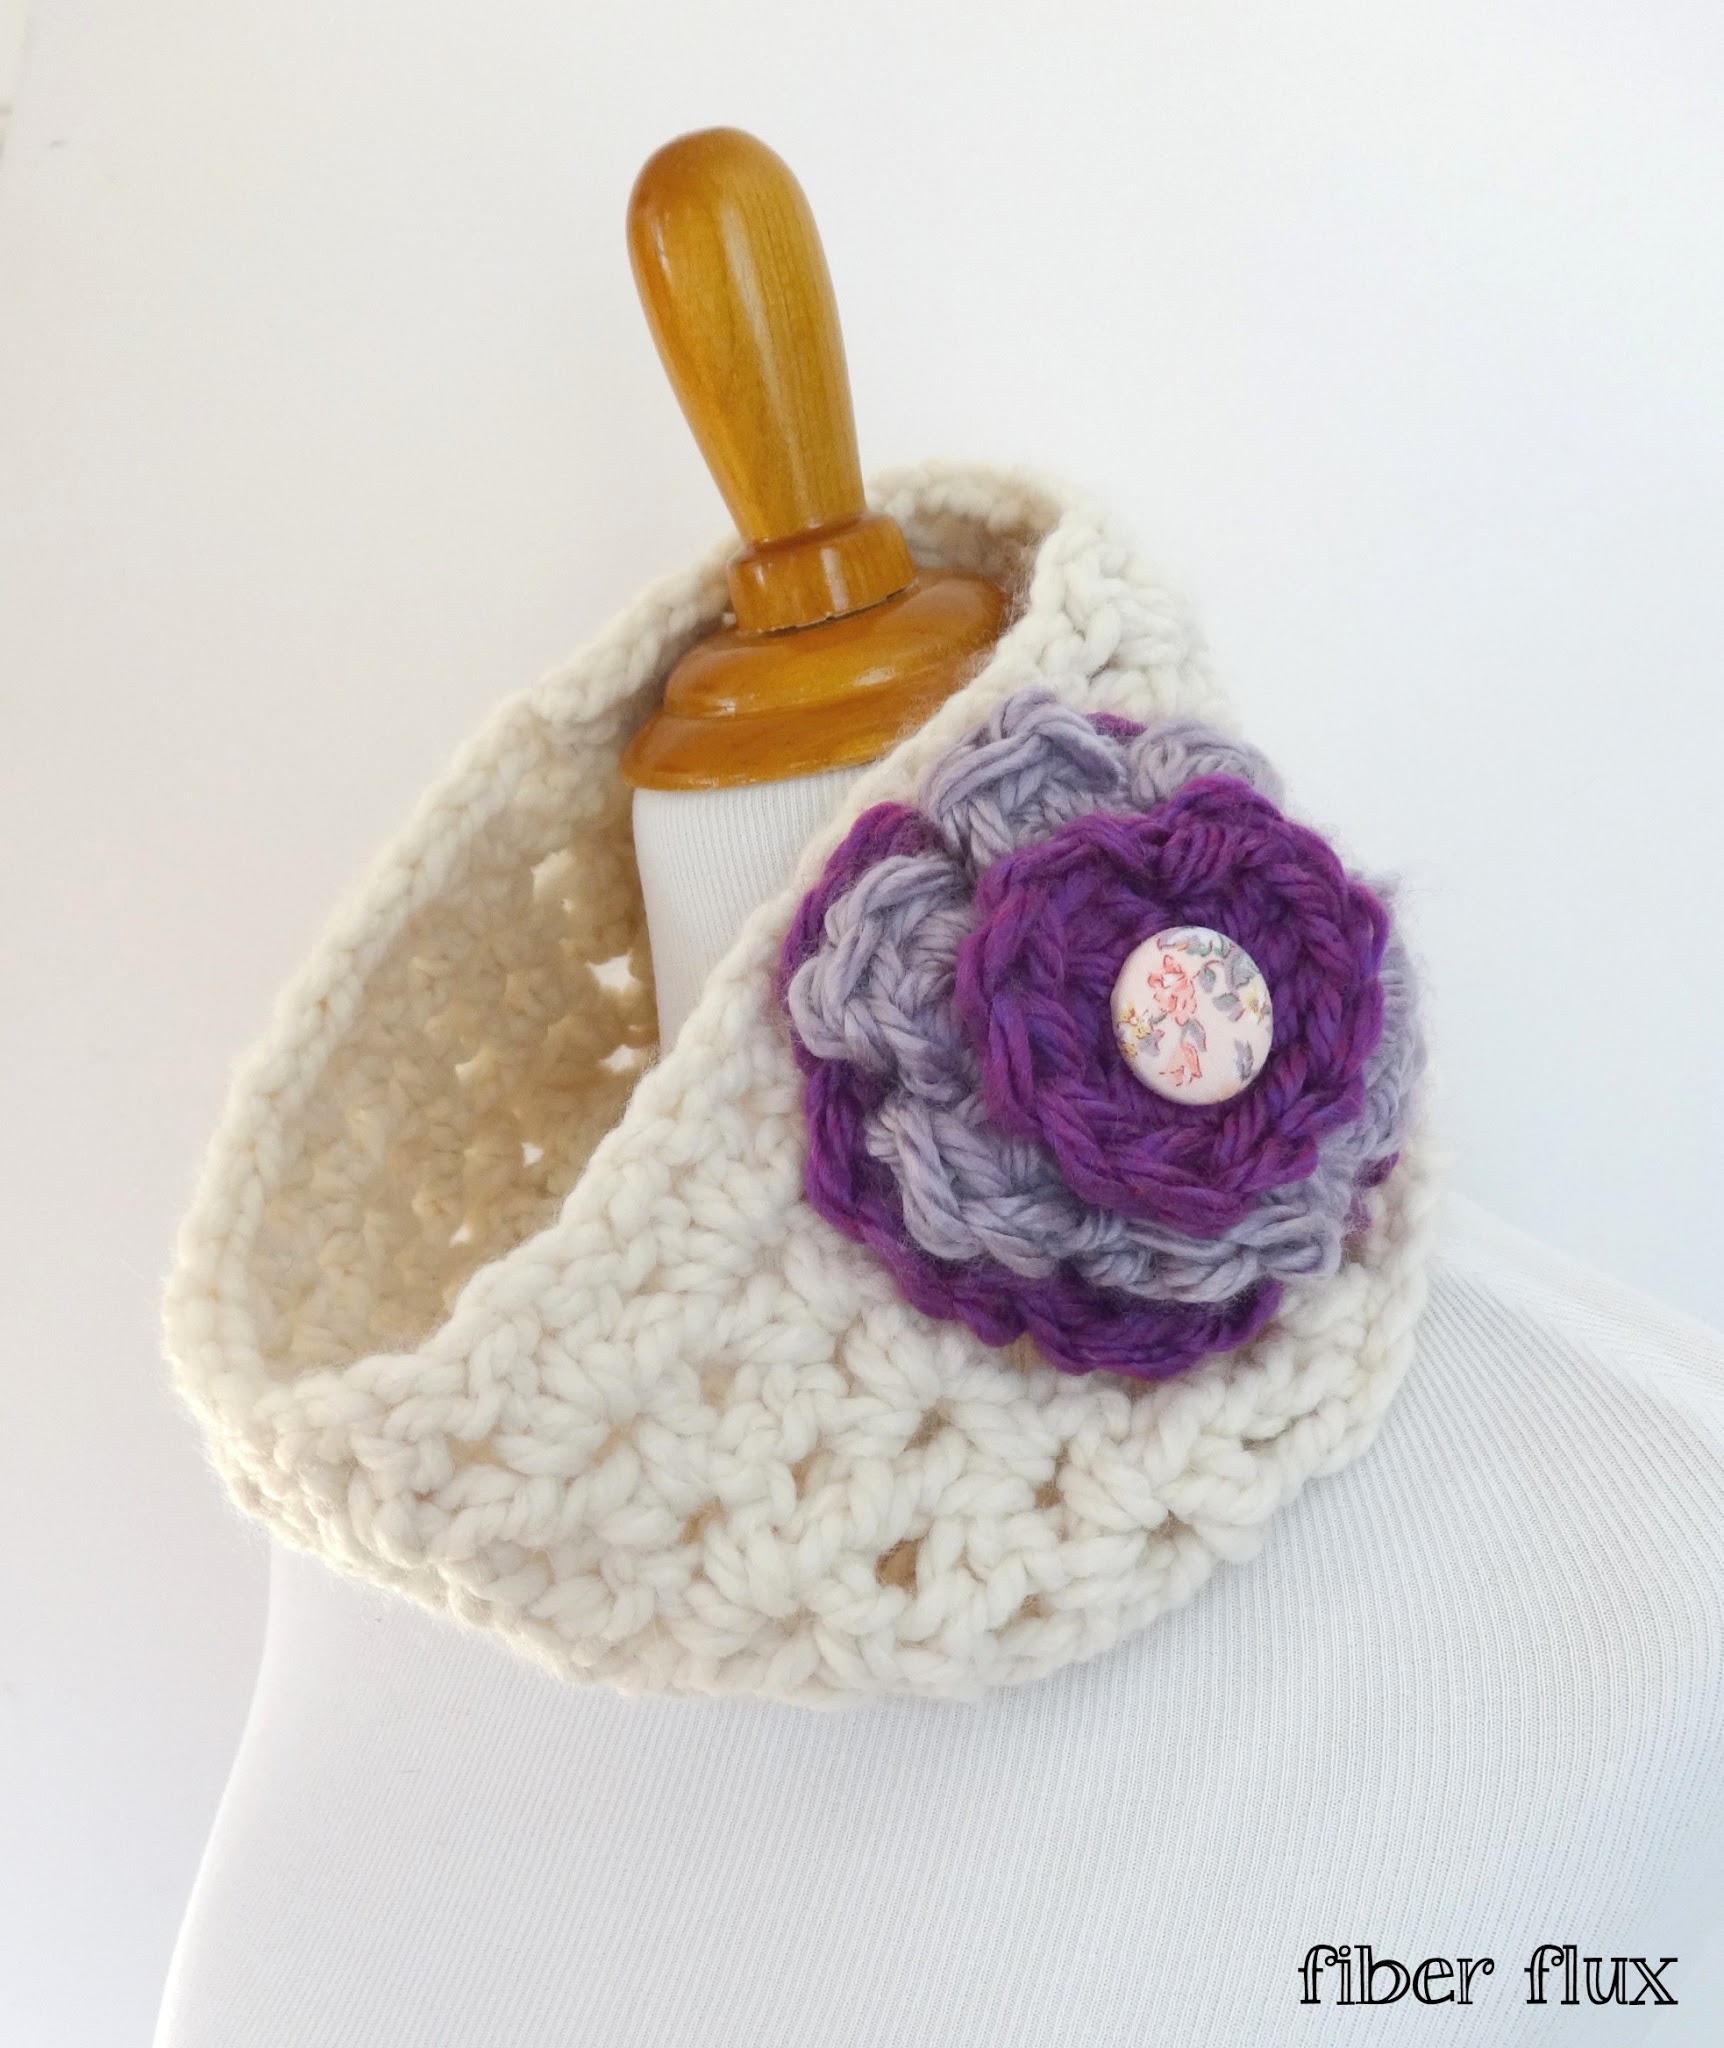
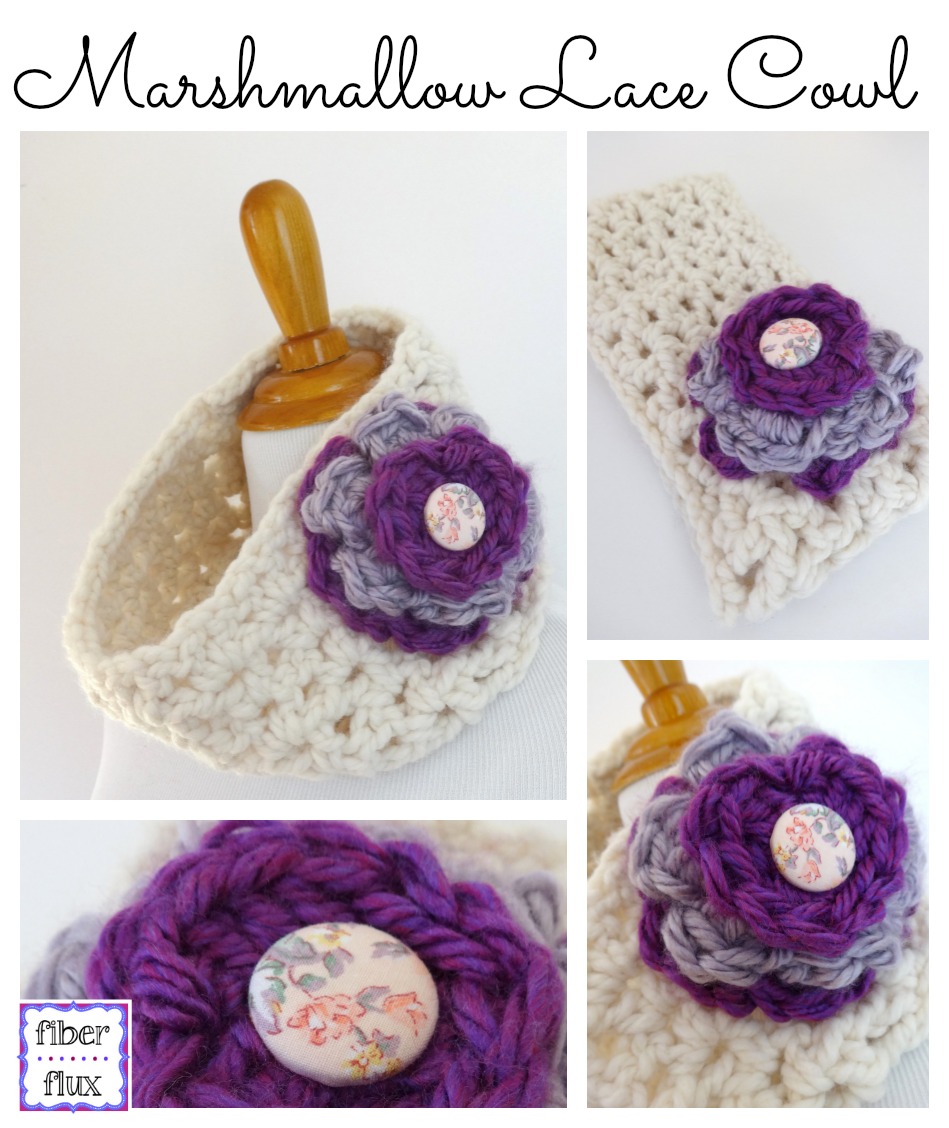
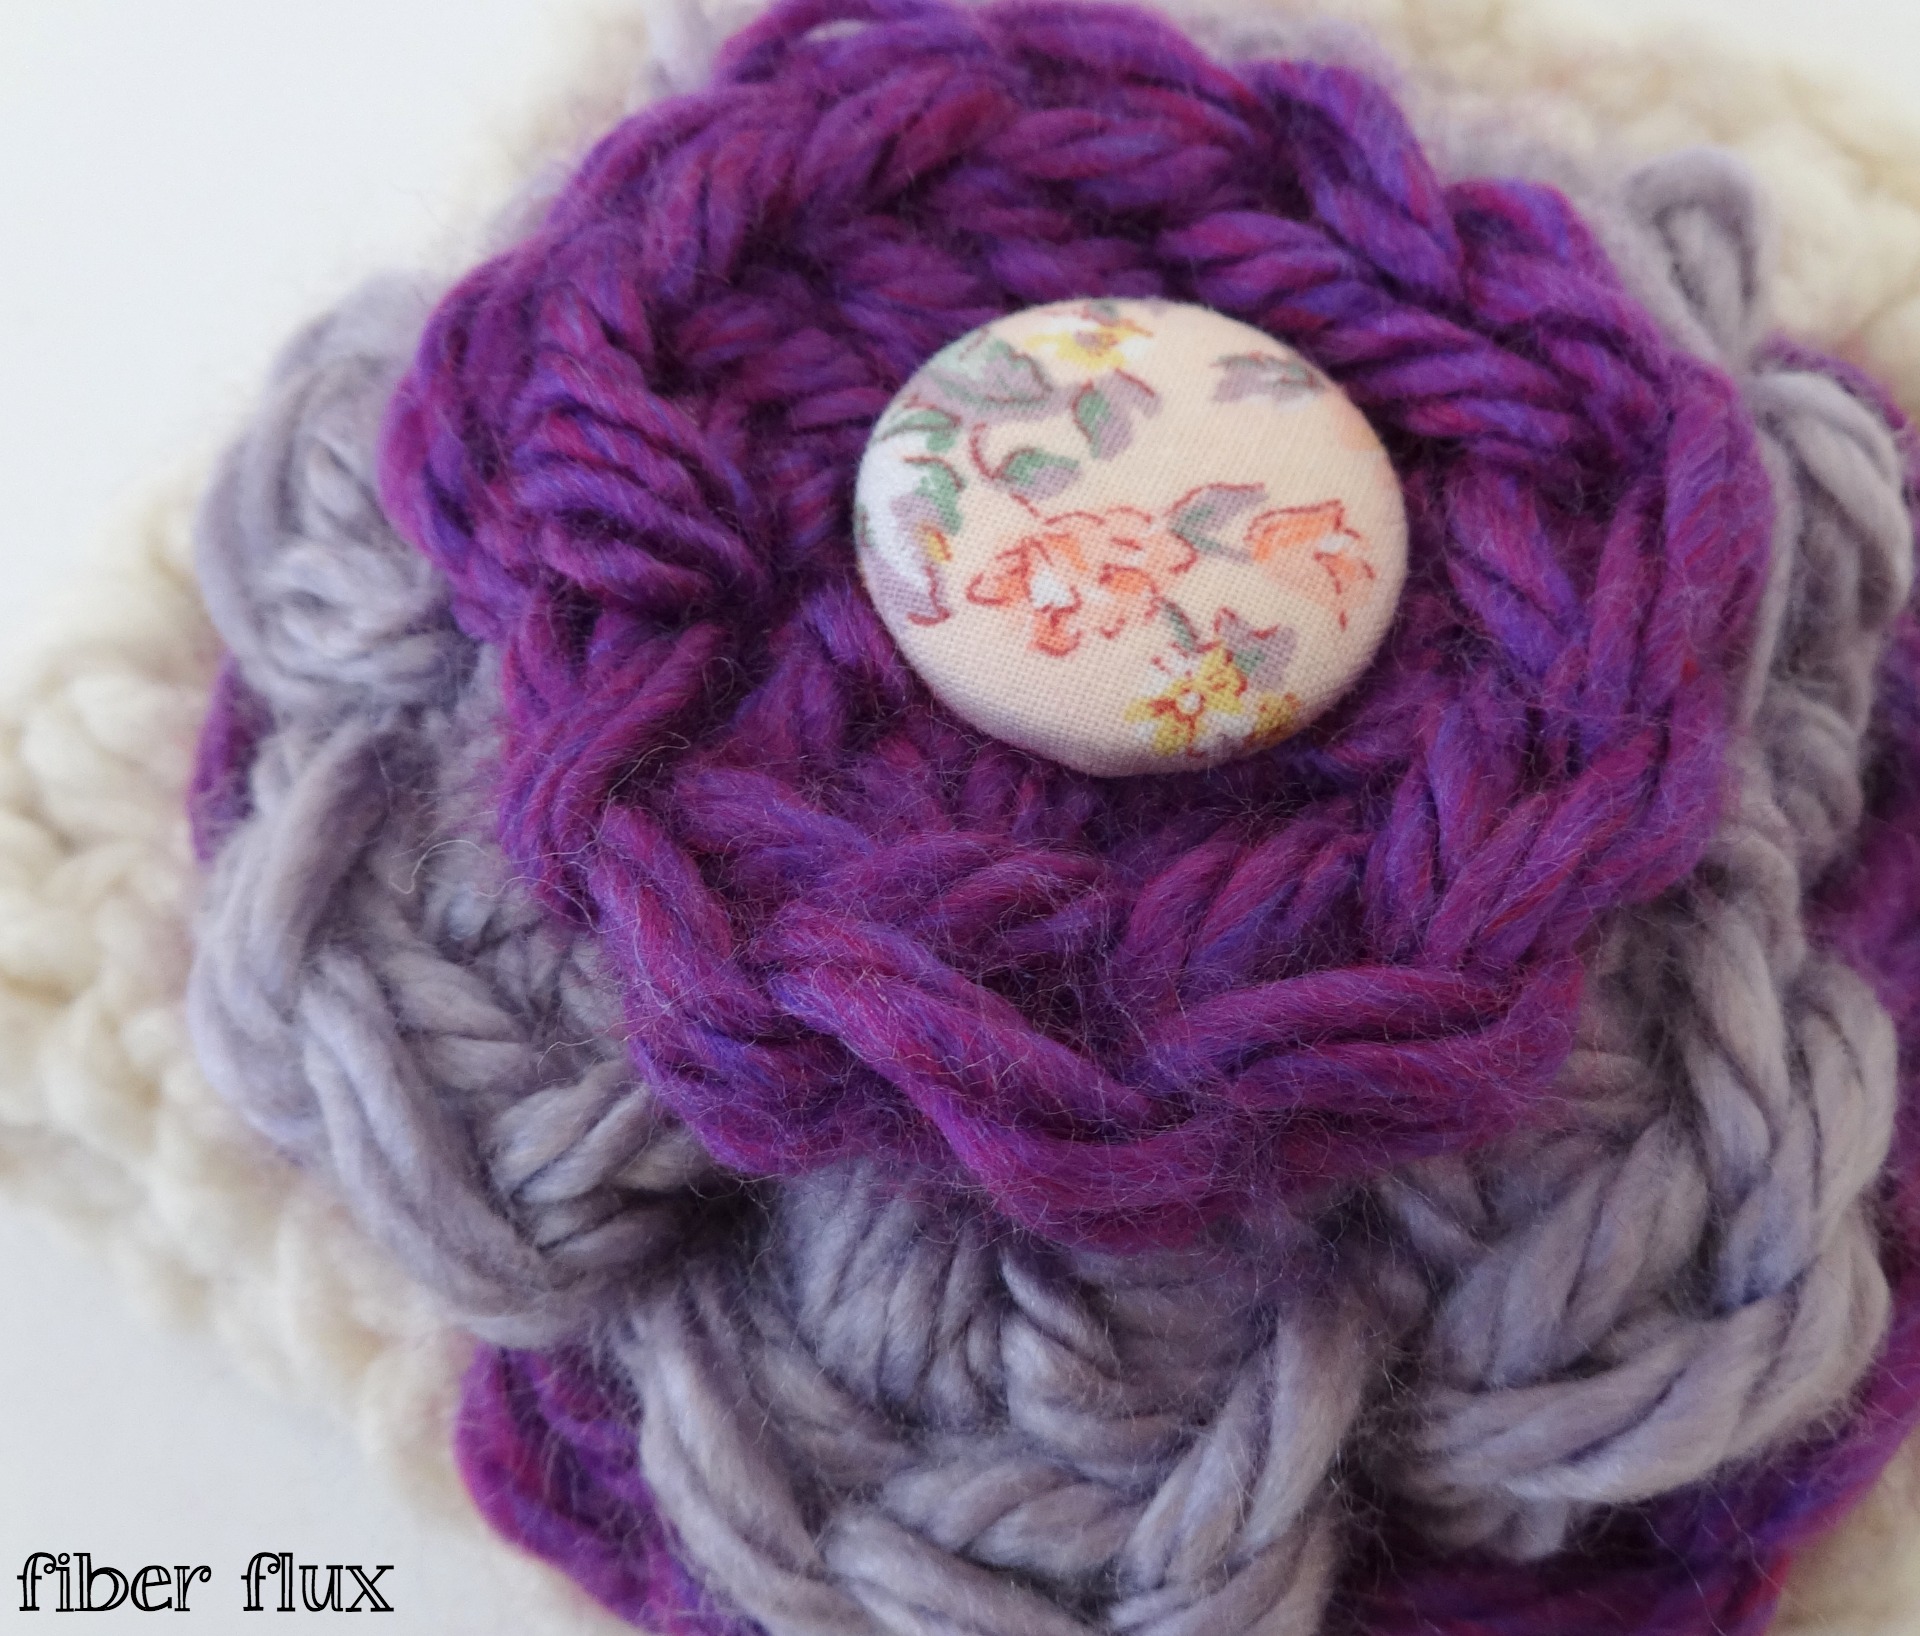
The Marshmallow Lace Cowl is fun, bulky, and luxurious! A lovely Fiber Flux reader asked for a “deluxe” flower version of the Meringue Cowl…consider it done! A cream lace cowl in the V-stitch is topped off by a large and fabulous flower, perfect for making a statement, while still staying cozy. It uses just one skein for the cowl part and yarn leftovers for the flower. I’ve topped mine off with a button I made myself too (see below for how-to info).
Marshmallow Lace Cowl
By Jennifer Dickerson
Click the button below to add this to your Ravelry queue:

Sizing:
- 24 Inch Cowl Circumference
- 6 Inch Cowl Height
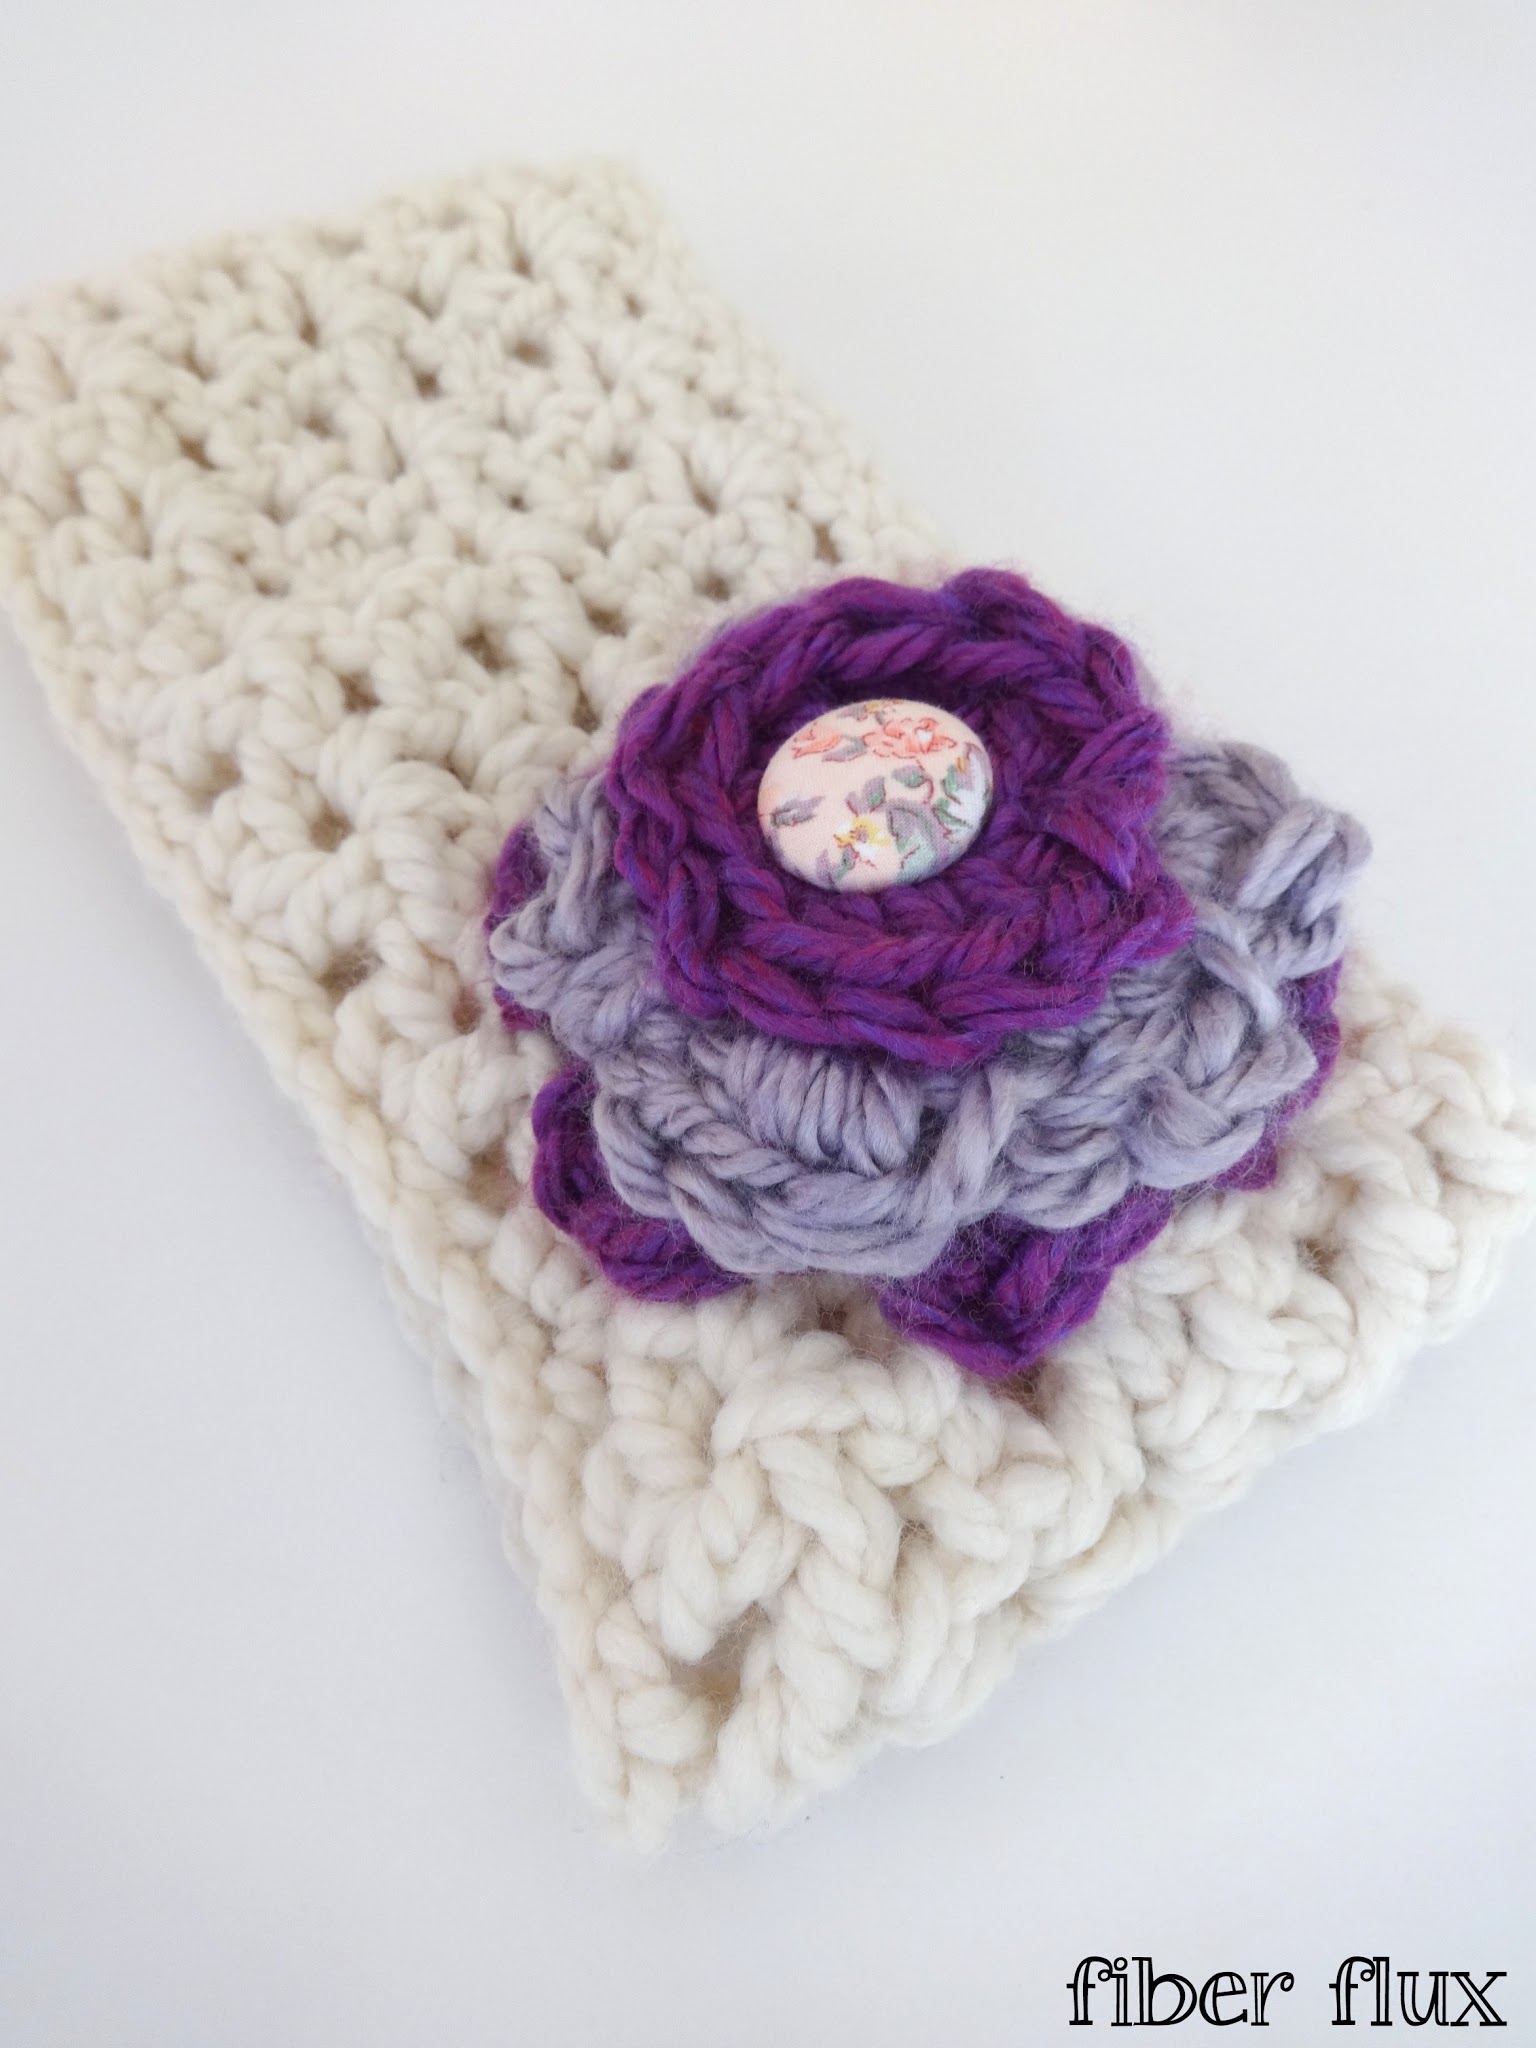
- 5 Inch Width for Flower
Materials
- 1 Skein Super Bulky Yarn of your Choice (yarn shown is Lion Brand Wool Ease Thick and Quick in the “Fisherman” colorway
- Super Bulky Yarn Leftovers (I used Lion Brand Hometown USA in the “Denver Rocky Mountain” and “Seattle Sea Mist”
- N (9 mm) Crochet Hook
- P (15 mm) Crochet Hook
- 1 Button
- Tapestry Needle
- Scissors
Instructions for Cowl:
(Cowl is worked lengthwise and seamed)
Ch 49 (To change circumference sizing, chain in multiples of 15+4).
Foundation Row: In the 4th chain from the hook, work dc, ch 1, dc in the same ch. *Skip two chains and then in the next ch, work dc, ch 1, dc in the same ch. Repeat from * to end.
Row 1: Turn, ch 3 and work dc, ch 1, dc in each of the chain 1 spaces from the previous row (center of each “V”). At the end of the row, finish with a dc in the last space (ch 3 turning space).
Repeat row 1 until desired width is reached. Cowl shown is a total of 6 rows of stitch pattern, with yarn leftovers.
Seam and weave in any ends. I left a long tail when I was finished and just used that to seam it together.
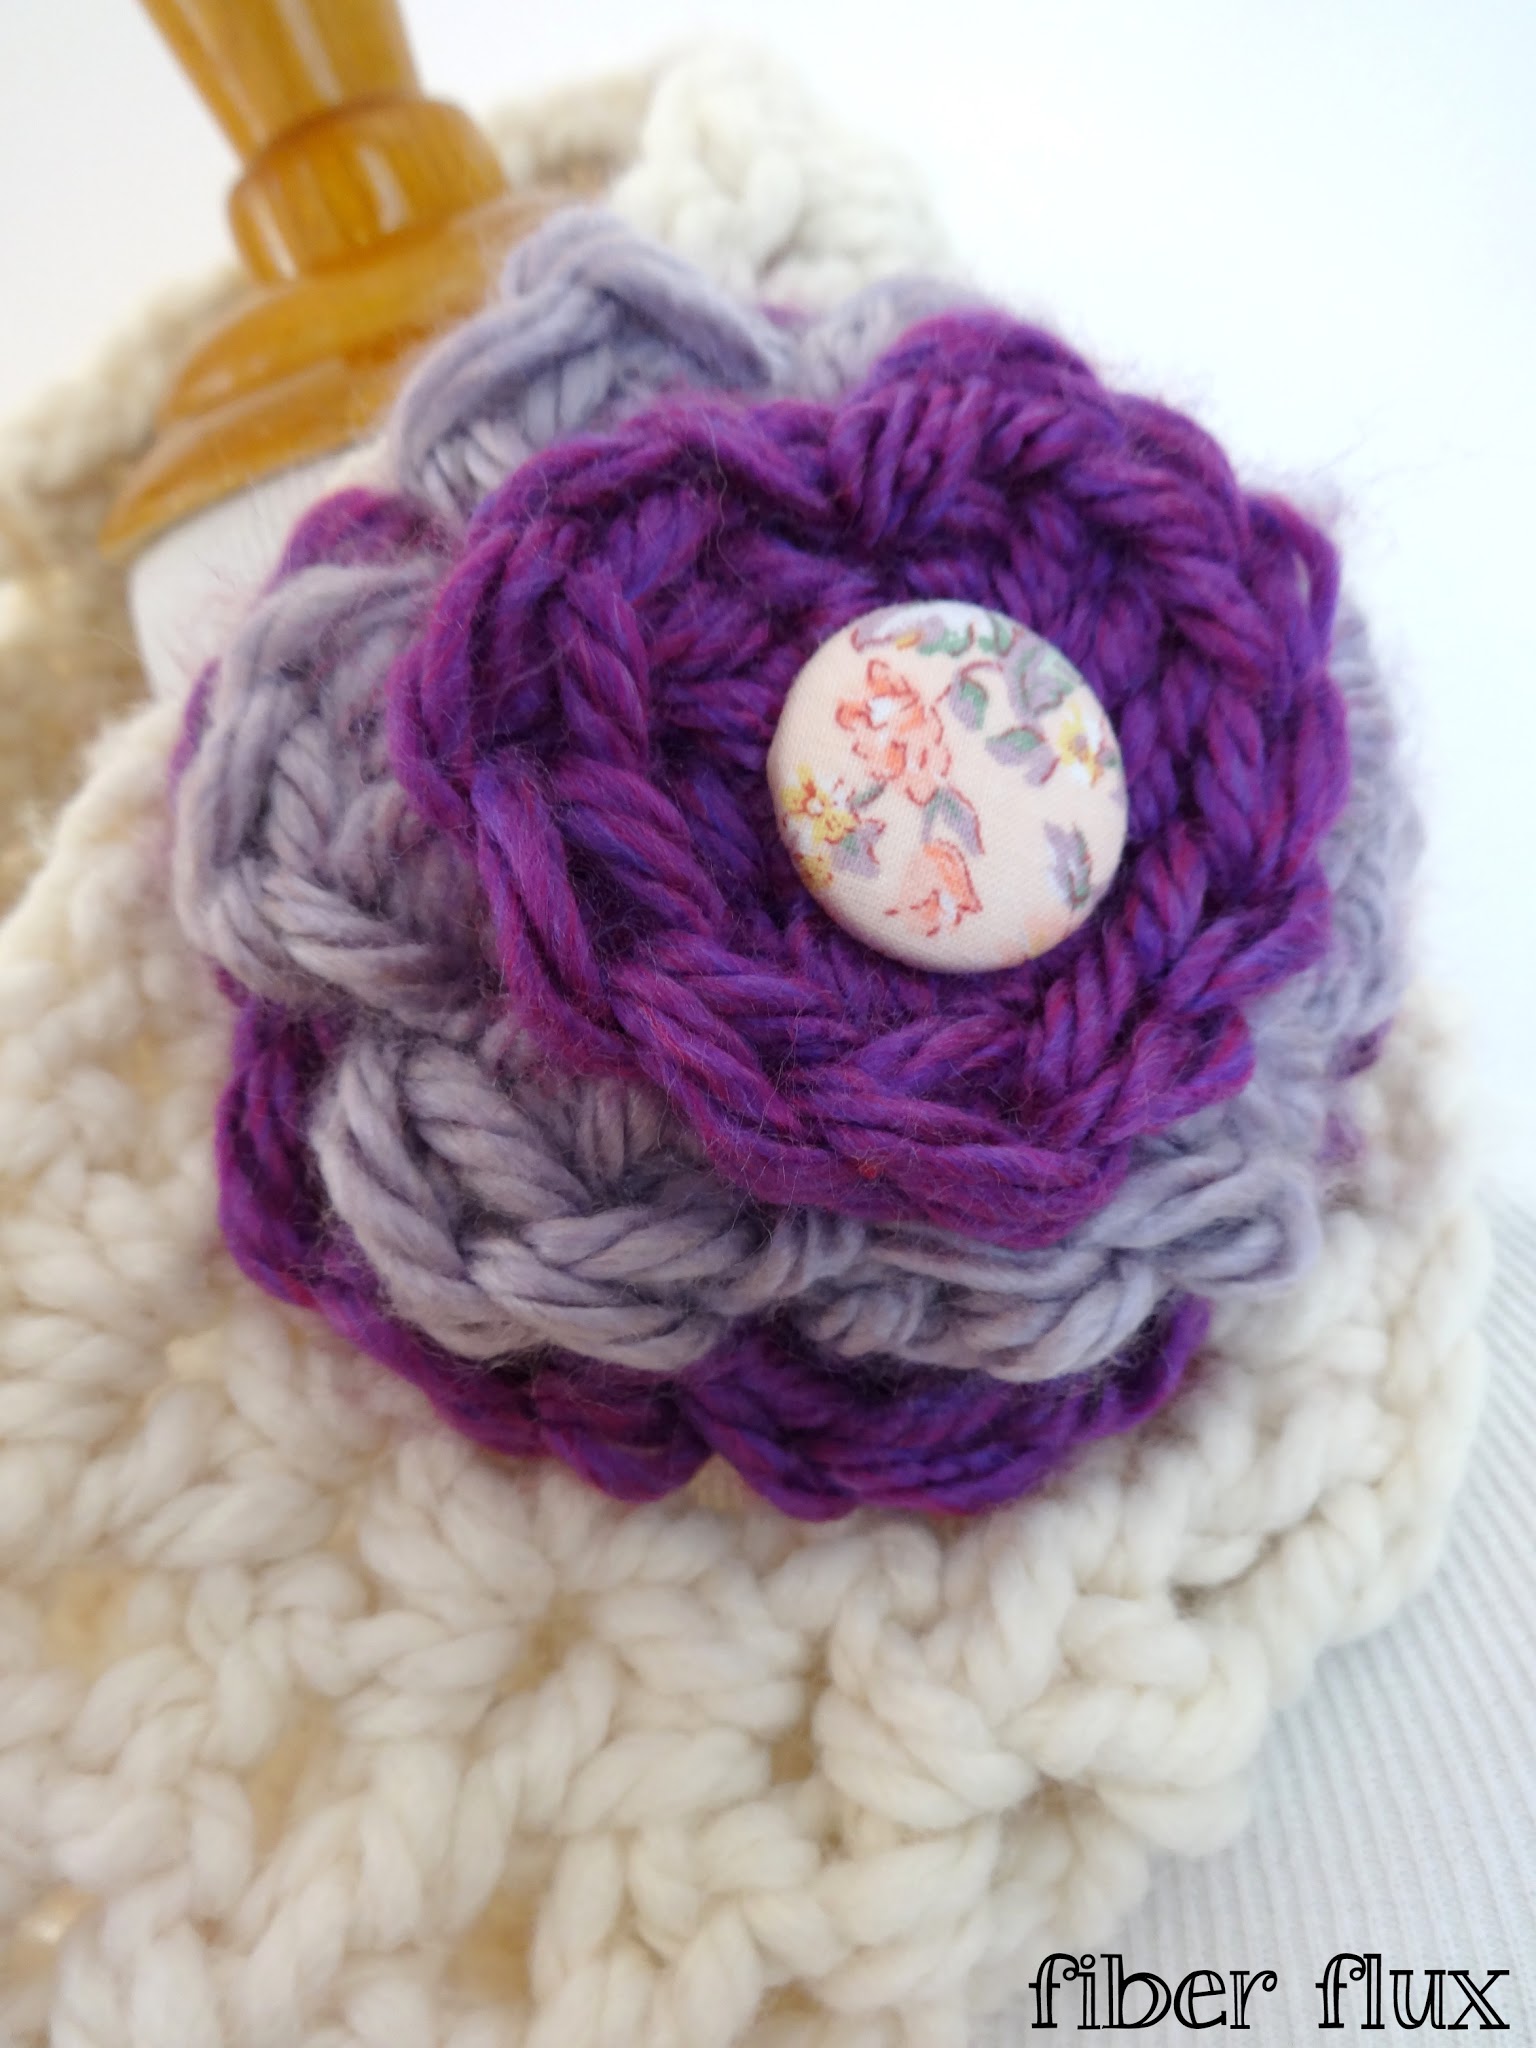
Instructions for Flowers:
(Make 2, one with an N hook and one with a P hook)
Ch 4 and join with a slip stitch to form a ring.
Round 1: Ch 3 then work 11 dc into the center of the ring.
Round 2: Chain 3 and in the first space, work (2 dc, then a sl st). *Skip the next space. In the next space work (3 dc, then a sl st) all in the same space. Continue from * to end for a total of six petals. Fasten off with a slip stitch in the next space, then close round with a slip stitch.
Instructions for Flower Center:
Ch 4 and join with a slip stitch to form a ring.
Round 1: Ch 3 then work 11 dc into the center of the ring.
Finishing and Assembly:
Layer flowers (large on bottom, smaller flower next, flower center next, button on top. Sew all layers together with a tapestry needle and weave in any ends that remain.
Click below to watch a video on how to crochet the Marshmallow Lace Cowl stitch by stitch:
Click here to learn how to make your own fabric covered buttons
For more fun projects and pretty patterns, be sure to follow Fiber Flux on Google+, Facebook, Twitter, and Pinterest for the latest updates!
 |
| Visit the Fiber Flux Yarn Shop! |

(Affiliate Link)


Hi, which is the size of the needle for the cowl, N or P size?
Wow this is super ! Thank you for such a beautiful pattern 🙂
P.S. I've been reading your blog for a while, I just haven't commented yet I love it !
Sehr schön. Danke.
Liebe Grüße, Manja
Same question…. which hook size for the cowl itself? Thank you for Christmas gift inspiration! 🙂
So I made this yesterday with the largest hook I already had, which was K, and only had to add one extra section of 15 +4. Then I made wristlets using the same pattern 15+4 ch wide to match. They all turned out amazing! Since I still have some yarn left I think I will make your friendship boot cuffs to go along with the set. I can't wait to give this gift set to my aunt!
Thank you so much for all your free patterns and tutorials! I have learned so much from your blog and made several projects and enjoyed all of them. You have really helped me in my journey to adopt a new lifestyle and gain a little more confidence in my abilities, which sounds silly, I know, but in a society where nobody really makes anything anymore I love being able to give my family and friends something truly from the heart. I just wanted to let you know what a positive thing you are doing and I hope you keep this up for a long time! 🙂
Looking forward to many more projects!