
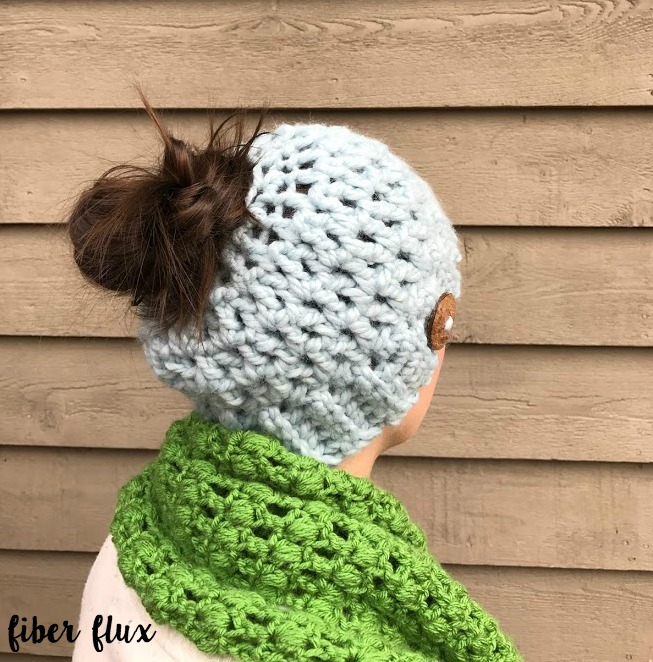
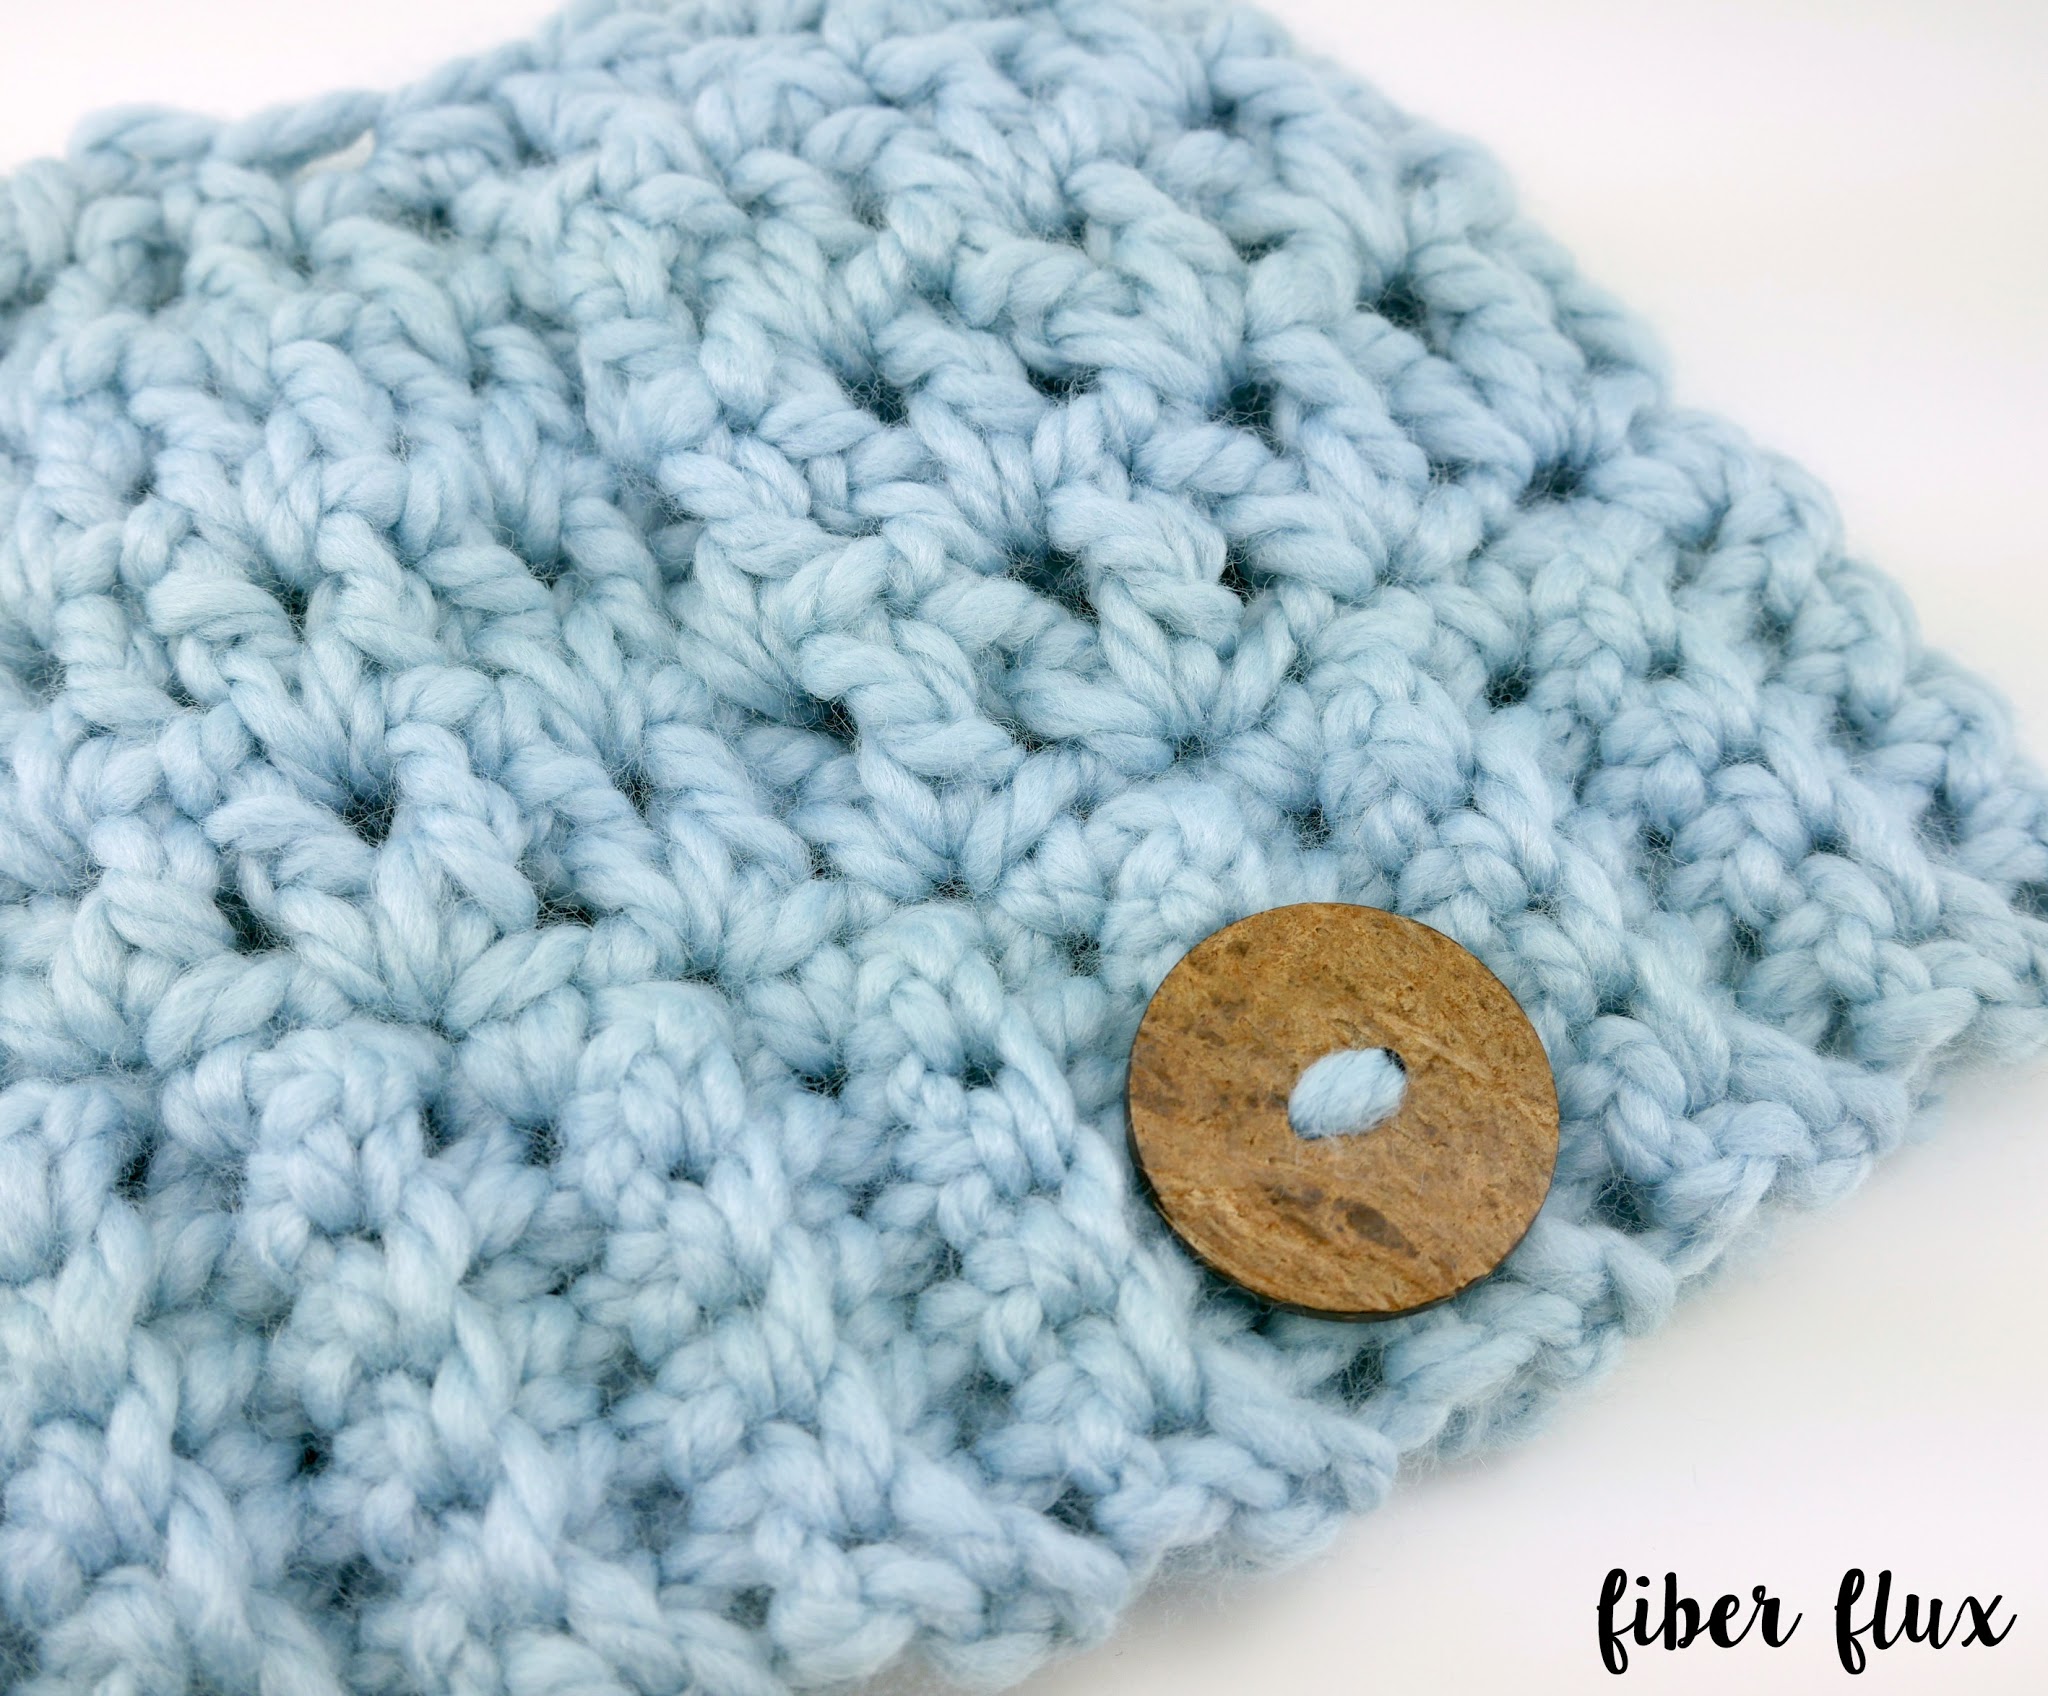
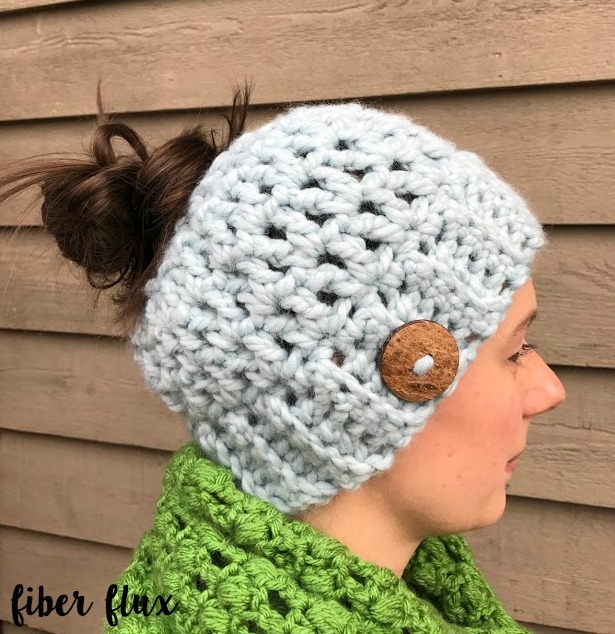
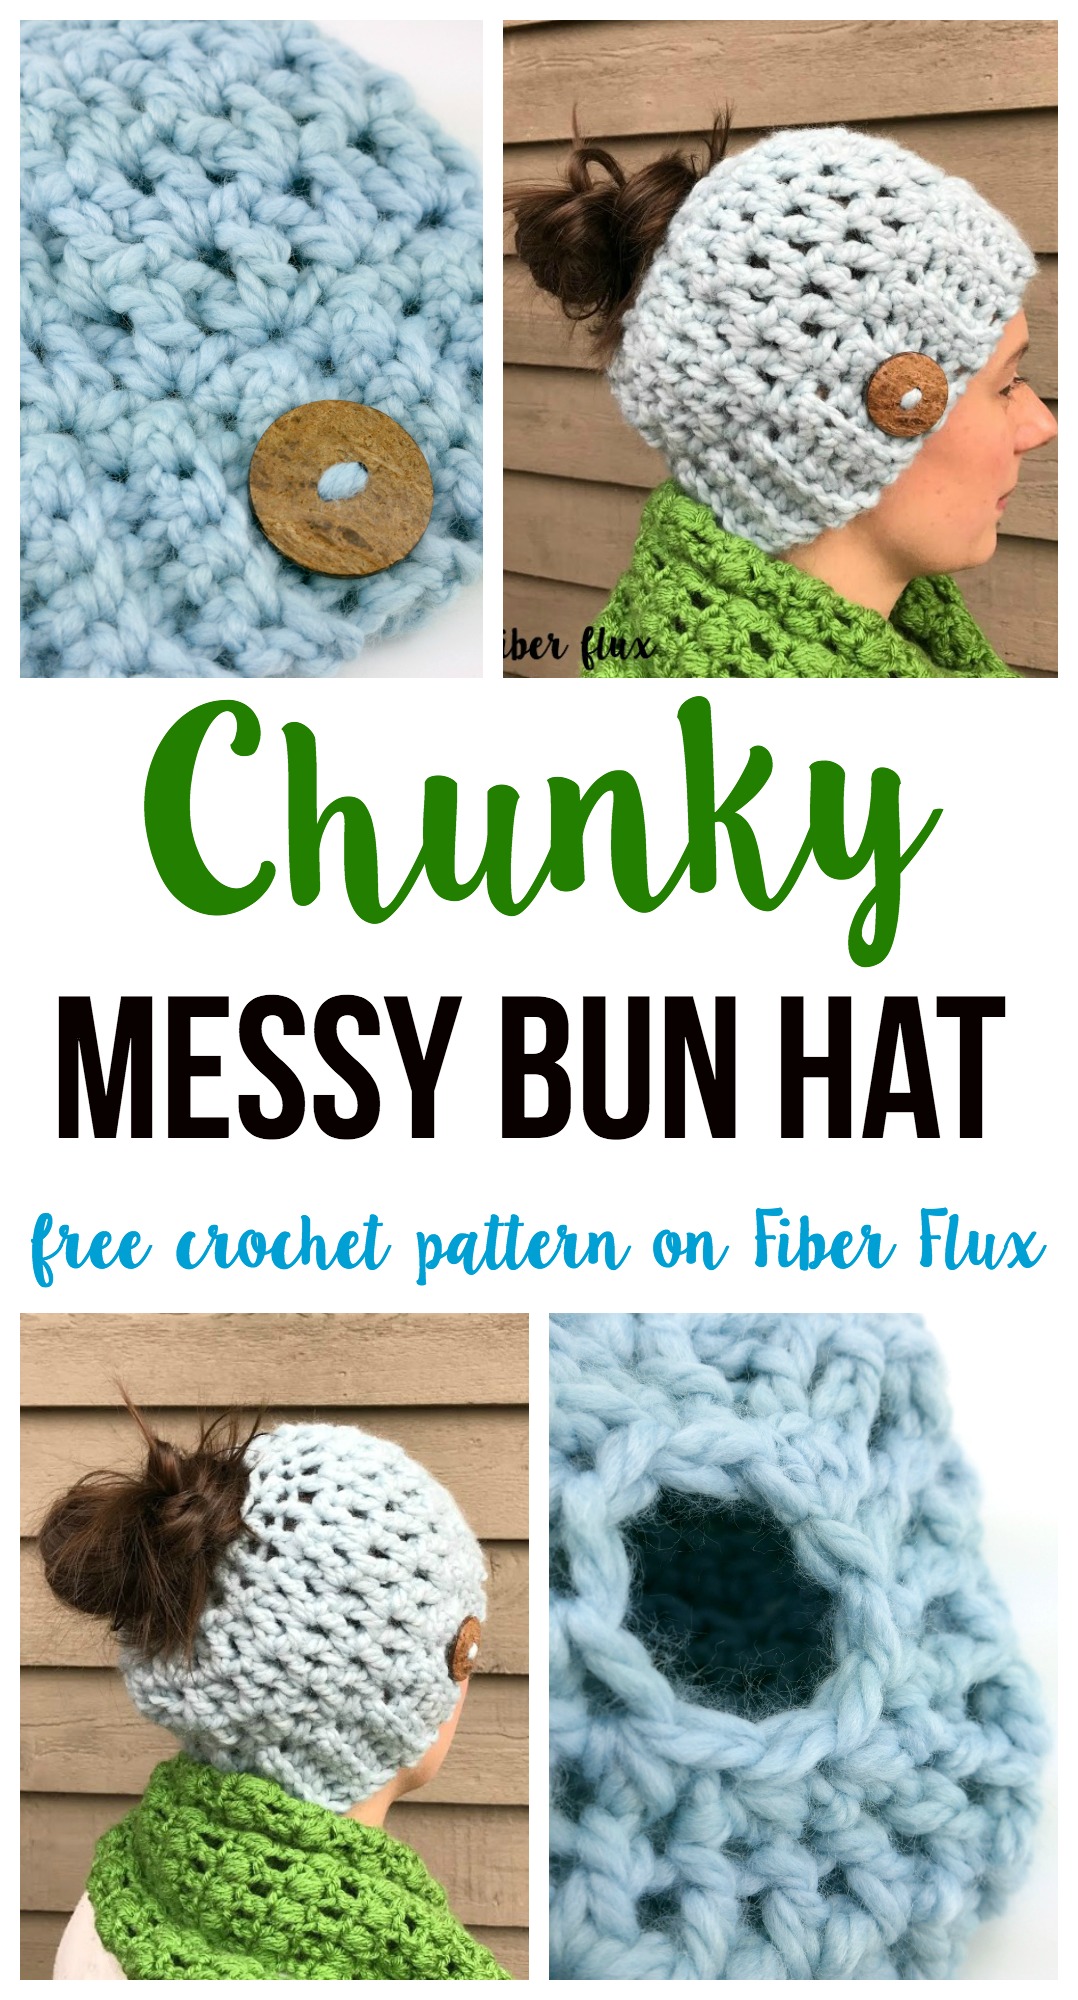
The Chunky Messy Bun Hat is super easy and fun to whip up. Messy bun hats are all the rage at the moment…there is an opening at the top to allow you to wear your hat with a bun or even a ponytail right through the top! This is a perfect project for a quick gift and uses only one ball of yarn.
*If you dig the cowl I’m wearing in the photos, it’s called theCilantro Cowl. Check out the free pattern + video here!
Let’s connect!


Chunky Messy Bun Hat
By Jennifer Dickerson
Click the button below to add this project to your Ravelry queue:

Click below to watch a full video tutorial on how to make this project:
(Can’t see the video? Click here!)
Materials:
-
9.0 mm crochet hook
-
1 Ball Wool Ease Thick & Quick (I used the “Glacier” colorway)
-
Tapestry Needle
-
Scissors
-
1 button (totally optional, I used a 1.5 inch wood button)

Click the image above to get yarn for this project!
(affiliate link)
Sizing:
-
7.5 inches tall
-
21 inch circumference
Instructions for Brim of Hat:
Ch 6
Row 1: In the second ch from the hook, work a sc. Work a sc in each ch across.
Row 2: Ch 1 and turn. Work a sc in the back loops only (blo) in each stitch across.
Repeat row 2 until piece measures approximately 21 inches long.
Join two edges together to form brim with a slip stitch seam. Do not fasten off yarn.

Instructions for Top of Hat:
*Note: For a taller hat, repeat round 2 as needed. For a larger opening at the top, don’t work round 6 of this section.
Round 1: Ch 1, then work a sc in each hole along the side (because the brim was worked in rows, you’ll be crocheting into the sides of the brim. Just look for the holes along the edge and work the sc stitches into them, keeping it in an even multiple).
Round 2: Ch 4 (counts as a dc + ch 1), then work a dc into the first st. *Skip the next st, then work a (dc, ch 1, dc) in the next st. Repeat from * to end of round. Join to close round in the third ch up (starting ch at beginning of round) with a sl st.
Round 3: Repeat round 2.
Round 4 (decrease round, so no ch 1 in between and note the starting ch is 3 this time not 4): Ch 3, then work a dc in the first st. *Work 2 dc in the center of each v. Repeat from * to end of round. Join with a sl st to close round.
Round 5: Ch 3, then * work a dc in between the two dc groups from the previous round.
Round 6: Ch 1, then *sc2tog in each st all the way around. (If you’re unfamiliar with this decrease, we’ll go through the whole round on the video tutorial).
Finishing:
With a matching piece of yarn, sew button to hat if desired as shown.. Weave in any ends that remain.
For more fun projects and pretty patterns, be sure to follow Fiber Flux on Google+, Facebook, Twitter, and Pinterest for the latest updates!
Visit the Fiber Flux Yarn Shop…lovely yarn & great prices!


 (Affiliate links, enjoy these awesome products and thanks as always for your support!)


Love this pattern! Have made several so far and each one has come out perfectly! Thanks for sharing 🙂
I love this tutorial and the pattern! I'd like to make one though without the hole at the top. How would I go about continuing to close the hat at the top? Thank you for your help!
I really enjoyed watching your video! you explain things really clearly so we can understand what you are showing! Excellent! Donna Bradshaw
Thank you so much, I absolutely LOVE this pattern. Works up quickly and easily and comes out sized right every time! Question for you – if I wanted to make this a regular hat (i.e. not messy bun) I could probably just do another round or two of the sc2tog to close it up, right?
Sandy,
Did you ever get your answer on how to make this pattern as a regular hat?
What a wonderful visual. It was the best follow along video I have watched. Thank you so much. Hats are easy and just like you said quick and fun!!!!! Thank you
Jennifer, you are one of the most talented and generous people alive! Thank you for this wonderful pattern. The only problem is, I can't quit making them.
Hello!
Just a question about the row count for the brim of the hat! You say that the brim should be about twenty-one inches, but approximately how many rows should that come out to? If you're not sure, should I have an even or odd amount of rows to make the rest of the pattern work? Thank you for your time! This hat looks so cute and I can't wait to make it! – Caroline L.