
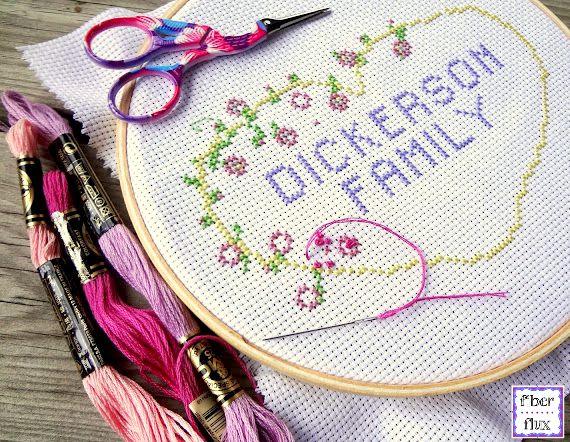
French knots are a pretty addition to a project that you can add anywhere to give it a little extra something. They add a bit of texture and create a three-dimensional effect. A french knot can be incorporated into a knitted or crocheted piece as shown below, or rendered with delicate embroidery floss as part of an embroidery project like the sampler I’m currently working on above.
When working with embroidery floss, I use a standard embroidery needle, the same one I use for cross stitch, and 3 strands of floss. Regular DMC floss is 6-ply, so I pull it apart.
French knots are one of those things that are simple and fast in concept, but are good to practice over and over. My Nana, is a sewing and embroidery pro, showed me this handy skill, and we made lots of knots together, until I felt like a French knot expert.
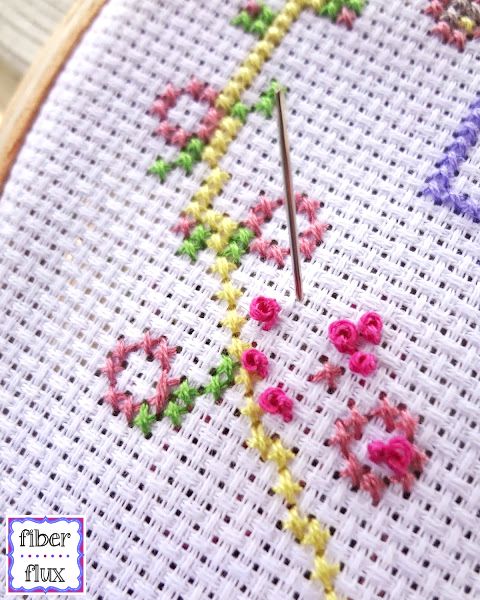
Here you can see the all of the little knots, check out the raised texture as compared to the flatter cross stitched areas:
To make a french knot, you’ll need a needle and thread/yarn. For this tutorial, I used a swatch of reverse stockinette, a tapestry needle, and some cotton yarn. Try experimenting with both yarn (as below), but also on different lighter weight fabrics with floss too.
For demonstration purposes, I put the working area in an embroidery hoop, but you don’t need to do this. In fact, it is important to be extremely careful when using hoops, because they will leave a ring in the fabric, and could possibly stretch the material permanently.

Thread the needle with a tail as shown above.
Bring the yarn/floss up from the back to the front,

Wrap the yarn/floss twice around the needle. You can’t see it in the picture, but the strand going off the page on the left is being held with my hand to keep the tension. Good tension (firm but gentle) is important just as in knitting or crochet to get a perfectly shaped knot.

Re-insert the needle through the fabric right next to the area where the yarn/floss came up. It is important that is next to it and not back in the same hole.

Begin to pull gently pull the needle through…see the knot forming?

And pull the rest of the way.

You’ll have a little knot that looks like a pretty rosette. Make a few of scrap material first to practice. I had to make quite a few! Happy stitching folks!

Here’s a video you can also watch to learn how to make a french knot:


How do you secure the knot in knitting so it doesn't come undone with wear and washing? Thanks, Trish
That is a great question! A secure knot should do the trick and when you wash the garment, it will "lock" everything into place if you will. I am guilty of over-knotting my work sometimes, but that should be fine.
great