
Last summer, a throw pillow I designed was published on the Stitch & Unwind Blog. I loved using the yarn and wrote a review on it as well, and now the pillow pattern in full is available here on Fiber Flux too!
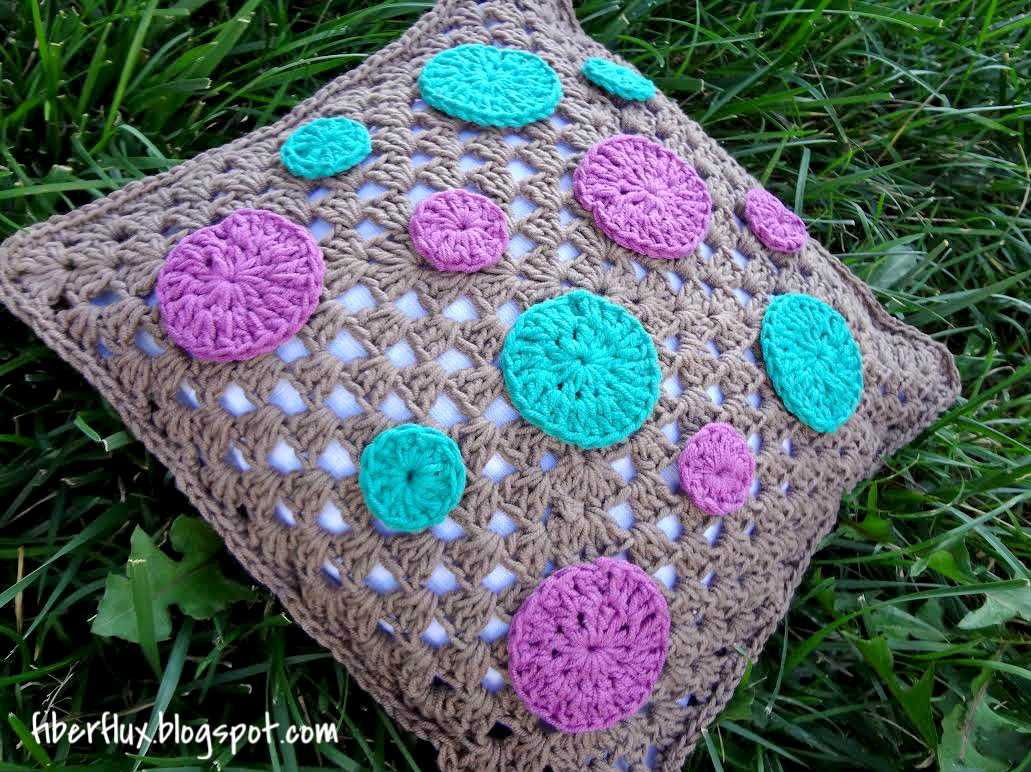
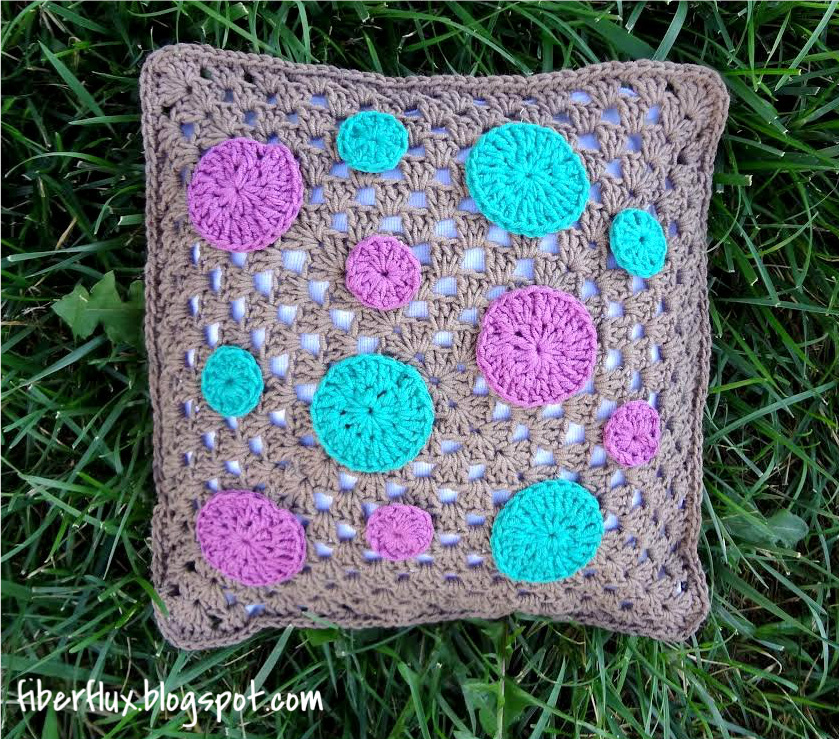
The Dotty Throw Pillow has both modern and vintage appeal. Two granny squares make the body of the pillow, and polka dots in multiple sizes add a fun embellishment. Soft and comfortable cotton yarn make this pillow pretty and perfect to cuddle up to!
Sizing:
- Pillow shown is a 12 inch square. However, you can make your pillow as large or as small if you like by simply working more or less rounds of the granny square.
Materials:
- 1 Ball Bernat Cotton-ish By Vickie Howell in “Cotton Gin”
- 1 Ball Bernat Cotton-ish By Vickie Howell in “Jade Jersey”
- 1 Ball Bernat Cotton-ish By Vickie Howell in “Coffee Filter”
- G (4.25 mm) Crochet Hook
- Tapestry Needle for seaming and weaving in ends
- Plain pillow form (can be found at the craft or fabric store)
Instructions:
Granny Square (Make 2 in the “Coffee Filter” colorway):
Chain 4, join into a ring with a slip stitch.
Round 1: Chain 4, work (3 dc into center of ring, chain 1) 3 times, then 2 dc into center of ring. Join to close with a slip stitch.
Round 2: To work the corner of round 2, first chain 4, then 2 dc in same space, then chain 1, then 3 dc in the same space. Chain 1, then work the next corner by working 3 dc in next space, chain 1, then 3 dc in same space, chain 1, repeat two more times to complete the round.
Round 3: Work the corner in the same manner as the previous round: chain 4, 2 dc in same space, chain 1, 3 dc in same space, chain 1. To work the sides, simply work 3 dc in the next space then chain 1…repeat until you reach a corner again.
Keep working in this manner, with two clusters in the corners and one cluster on the sides until you finish the round. Just be sure there is a ch 1 in between each grouping of 3 dc as you work each round.
Repeat round 3 until your square measures 12 inches across or 24 inches across depending on what size you prefer.
A note about beginning a new round:
- To begin a new round in the same color, simply slip stitch until you reach a ch1 at the corner and begin the new round.
- To begin a new round in a new/different color, cut yarn, leaving a tail, and fasten it with a slip stitch. Join the new yarn at one of the corners as shown and tie securely. Continue to the next round.
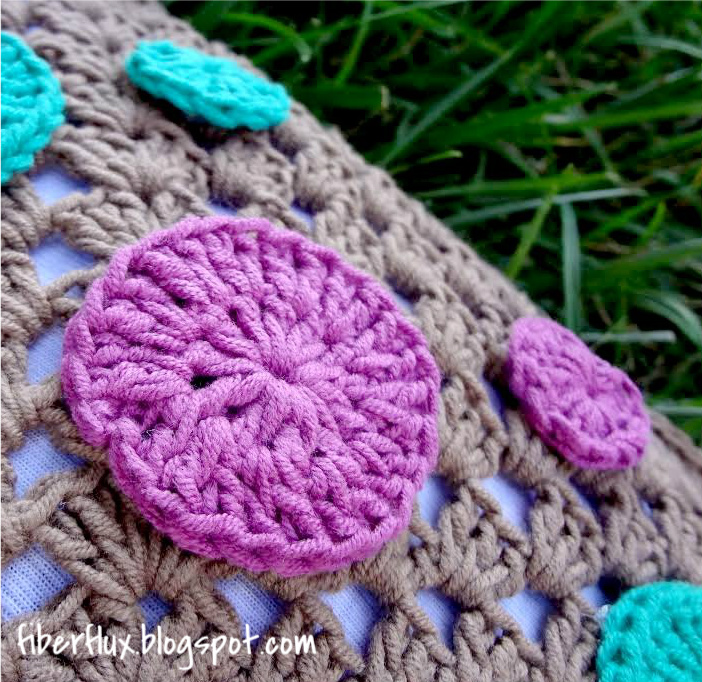
Instructions for a small dot:
Ch 4 and join with a sl st to form a ring.
Work 12 dc in the center of the ring.
Fasten off and weave in any ends.
Instructions for large dot:
Ch 4 and join with a sl st to form a ring.
Work 12 dc in the center of the ring.
Ch 3 and work a dc in the first space.
In the next space, work 2 dc. Continue around the circle by working 2 dc in each space all the way around. Join to close circle with a sl st.
Fasten off and weave in any ends.
Finishing & Assembly:
Attach dots to granny squares by seaming them on with a tapestry needle and a length of same colored yarn. Or if you prefer, you can attach the dots to the pillow with some fabric glue instead.
Weave in all ends of the squares. Stack the two granny squares with right sides facing out. Fasten the same colored yarn in the corner of both squares. Seam together by working a single crochet in both loops of both squares on three sides of the squares. Place pillow form inside and continue to join the squares together to close the top of the pillow up. Fasten off and weave in ends.
© Jennifer Dickerson 2014
For more fun projects and pretty patterns, be sure to follow Fiber Flux on Facebook, Google+, Twitter, and Pinterest for the latest updates!


The dots are so cute! I haven't mastered a square in double crochet yet ( can never figure out where the last stitch is, so my sides are all wonky ) but I am getting the hang of circles.
Now I feel the need to go put circles on things. Would be cute as a skirt edging too if you added an embroidered stem, you could have flowers for Spring!
Thanks for sharing, you have fired up my imagination:)
Great ideas, thanks so much for sharing your springy ideas! 🙂
very cute! Have only crocheted for a few months, but am loving it! This will be my first Granny Square 🙂
Neat! Have fun! 🙂
I love this pillow, going to try it.
nice)
Awesome post
This comment has been removed by a blog administrator.
This comment has been removed by a blog administrator.
This comment has been removed by a blog administrator.
This comment has been removed by a blog administrator.