
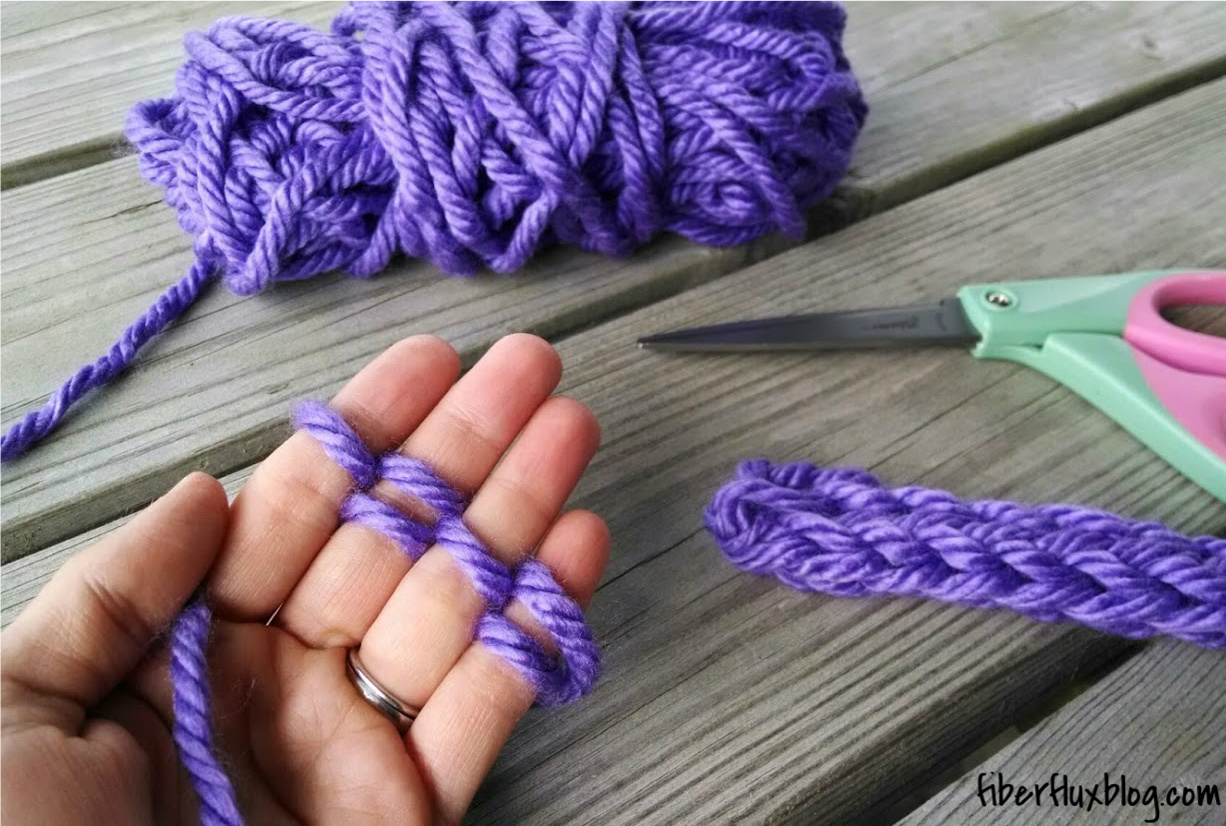
Let’s learn how to finger knit! Finger knitting is a fun and easy to learn! If you have never tried it, here is a quick and simple tutorial that will get you started in no time flat. This is especially great for kids because no hooks or needles are required, just your hands, yarn and scissors. I used super bulky yarn for this tutorial, but skinnier yarn is OK for smaller hands. Because your fingers become the loom, the size of your fingers will determine the size of the finished piece. The result is a rope-like strand that can be used for lots of things including a belt, thin scarf, and so much more!
*Be sure to scroll down to watch the video tutorial to see how to finger knit step by step.
Note: If doing this with very young kids, be sure to assist with the scissors part.
Let’s get started!
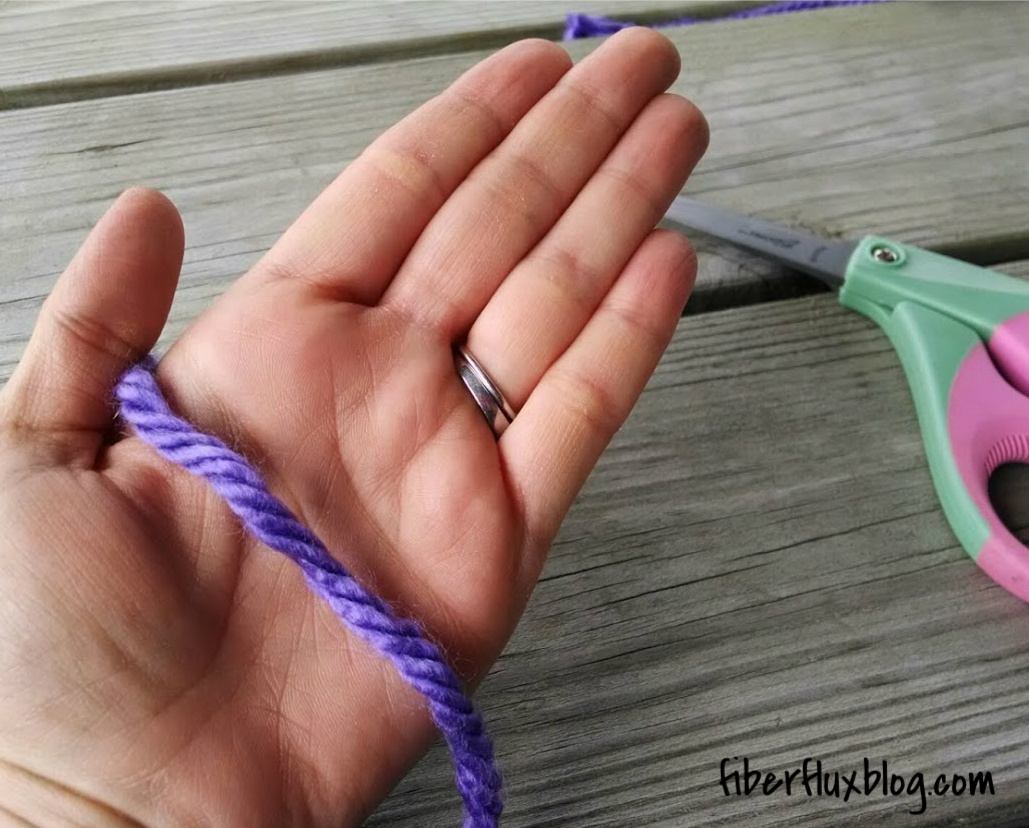
Begin by pulling out a few inches of yarn and clamp it with your thumb as shown below. The working yarn (attached to the yarn ball) will be going away from you and the tail will be closer to you.
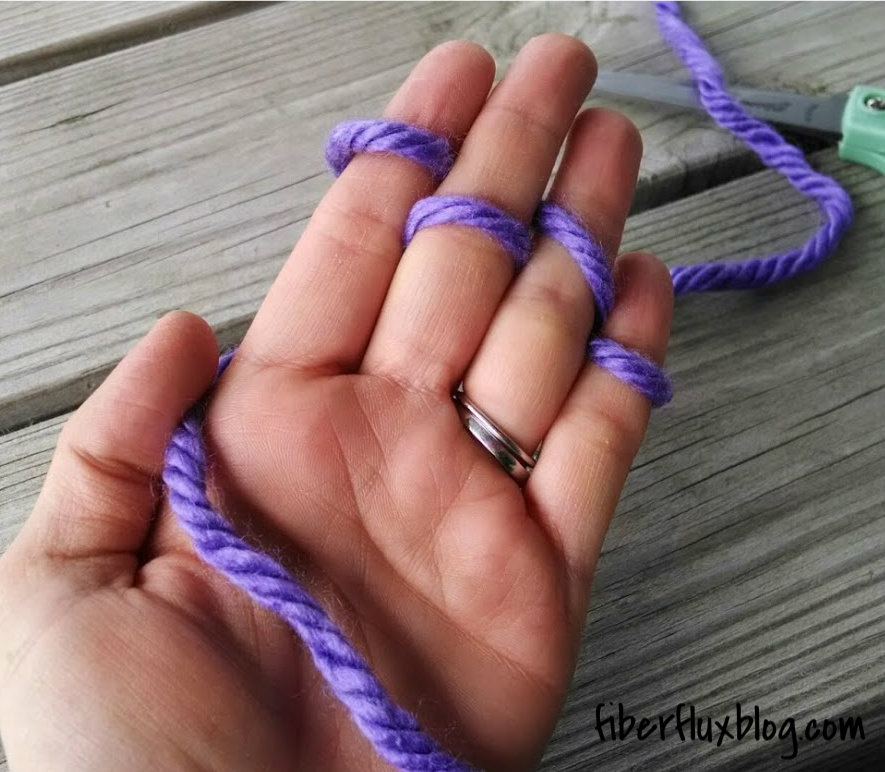
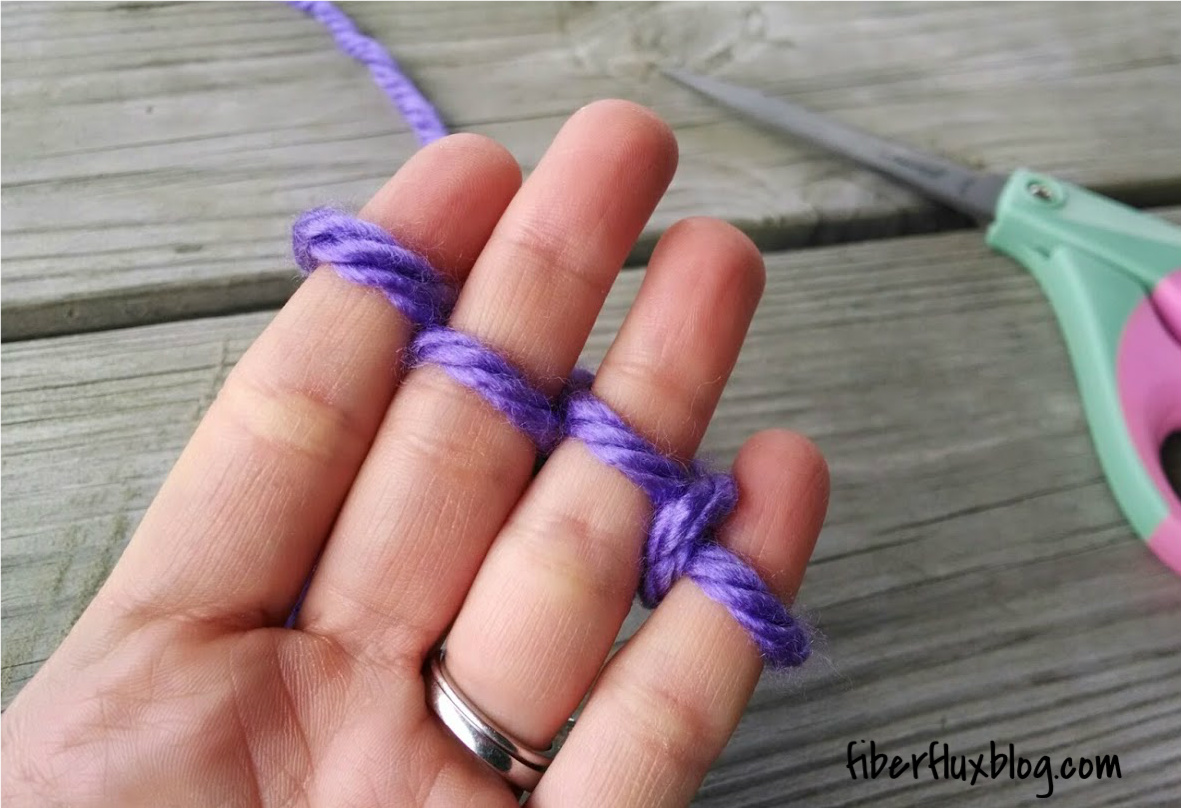
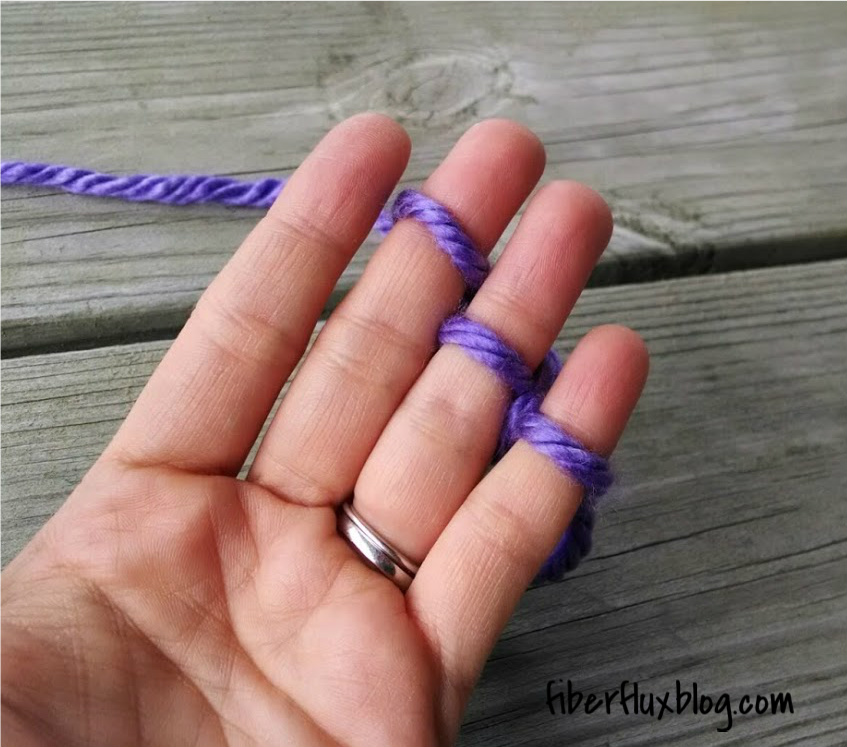
Next, take the working yarn and go under your index finger,
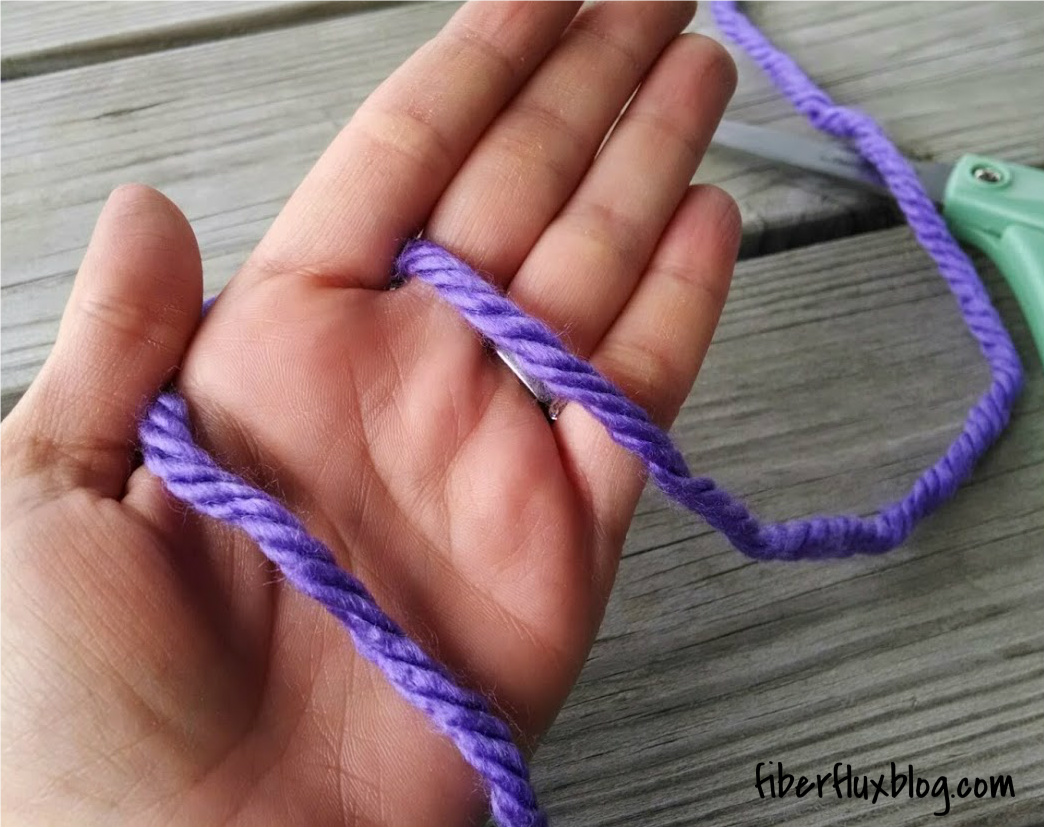
Over your middle finger, under your ring finger, and over your little finger.
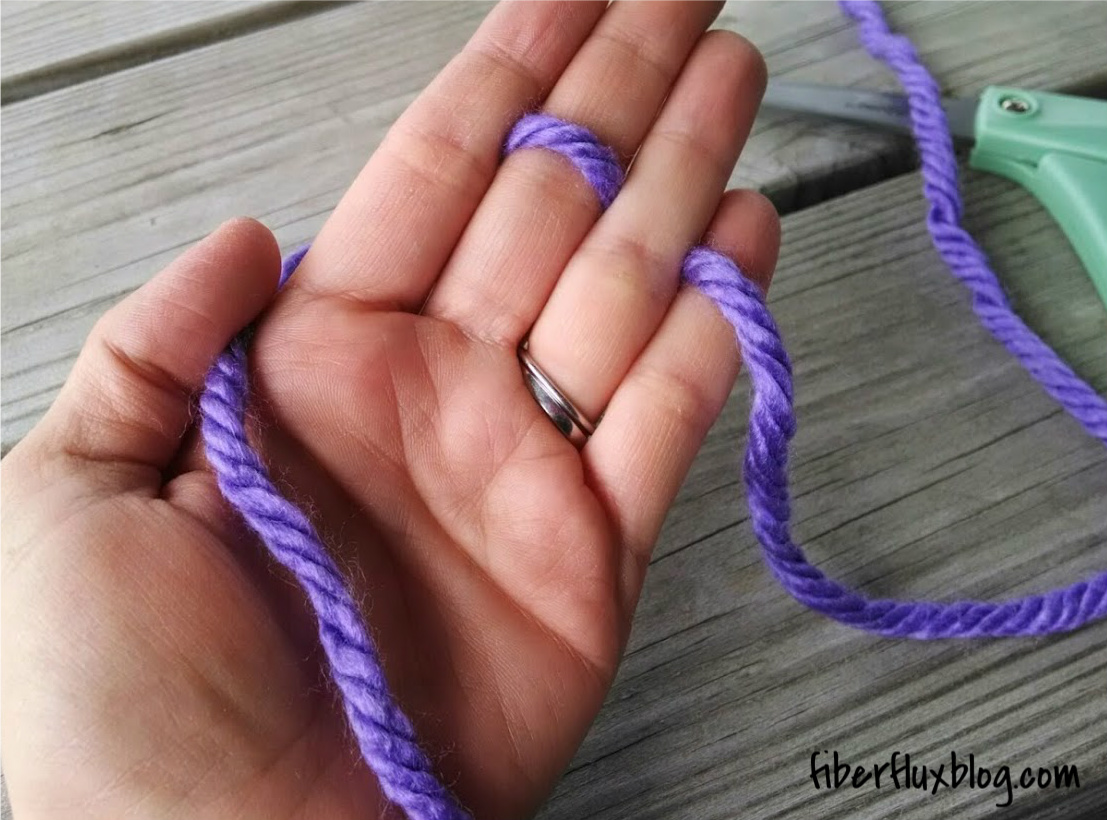
Wrap yarn around your little finger and continue in the other direction…this time go over your ring finger, under your middle finger, and over your index finger. You will now have a loop on each finger.
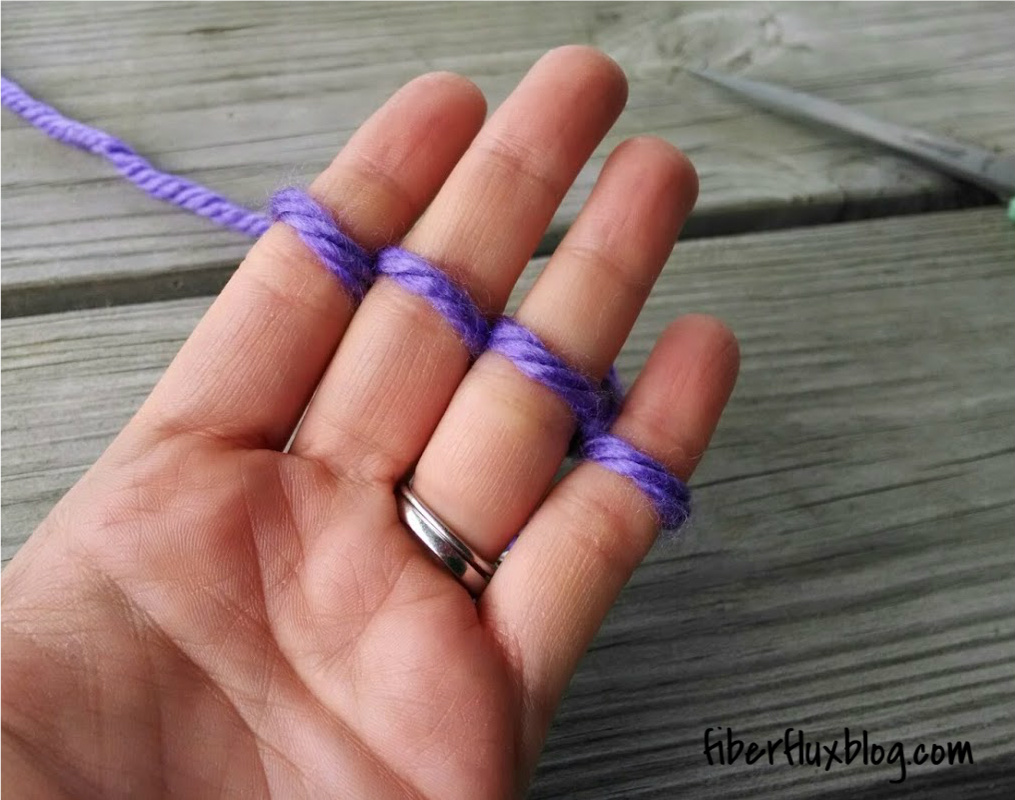
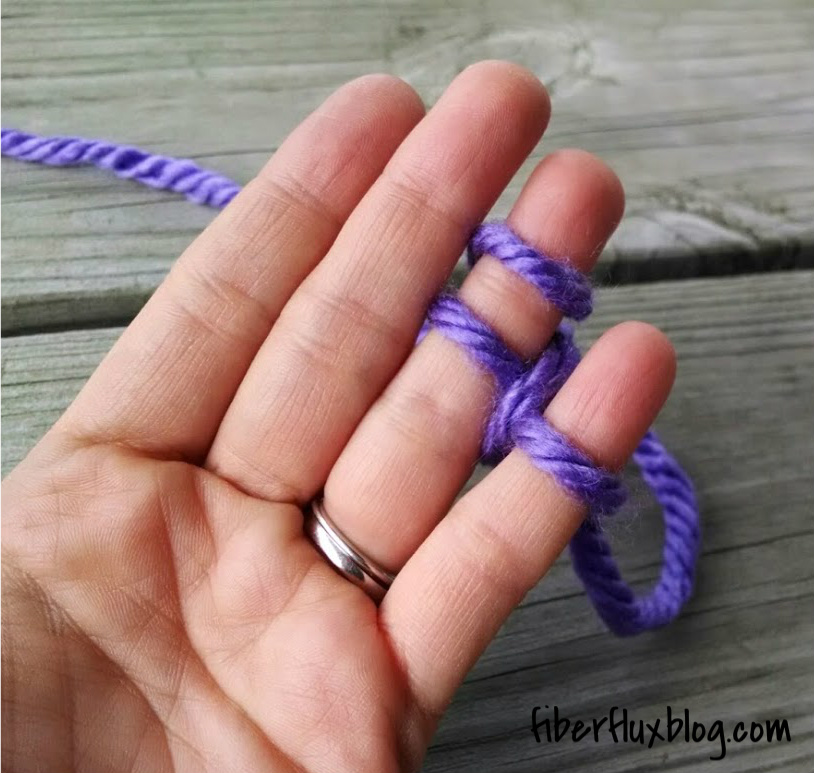
Repeat this process…
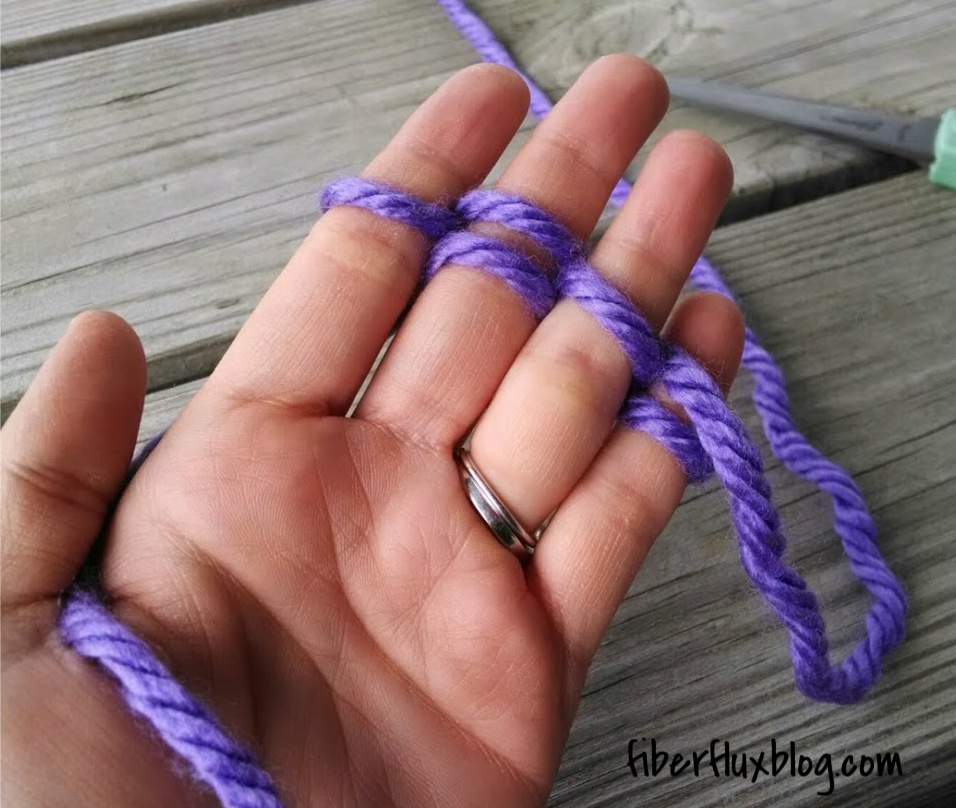
Until you have two loops on each finger.
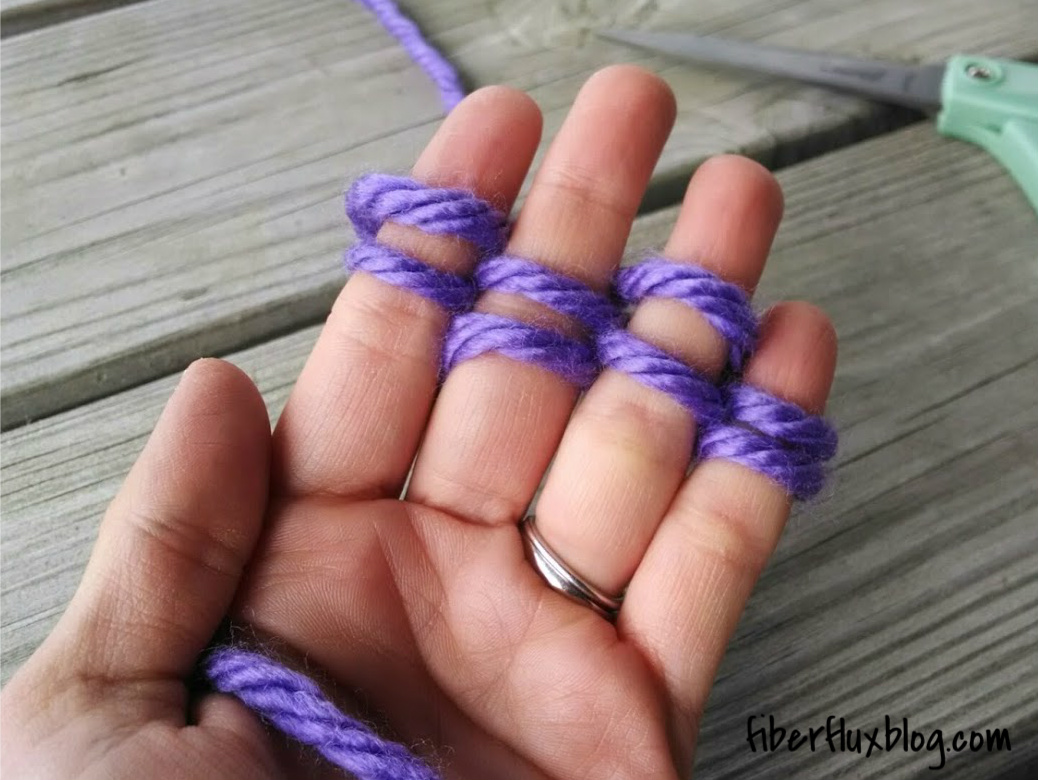
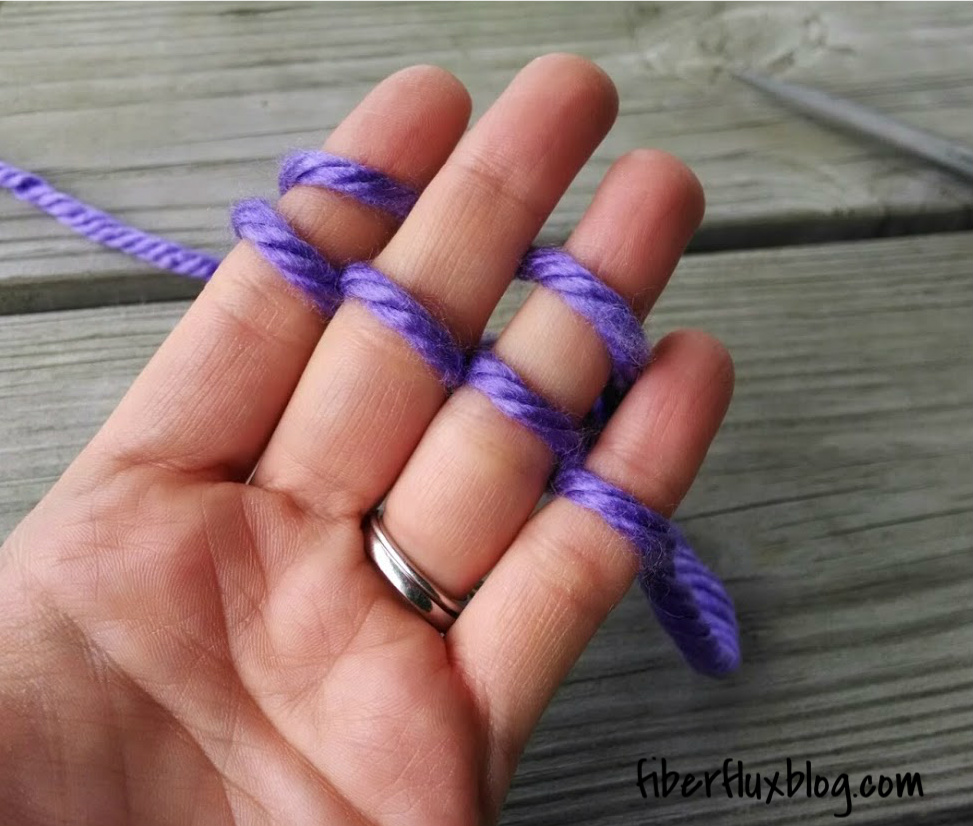
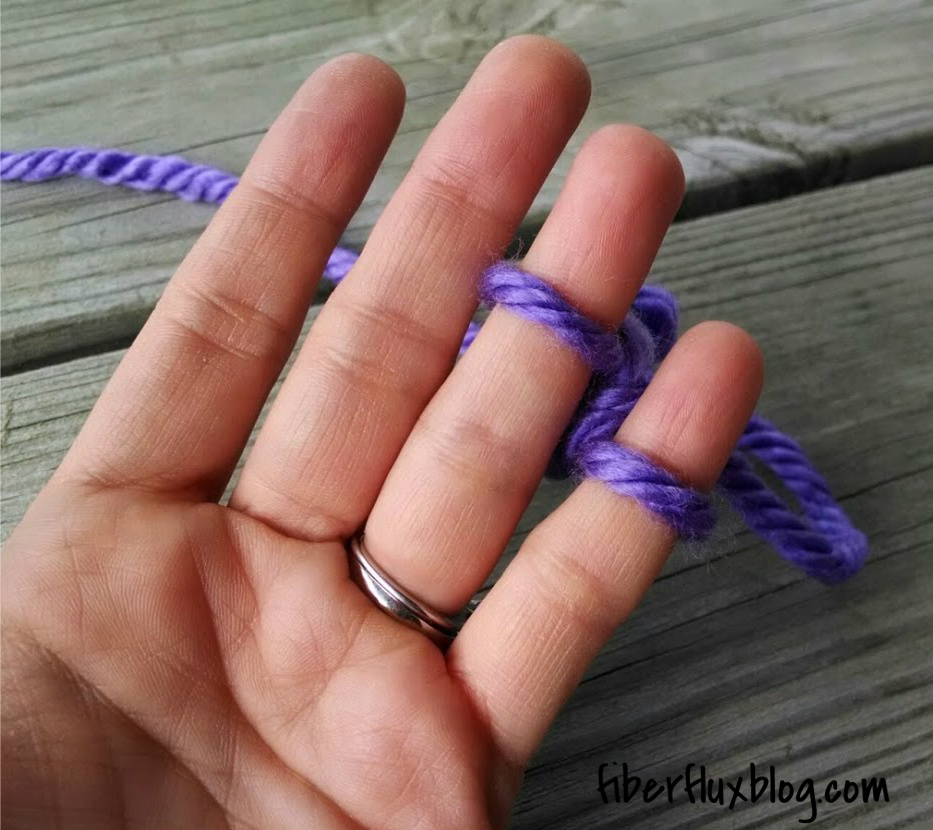
Next, with your other hand, lift the bottom loop up and over the top loop and off of your finger as shown below:
Repeat this step for each finger,
and push everything down a bit to prepare for the next step.
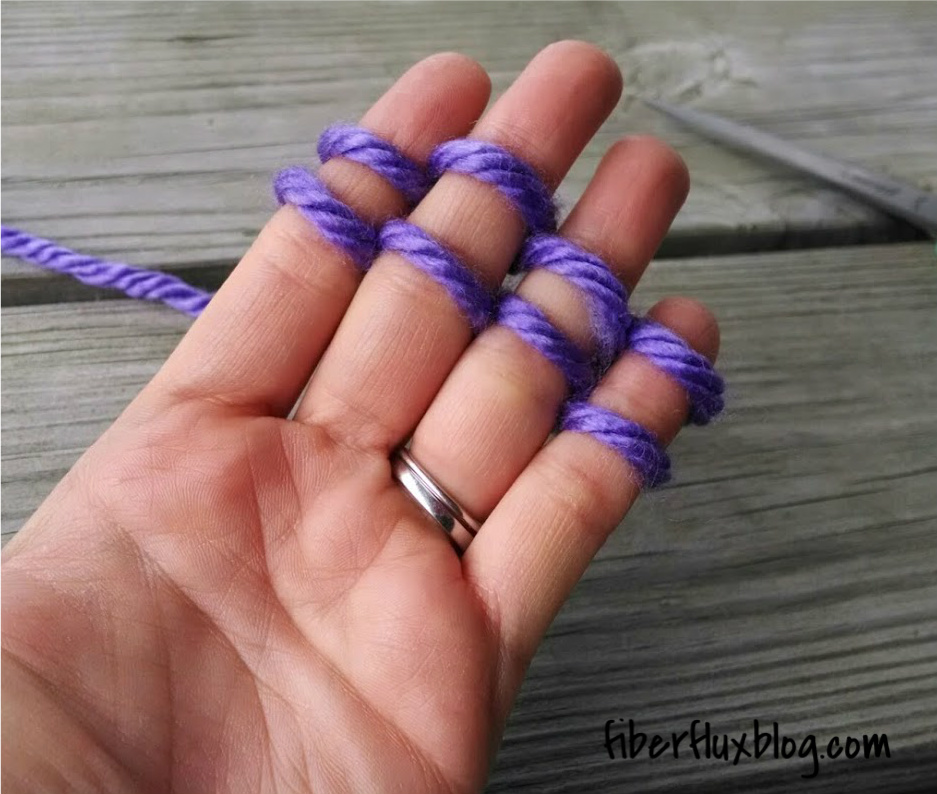
Repeat as you did before by winding the yarn around your fingers, starting with your index finger,
across to your little finger, then back across to your index finger again.
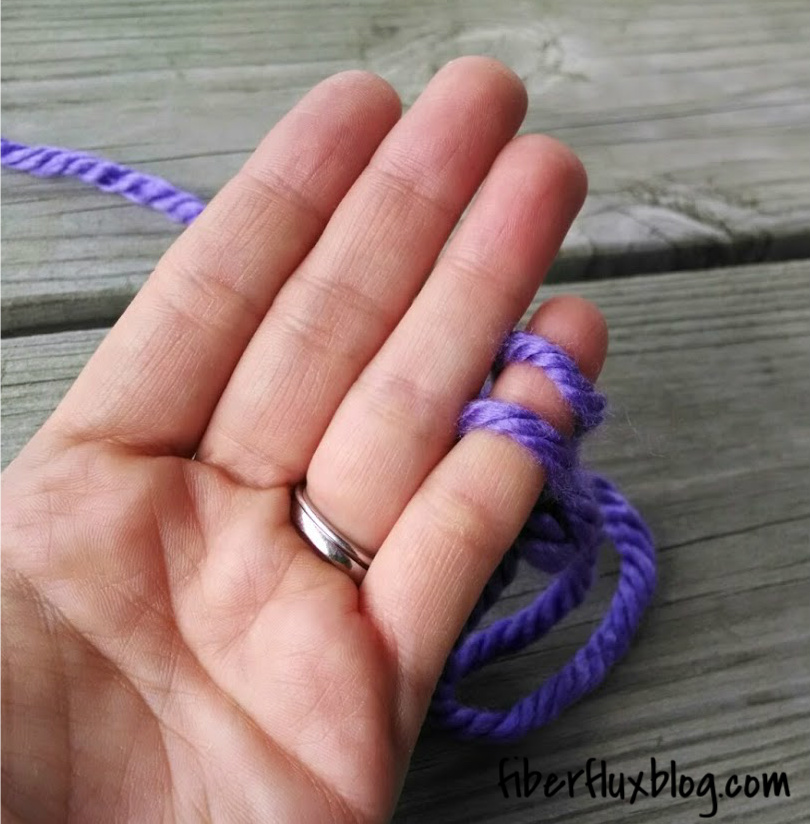
Repeat by lifting the bottom loops up and over the top loops and off of your fingers.
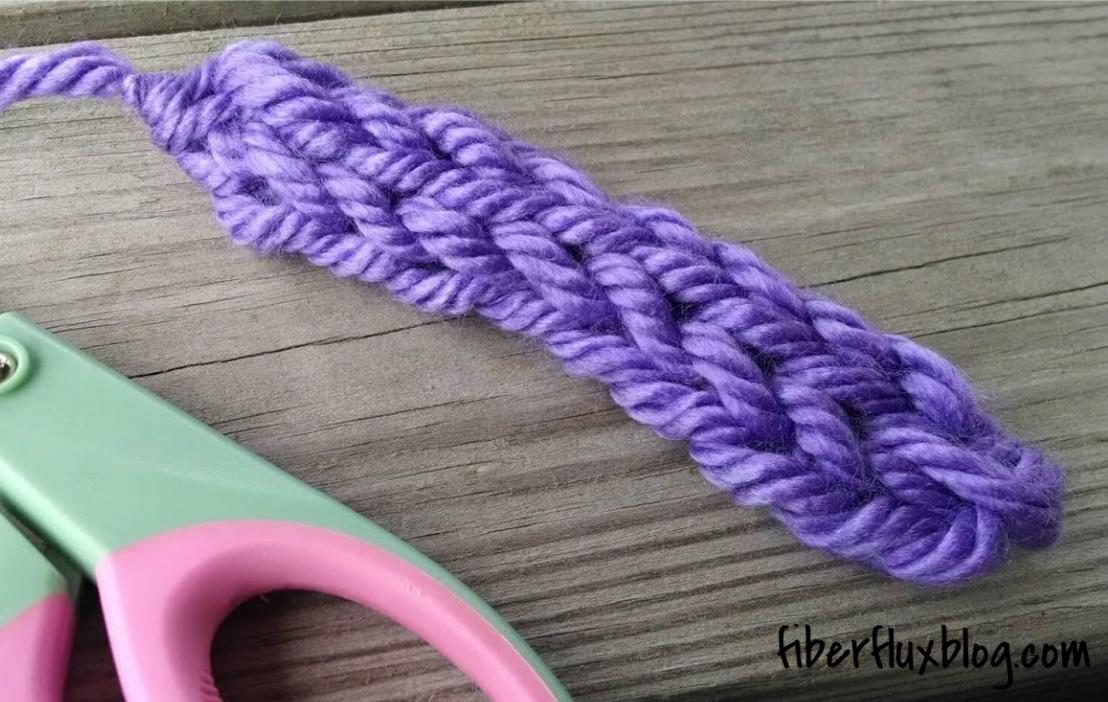
Keep going in this manner until your “rope” is as long as you’d like it to be.

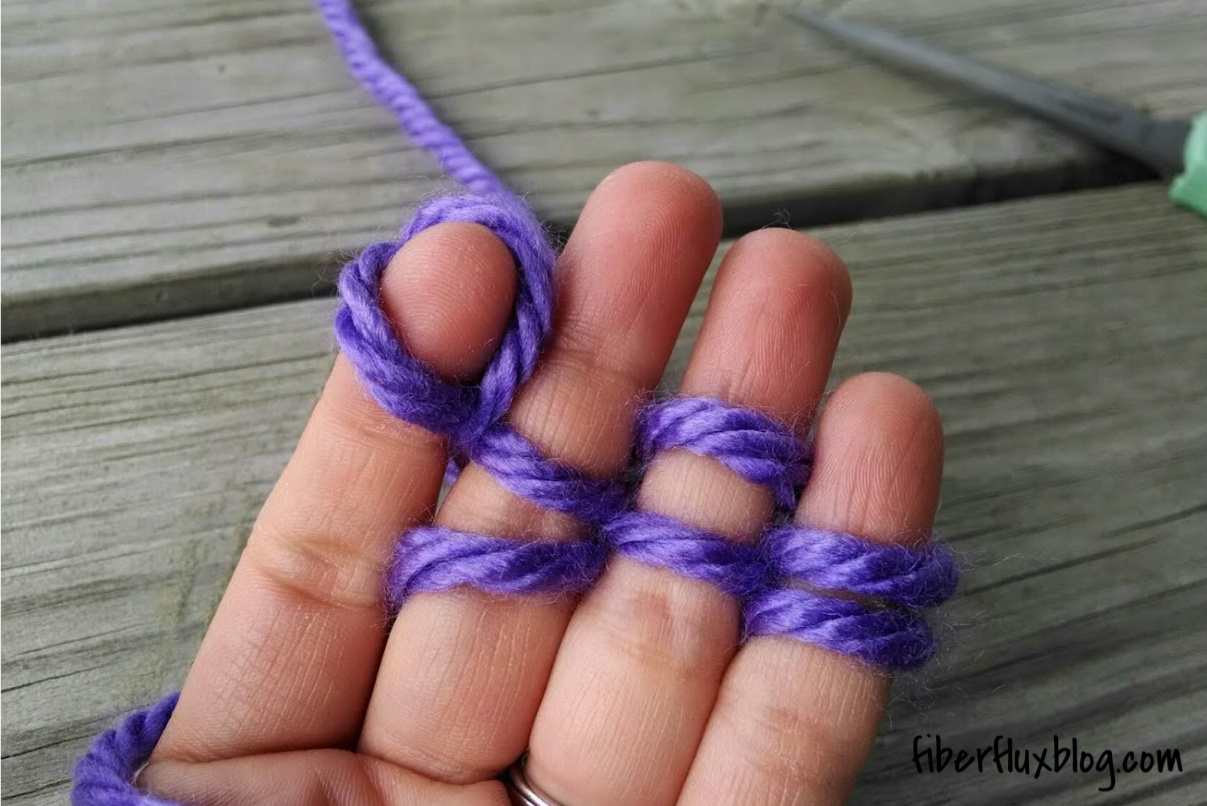
To remove the project from your fingers, begin by moving the loop on your index finger over to your middle finger,

Lift the bottom loop up and over the top loop and off of your finger,
Repeat this step for the next finger,
and the next finger,
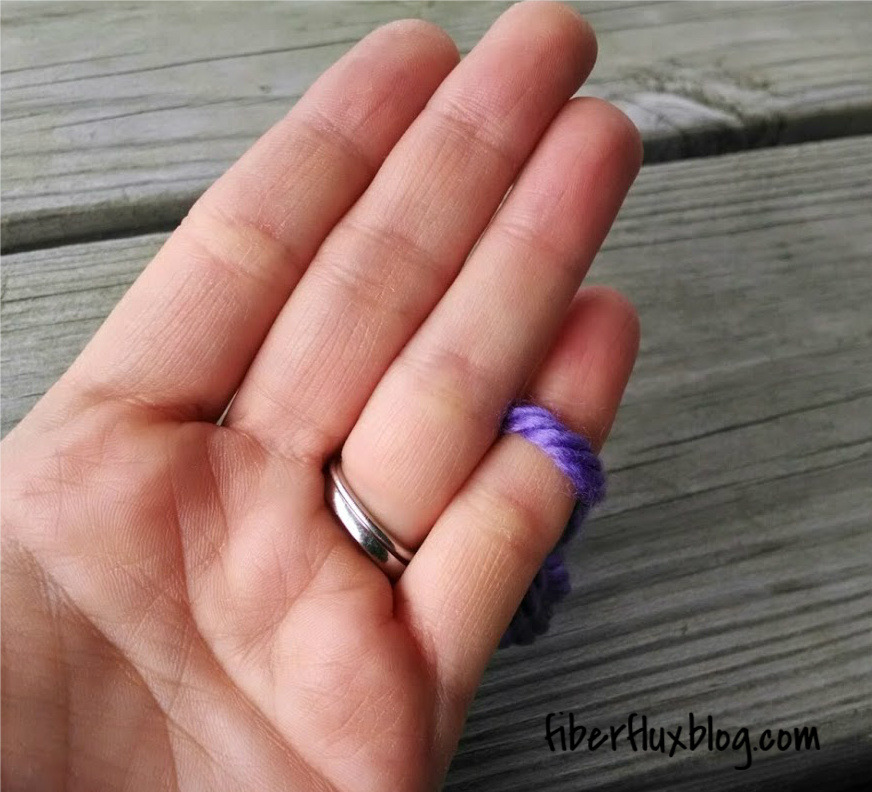
Until you have two loops of your little finger.
Do the same thing by lifting the bottom loop up and over the top loop and off your finger…only one loop will remain.
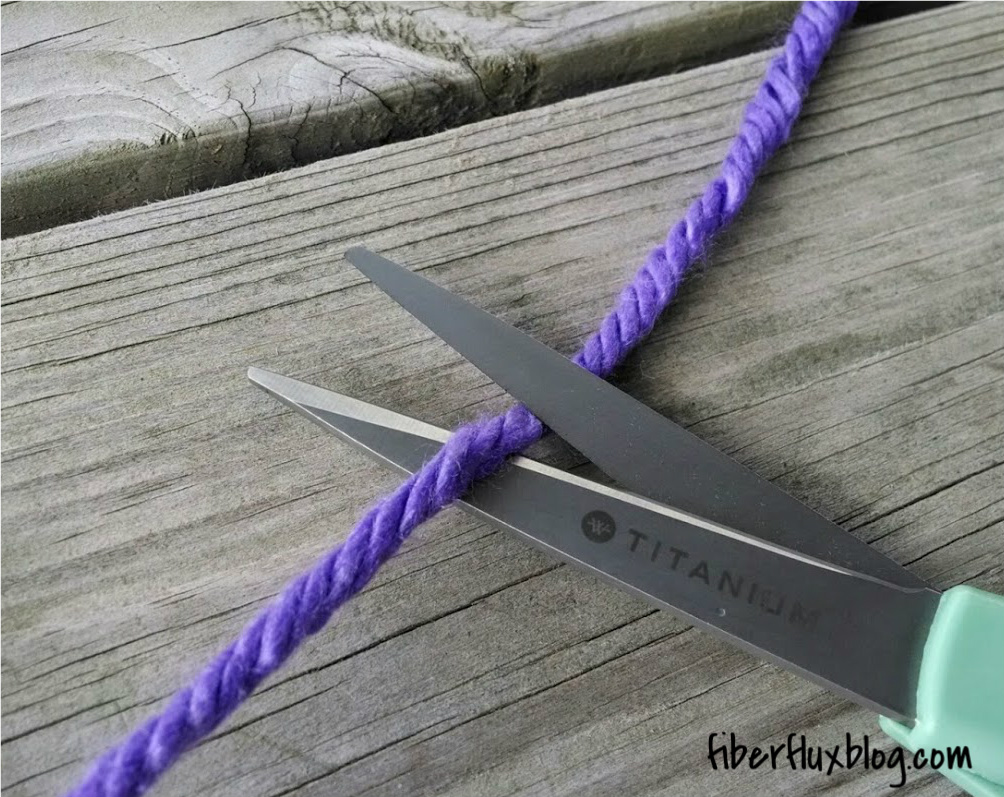
Gently and carefully slide the loop from your little finger and snip the yarn, allowing for a few inches for a yarn tail.
Pass the yarn tail through the loop and tighten everything up.
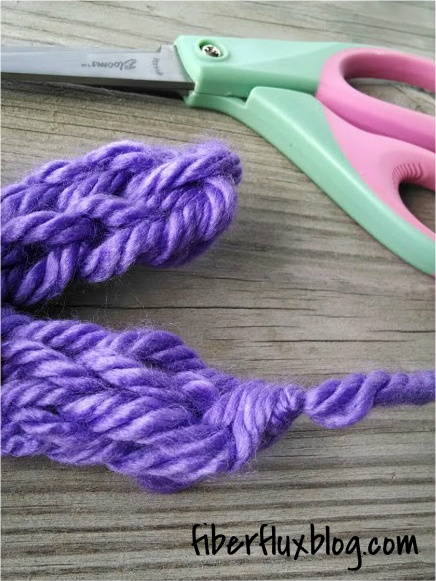
depending on what you’d like to do with your project, you can leave the tail intact to tie it together or onto something. Or you can weave the tail into the piece with your fingers. All finished!
Watch a video on how to finger knit:
Looking for more knitting patterns? Check out my knitting pattern library!
For more of the latest fabulous crochet, follow Fiber Flux on Facebook, Pinterest, Instagram, Tik Tok, and YouTube!


Thank you that's a very clear tutorial
Thanks great cleartutorial
bel lavoro, brava ciao.
Would there be a way to make fingerless gloves with this method? Love this idea. Thank you.