
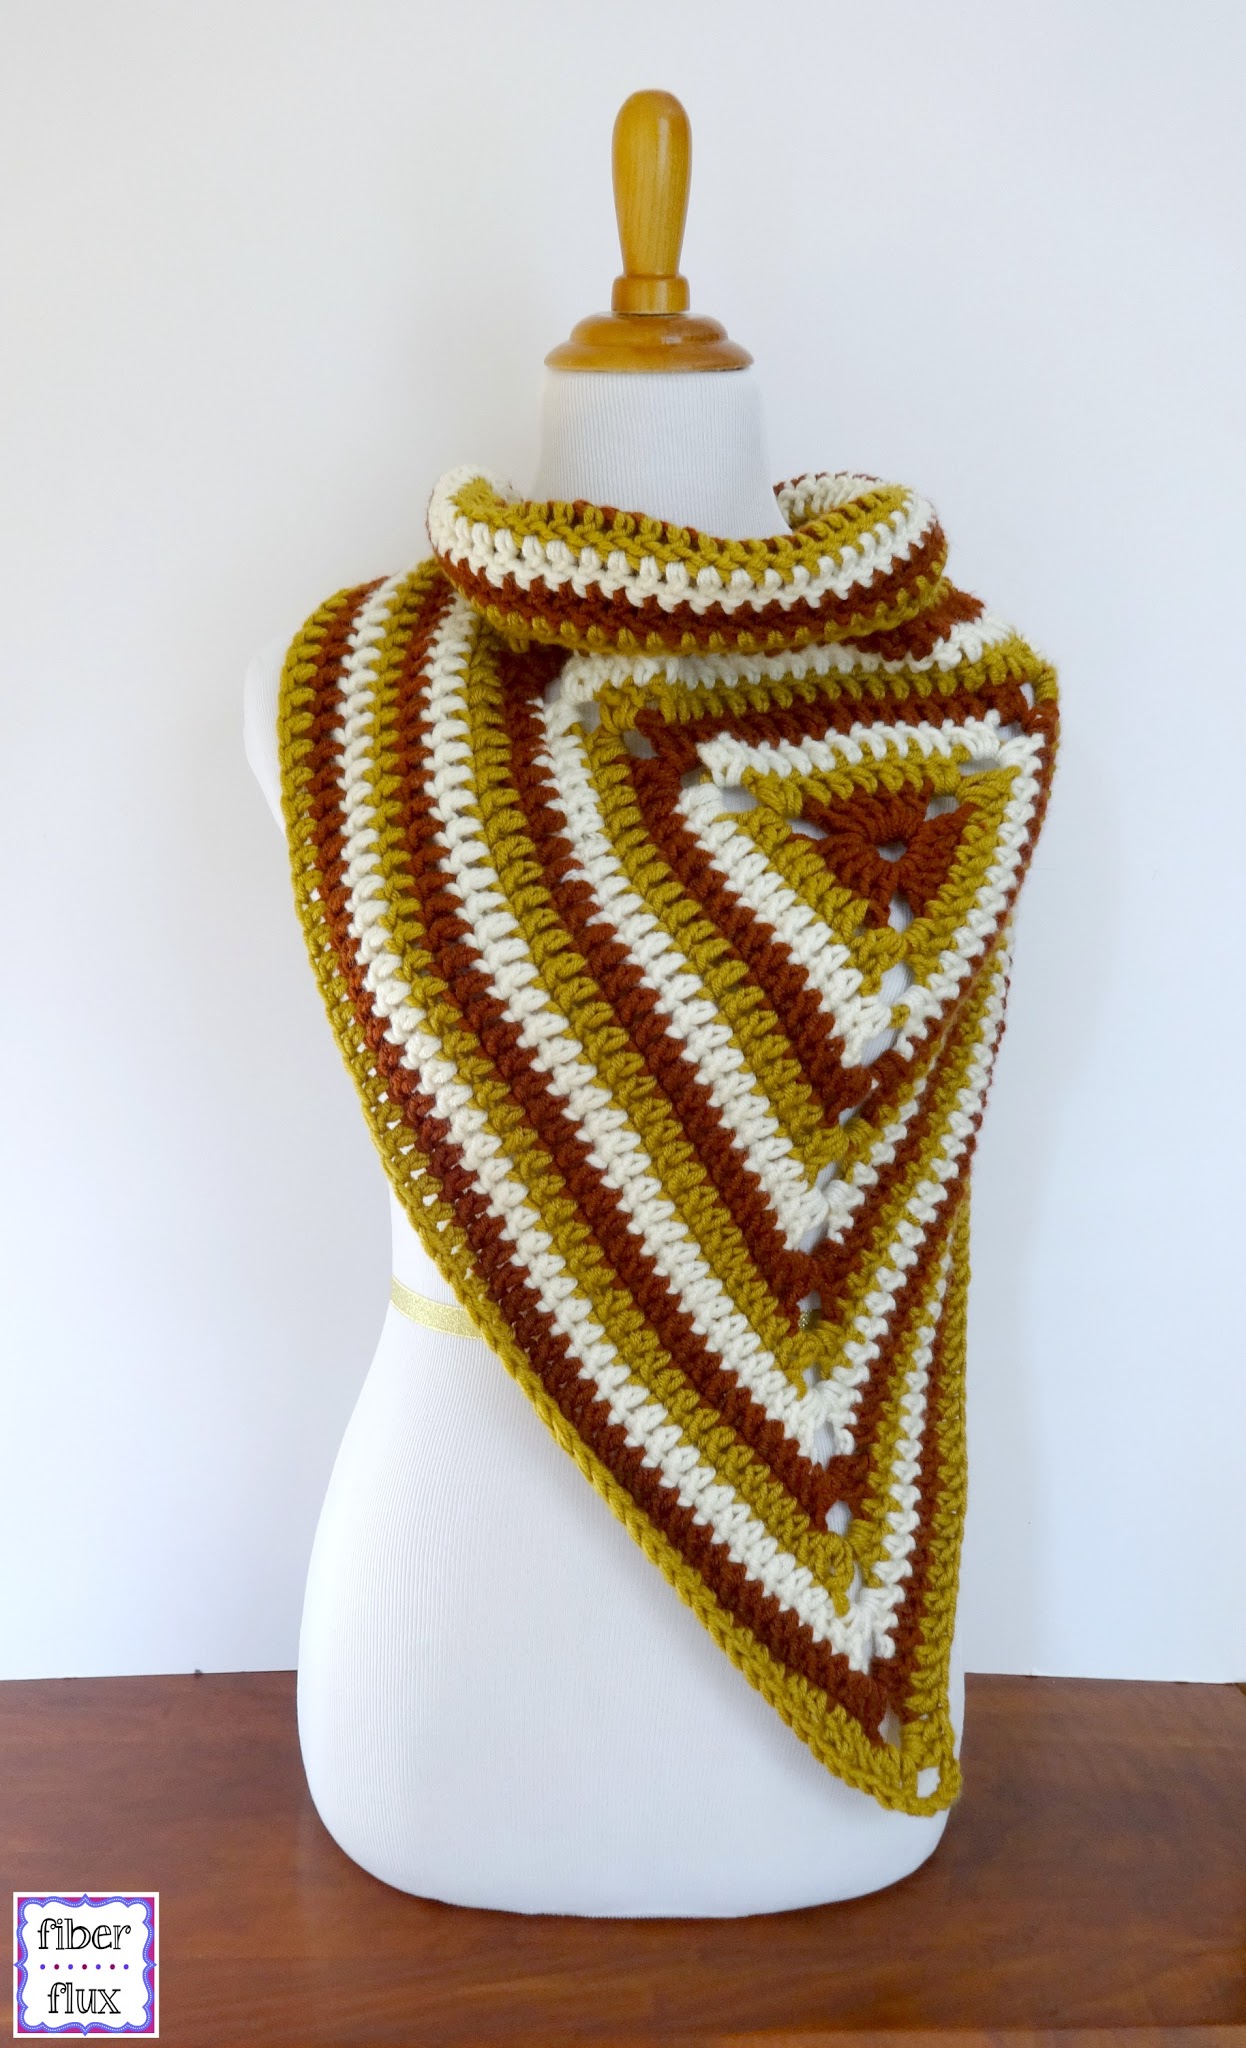
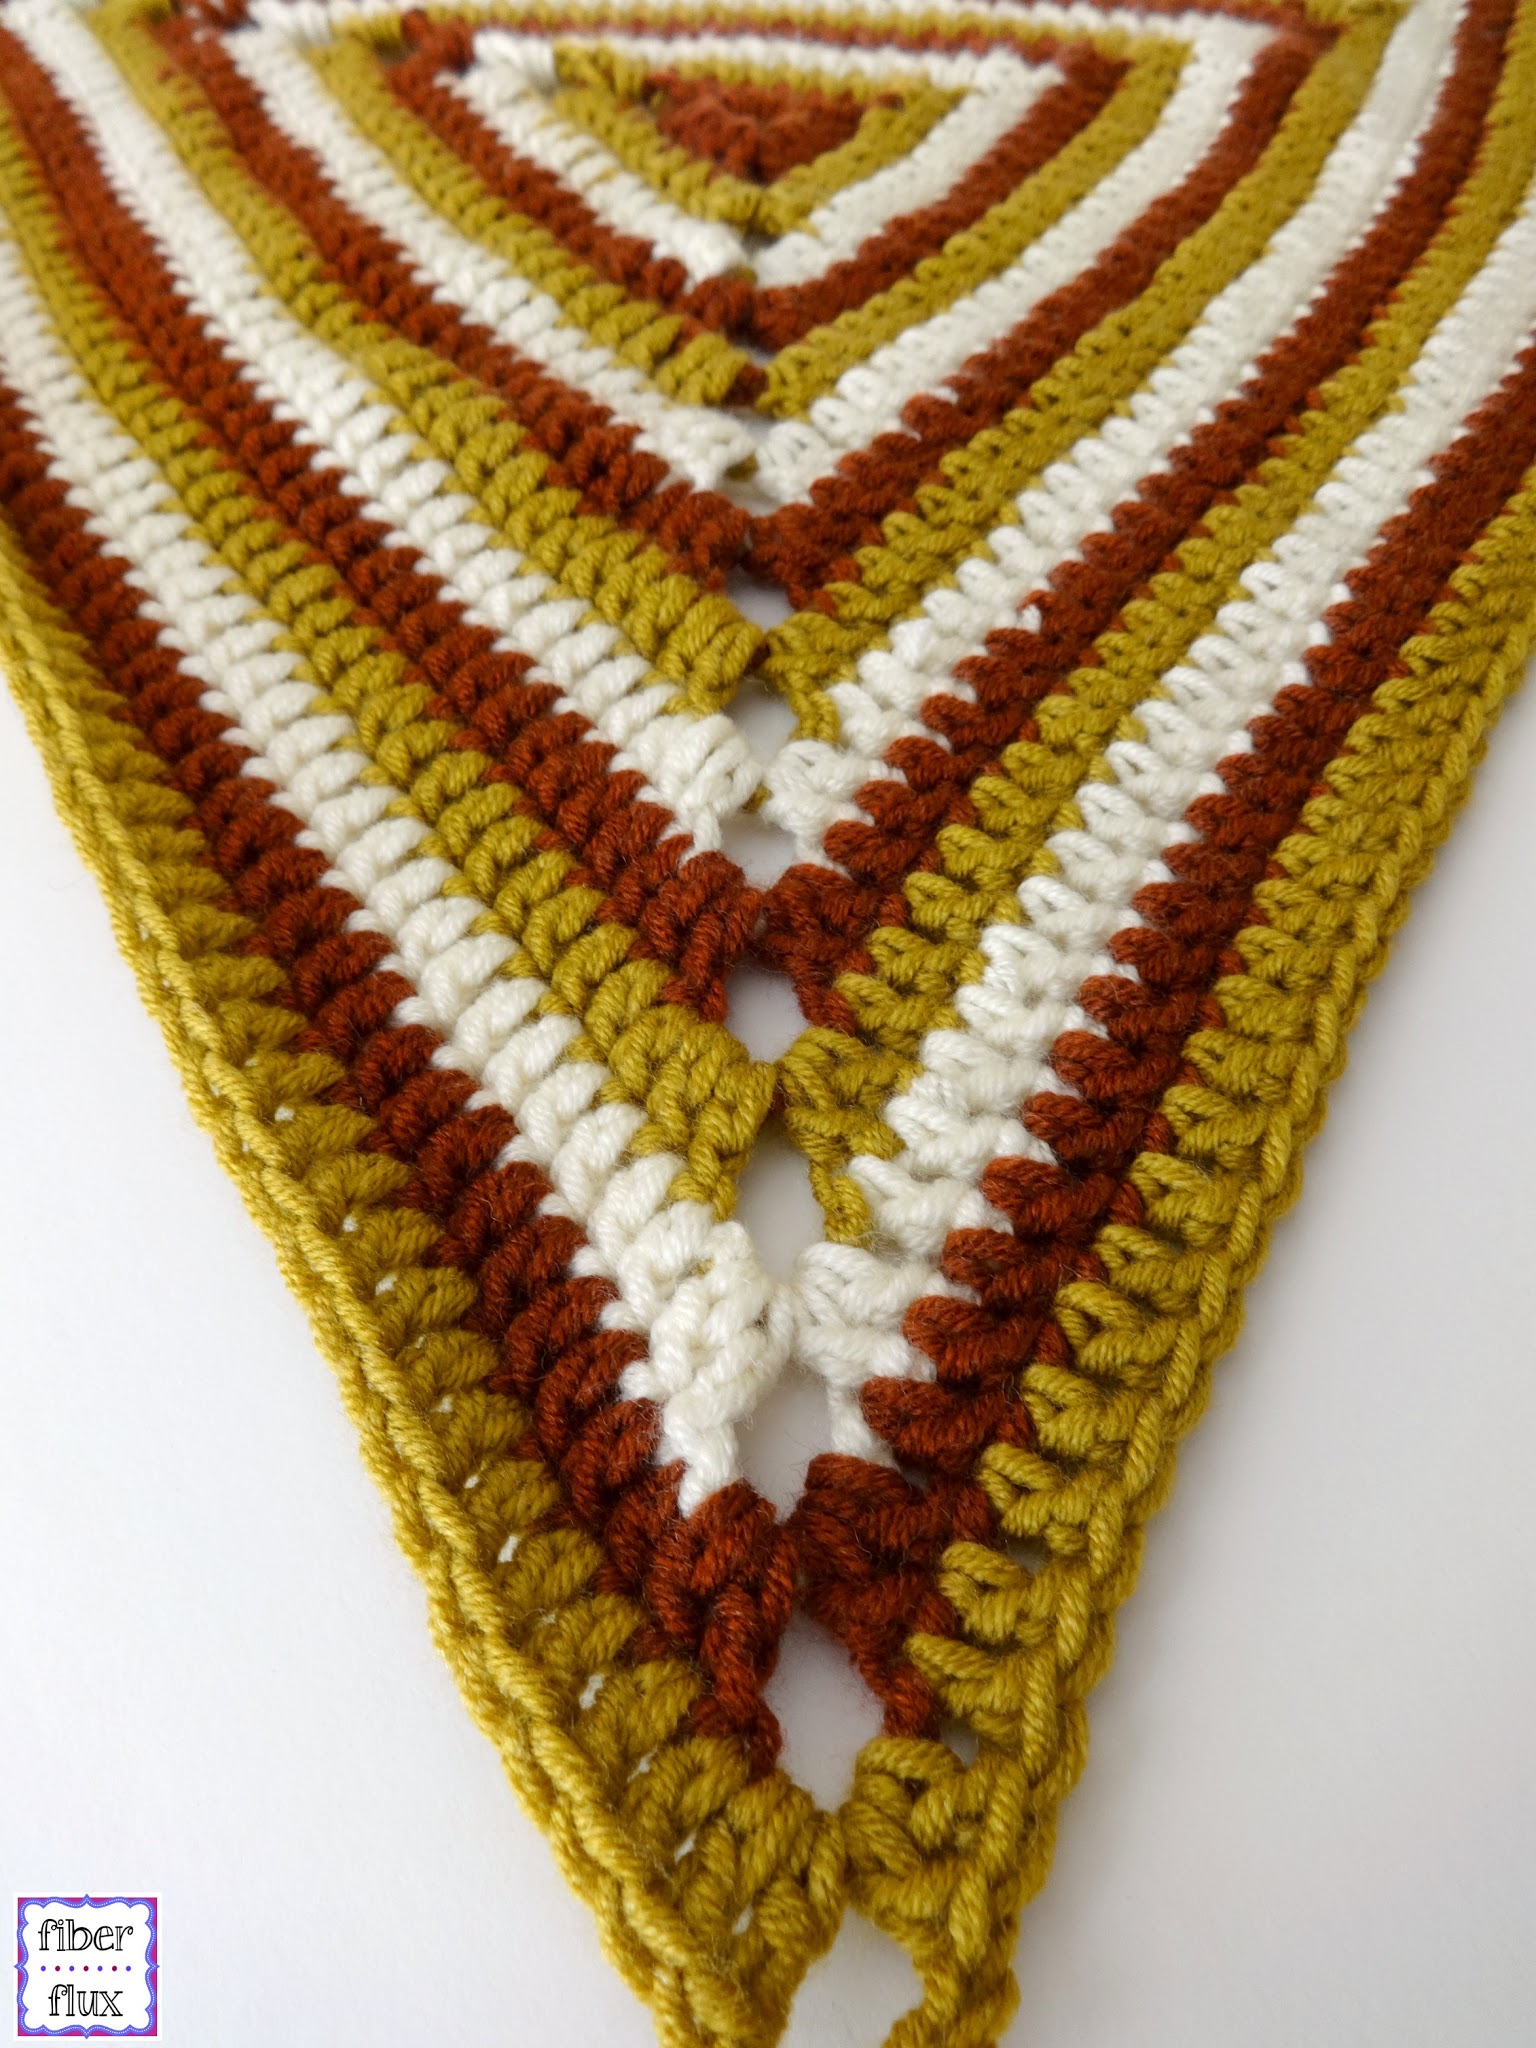
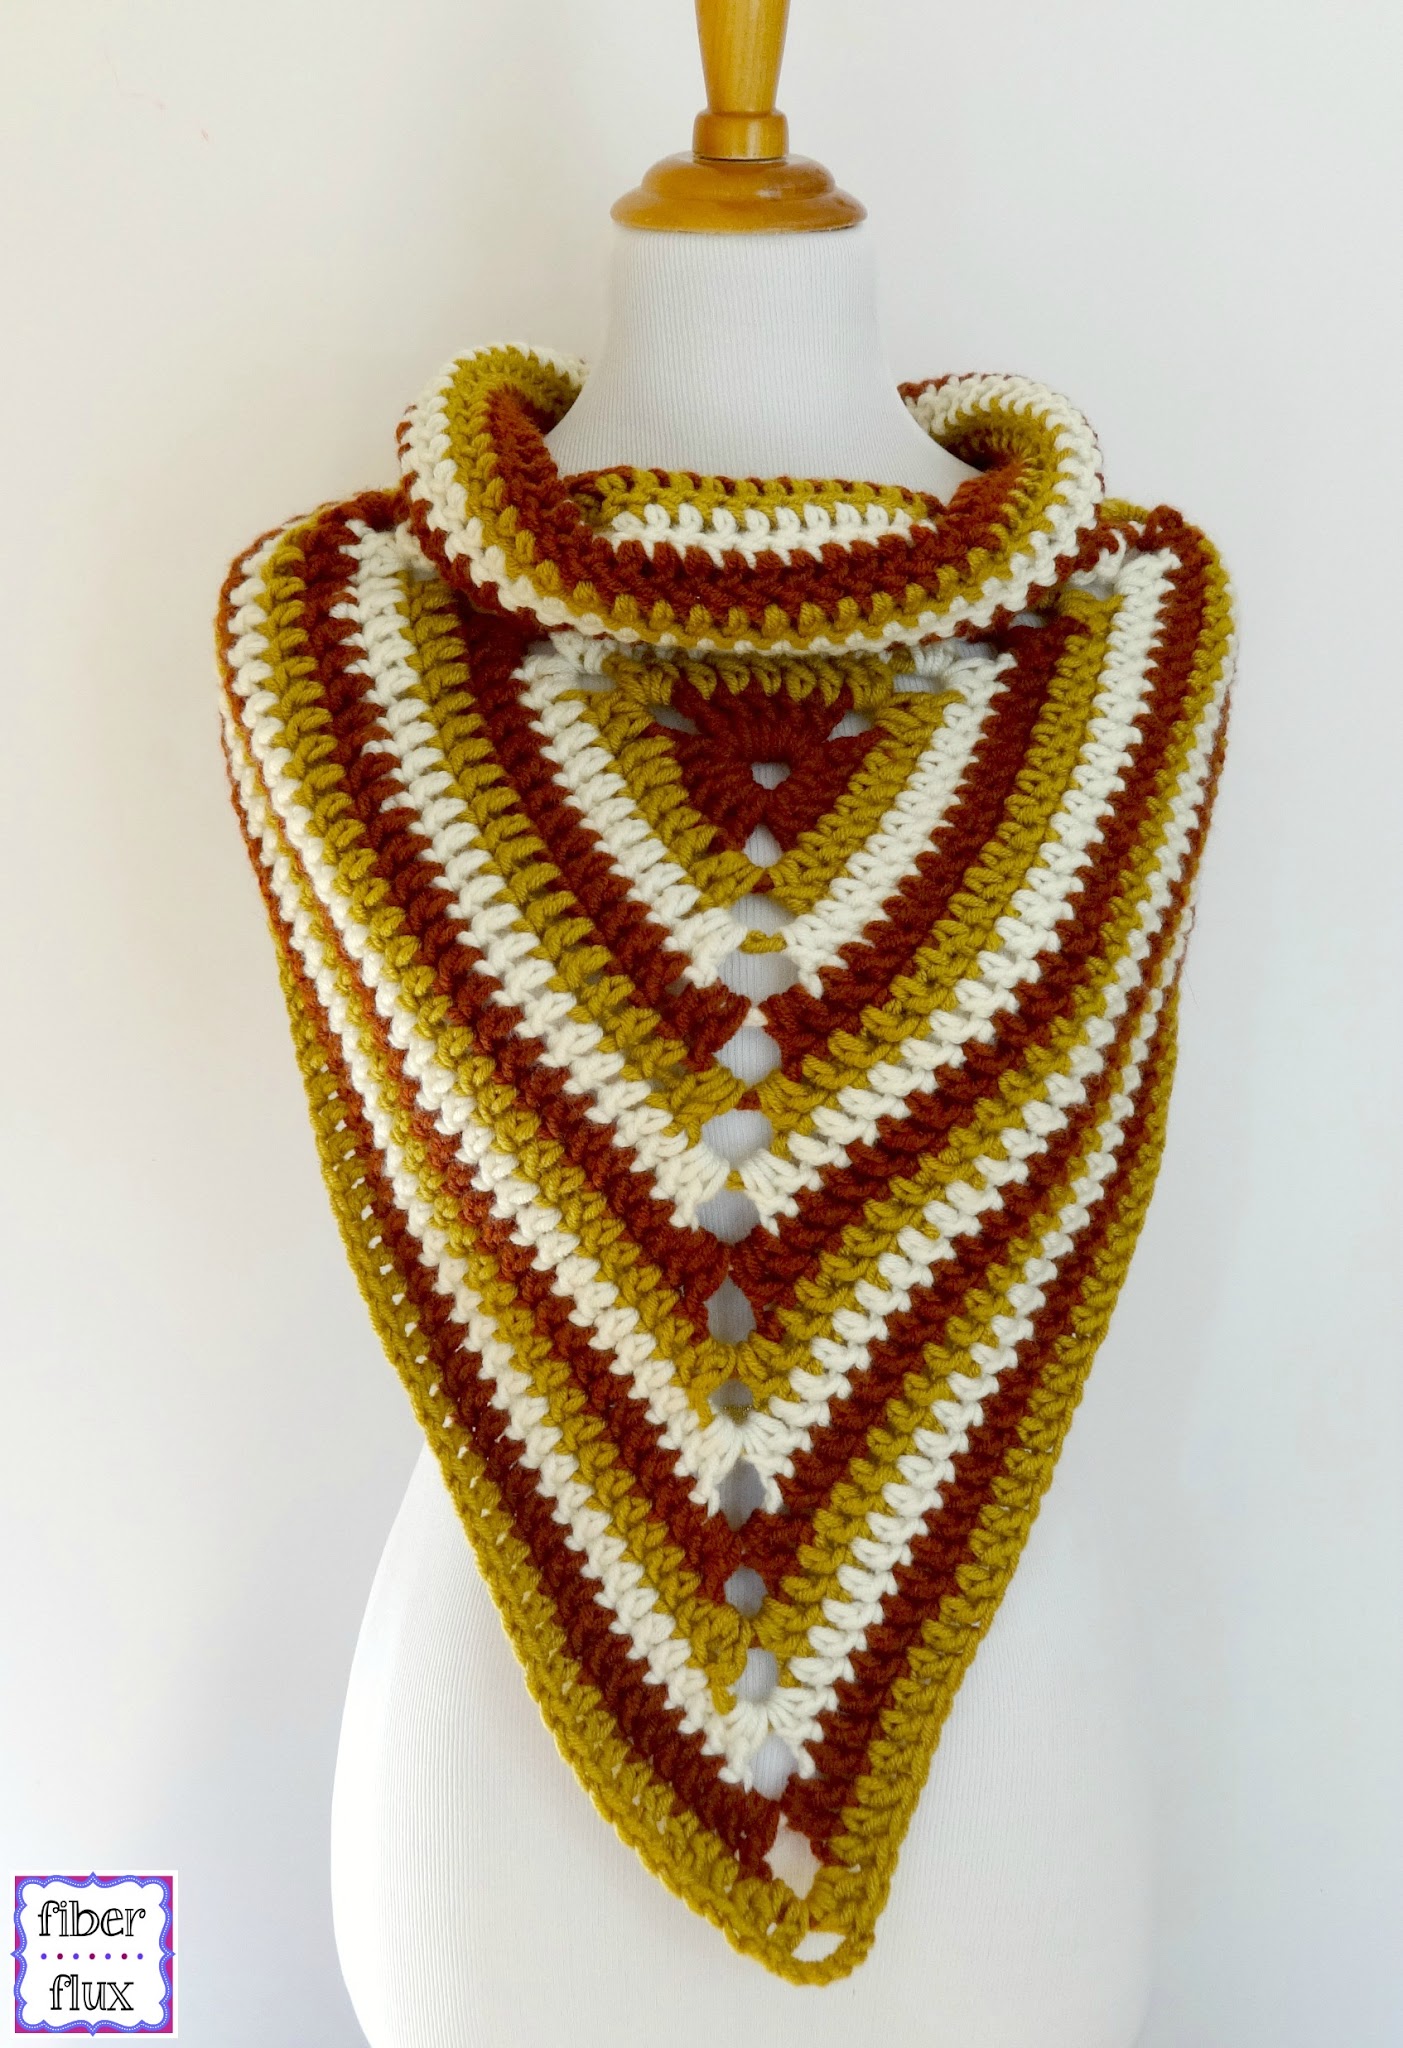
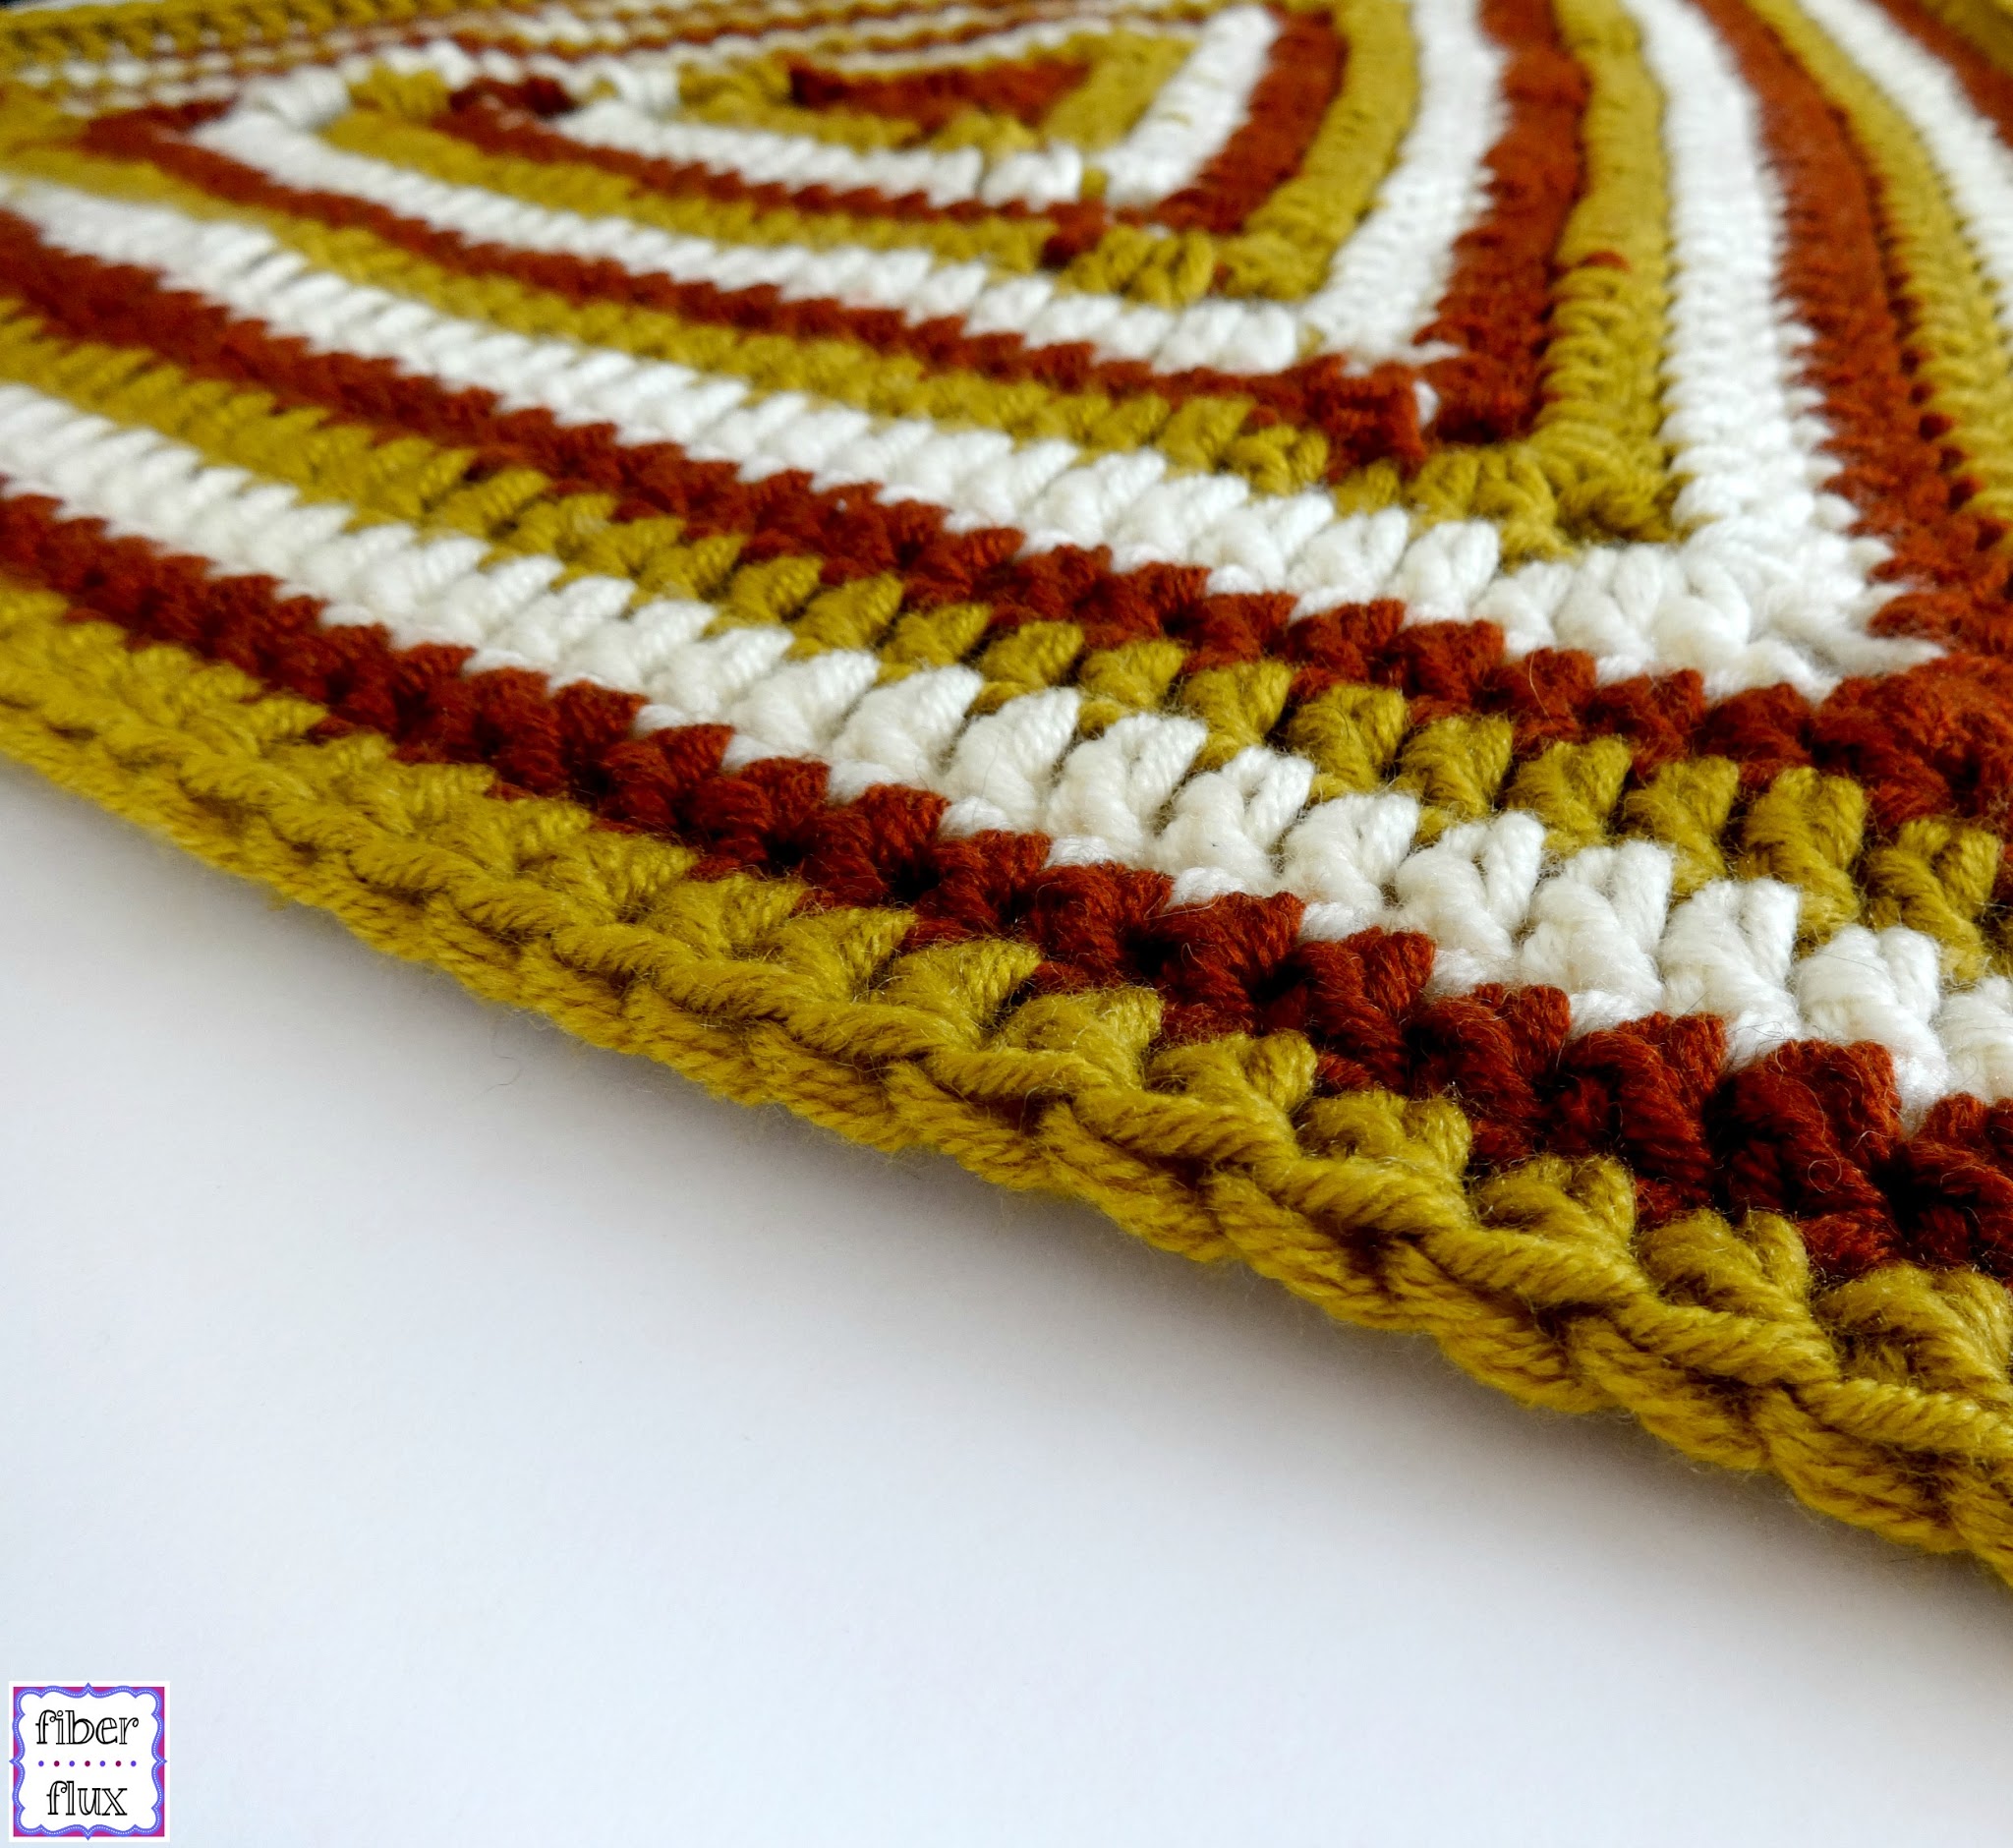
The Renaissance Button Wrap is a bold triangle wrap secured with a button. It is cozy and versatile and can be easily personalized using your favorite colors. The decorative corner holes function as button holes too, making it fully adjustable.
A very special thank you to the good folks at Lion Brand Yarn for gifting me this yarn.
Renaissance Button Wrap
By Jennifer Dickerson
Click the button below to add this to your Ravelry queue:
Materials:
- 3 skeins Lion Brand Lion’s Pride Woolspun (colors shown: “Honey” “Rust” and “Fisherman”)
- K (6.5 mm) crochet hook
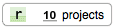
- 1 button
- Tapestry Needle
- Scissors
Sizing:
- 30 inches across from point to point

Instructions:
Note: Each round is worked in a different color. However, feel free to create any color sequence you like.
Ch 6, join in ch furthest from hook with a sl st to form a ring.
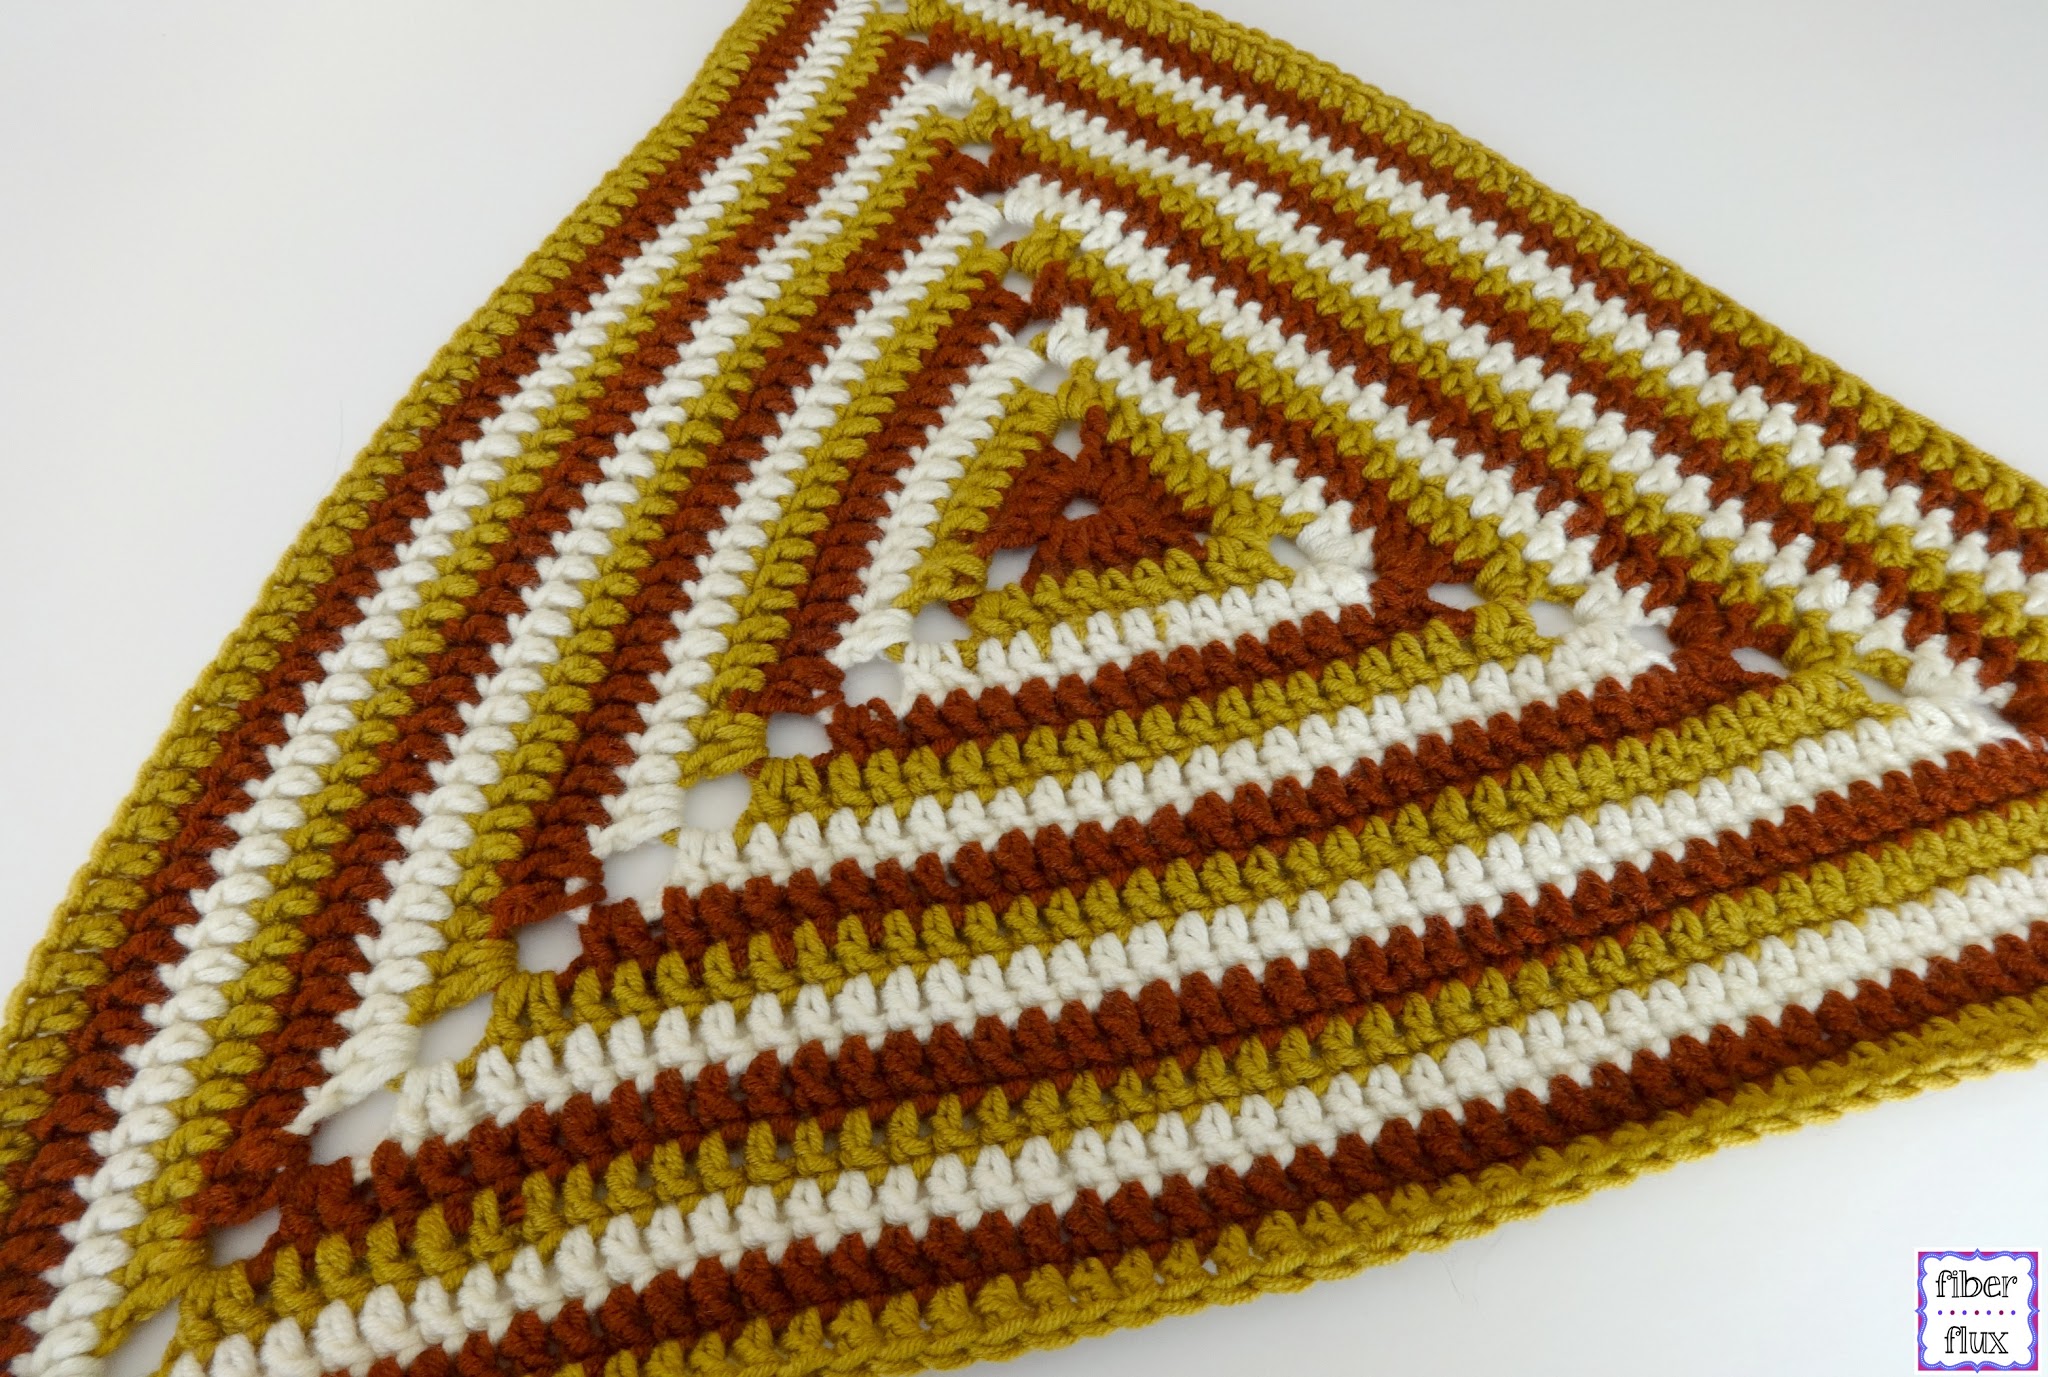
Round 1: Ch 8, then into the center of the ring, work (5 dc, ch 5) two times. Then work 4 dc into the center of the ring. To close the round, work a sl st into the third ch of the ch-8 from the beginning of the round.
(tie on a new color into one of the corner spaces)
Round 2: Ch 8, then work 2 dc in the corner space. Work a dc in each stitch along the side of the triangle (dc stitches worked along the sides of the triangle). When you reach the next corner space, work 2 dc, ch 5, 2 dc. Work a dc in each stitch along the next triangle side (dc stitches worked along the sides of the triangle). Work the next corner the same way as before, 2 dc, ch 5, 2 dc, then work the final side by working a dc in each stitch across. To complete round, work a dc in the corner space where round was started, then, work a sl st into the third ch of the ch-8 from the beginning of the round.
Repeat round 2 until triangle measures 30 inches from point to point (or desired length). I worked 14 rounds, however based on yarn choice, tension, etc, you may work more or less rounds.
Note: Sides are worked into the stitches and corners are worked into the spaces of the triangle. Your triangle will grow because 4 stitches are added to each side of every round.
Finishing & Assembly:
Weave in all ends that remain. With a matching piece of yarn, sew button to one of the triangle points with a tapestry needle.
Click below for a video tutorial on how to crochet the Renaissance Button Wrap stitch by stitch:
For more fun projects and pretty patterns, be sure to follow Fiber Flux on Google+, Facebook, Twitter, and Pinterest for the latest updates!
I was gifted this yarn from Lion Brand Yarn, design and ideas are my own, please read my disclosure policy here.

(Affiliate Link)


OMGoodness….I want to go home and make this right NOW!!!!!!!!!!!
Yay! 🙂
So dumb question but is wool spun a bulky (6) weight?
Thanks Laurie for your question! The label lists it as a "5" weight. Here is a link to the product page for more info:
http://www.lionbrand.com/yarns/lionspridewoolspun.html
Happy stitching! 🙂
Can this be made with any weight of yarn? Is woolspun a bulky yarn or no?
Yes! You can totally make with any yarn (and hook you like)! Because each round makes the wrap grow larger, just keep working more rounds until you get the exact size you want…hope that helps!
looks great, love the colors and the way this pattern worked out! so versatile too with all the button options!