

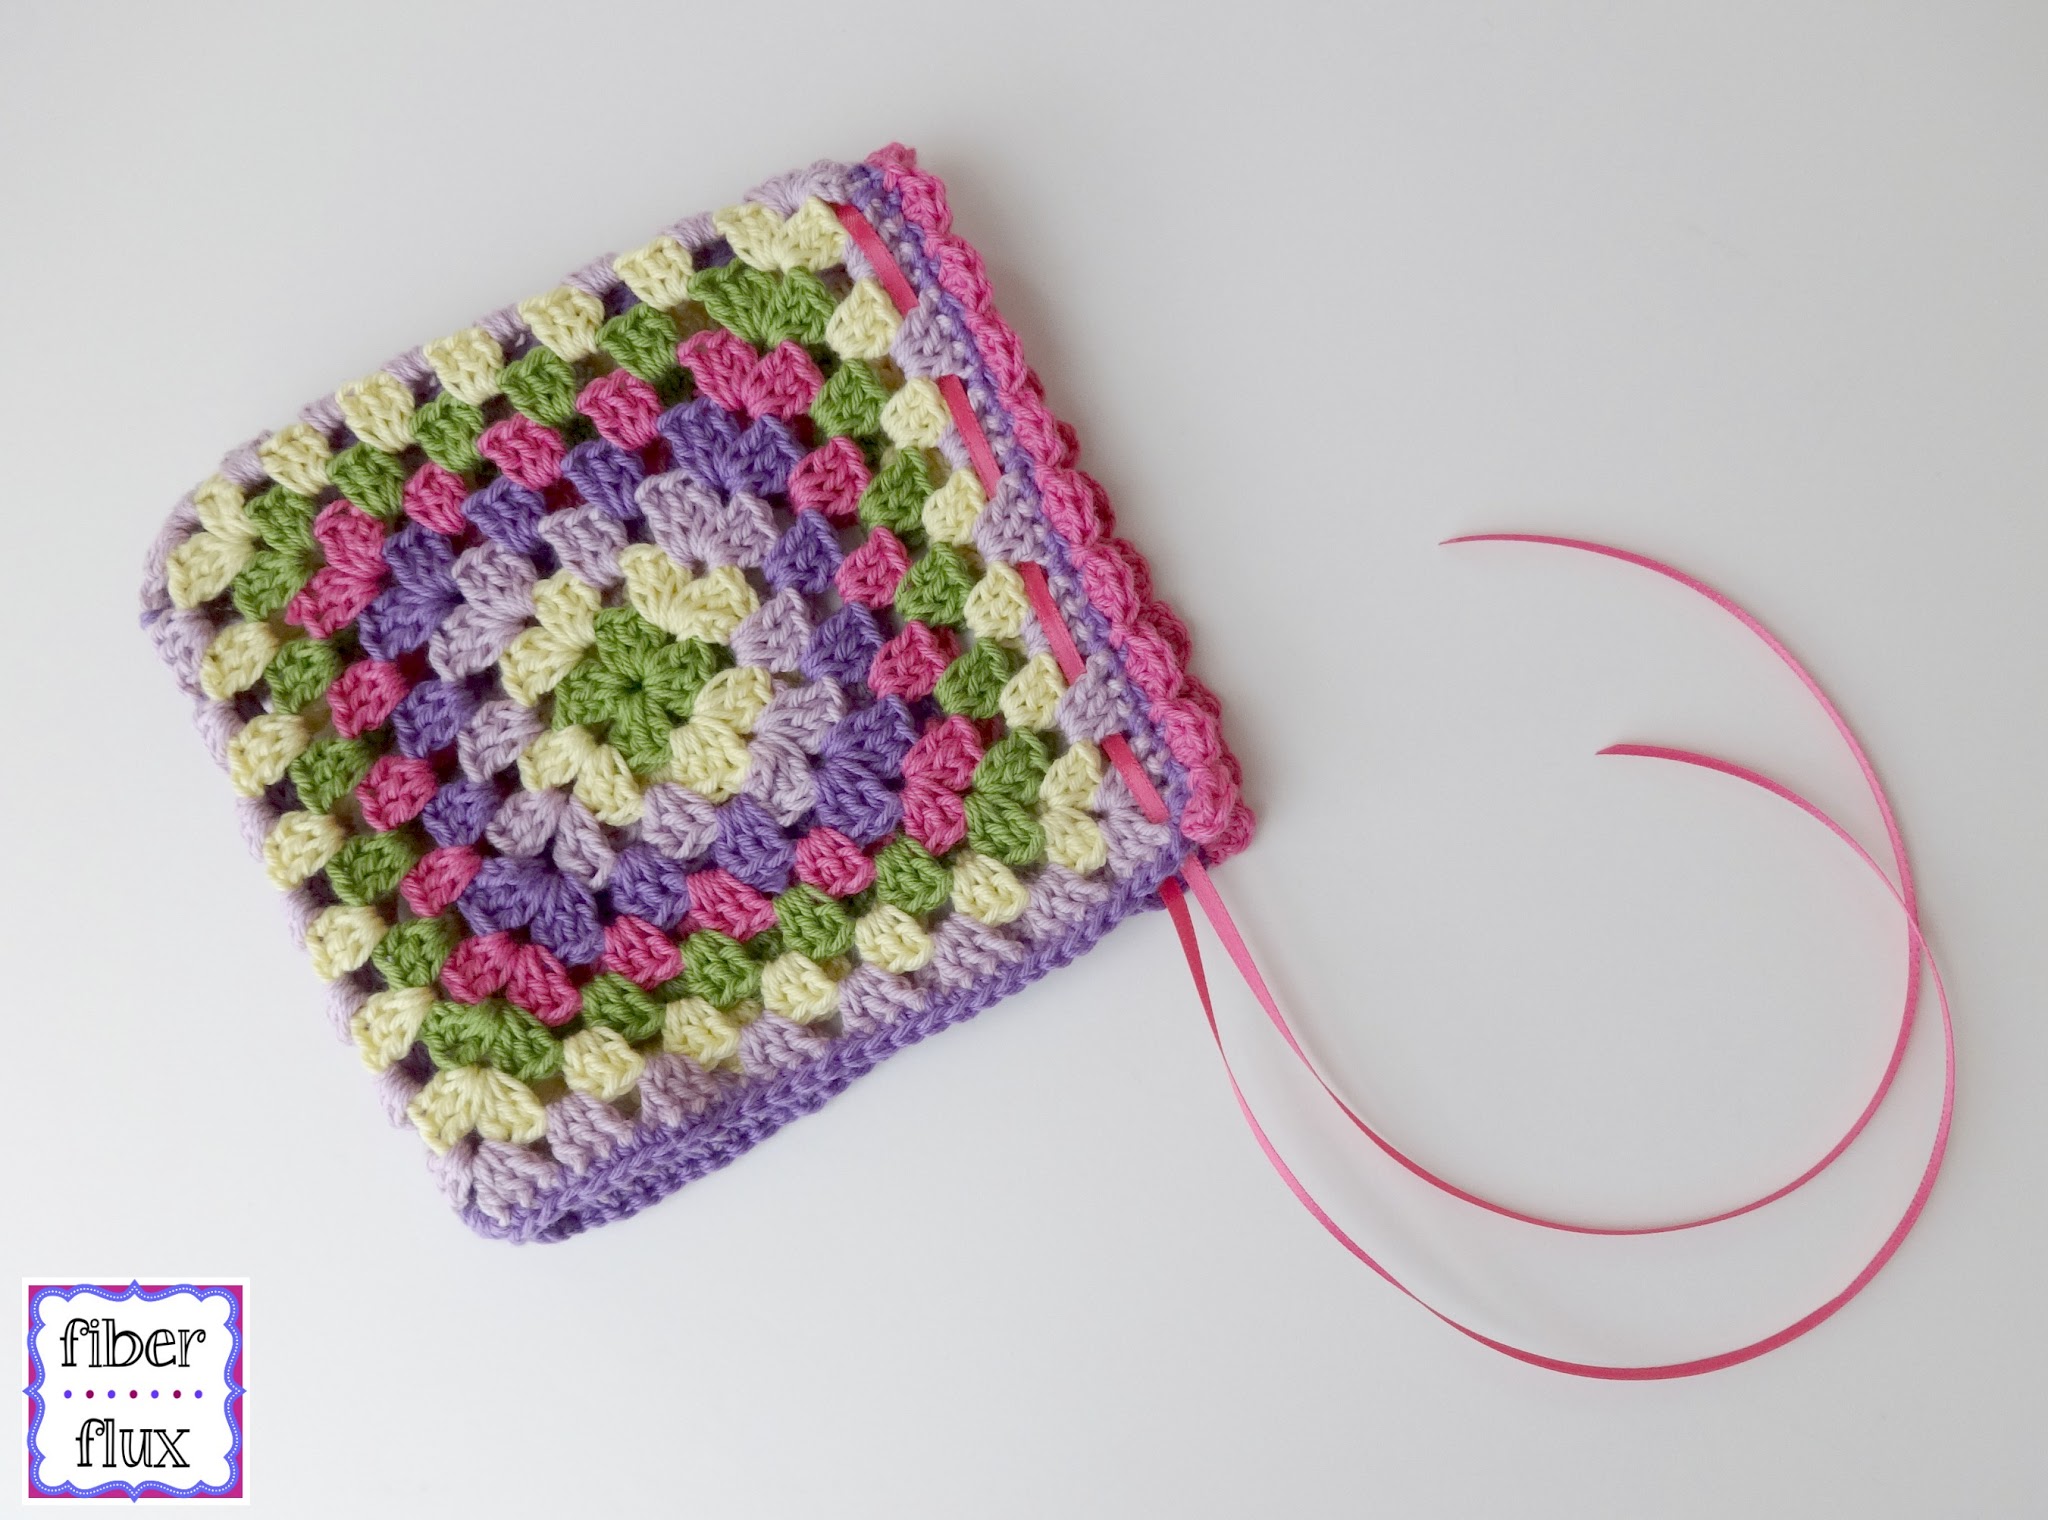
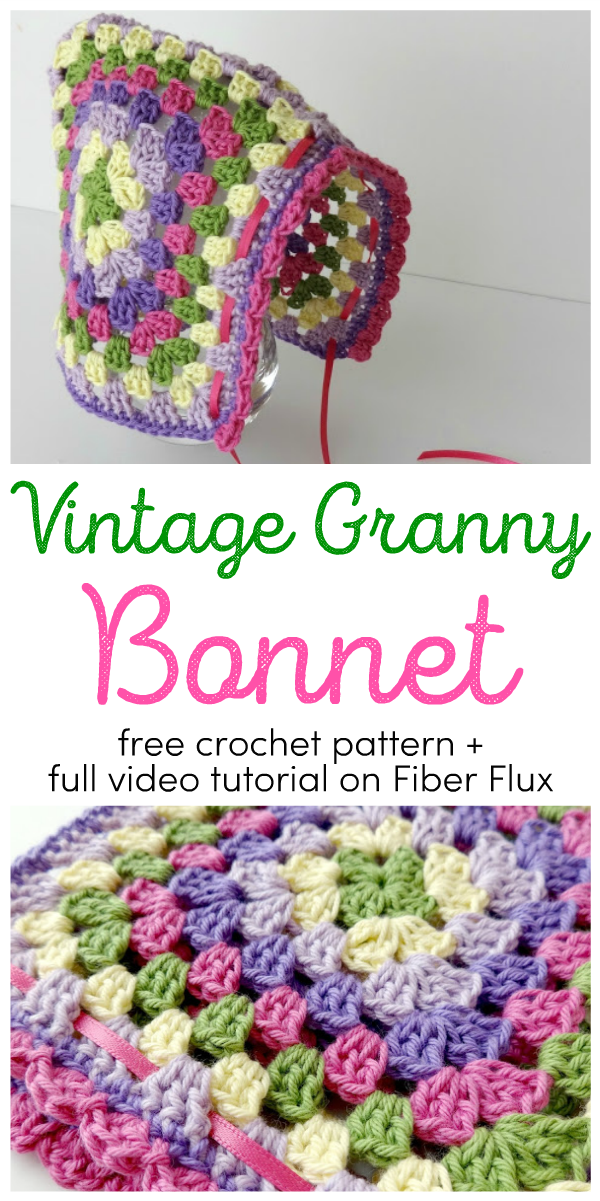
The Vintage Granny Crochet Bonnet is sweet and easy to make. It is cleverly constructed with two granny squares, and finished off with a beautiful scalloped edging. Make one for a special little one in any color combination you like!
Watch a video tutorial on how to crochet the Vintage Granny Crochet Bonnet:
Materials:
- 1 pack of Lion Brand Bon Bons in the “Nature” colorway pack
- F (3.75 mm) crochet hook
- Tapestry needle
- Narrow ribbon (ribbon shown is 3 mm satin ribbon)
- Scissors
Sizing:
- Each granny square is about 7 inches across. When seamed, finished bonnet is about 6.5 inches across.
*Note: You can make this bonnet any size you like, simply by working more or less rounds of the granny squares. Make each square roughly half the child’s head circumference.
Tutorial Links:
- How to Put a Slip Knot on Your Hook
- Chain (ch)
- Double Crochet (dc)
- Single Crochet (sc)
- Slip Stitch (sl st)
Instructions for Granny Squares (make 2):
Note: Bonnet as shown is worked in round of each color.
- Chain 4, join into a ring with a slip stitch.
- Round 1: Chain 4, work (3 dc into center of ring, chain 1) 3 times, then 2 dc into center of ring. Join to close with a slip stitch.
Note: if you want to make round 2 in the same color, simply slip stitch until you reach a ch1 at the corner and keep going. If you want to switch colors…cut yarn, leaving a tail, and fasten it with a slip stitch. Join the new yarn at one of the corners as shown and tie securely.
- Round 2: To work the corner of round 2, first chain 4, then 2 dc in same space, then chain 1, then 3 dc in the same space…first corner done!
- Then chain 1, then work the next corner by working 3 dc in next space, chain 1, then 3 dc in same space, chain 1, repeat two more times to complete the round.
- Round 3: Work the corner in the same manner as the previous round: chain 4, 2 dc in same space, chain 1, 3 dc in same space, chain 1. To work the sides, simply work 3 dc in the next space then chain 1…repeat until you reach a corner again.
Keep working in this manner, with two clusters in the corners and one cluster on the sides until you finish the round. Just be sure there is a ch 1 in between each grouping of 3 dc as you work each round. That is what gives you those pretty spaces in between each cluster and keeps it nice and flat.
Repeat round 3 as many times as you need to achieve the desired size, I worked the one shown until the square was about 7 inches across.
Edge Round 1:
- To transition from the granny square to the scallop, a sc edge will give a nice neat edge.
- Tie new yarn in any corner (I used dark purple for the bonnet shown), and ch 2, then work 2 sc in the same space.
- Continue down the first side, working a sc in each stitch and space.
- Work 3 sc in the next corner, then continue in this manner (sc along edge, 3 sc in each corner).
- Fasten off and weave in ends.
- Repeat for the other square.
Seaming:
- Stack both squares with front sides facing inward.
- Slip stitch seam from bottom right corner to upper left corner, fasten off.
- Turn right side out and weave in ends.
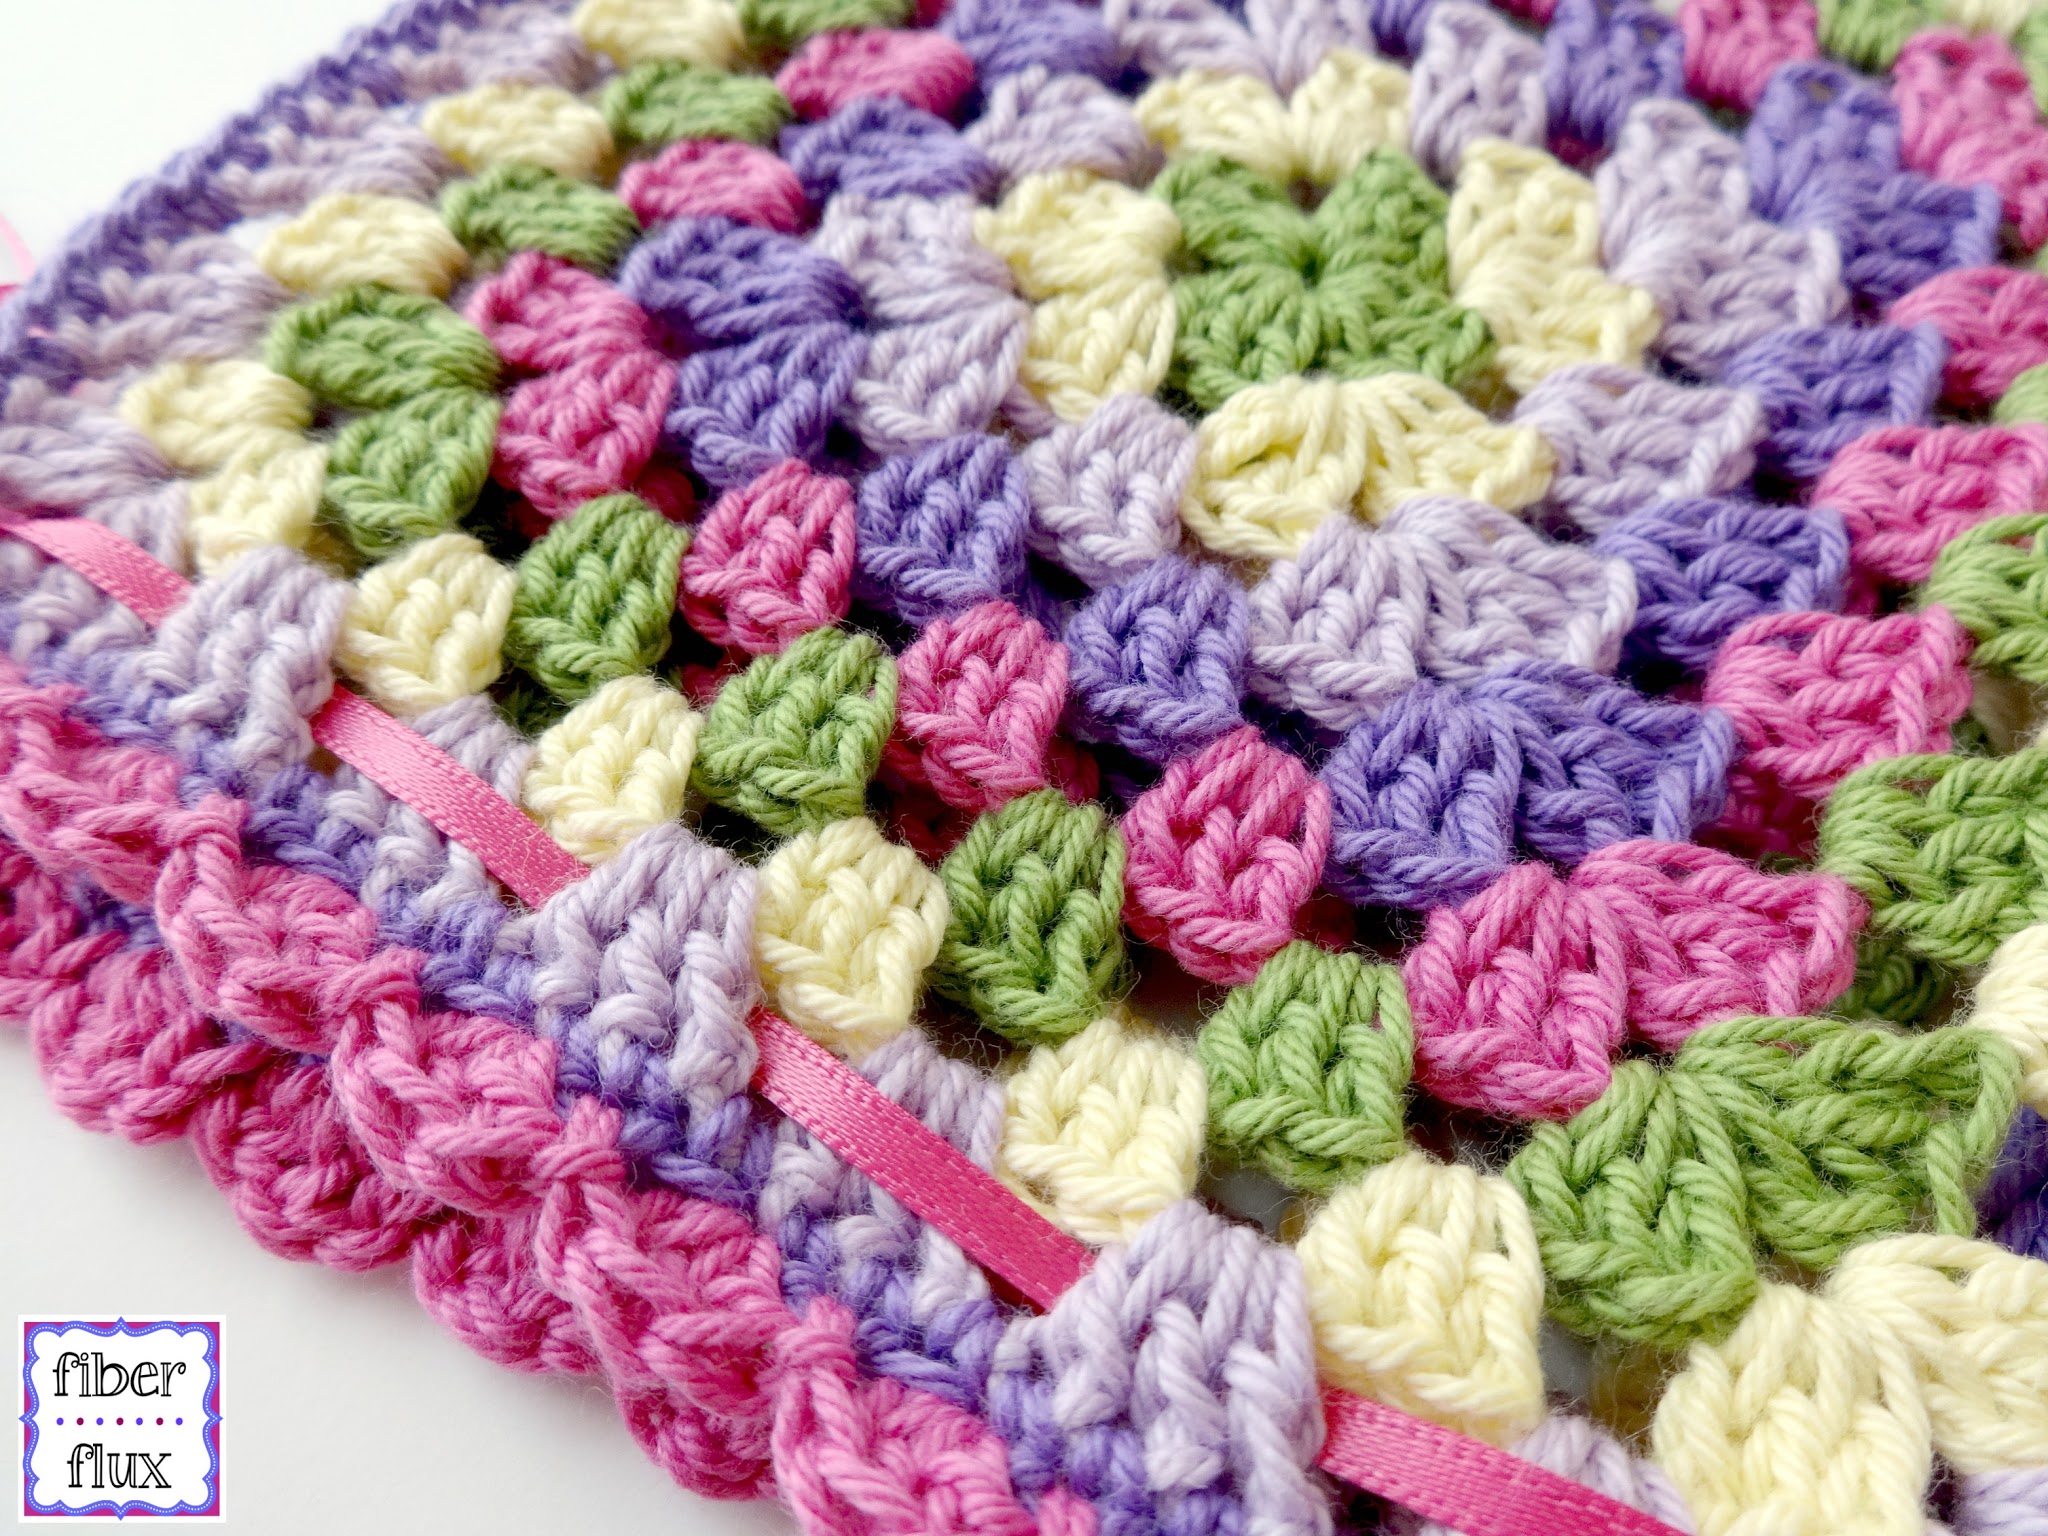
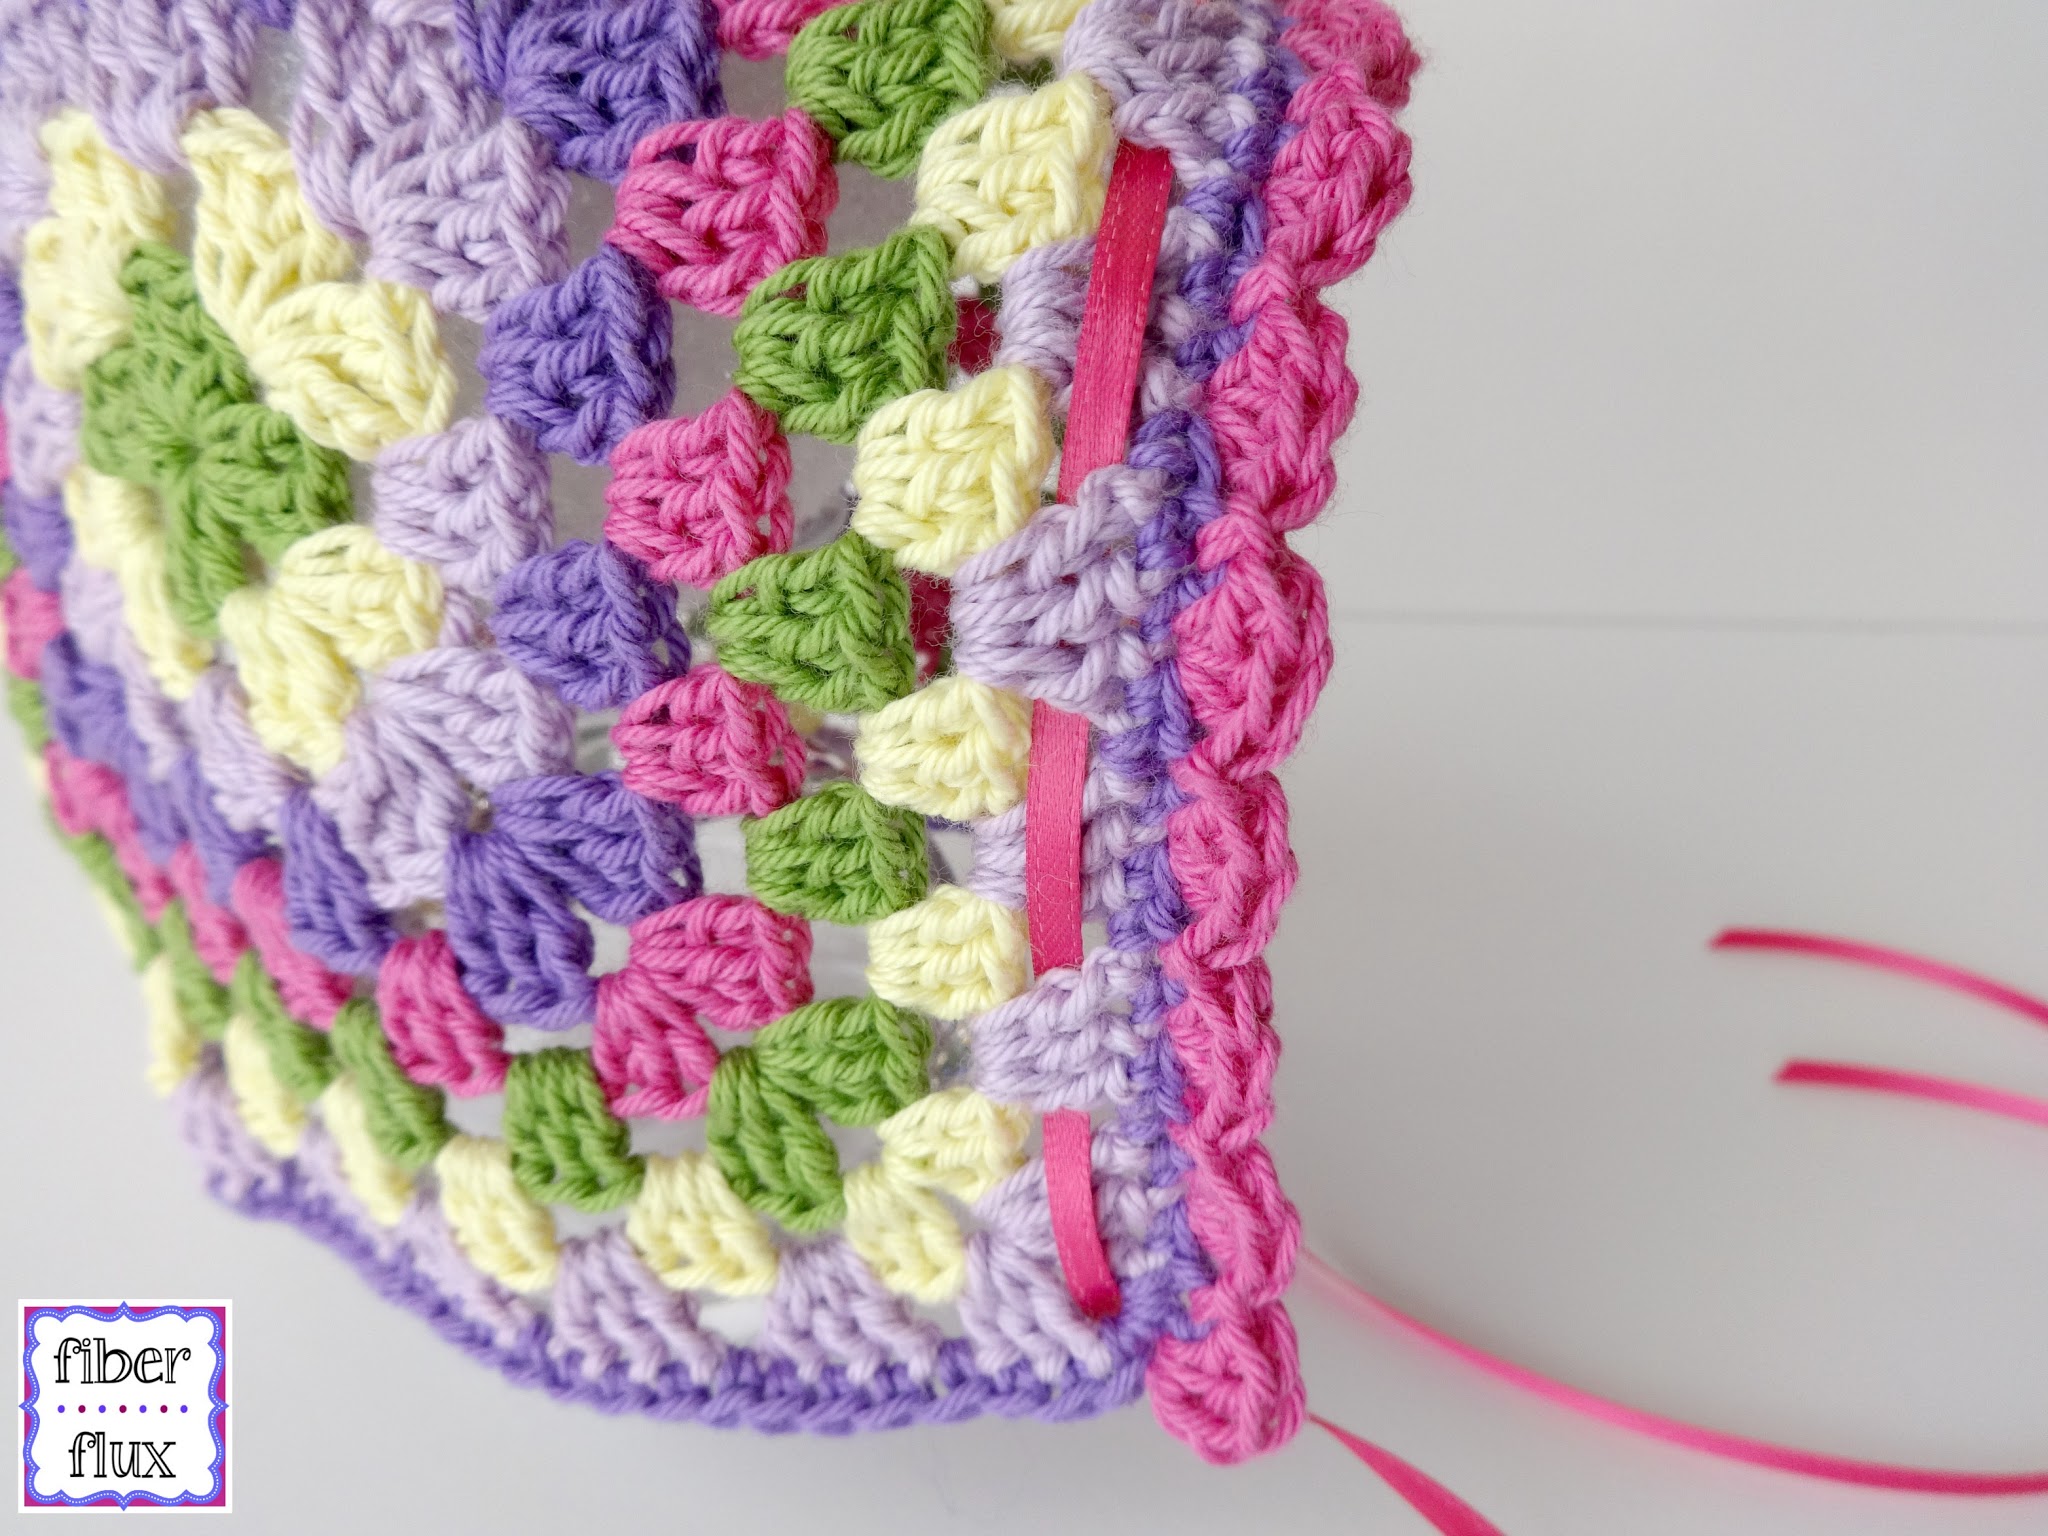
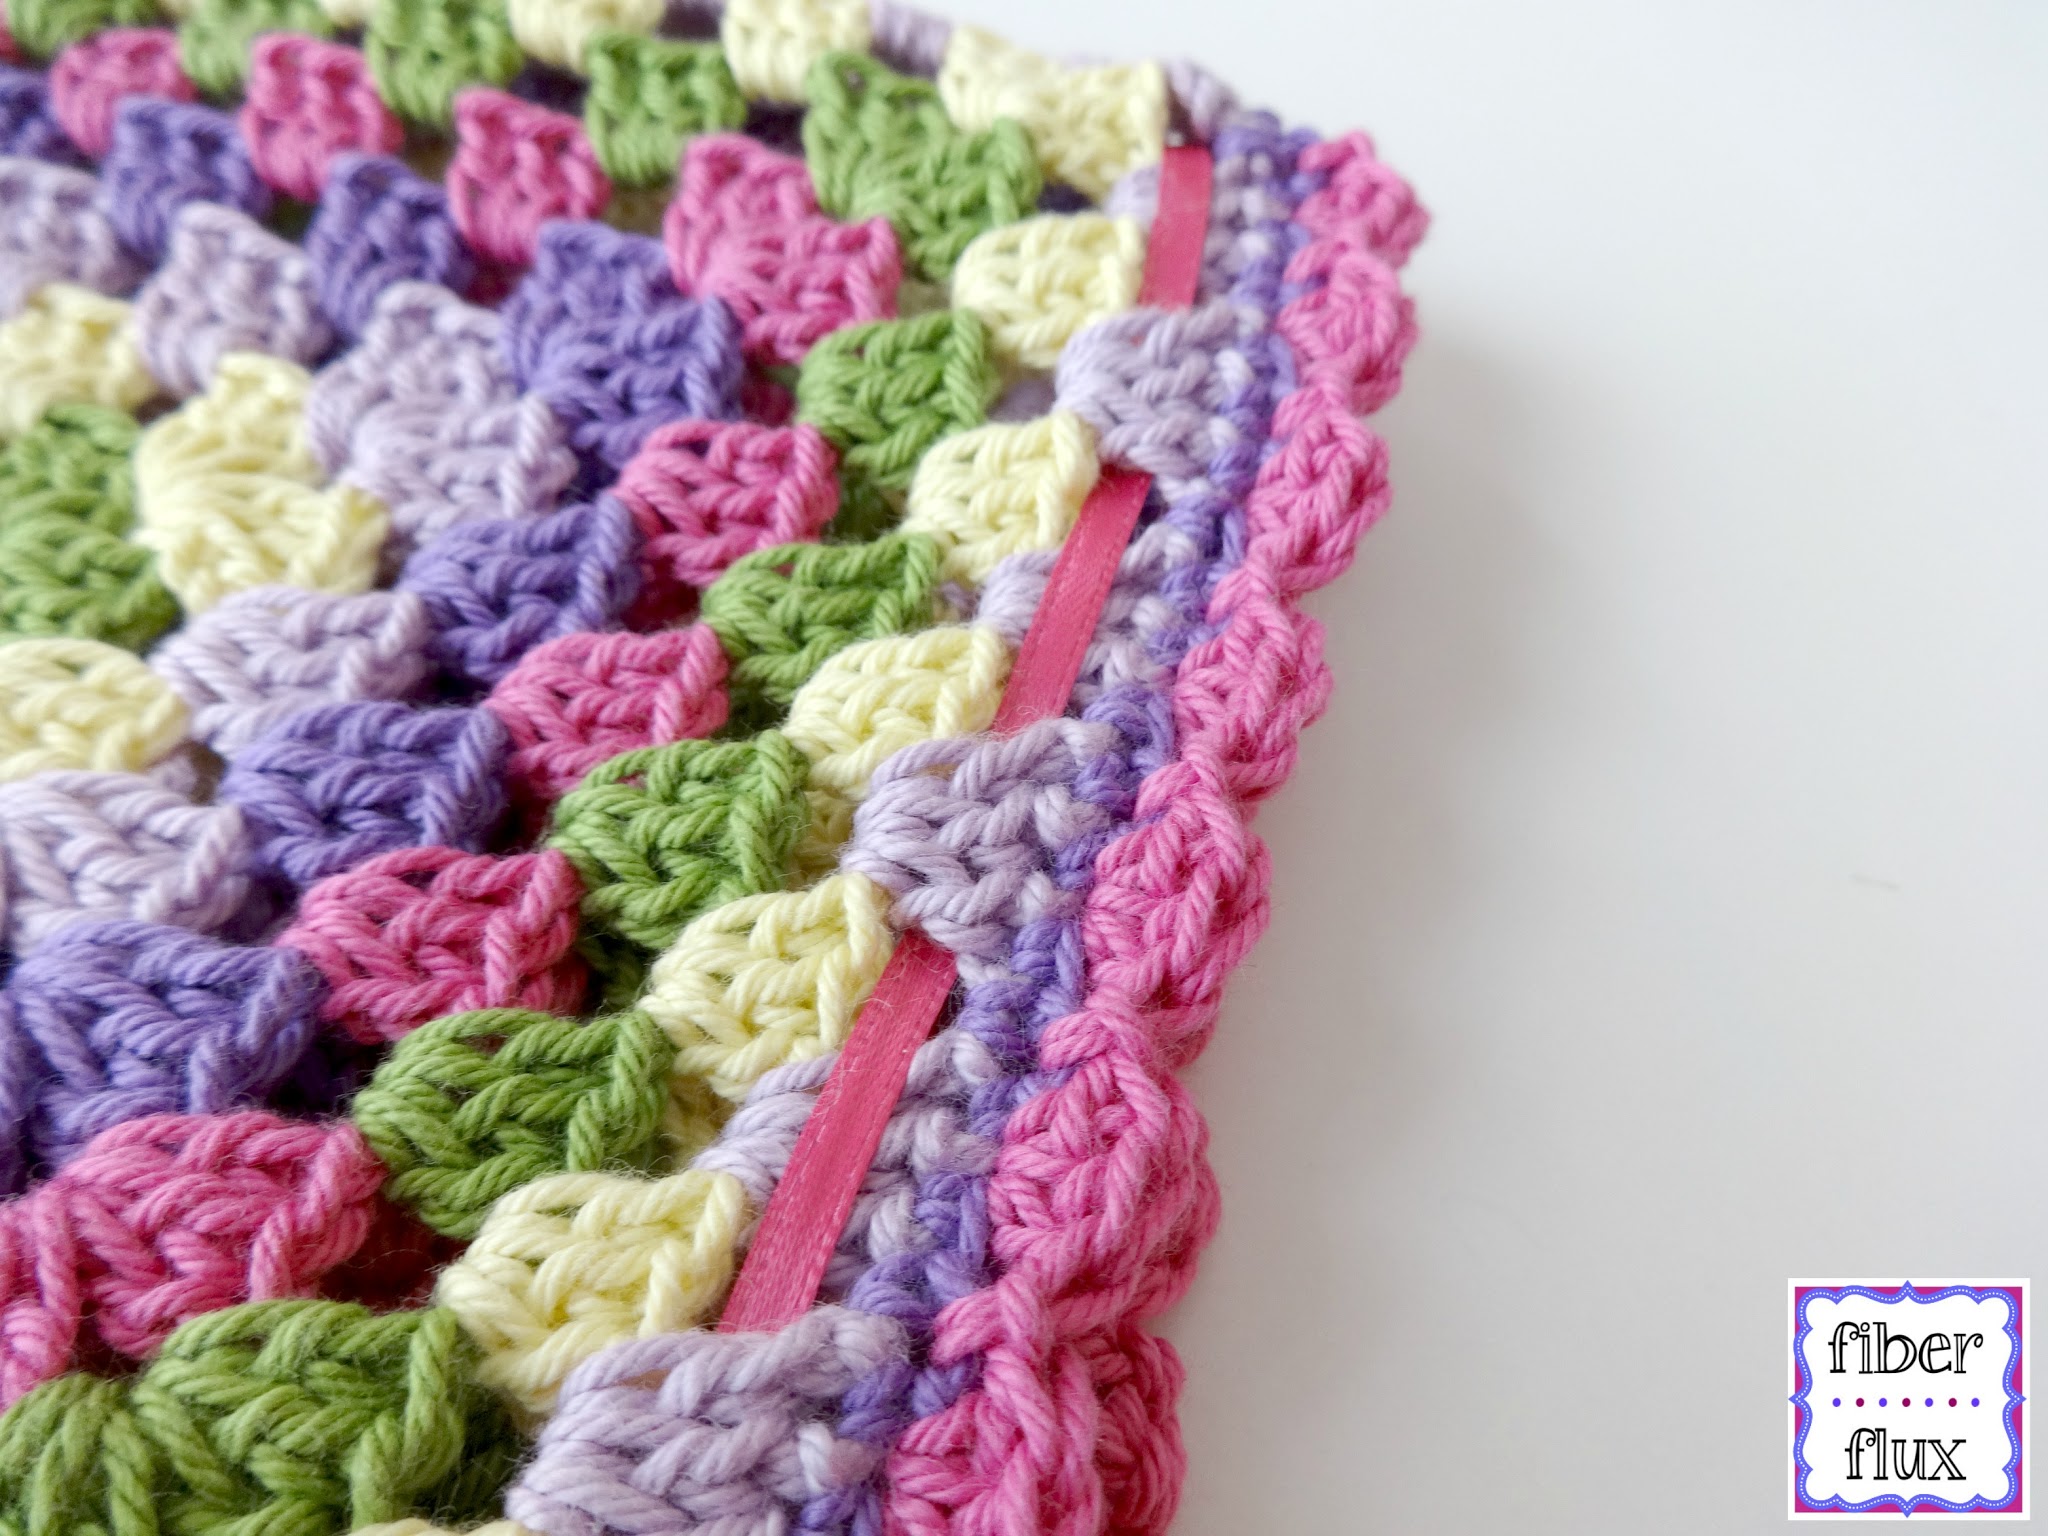
Scallop Edge (shown in pink):
- Beginning at bottom front edge (see photo above), tie new yarn color onto stitch (shown in pink in photos) and chain 3.
- Work 2 dc in the same stitch. In the next stitch, work a slip stitch.
- Skip the next stitch and work *3 dc in the next st,sl st in the next st, skip the next st.
- Continue around front edge of bonnet from * to end.
- Finish off by working a sl st in last dc group to round off the last scallop.
- Fasten off and weave in ends.
Ribbon Tie:
- With a large tapestry needle (or you can do it by hand if needed), thread ribbon and weave in and out of the last granny square round worked (shown in light lavender).
- The ribbon should start at the bottom front edge, travel upwards across top front of bonnet and end at the opposite side (the first photo is will show you if you are unsure).
Note: Please supervise child at all times while wearing tie on hats or hats of any kind.
Looking for more crochet patterns for baby? Check out my baby and kids free crochet pattern library!


What a cute idea.
Lisa
How clever! I love the colors :o)
Love your adorable bonnet – such a clever idea! Thank you for sharing.
This is totally cute. I'd rather knit than crochet, but I can't wait to make this! Thanks!!
Very cute bonnet . What size is the bonnet.
Very cute bonnet. What size is the Bonnet.?
what's the sizing for 3-6month infant?