
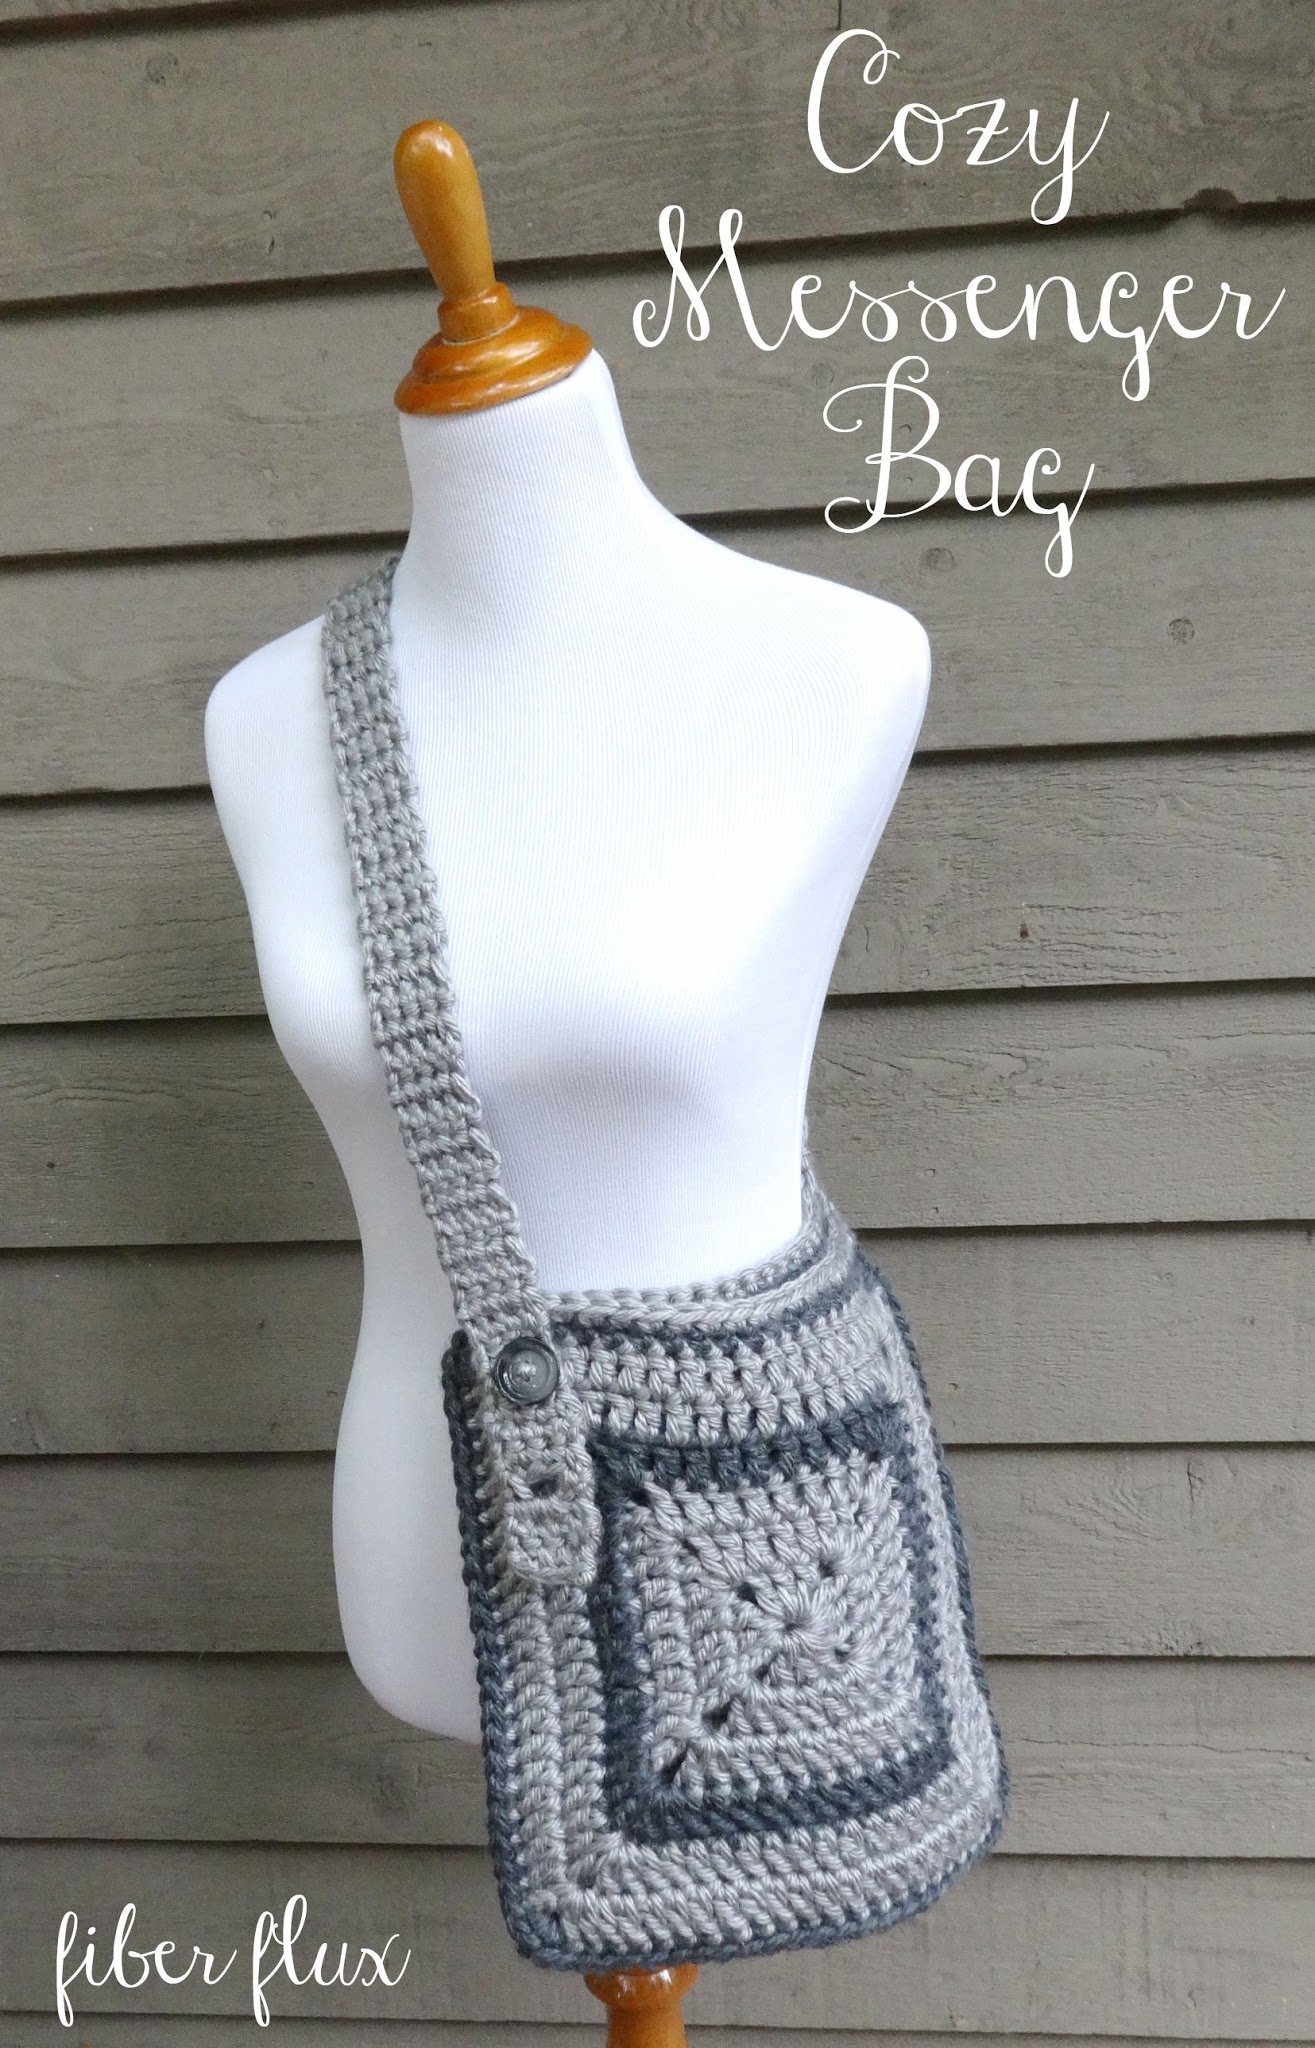
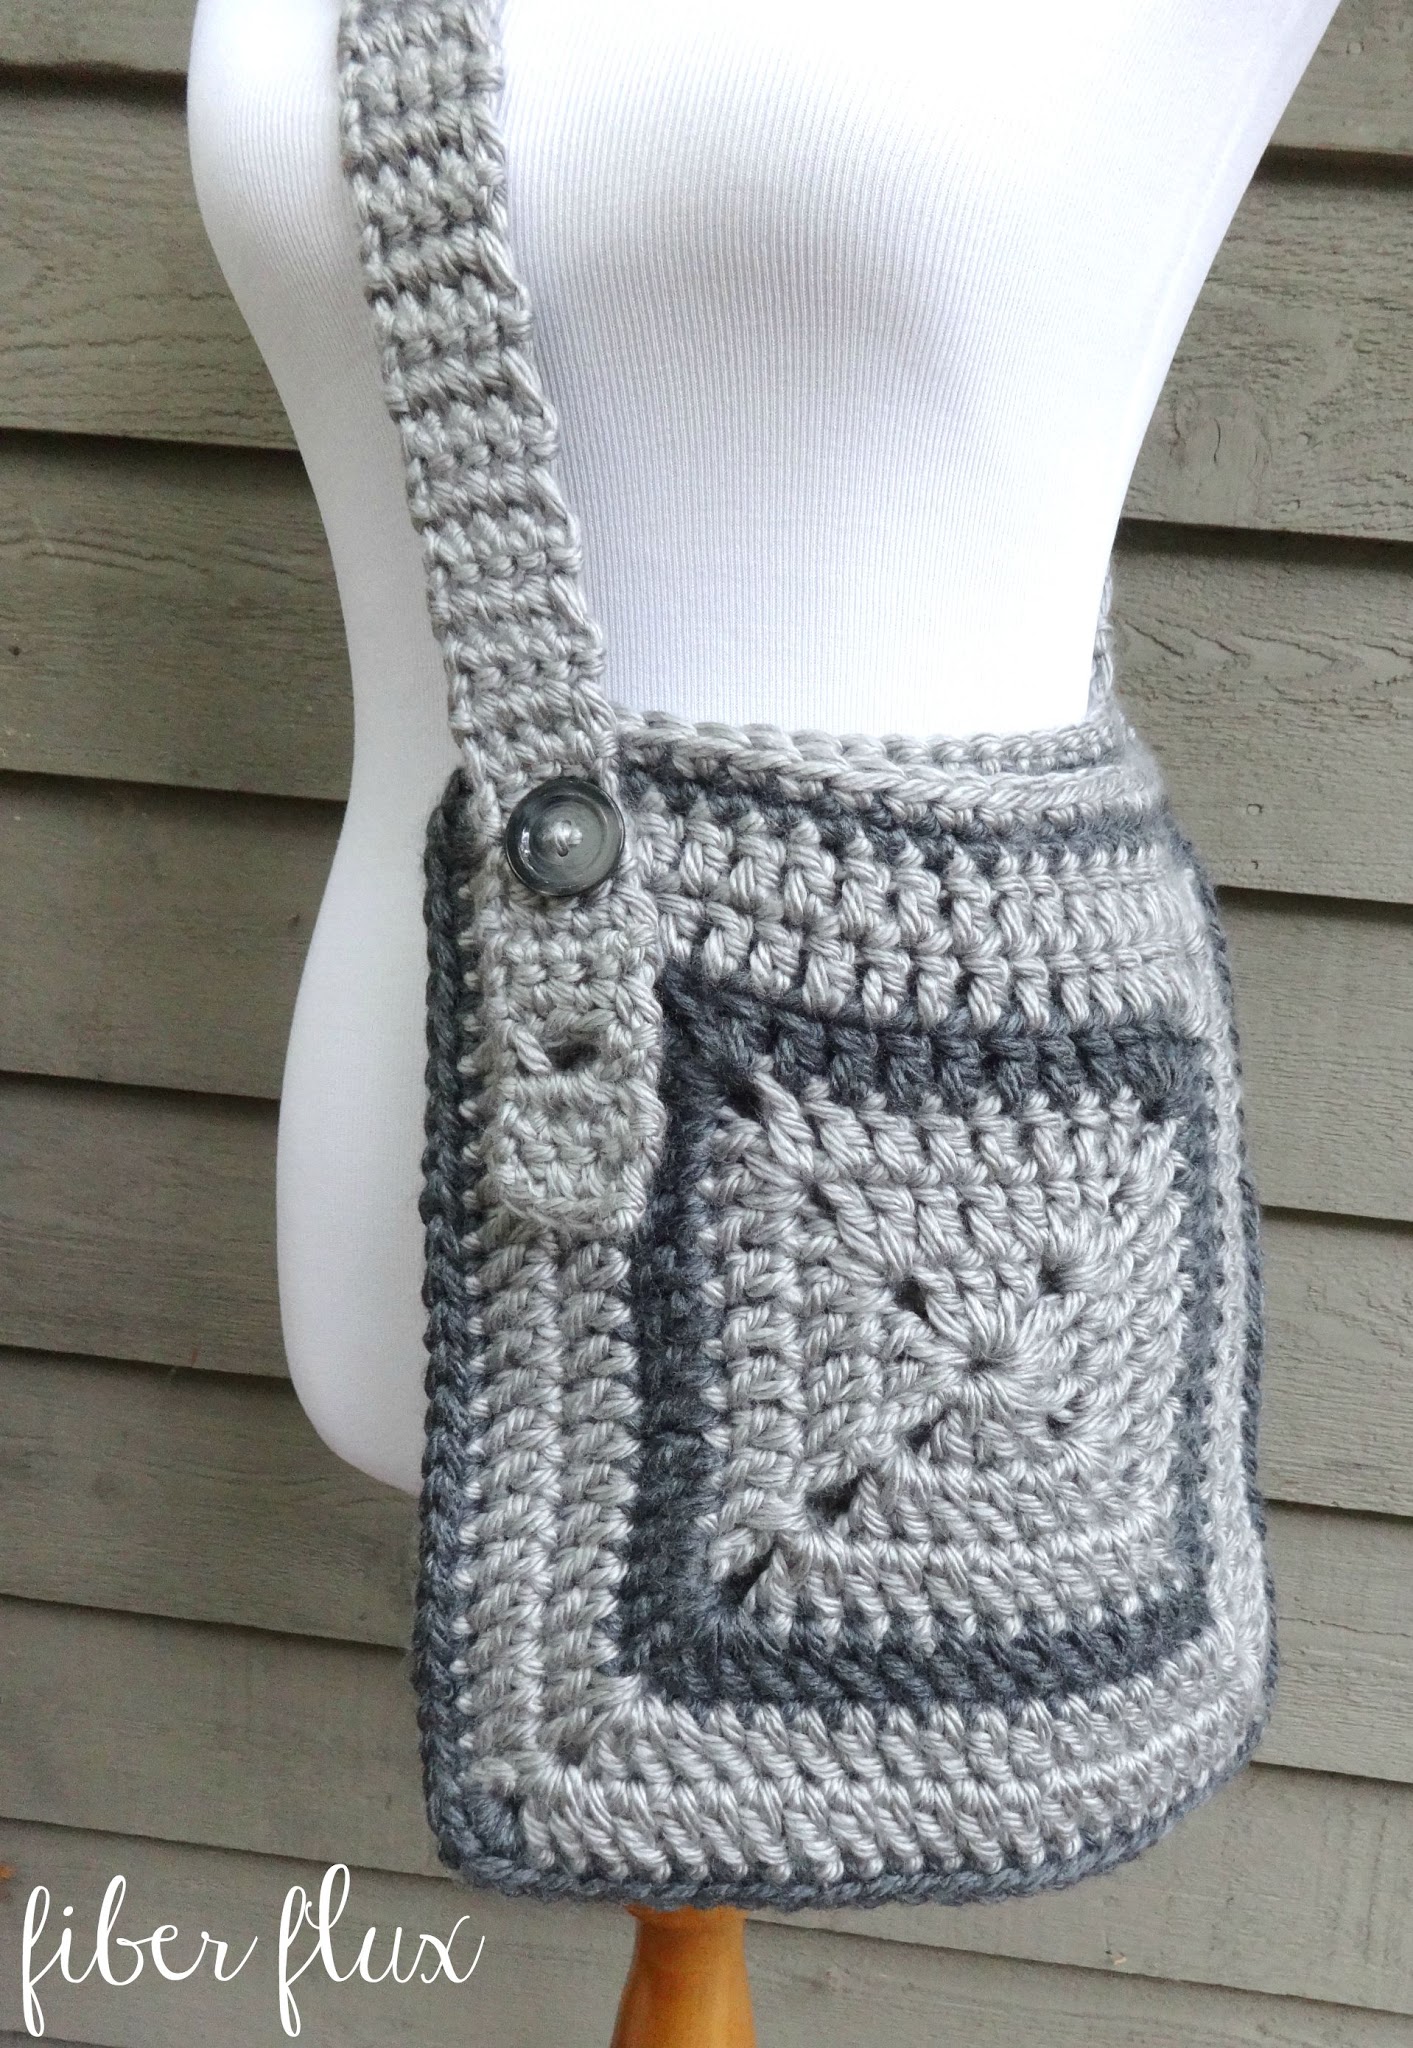
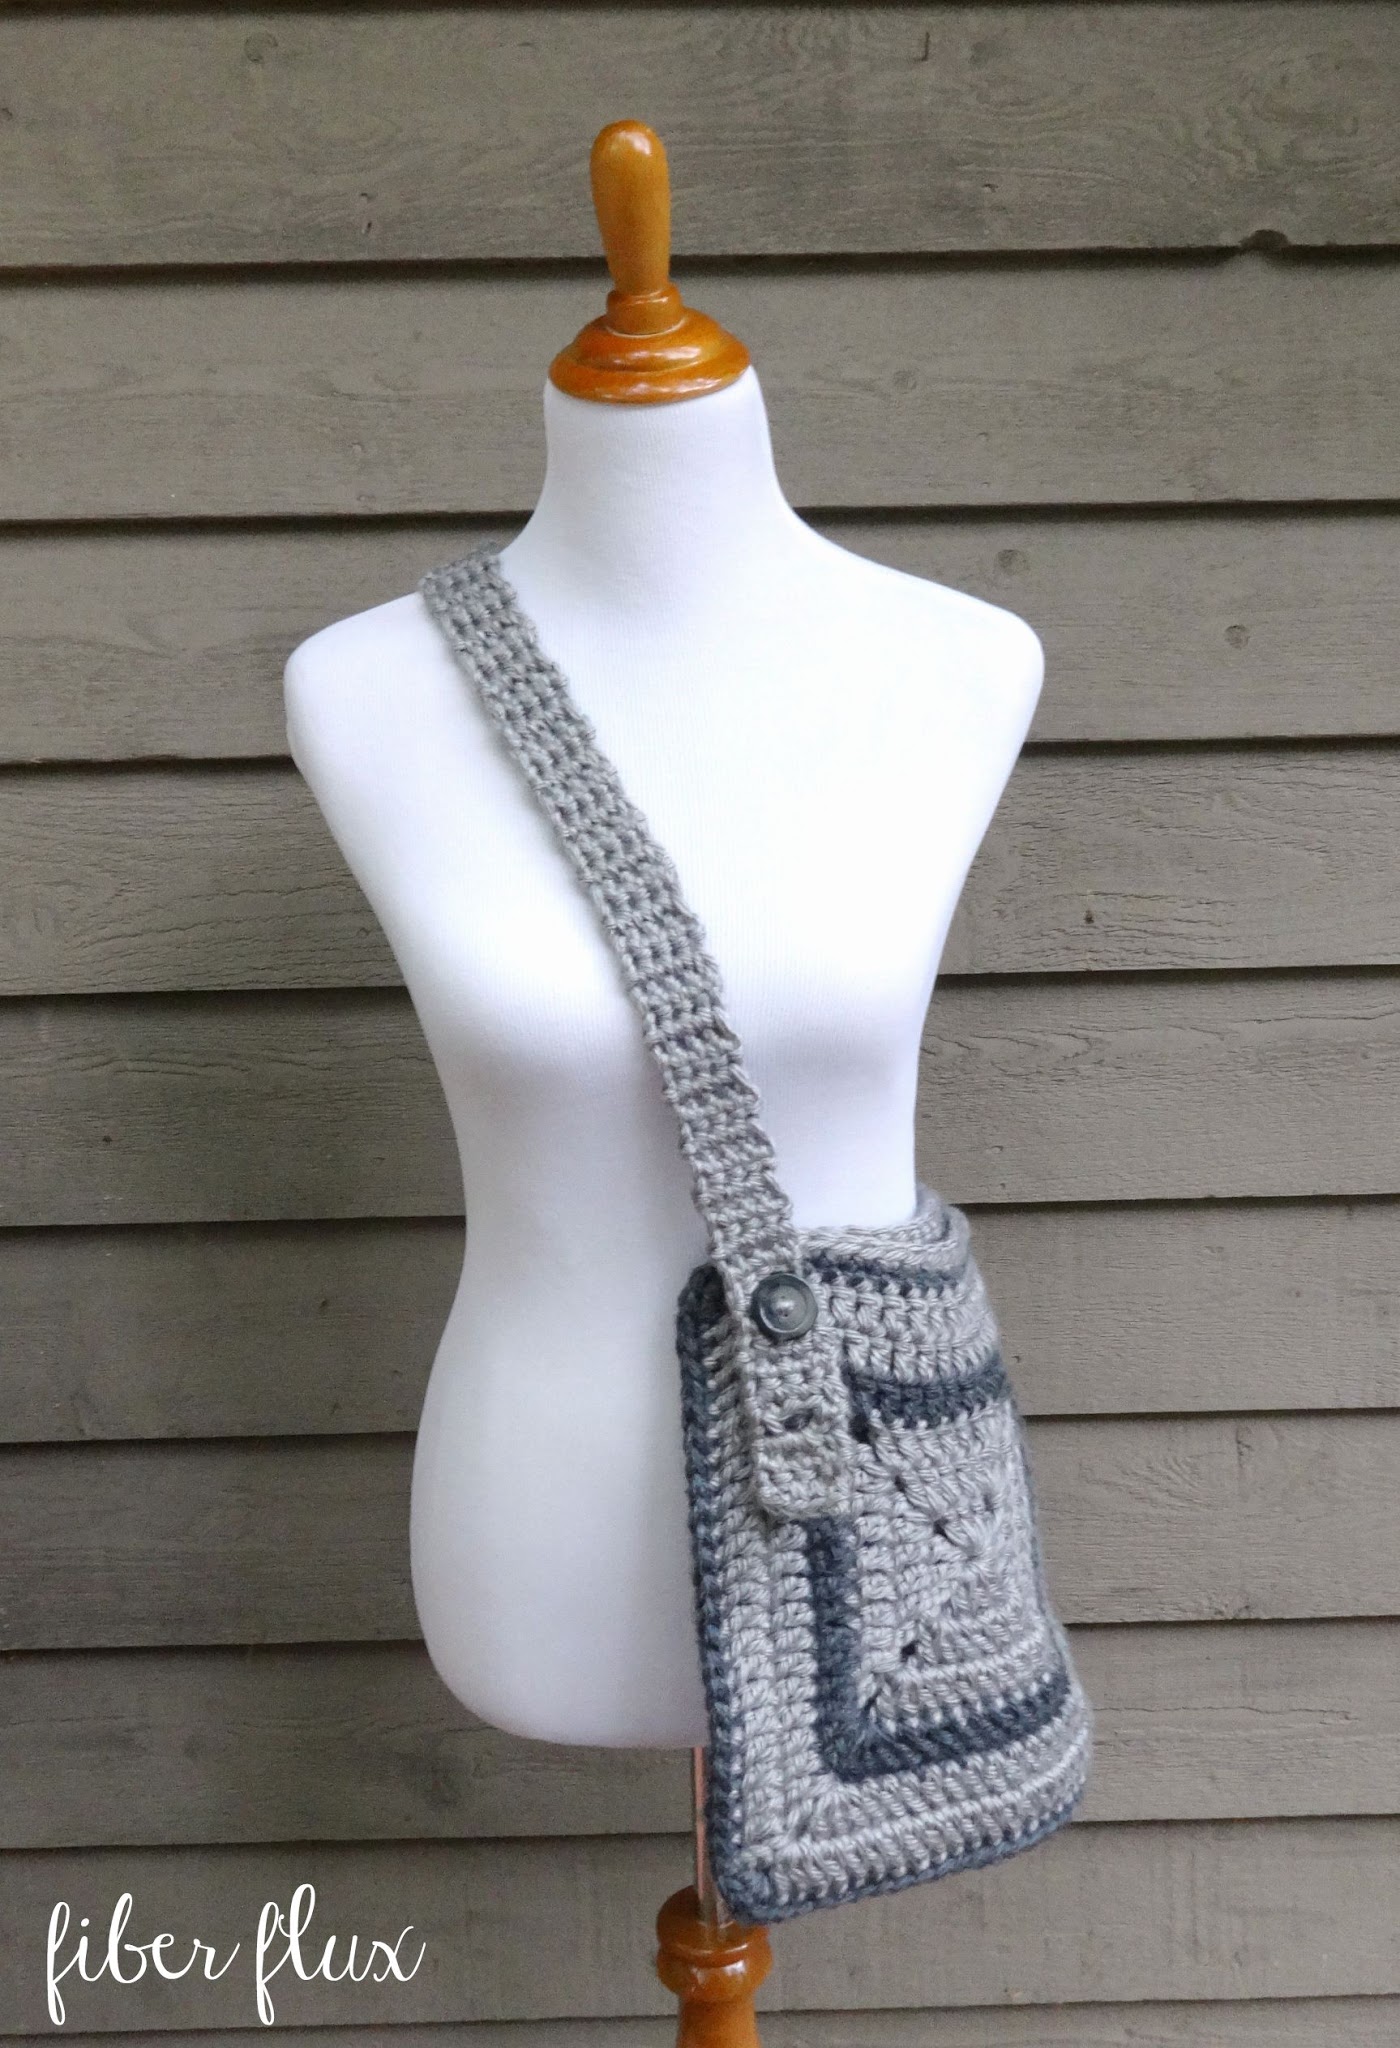
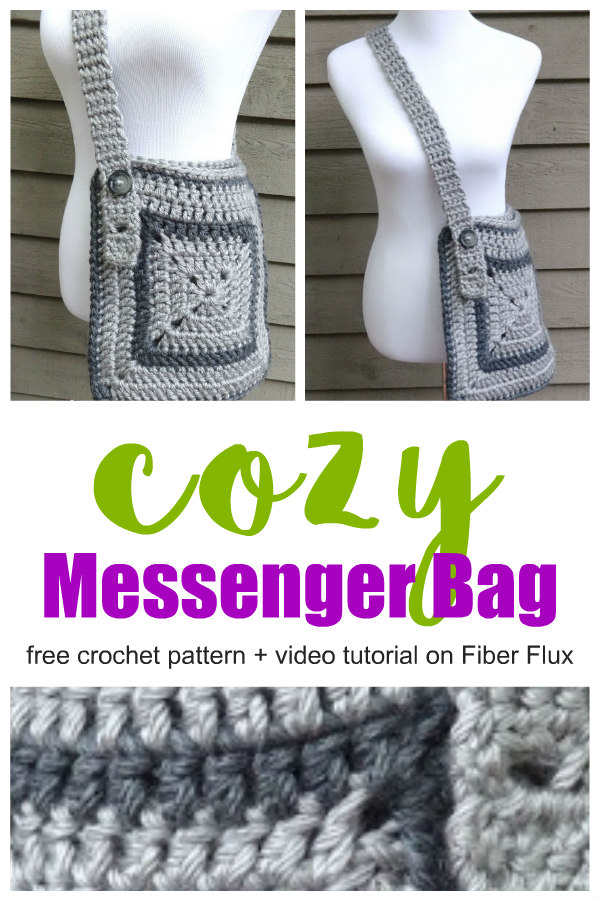
The Cozy Crochet Messenger Bag is easy to stitch up and fun to customize in your favorite colors. The bag is constructed with two squares seamed together, then a simple strap is added to the back, then buttoned at the front, crossing over the body. Two button holes are worked into the strap, making it fully adjustable too!
I am a huge fan of any style bag that can be worn across the body. Because the weight is distributed across instead of on one side (on the shoulder for example), they are a super comfortable, hands-free way to carry your necessities.
Watch a full video tutorial on how to make the Cozy Crochet Messenger Bag:
Materials:
- 3 Balls Lion Brand Hometown USA or super bulky yarn of your choice (colors shown are “Chicago Charcoal” and “Dallas Gray”)
- N (9.0 mm) crochet hook
- 1 large button
- Tapestry needle
- Scissors
Sizing:
- Squares are 12 inches tall and 12 inches wide, however you can make squares larger or smaller to change the size of your tote.
Tutorial Links:
- Chain (ch)
- Slip Stitch (sl st)
- Single Crochet (sc)
- Double Crochet (dc)
- How to Crochet A Solid Granny Square
Bag Square Instructions (Make 2):
Note: Bag as shown is worked in three rounds of light gray, then one round of charcoal, then two more rounds of light gray.
Ch 4 and join with a slip stitch to form a ring.
Round 1:
Chain 5, then work 3 dc into the center of the ring, then ch 2. Work the (3 dc, ch 2) two more times into the center of the ring. Work 2 more dc into the center of the ring, and join with a sl st to close.
Round 2:
In any corner, tie on a new color then ch 5. Work two dc into the center of the ring. Work a dc in each of the next three stitches. To work the corner, work two dc, ch two, then two more dc in the ch 2 space from the previous round. Work the next side the same way, working a dc in the next three stitches, then work the next corner by working 2 dc, ch 2, 2 dc all in the same space. Keep working in this manner all the way around the square. At the corner where the round began, work one more dc in the corner space, Join with a sl st to close round.
Round 3:
In any corner, tie on a new color then ch 5. Work 2 dc in the same space. Work a dc in each stitch across the top (there will be seven this time), Work the corner the same way as the previous round (2 dc, ch 2, 2 dc) Keep going in this manner all the way around, working the corners and the sides as before. When reaching the last corner, work one more dc, and join with a slip stitch to close.
Repeat round 3 until square measures about 12 inches across. Each side will grow in stitch count as square get larger, but corners are always worked the same way.
Do not fasten off.
Sandwich squares together so right sides are facing outward. Beginning at the top left corner, work a sc in each stitch along the sides. When you get to the corner spaces, work 3 sc in each corner space. Seam along left side, then the bottom, then up the right side. Leave the top unseamed.
Without fastening off, work a sc in the next stitch of the top edge of bag (at this point you will not be seaming, just adding an edge to the top of bag opening). Work a sc in each st around entire top edge of bag, join with a sl st to close round, then fasten off.
Instructions for bag top and bag strap:
Tie on new color into last stitch worked and ch 1. Work a sc in each st around top edge of bag. Join with a sl st to close round. *Ch 1 and turn. Work a sc in the first 4 sts only to begin the handle. Repeat from * until the handle is almost as long as you need it to be, saving the last 6 inches for the two buttonholes, then proceed to next section.
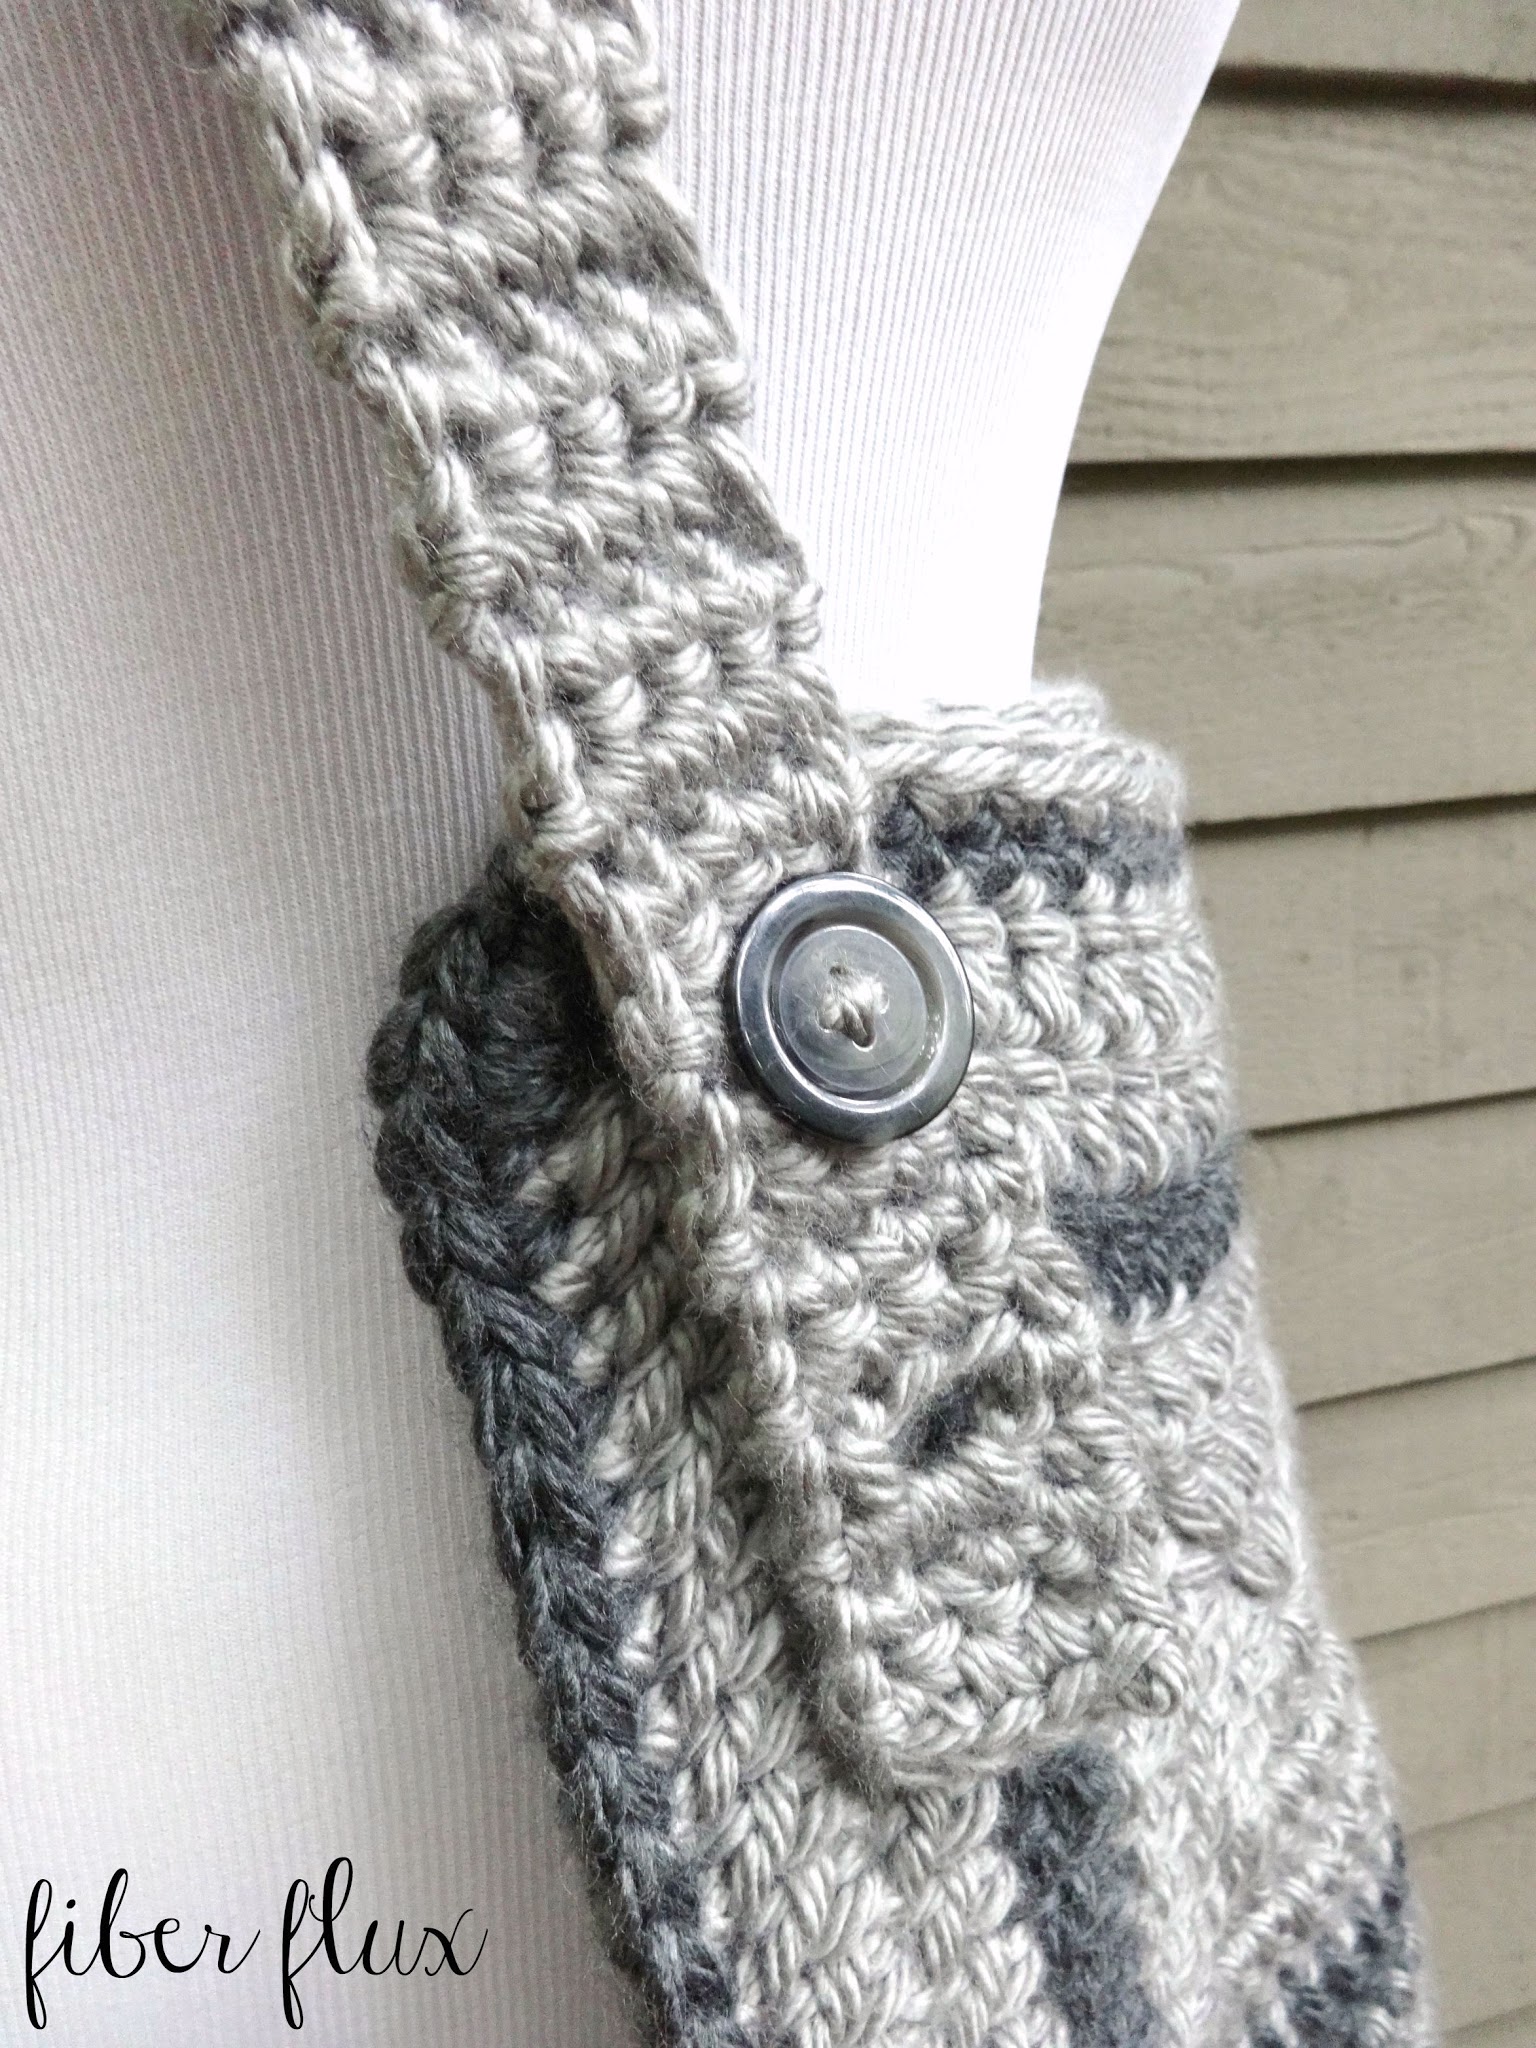
Button hole section and finishing of bag strap:
Row 1: Ch 1 and turn. Work a sc into the first st and ch 2. Skip over the next two sts, then work a sc into the last st.
Row 2: Ch 1 and turn. Work a sc into the first st, then 2 sc in the ch 2 space from the previous row, then a sc in the last st.
Work three more rows of sc in each st, then add another buttonhole (following rows 1 and 2 again). Finish off the handle by working two more rows of sc.
Weave in any ends that remain. With matching yarn and a tapestry needle, sew button to upper left corner of front of bag. All finished and your Cozy Crochet Messenger Bag is ready to wear!


Do u fasten off after 1st square is made?
That is a great question! I fastened off both of my squares, only because I seamed in a different color. However, if you are sticking with the same color, you could choose to not fasten off the second square and keep going for the seaming part. Hope that helps…full video tutorial coming soon!
How can I put a lining into my messenger bag
Spontaneously feel I'm in need of a new bag…
Hi, are the buttons & buttonholes purely decorative? I'm a little confused because aren't the instructions to do the 1st 4 sc's for the strap on the top edge. Thanks for your beautiful patterns, I really love them. 🙂
Read down to the brackets it says work a sc st in the first 4 sts for handle. you do this after you do a sc in each st around the top of bag.
Instructions for bag top and bag strap:
Tie on new color into last stitch worked and ch 1. Work a sc in each st around top edge of bag. Join with a sl st to close round. *Ch 1 and turn. [Work a sc in the first 4 sts only to begin the handle. Repeat from * until the handle is almost as long as you need it to be, saving the last 6 inches for the two buttonholes],then proceed to next section.
Thanks so much for this pattern! This will be the perfect Christmas present for one of my granddaughters. I will be lining the bag though with some pockets on the inside for her. She is an organized kind of gal so just putting things into the back is not her style. So now I know I need to buy fabric, but do I need to buy yarn! Time to go yarn diving to see what I have for her! Thanks again for the inspiration!
hi, can you use worsted weight yarn
Hi, I was wondering if you could use just worsted weight yarn and if so would I use the same size hook?
I'm using crafter cotton from hobby lobby and a size 4.5mm hook and needing about twice as many rounds so may just need more rounds with a ww yarn….
Beautiful bag!how many centimeters long the handle??
This comment has been removed by a blog administrator.
This comment has been removed by a blog administrator.
I examine your blog site presently share great information right below. Shoulder Strap
This comment has been removed by a blog administrator.
This comment has been removed by a blog administrator.