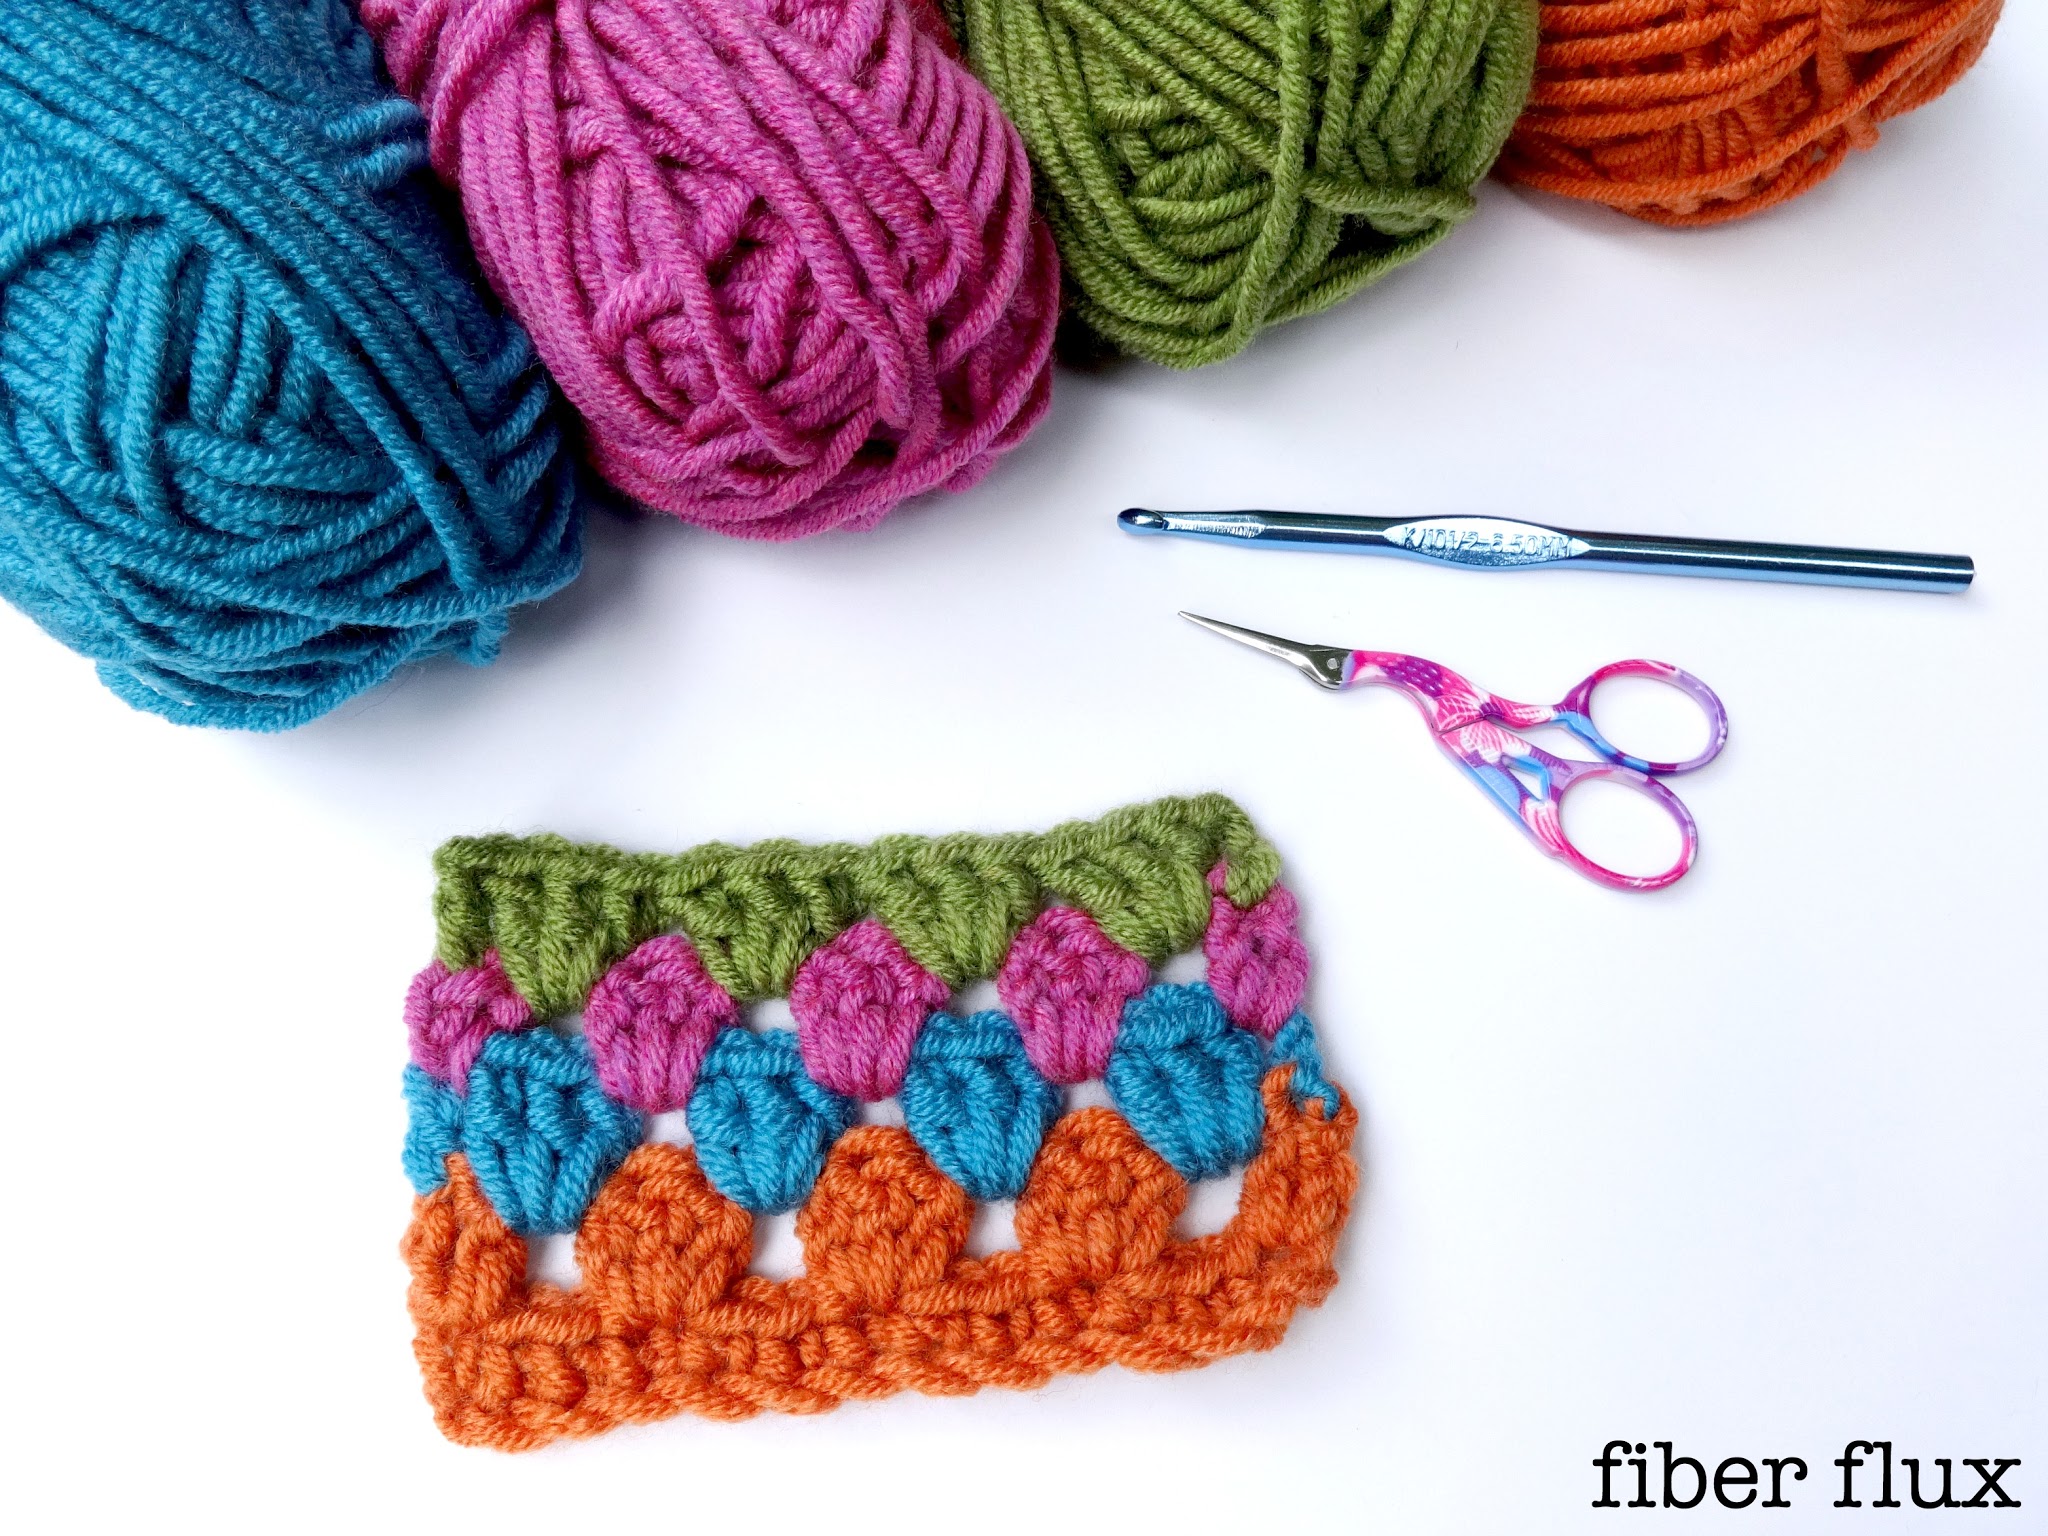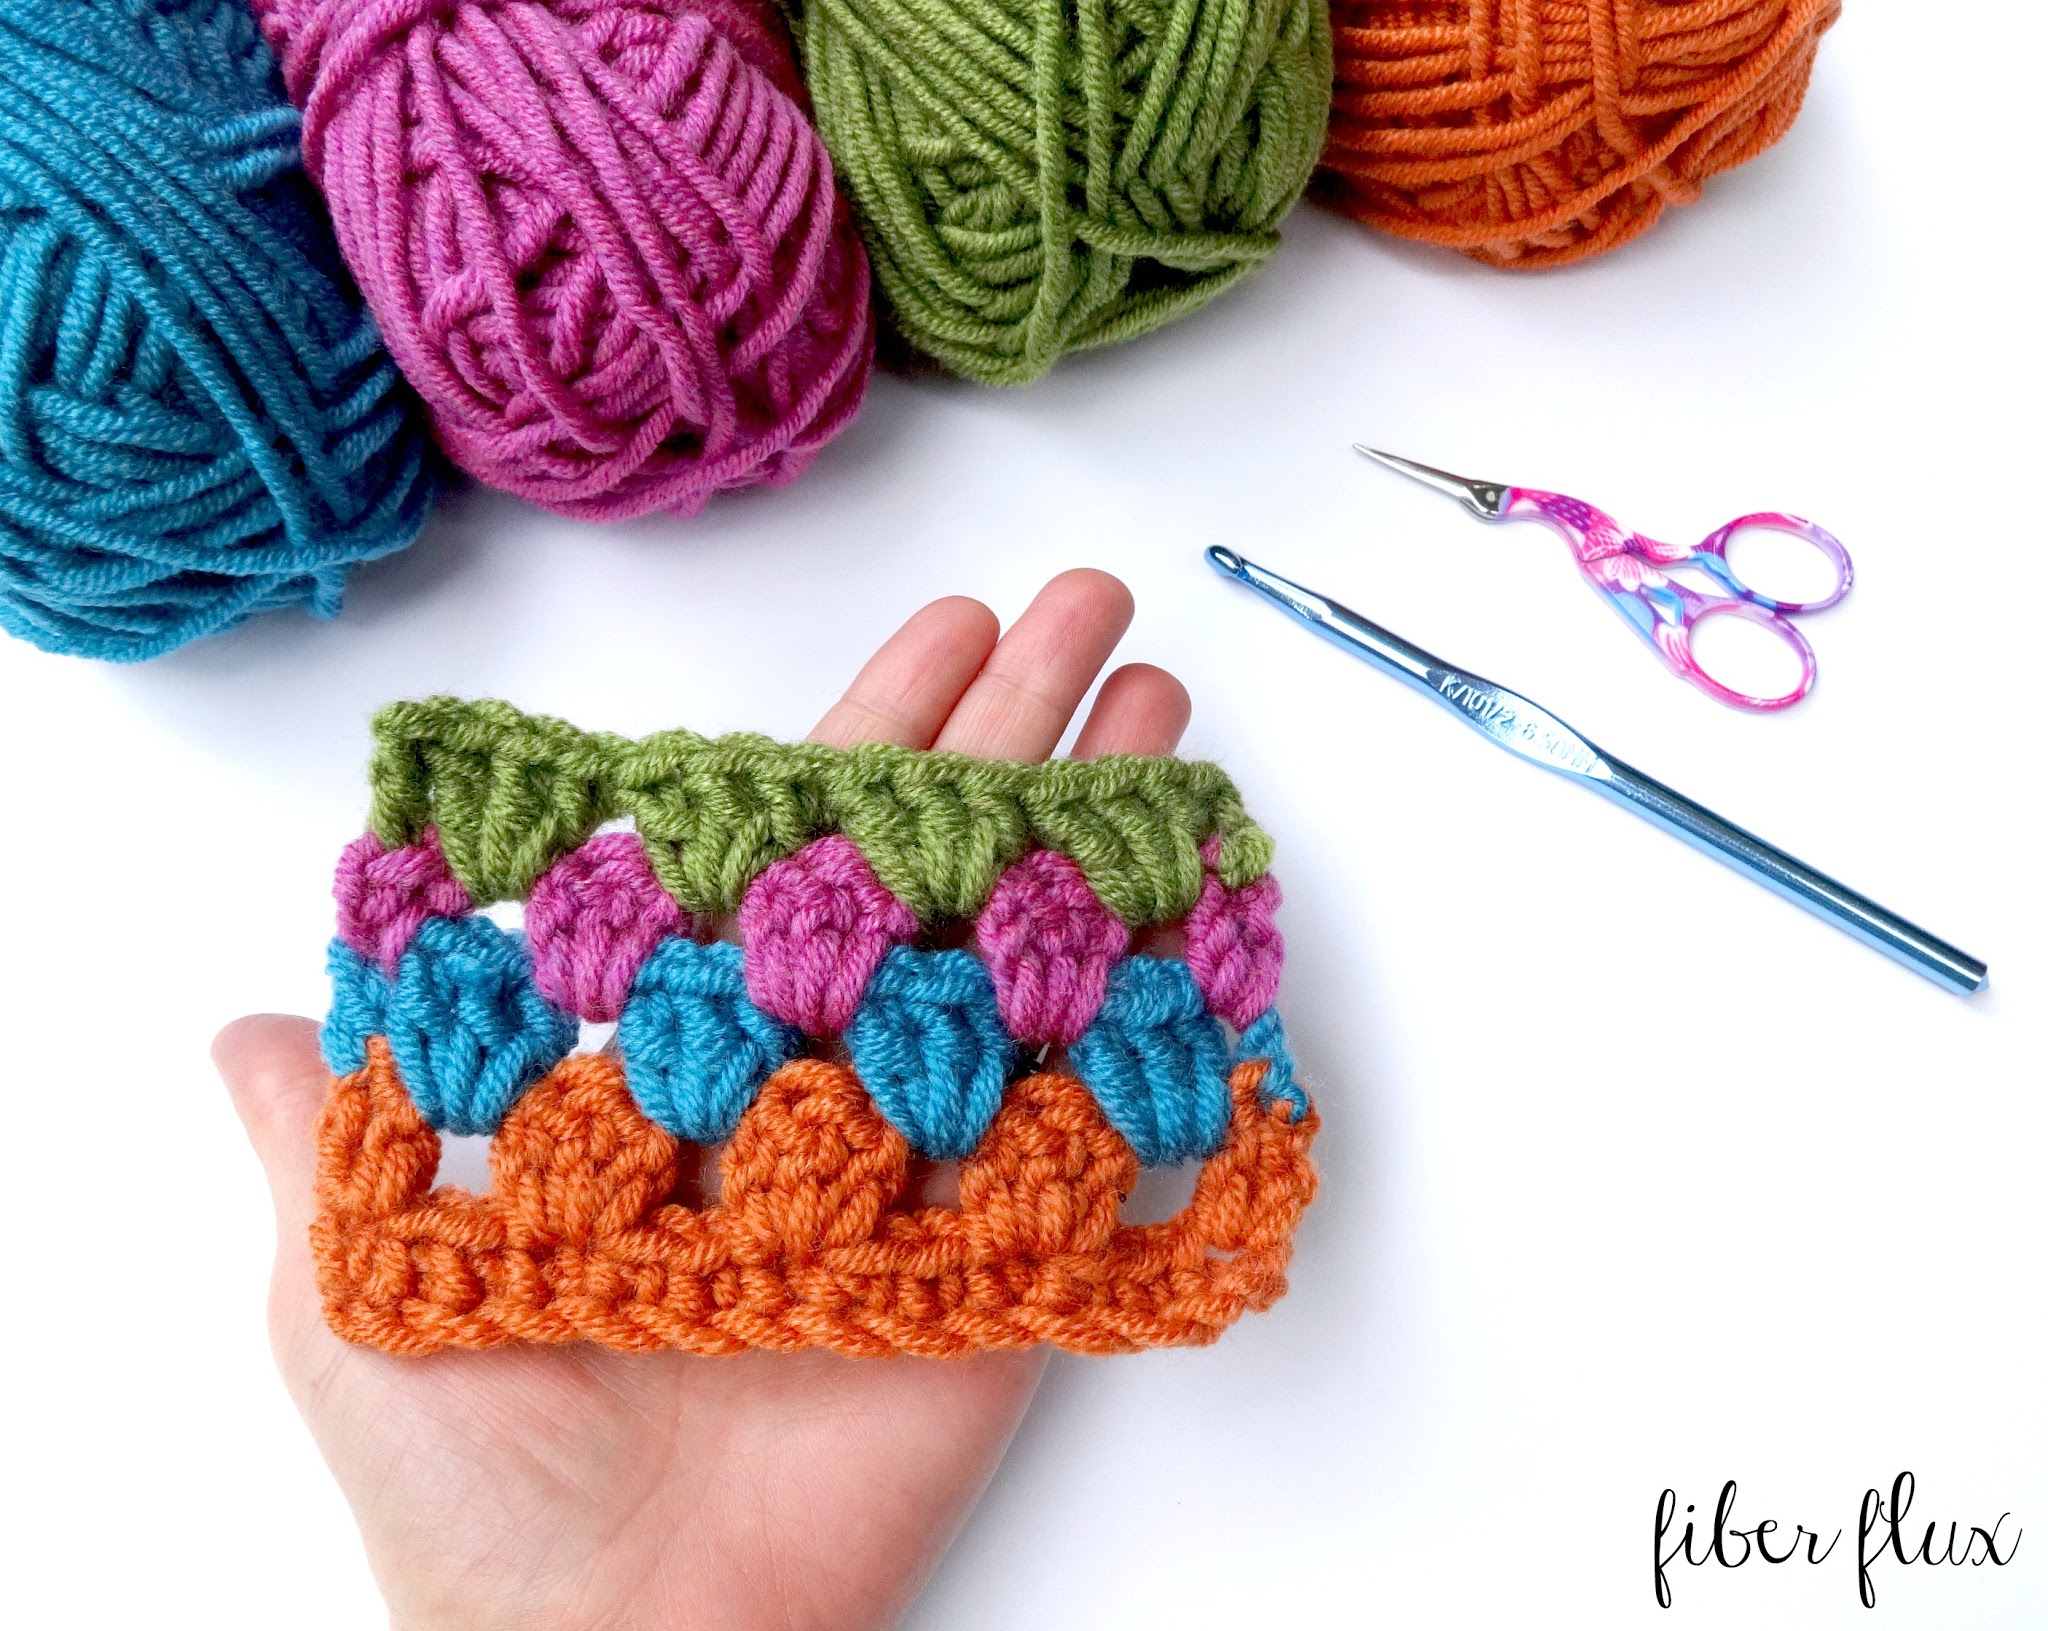
The crochet granny stripe stitch is one of my favorite stitches to work up. They are easy, fun, and a great way to use up your yarn leftovers. They can be very colorful too, making for a very pretty project! Included is both a full photo tutorial and full video tutorial.
Watch the full video tutorial on how to do the crochet granny stripe stitch:
For this tutorial I used Lion Brand Lion’s Pride Woolspun and a 6.5 mm hook, but you can use any yarn you like. Just check the yarn label for the recommended hook size for best results.
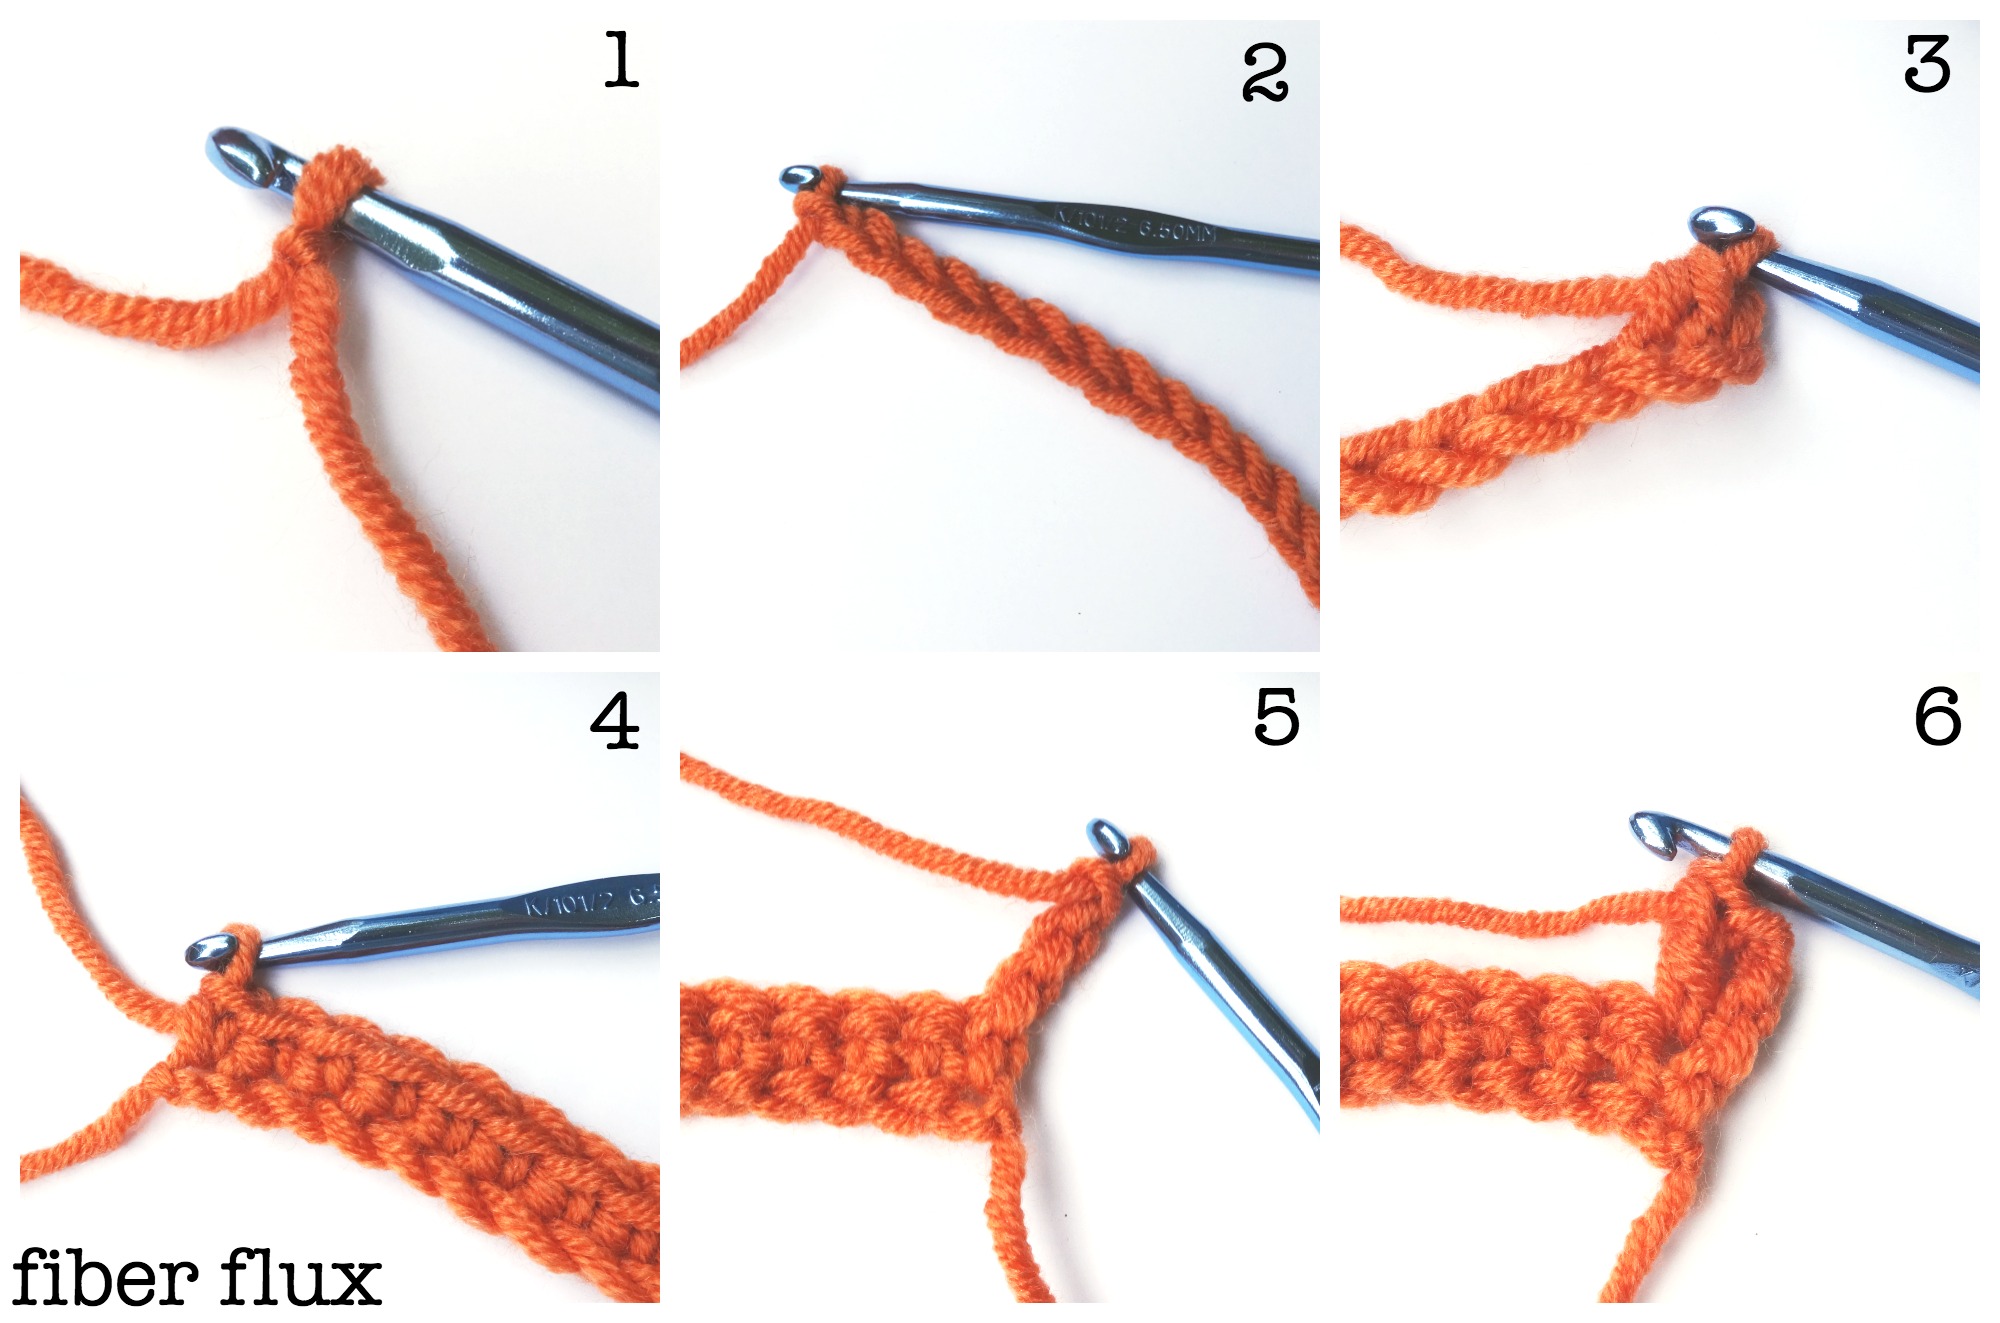
Steps 1-6 in the photos above.
- Step 1: Put a slip knot on your hook.
- Step 2: Make you starting chain. For the granny stripe pattern, you’ll need a multiple of 3+2 (for the practice swatch in this tutorial, I’ll be making 14 chains…when we break that down we get: 3+3+3+3+2, or 12+2)
- Step 3: In the 2nd chain from the hook, work a single crochet.
- Step 4: Work a single crochet in each chain across.
- Step 5: Chain 3 (counts as a dc) and turn.
- Step 6: Work 1 double crochet in that very first stitch.
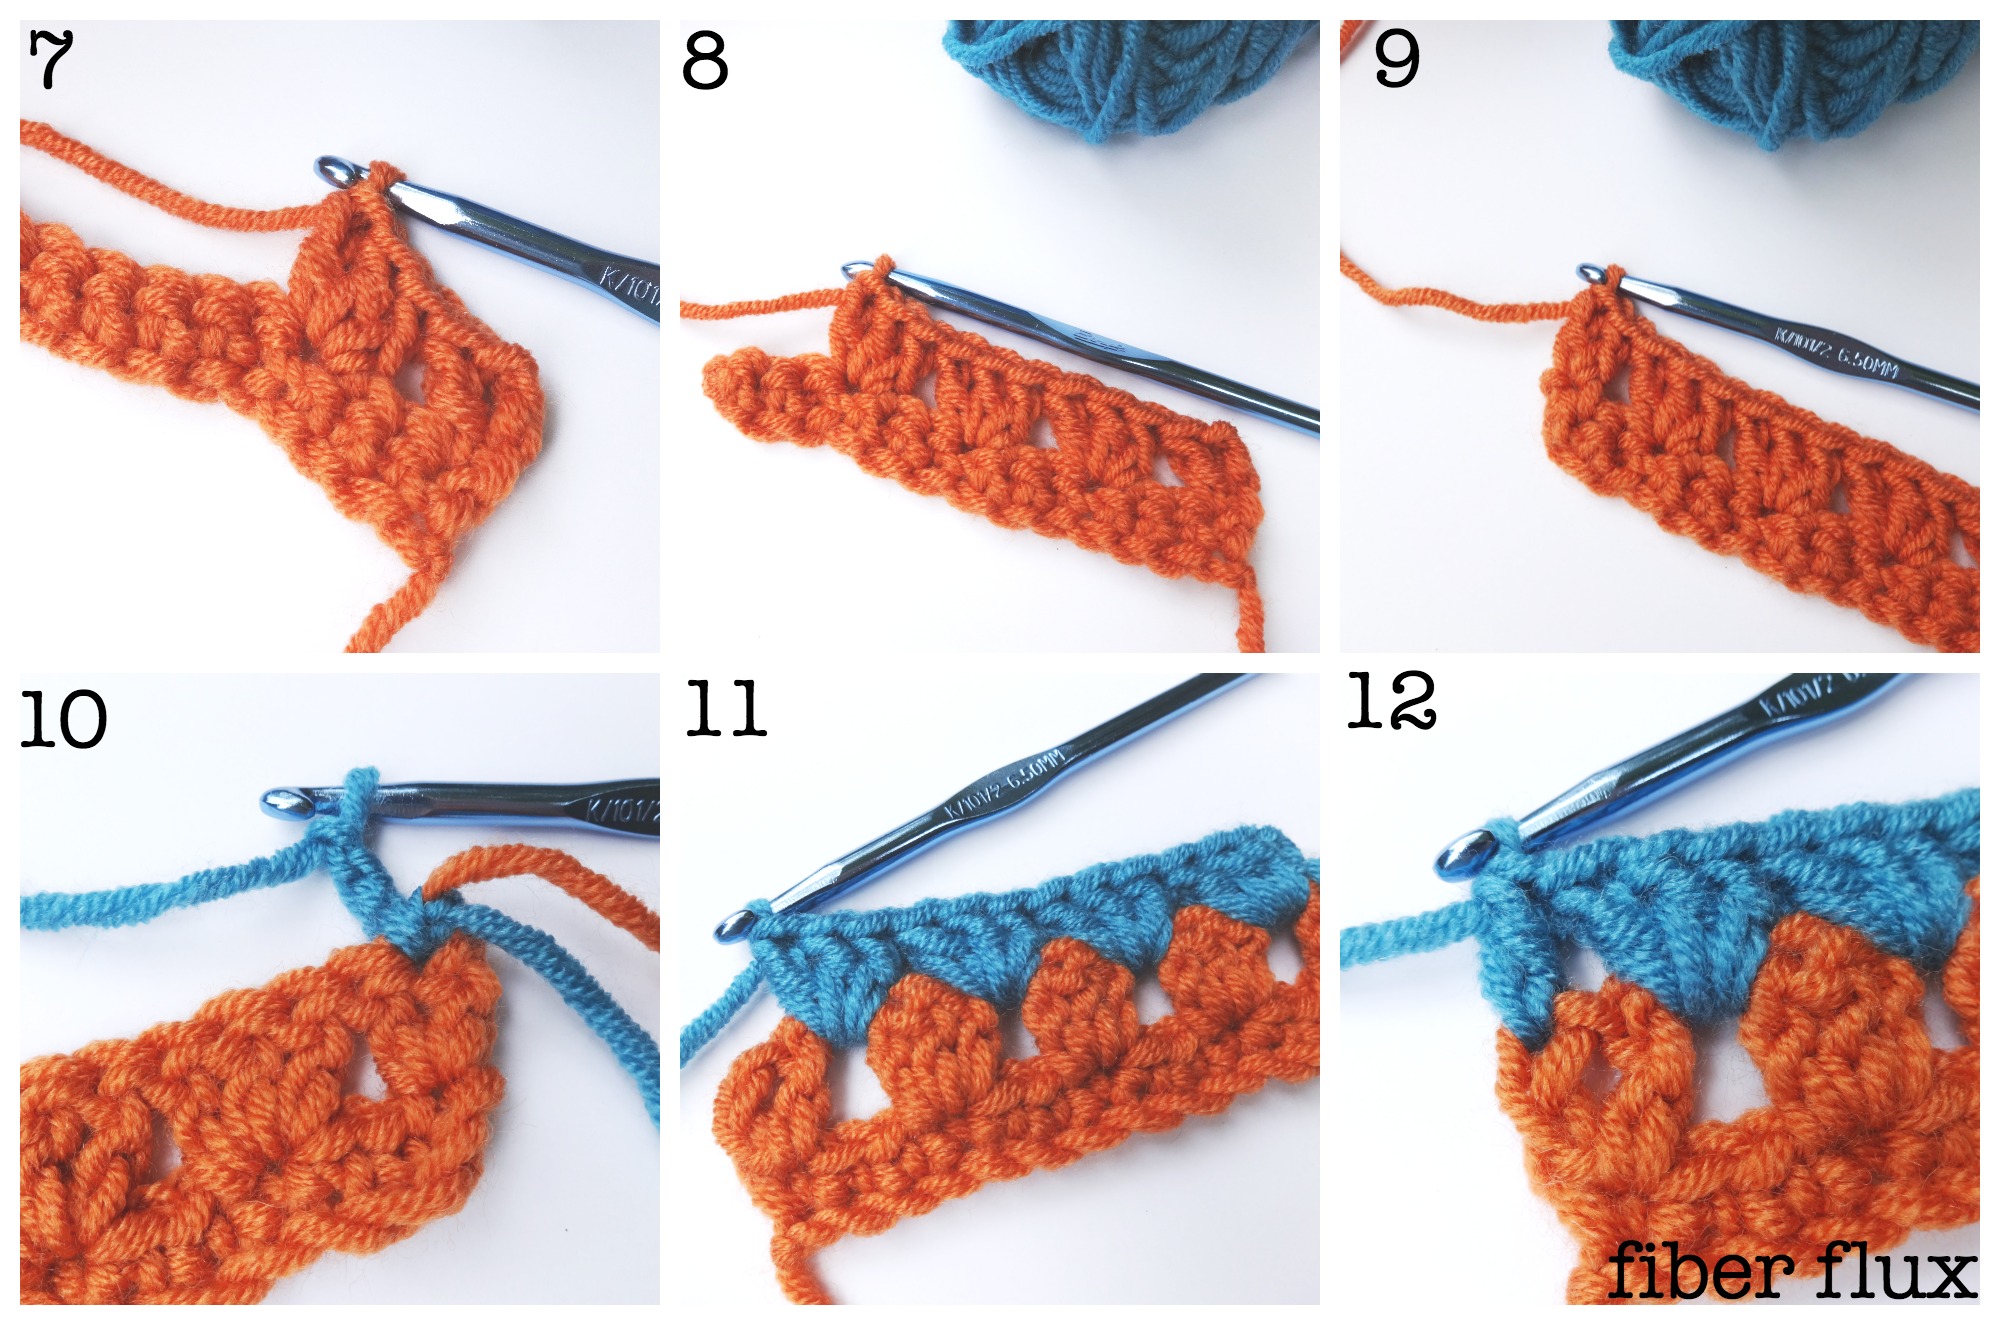
7-12 in the photos above.
- Step 7: Skip two stitches, and in the next stitch, work 3 double crochet.
- Step 8: Repeat step 7 all the way across the row until 3 stitches remain.
- Step 9: Skip two and in the very last st, work 2 double crochet.
- Step 10: Tie on a new color (or keep the same color if you wish) and chain 3.
- Step 11: Work 3 double crochet the the first space (in between the double crochet clusters from the previous row). Work 3 double crochet in each space until you reach the end of the row.
- Step 12: Work a double crochet in the top chain of the turning chain from the previous row.
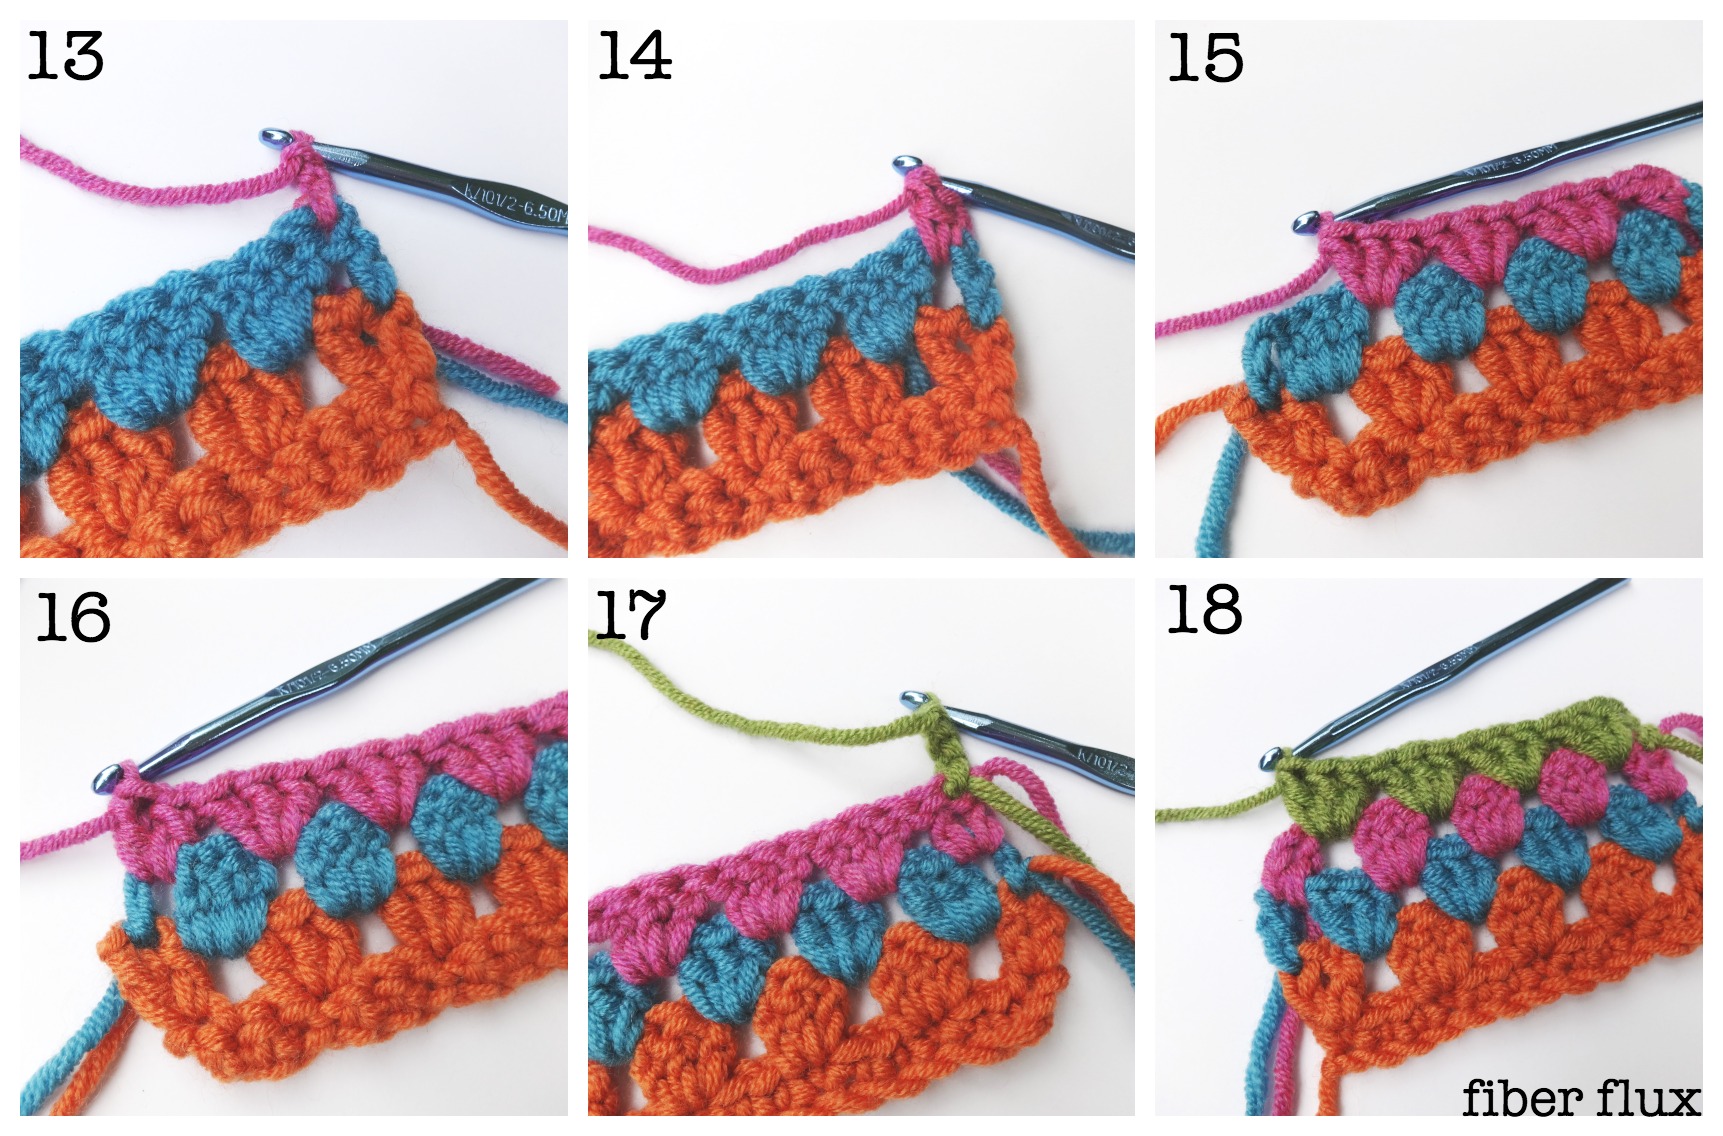
13-18 in the photos above.
- Step 13: Tie on a new color and chain 3.
- Step 14: Work a double crochet in that first space.
- Step 15: Work 3 double crochet in each space across until you reach the last space.
- Step 16: Work 2 double crochet in the last space of the row.
- Step 17: Tie on a new color, chain 3, and turn.
- Step 18: Work 3 double crochet in each space across the row.
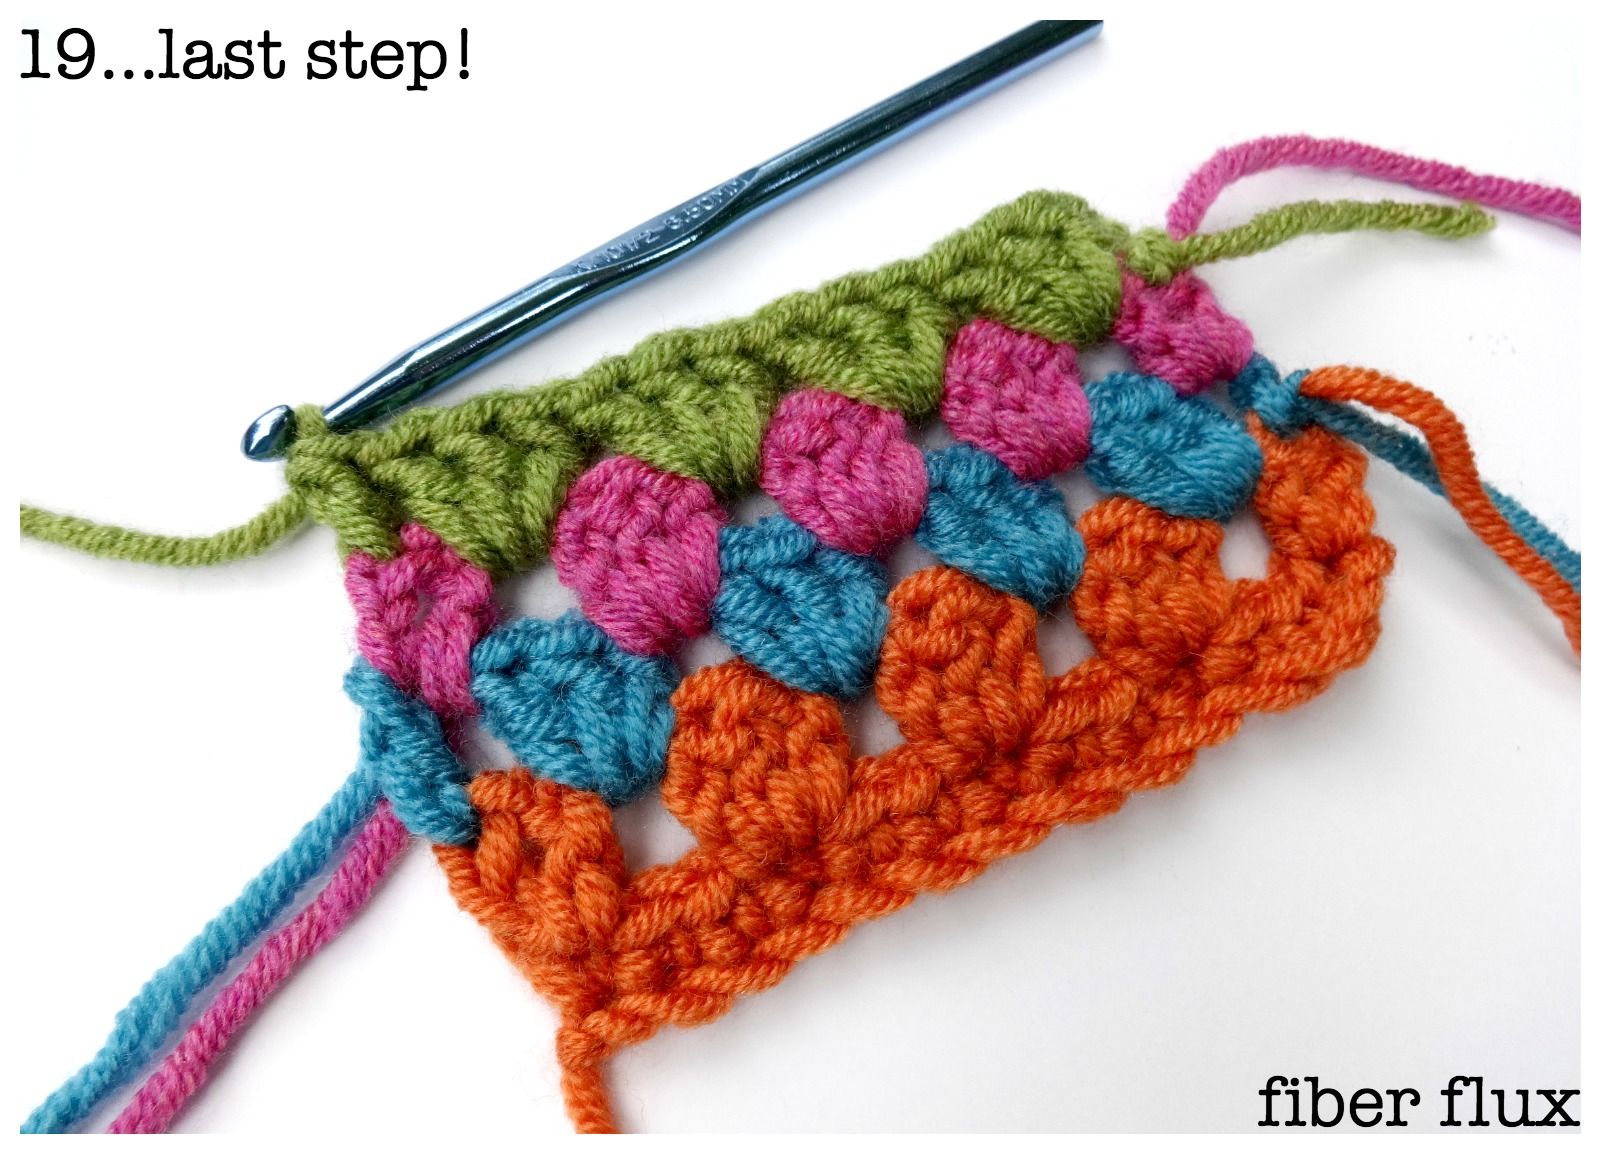
- Step 19: To finish the granny stripe pattern, work a double crochet in the top chain of the turning chain from the previous row. Fasten off and weave in any ends that remain.
To continue working the granny stripe pattern, repeat steps 13-19 (rows 4 and 5, the orchid and green rows in this tutorial) until your granny stripes are as long as you need them to be.