
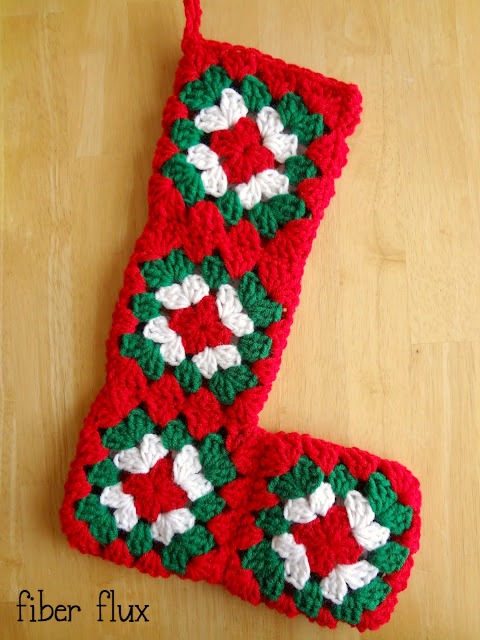
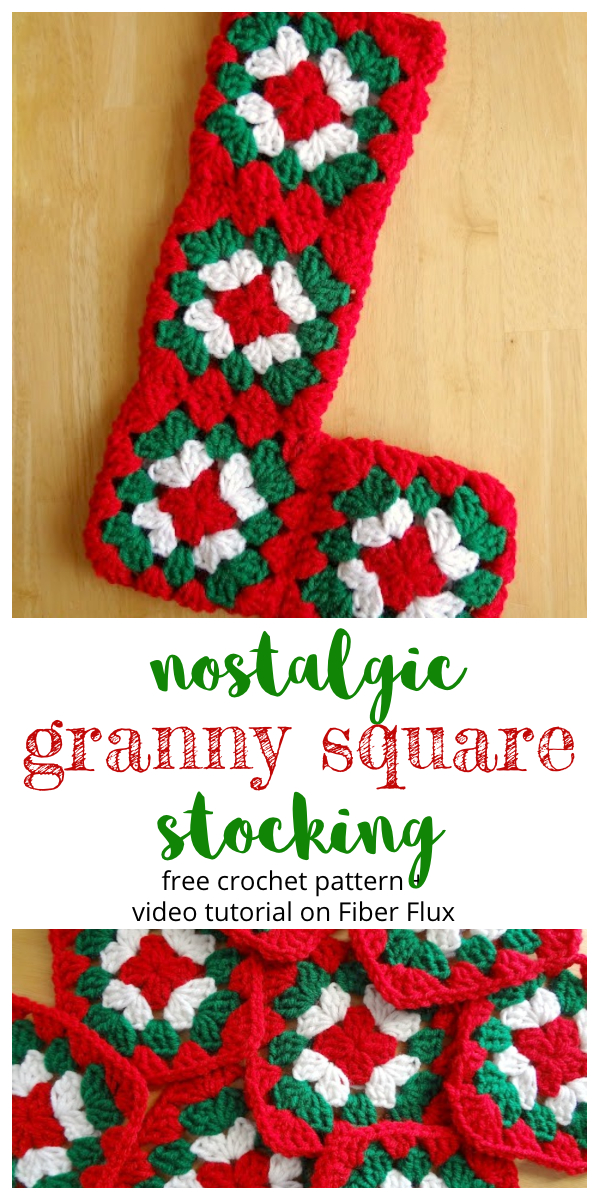
The Nostalgic Granny Square Crochet Stocking is a fun to make retro stocking that adds some handmade festivity to your home! When I was a little girl we had a stocking just like this one. Over the years like many of our things, the stocking became lost in the shuffle. I saw one hanging in the window of an antique shop recently and remembered the beautiful stocking of years past. Here is a full tutorial (written + video) to make your own special stocking too! Included is how to make the square, join them together to construct the stocking and how to add a hanging loop to the top…enjoy!
Get the ad-free crochet pattern PDF from my shop here!
Watch a full video tutorial on how to crochet the Nostalgic Granny Square Crochet Stocking (scroll down for pattern):
Tutorial Links:
- Chain (ch)
- Slip Stitch (sl st)
- Double Crochet (dc)
- Whip Stitch
- How To Crochet A Classic Multicolor Granny Square
Here’s what you’ll need:
- Worsted weight yarn (I used Red Heart Super Saver in “Cherry Red” “Hunter Green” and “White”)
- A tapestry needle to seam them together
- 5.0 mm crochet hook
- Scissors
- Tape Measure (optional)
(Begin with red yarn) ch 4, join into a ring with a slip stitch.
Round 1 (red yarn):
Chain 4, work (3 dc into center of ring, chain 1) 3 times, then 2 dc into center of ring. Join to close with a slip stitch.
Round 2 (white yarn):
To work the corner of round 2, first chain 4, then 2 dc in same space, then chain 1, then 3 dc in the same space. Ch 1, then work the next corner by working 3 dc in next space, chain 1, then 3 dc in same space, chain 1, repeat two more times to complete the round.
Round 3 (green yarn):
Work the corner in the same manner as the previous round: chain 4, 2 dc in same space, chain 1, 3 dc in same space, chain 1. To work the sides, simply work 3 dc in the next space then chain 1…repeat until you reach a corner again.
Round 4 (red yarn):
Work the corner in the same manner as the previous round: chain 4, 2 dc in same space, chain 1, 3 dc in same space, chain 1. To work the sides, work 3 dc in each of the the next 2 spaces then chain 1…repeat until you reach a corner again.
A note about making multicolored rounds:
To begin a new round in a new/different color, cut yarn, leaving a tail, and fasten it with a slip stitch. Join the new yarn at one of the corners as shown and tie securely.
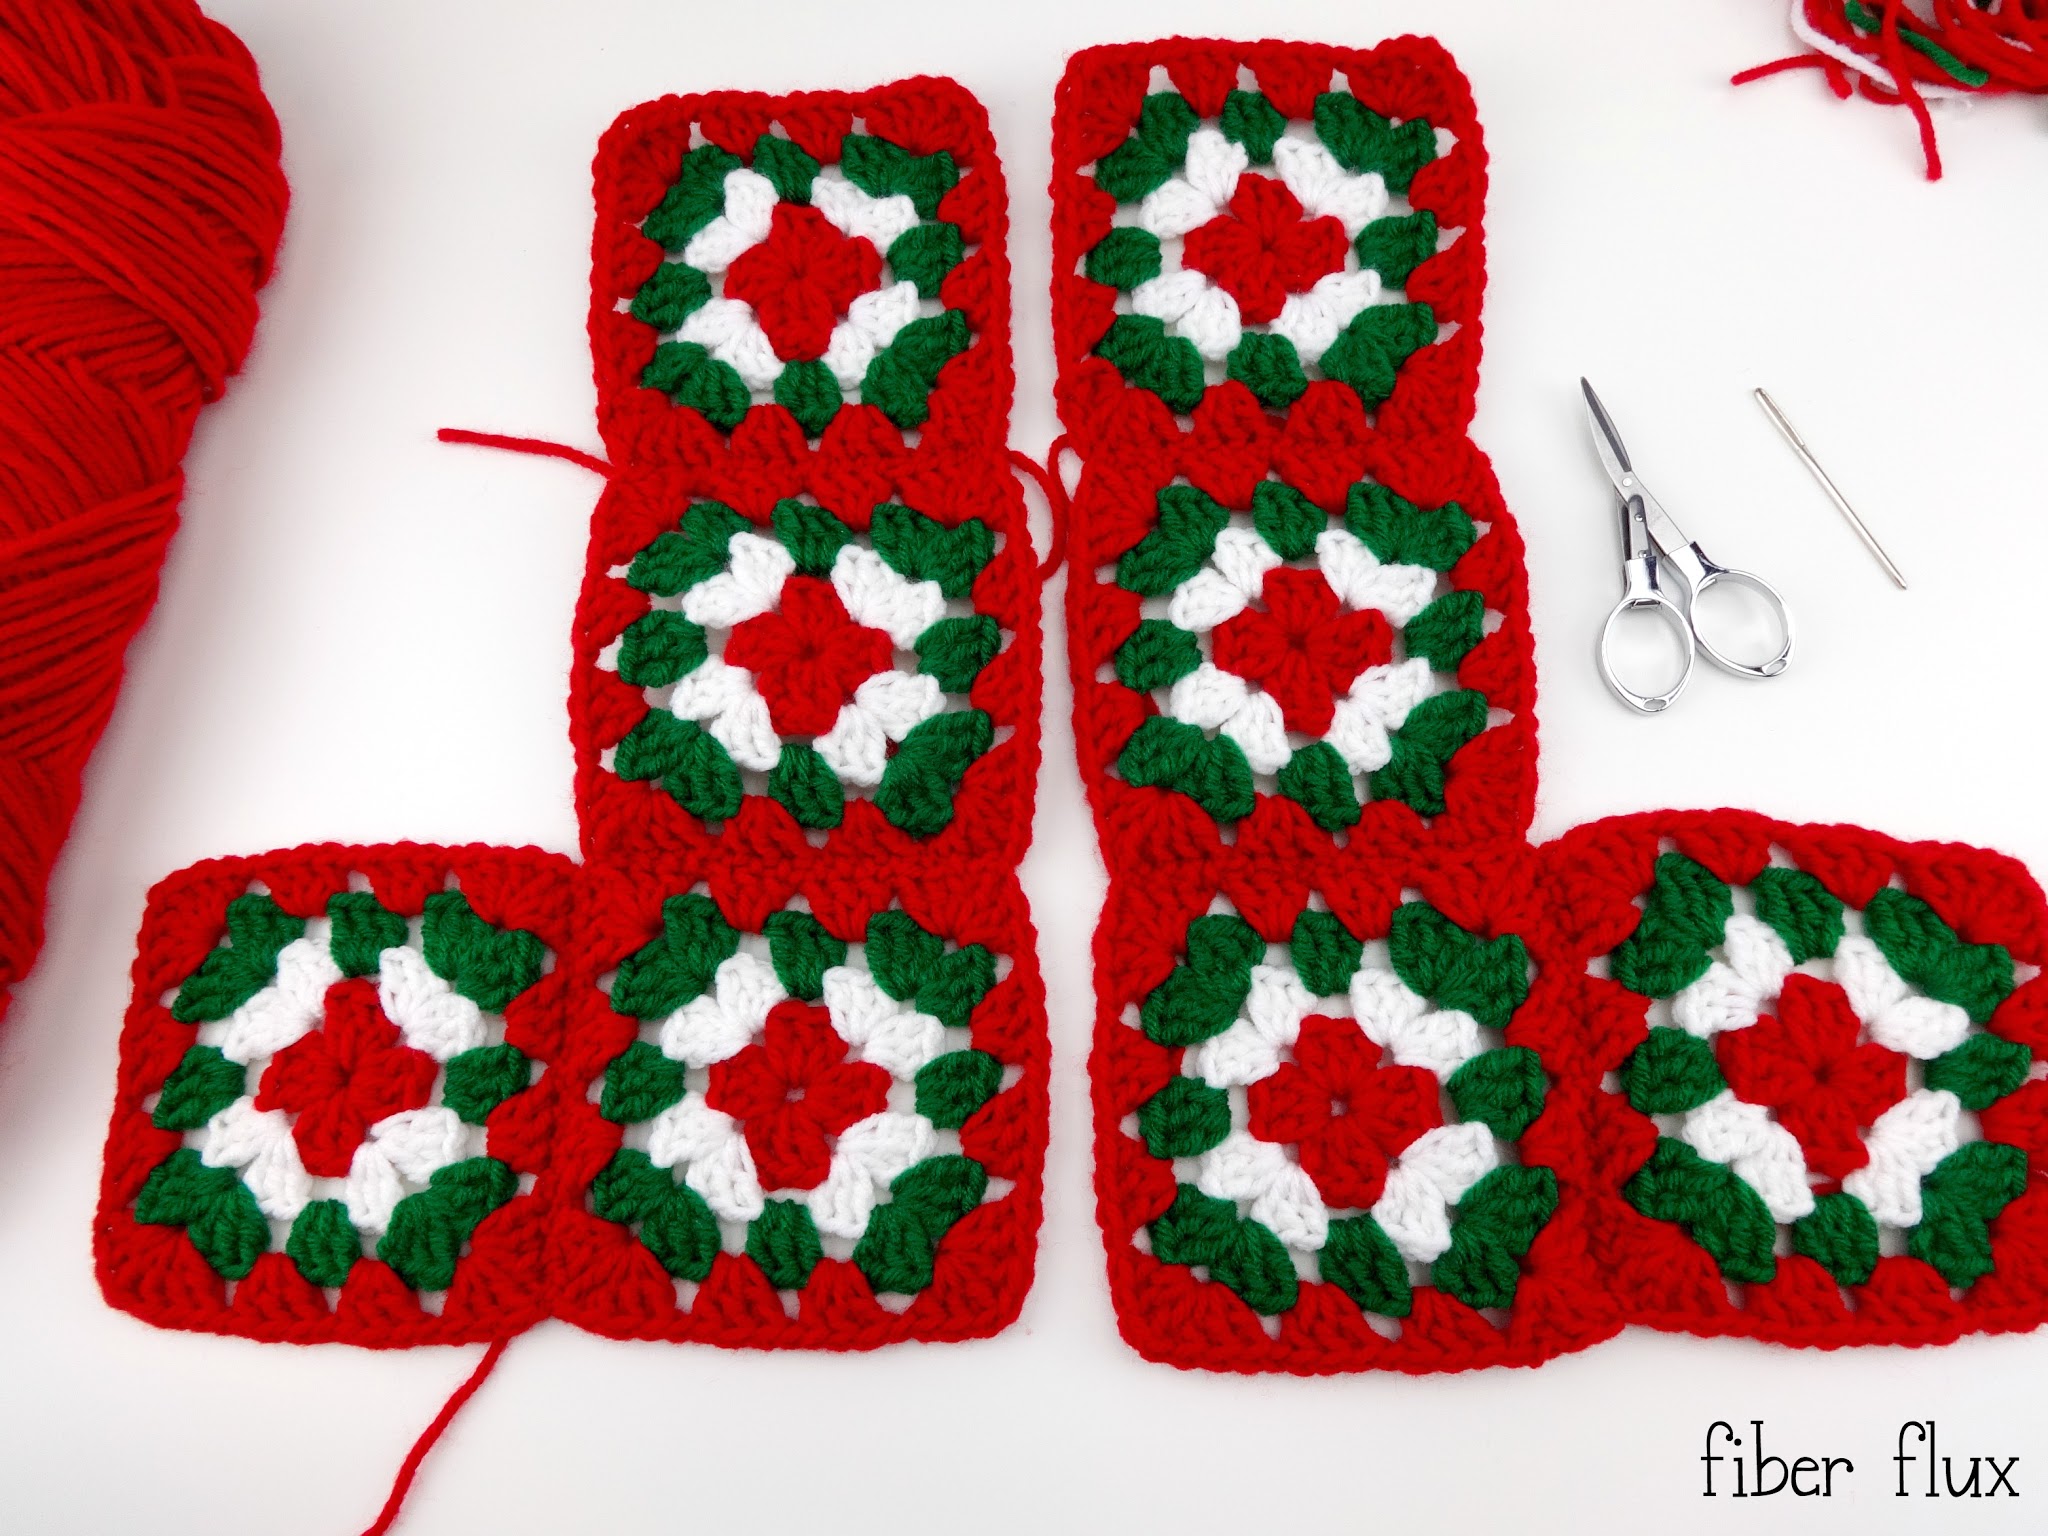
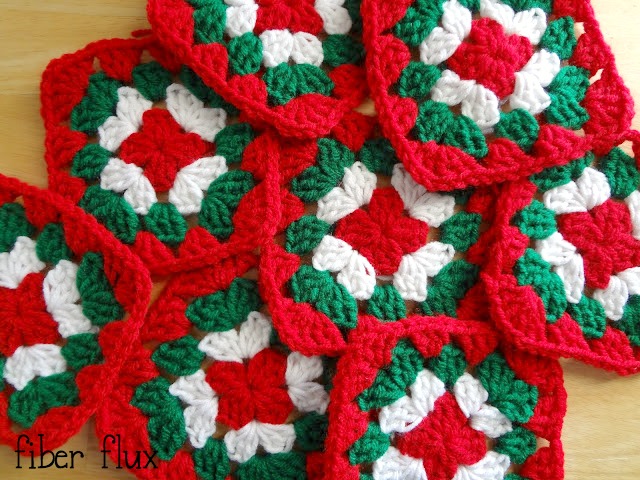
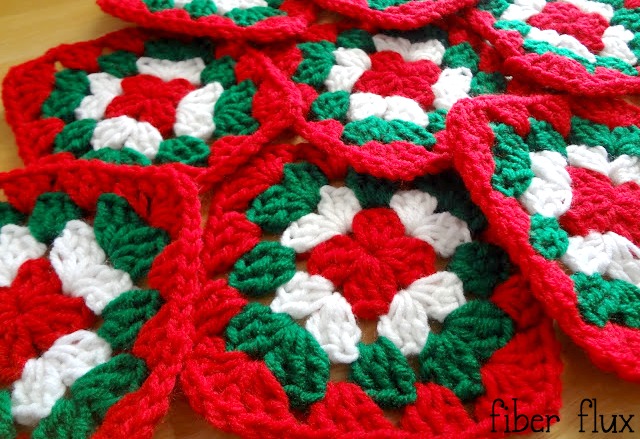
Here’s how assemble the granny square stocking:
- Make 8 granny squares and weave in ends.
- Seam them together as shown in the photo above to make 2 “boot” shapes. Important: make them a mirror image of one another and have their right sides (side that faces you when you make the square) facing upward.
- Sandwich the two boots together (right sides facing inwards this time) and whip stitch together, leaving the top open and unseamed.
- Turn stocking right side out.
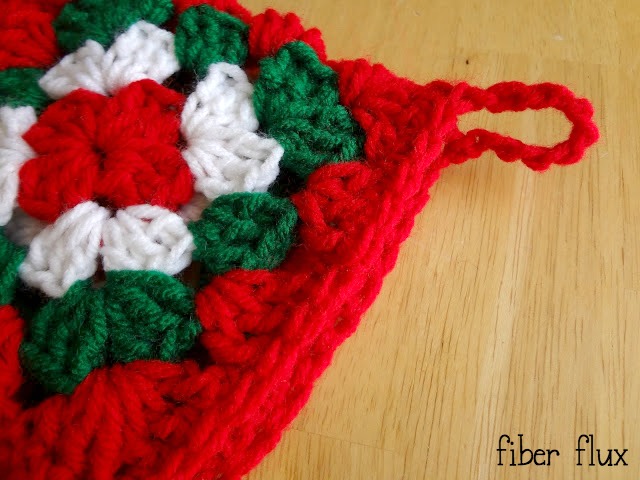
- In the upper left corner of the stocking (as shown below), tie on a matching or coordinating color.
- Single crochet in each stitch all the way around.
- When you come back to your starting point, ch 10 to make a loop and then work a sc in the same st to close the loop. Fasten off.
- Weave in all ends and hang…lovely!


Just what I've been looking for – quick and easy. I need 6 of these for my grandchildren so with Xmas approaching fast I need to get crocheting. Thank you for sharing.
Thank you so much for sharing this pattern! My grandmother gave me one of these as a little girl, and it's the stocking I still use today. I inherited much of her yarn stash when she passed away. I wanted to make stockings for my family with her yarn, and your pattern is identical to how she made my stocking. I have now made two for family members. A heartfelt thank you, and Merry Christmas. -Clare from Wisconsin
I made this stocking and the colors shout "WOW". It is beautiful. I just finished sewing all my squares together and now am going to do the SC around the top and make the loop. I whip stitched mine on the outside very neatly in red. I had decided to do that the first time I watched your tutorial. Now in thin wood I need the word WELCOME or MERRY CHRISTMAS. I will paint them in either silver or gold and then add glitter. Mine is going to be for my front door.
I just finished sewing all my squares together. Your color scheme just shouts "WOW". I whip stitched mine very neatly in red on the outside. I had decided to do that the very first time I saw your video. I still have to SC around the top and make the loop. I then am going to be looking for WELCOME or MERRY CHRISTMAS in very thin wood. I will paint them in gold or silver and add glitter. It then will be glued to my stocking which I intend to use on my front door.