
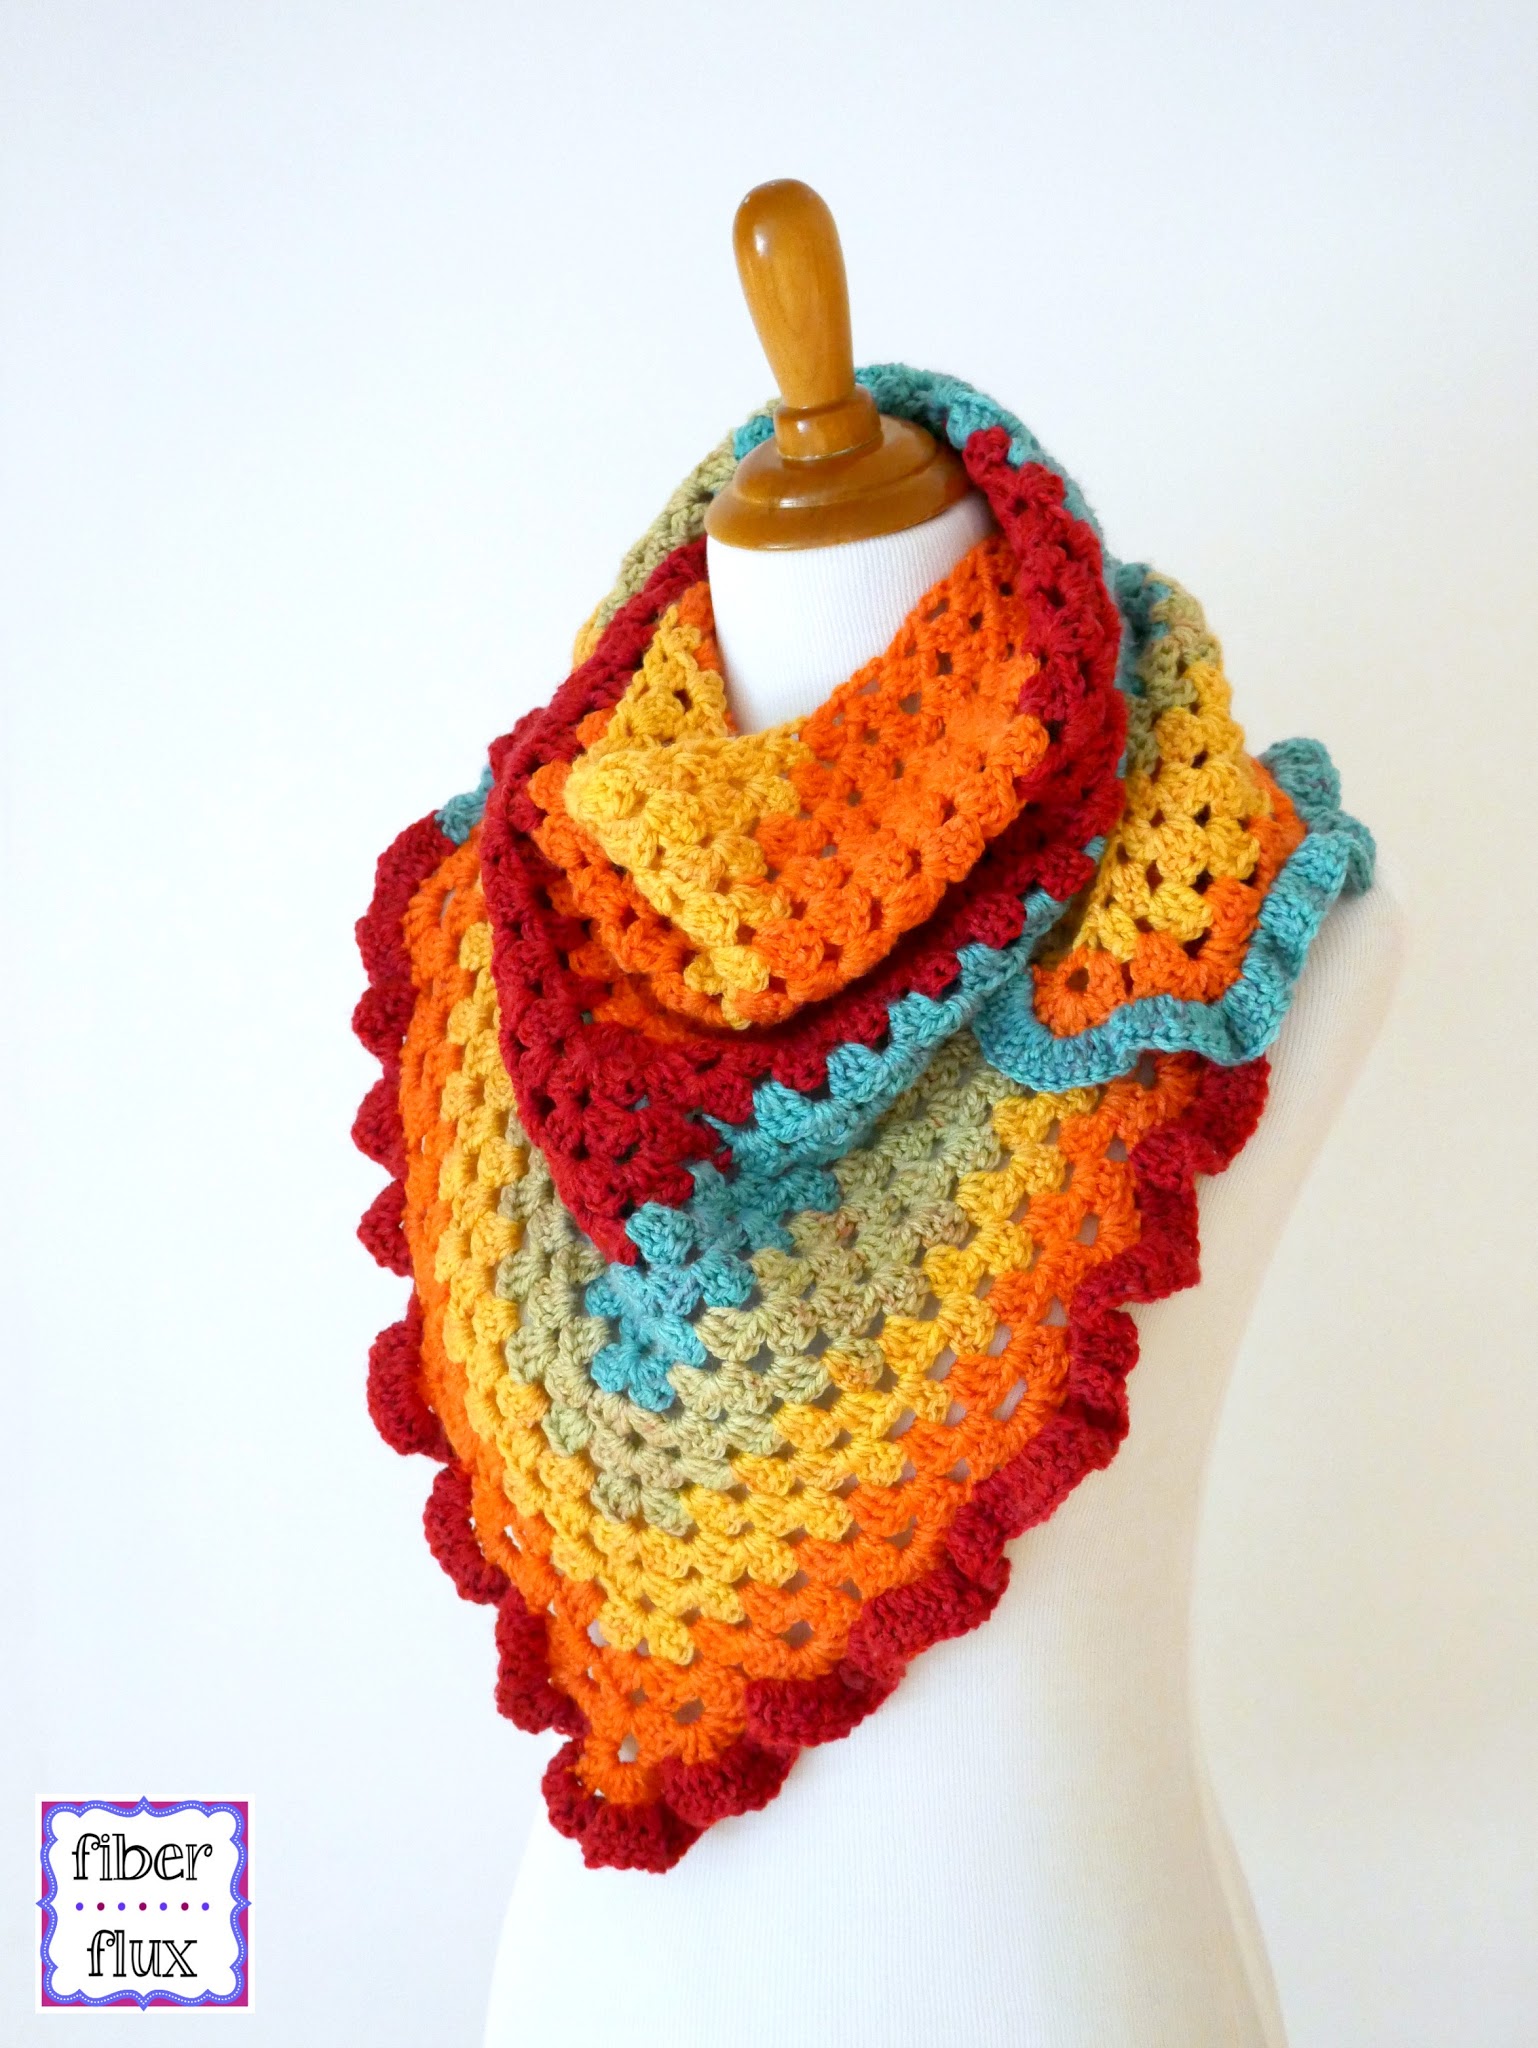
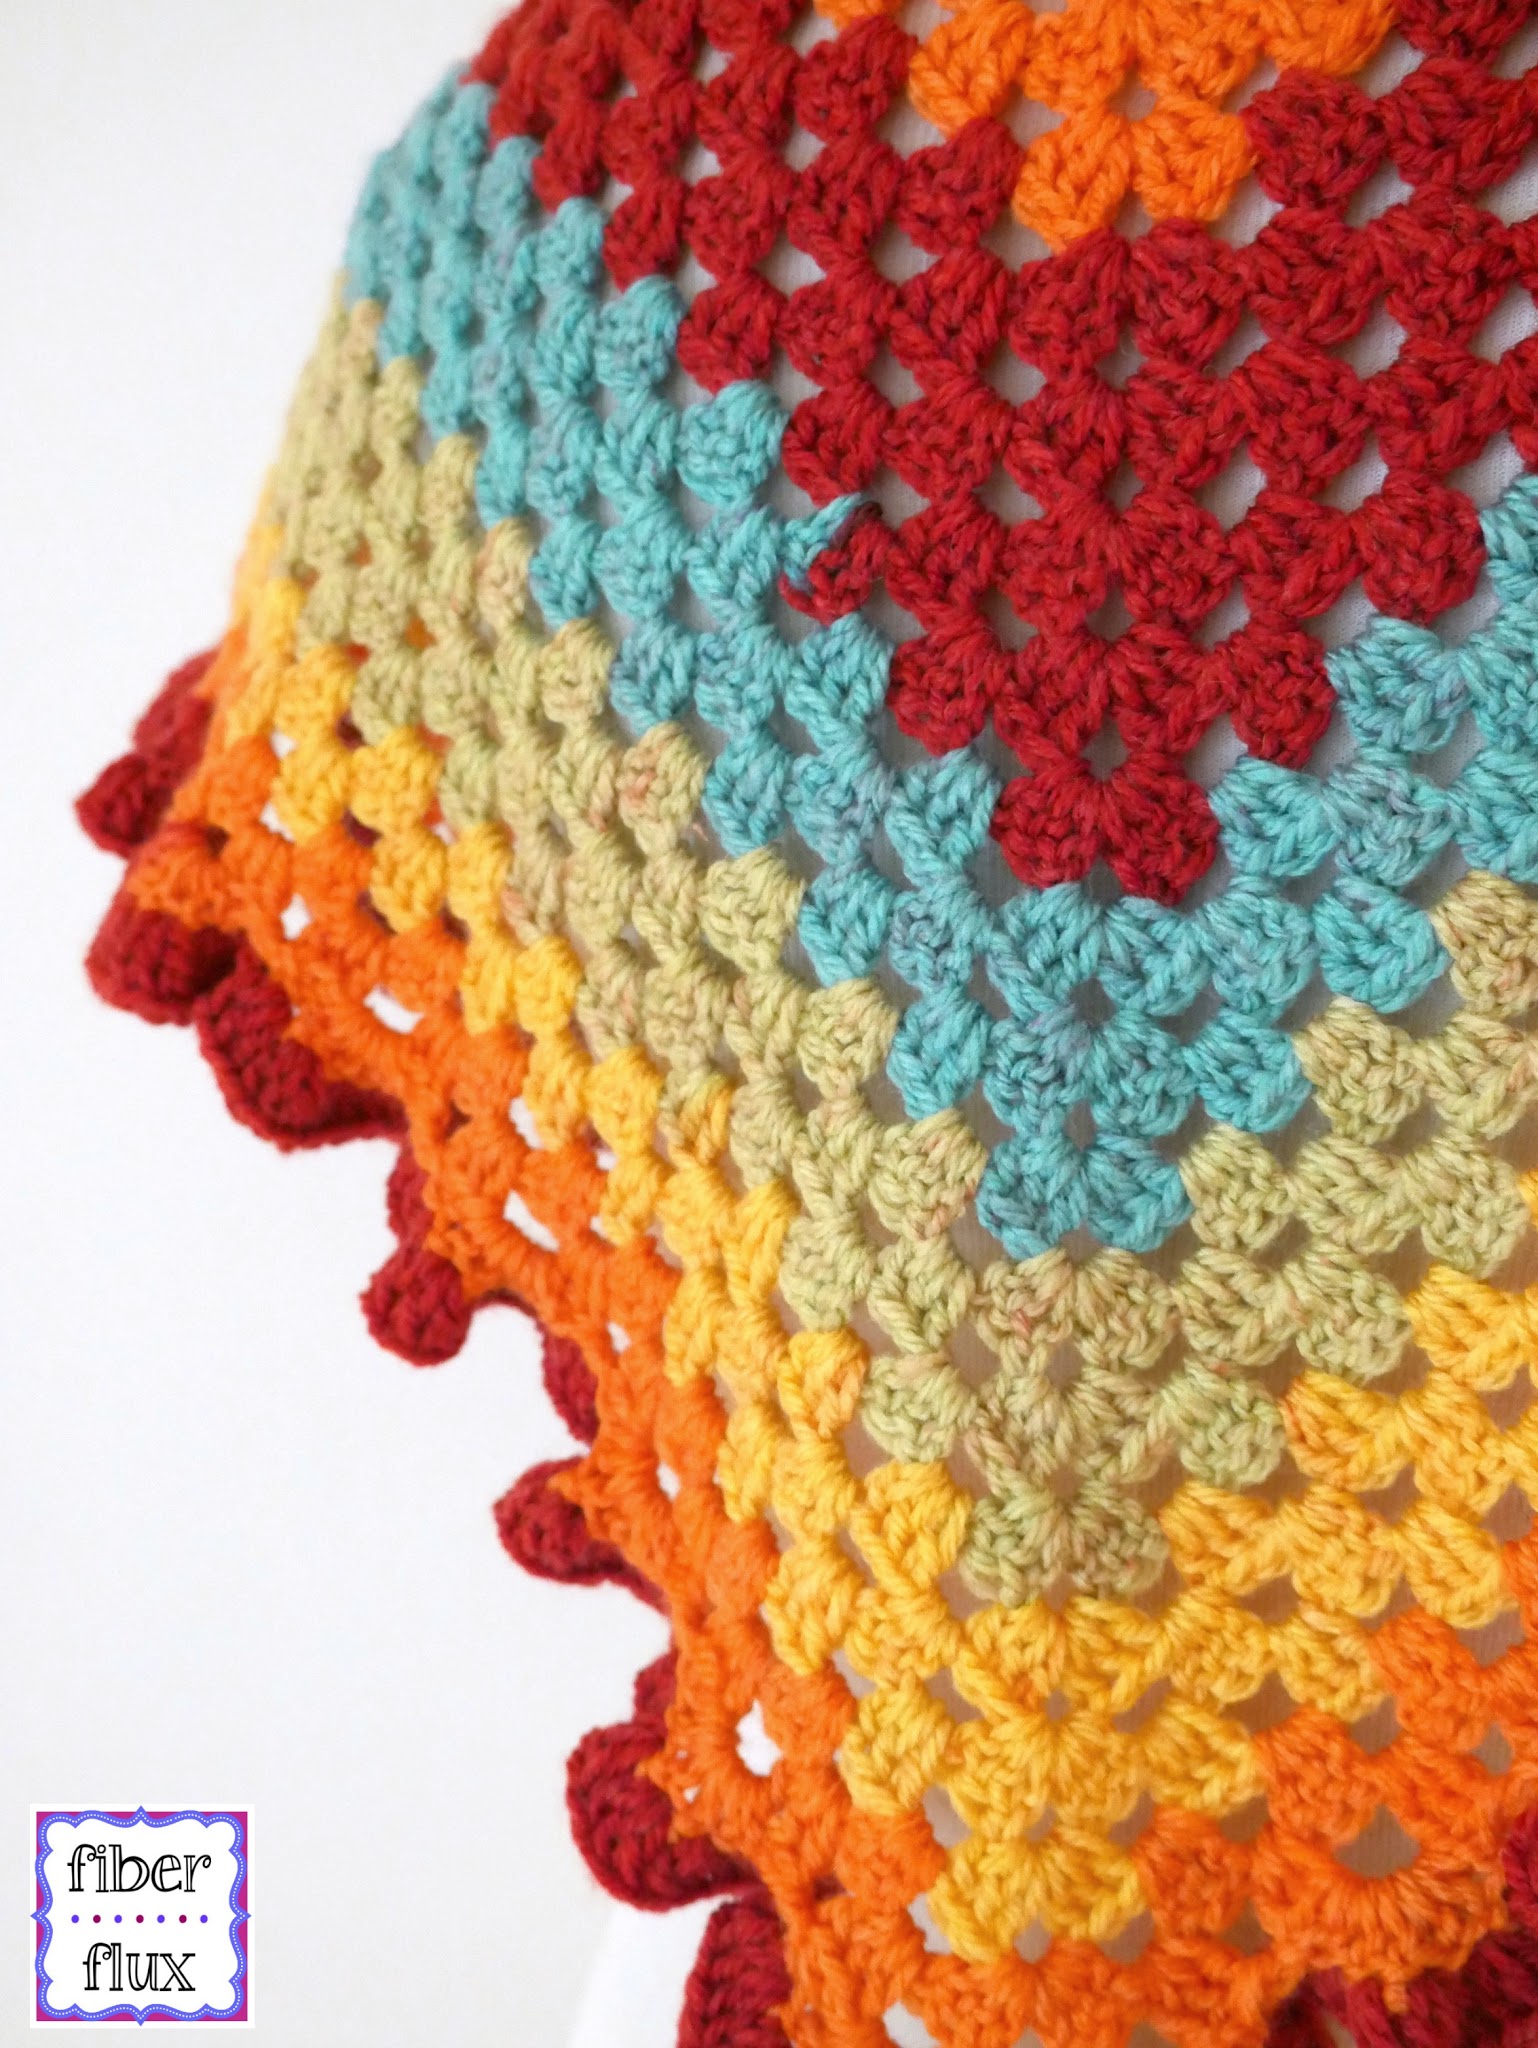
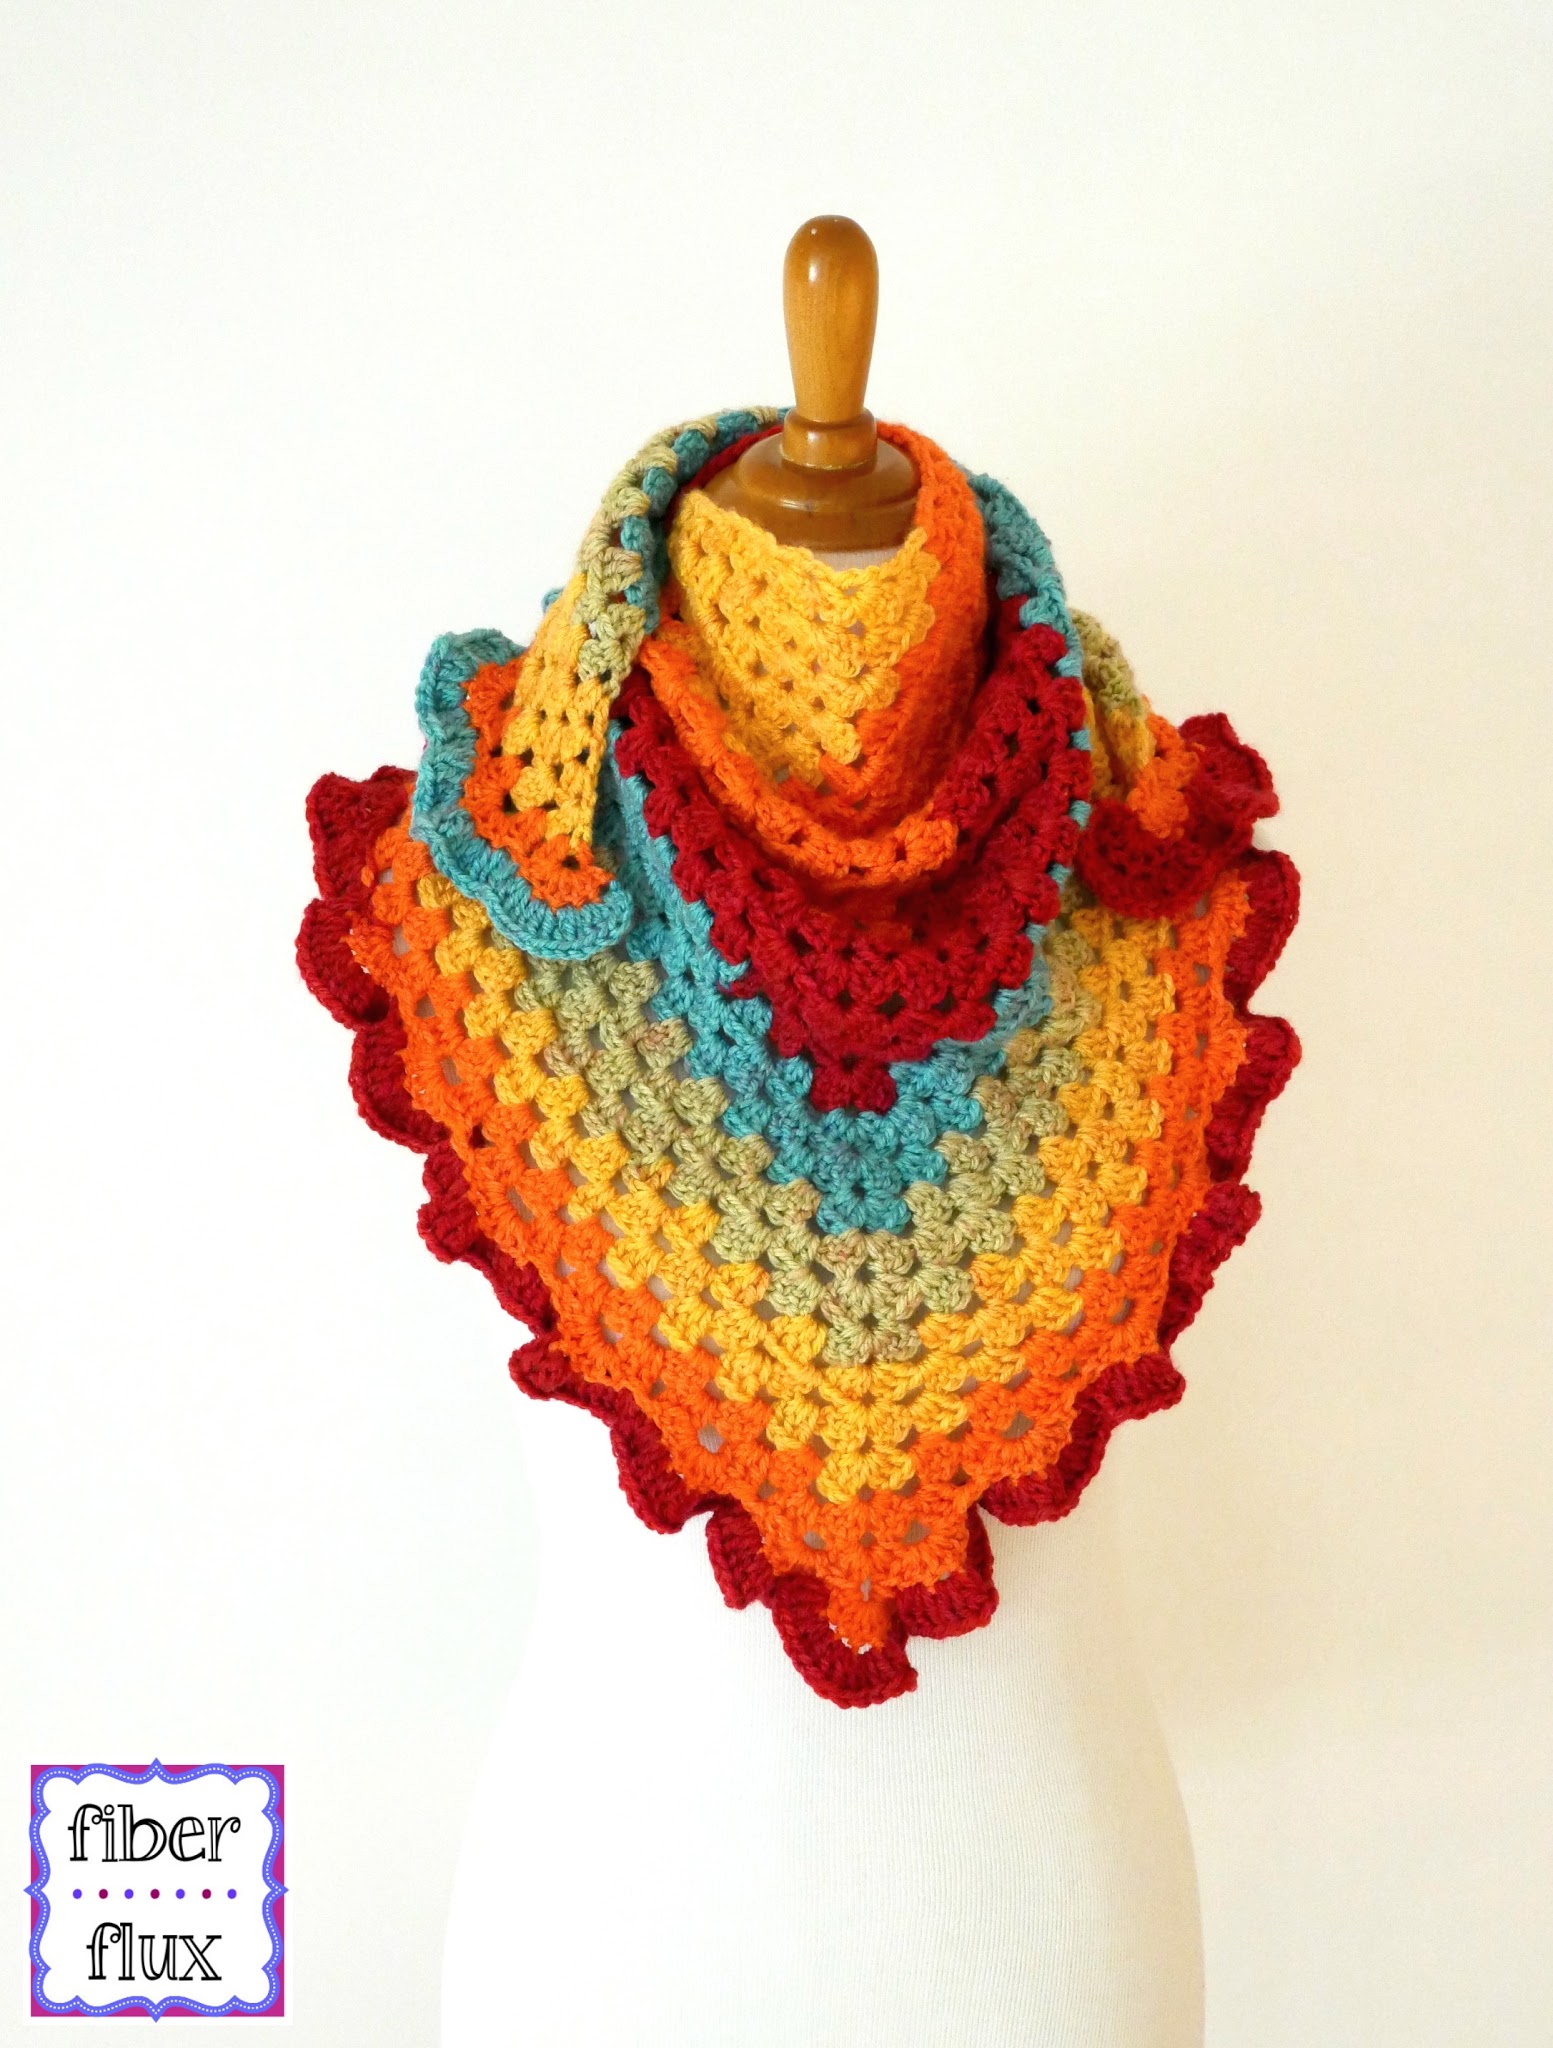
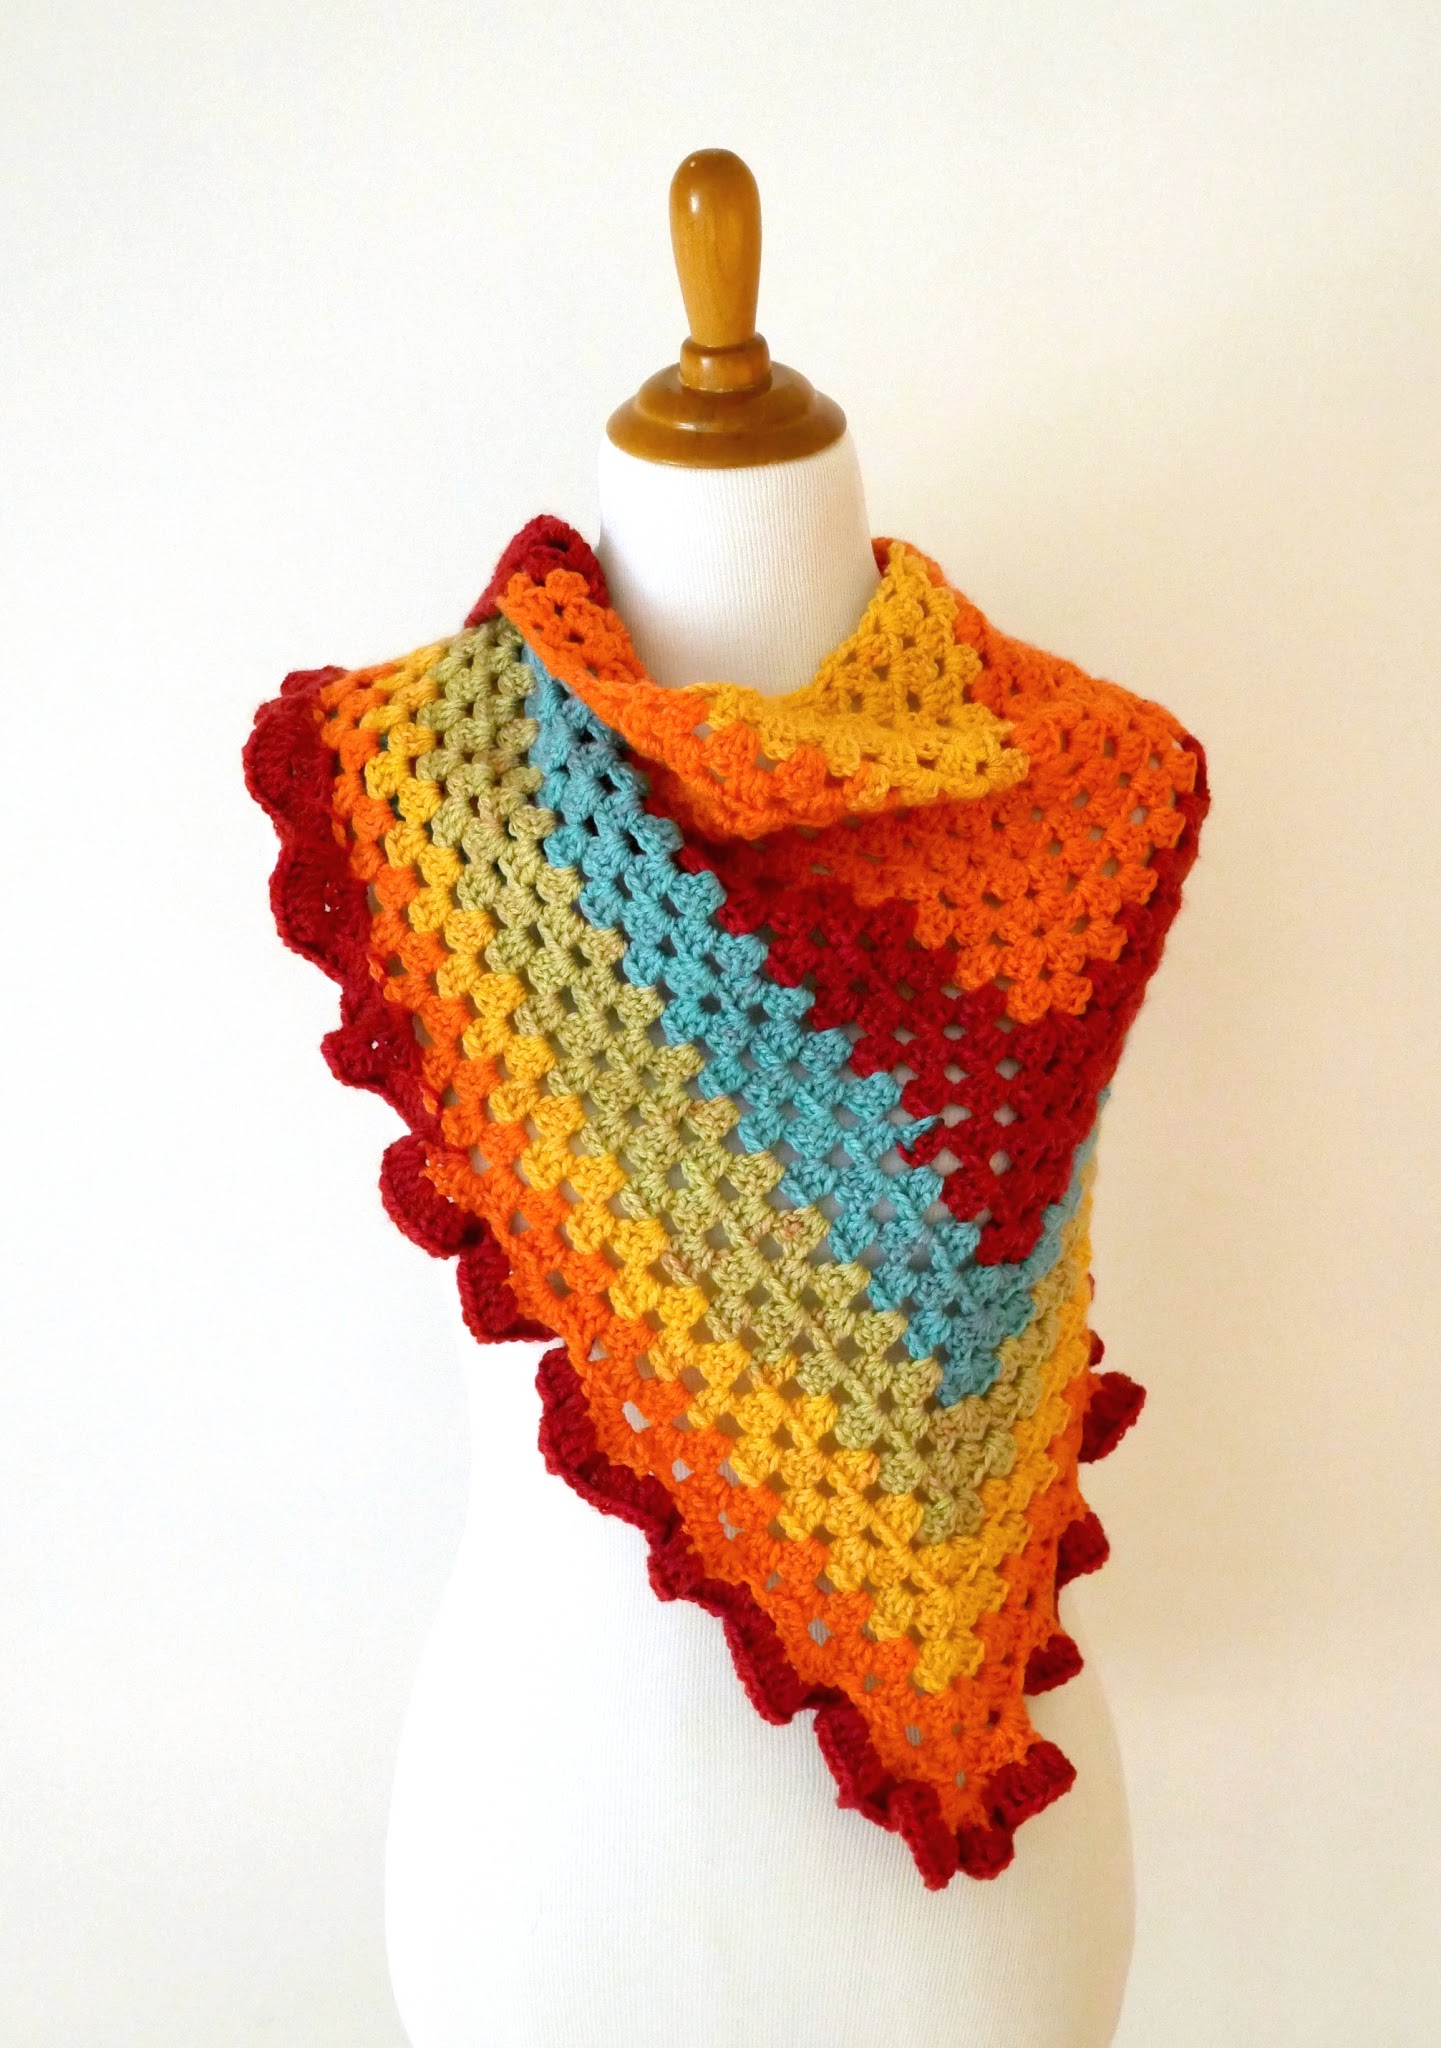
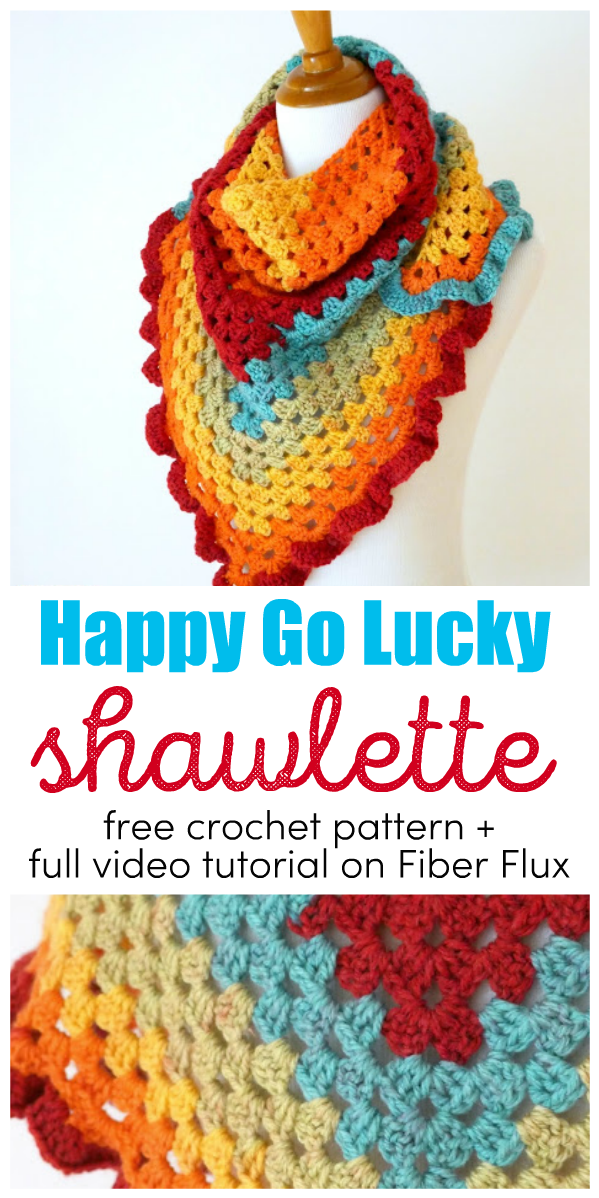
The Happy Go Lucky Crochet Shawlette is fun, colorful, and super easy to stitch up. A simple granny triangle shows off the self striping yarn beautifully and a fabulous ruffle gives it a fun and lighthearted texture!
👉Get the ad-free crochet pattern PDF from my shop here!👈
Watch a full video tutorial on how to make the Happy Go Lucky Crochet Shawlette:
Abbreviations and Tutorial Links:
Materials:
- 5.0 mm H crochet hook
- 1 Caron Cake (please note that if you are substituting yarn, just look for a yarn that recommends a 5.0 mm hook. You’ll need approximately 383 yards of yarn for this project).
- Tapestry Needle
- Scissors
Sizing:
- 50 inches across the top triangle edge
- 34 inches along each side triangle side
Instructions for the main part of shawlette (granny triangle):
Note: To make the shawl as shown, work a total of 29 rows before continuing to the edging rows. You can make yours larger or smaller by working more or less rows of this section.
- Ch 4, then in the ch furthest from the hook sl st to form ring.
- Row 1: Ch 4 (counts as a dc, ch 1), the work (3 dc, ch 2, 3 dc) in center of ring, the work (ch 1, dc) in the ring.
- Row 2: Ch 4 (counts as a dc, ch 1), the work 2 dc in the ch 1 space from the previous row, then ch 1. Work (3 dc, ch 2, 3 dc) in the ch 2 space (top corner peak) from the previous row, then ch 1. Work 2 dc, ch 1 in the ch 1 space from the previous row, then a dc in the third ch of the turning chain.
- Row 3: Ch 4 (counts as a dc, ch 1), then work 2 dc, ch 1 in the ch 1 space. Work 3 dc, ch 1 in the chain 1 space. Work (3 dc, ch 2, 3 dc) in the chain 2 space (top corner peak). Ch 1, then 3 dc in the ch 1 space, then ch 1, then 2 dc in the ch 1 space, then ch 1, then a dc in the last dc.
- Row 4: Ch 4 (counts as a dc, ch 1). Work 2 dc in the ch 1 space, then work (3 dc, ch 1) in each of the the next ch 1 spaces, then ch 1. Work (3 dc, ch 2, 3 dc) in the ch 2 space (top corner peak), then work (ch 1, 3 dc) in each of the next ch spaces, then ch 1. Work 2 dc in the last ch space, ch 1, then a dc in the last dc.
Continue with your shawl, making it as big as you like!
- Repeat row 4, adding a (3-dc in a ch- 1 sp) on each side for each row until triangle has a total of 29 rows from beginning (to make shawlette as shown). You can add more repeats of row 4 if you’d like a larger shawl or less rows for a smaller shawlette.
If you like a clean, straight edge, you can fasten off at this point (or put a couple more repeats of row 4). If you’d like a ruffle, move on to the edging instructions below…
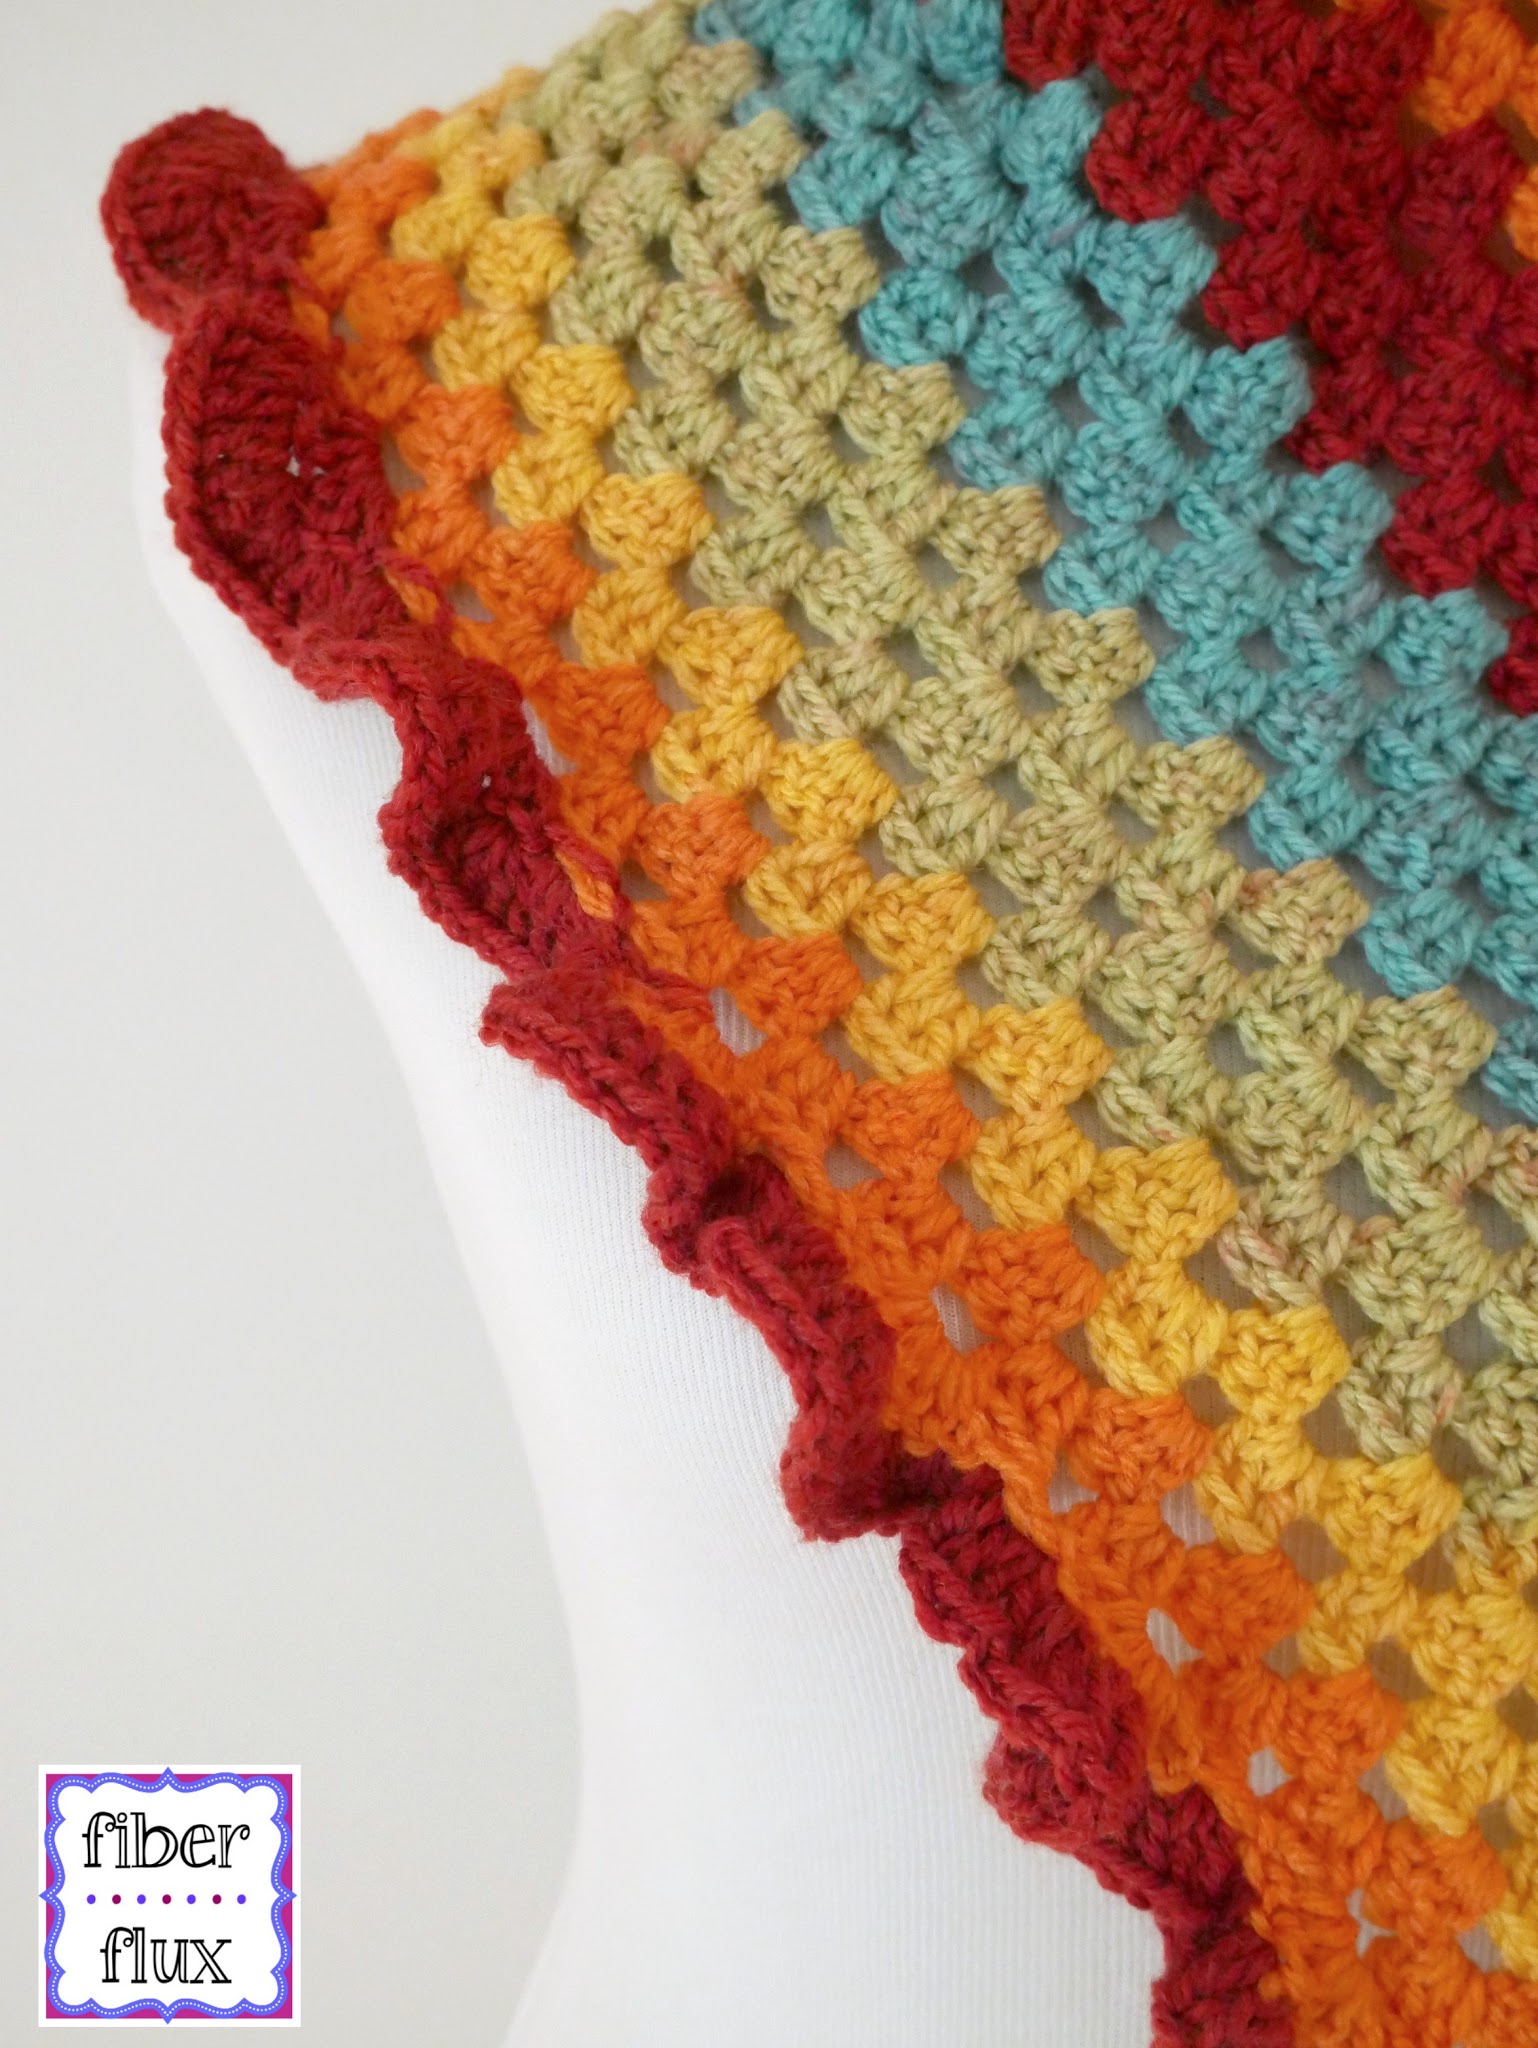
Edging Instructions:
Row 1: Ch 3 and turn. In the first space work 5 dc. *Work a sl st in the next space, then 6 dc in the next space. Repeat from * then at the top peak (corner ch 2 space) work (sl st, 10 dc, sl st). Continue down the other side of the triangle by working *6 dc in the next space, then a sl st in the next space. Repeat from * to the last space, then work (6 dc, st st) in the same space.
Row 2: Ch 3 and turn. Work 2 dc in the first st, then 3 dc in each dc from the previous row. After working the very last dc of the row, also work a sl st into the same st to create a softer, rounded edge to finish off the ruffle row. Fasten off.
Finishing & Assembly:
Weave in any ends that remain and you’re finished!
Happy crocheting lovelies!


Thank you for this lovely design
So pretty, Jennifer, love the colors! Pinned.
Thank-you for sharing! It's fun and beautiful!
Gosh! When I look at this, I want to give Jennifer a hug:)
Absolutely gorgeous!
Thank you for this lovely pattern and easy to follow instruction. I'm a beginner but I was be able to follow it and got it done on my first try. I dont know how to read the pattern but the video sure help me alot. Thanks again!
I followed the pattern exactly, used the recommended hook size and a Caron Cake. Ran out of yarn 2/3 of the way through the last row of the edging. I don't crochet loosely so not sure what went wrong! Now I have to hope that I can find another Caron Cake in Macaron before Christmas!!! Does the yarn length that is listed in the pattern include the edging?
The rainbow one she used is 335g. The other colors are just 200g. Nothing you did she just used a bigger ball.
I just enjoyed watching your video for this pretty shawl. I have my Sprinkes Varon Cakevrwady and my crochet hook and I will be referring to your video to start it carefully. Thank you fir the printed pattern, too, Jennifer! 🙂
You have quickly become one of my favorite designers. This is the 3rd project of yours that I've done. I love how you explain things in your videos, and I appreciate how easy you make everything.
And to think,I almost missed this one!!! Thank goodness it's at the bottom of ideo!!! THANK you so much Jennifer,I'm going to work on this one,inbetween my other projects ❤❤❤❤❤❤
Love this shawlette…one question though…in your written instructions row 4 says to work 2 dc in the first ch 1 space but in your video on row 4 you said to work 3 dc. Was just wondering which one to use as this is the row repeated for the rest of the shawlette. Thanks so much! Can't wait to the finished product – I'm using Buttercream!
Love this shawlette…one question though…in your written instructions row 4 says to work 2 dc in the first ch 1 space but in your video on row 4 you said to work 3 dc. Was just wondering which one to use as this is the row repeated for the rest of the shawlette. Thanks so much! Can't wait to the finished product – I'm using Buttercream!
I made this and posted a photo on my blog 🙂
http://tlhcraftblog.blogspot.com/2017/08/happy-go-lucky-shawlette.html
So happy to find this beautiful looking pattern! And super happy it's made with a slip stitch and not à magic ring, just can't get hang of that! Will pick up a Caron Cake while out shopping next week..will let you know how it turns out!
If you can do a slip knot, you ARE doing a magic ring. Just don't pull the knot tight. You're already doing it and don't even realize it.
I have been looking for a project that used only one Caron Cake and this is perfect!! Thank you so much for sharing your design.
Jennifer, you taught me how to crochet. And, I can do this pattern, following your great video and written instructions. Thank you so much, I love this pattern.
This comment has been removed by a blog administrator.
Thank you for giving detail written patterns. I am learning from your blog. Video is helpful too.
This comment has been removed by a blog administrator.