
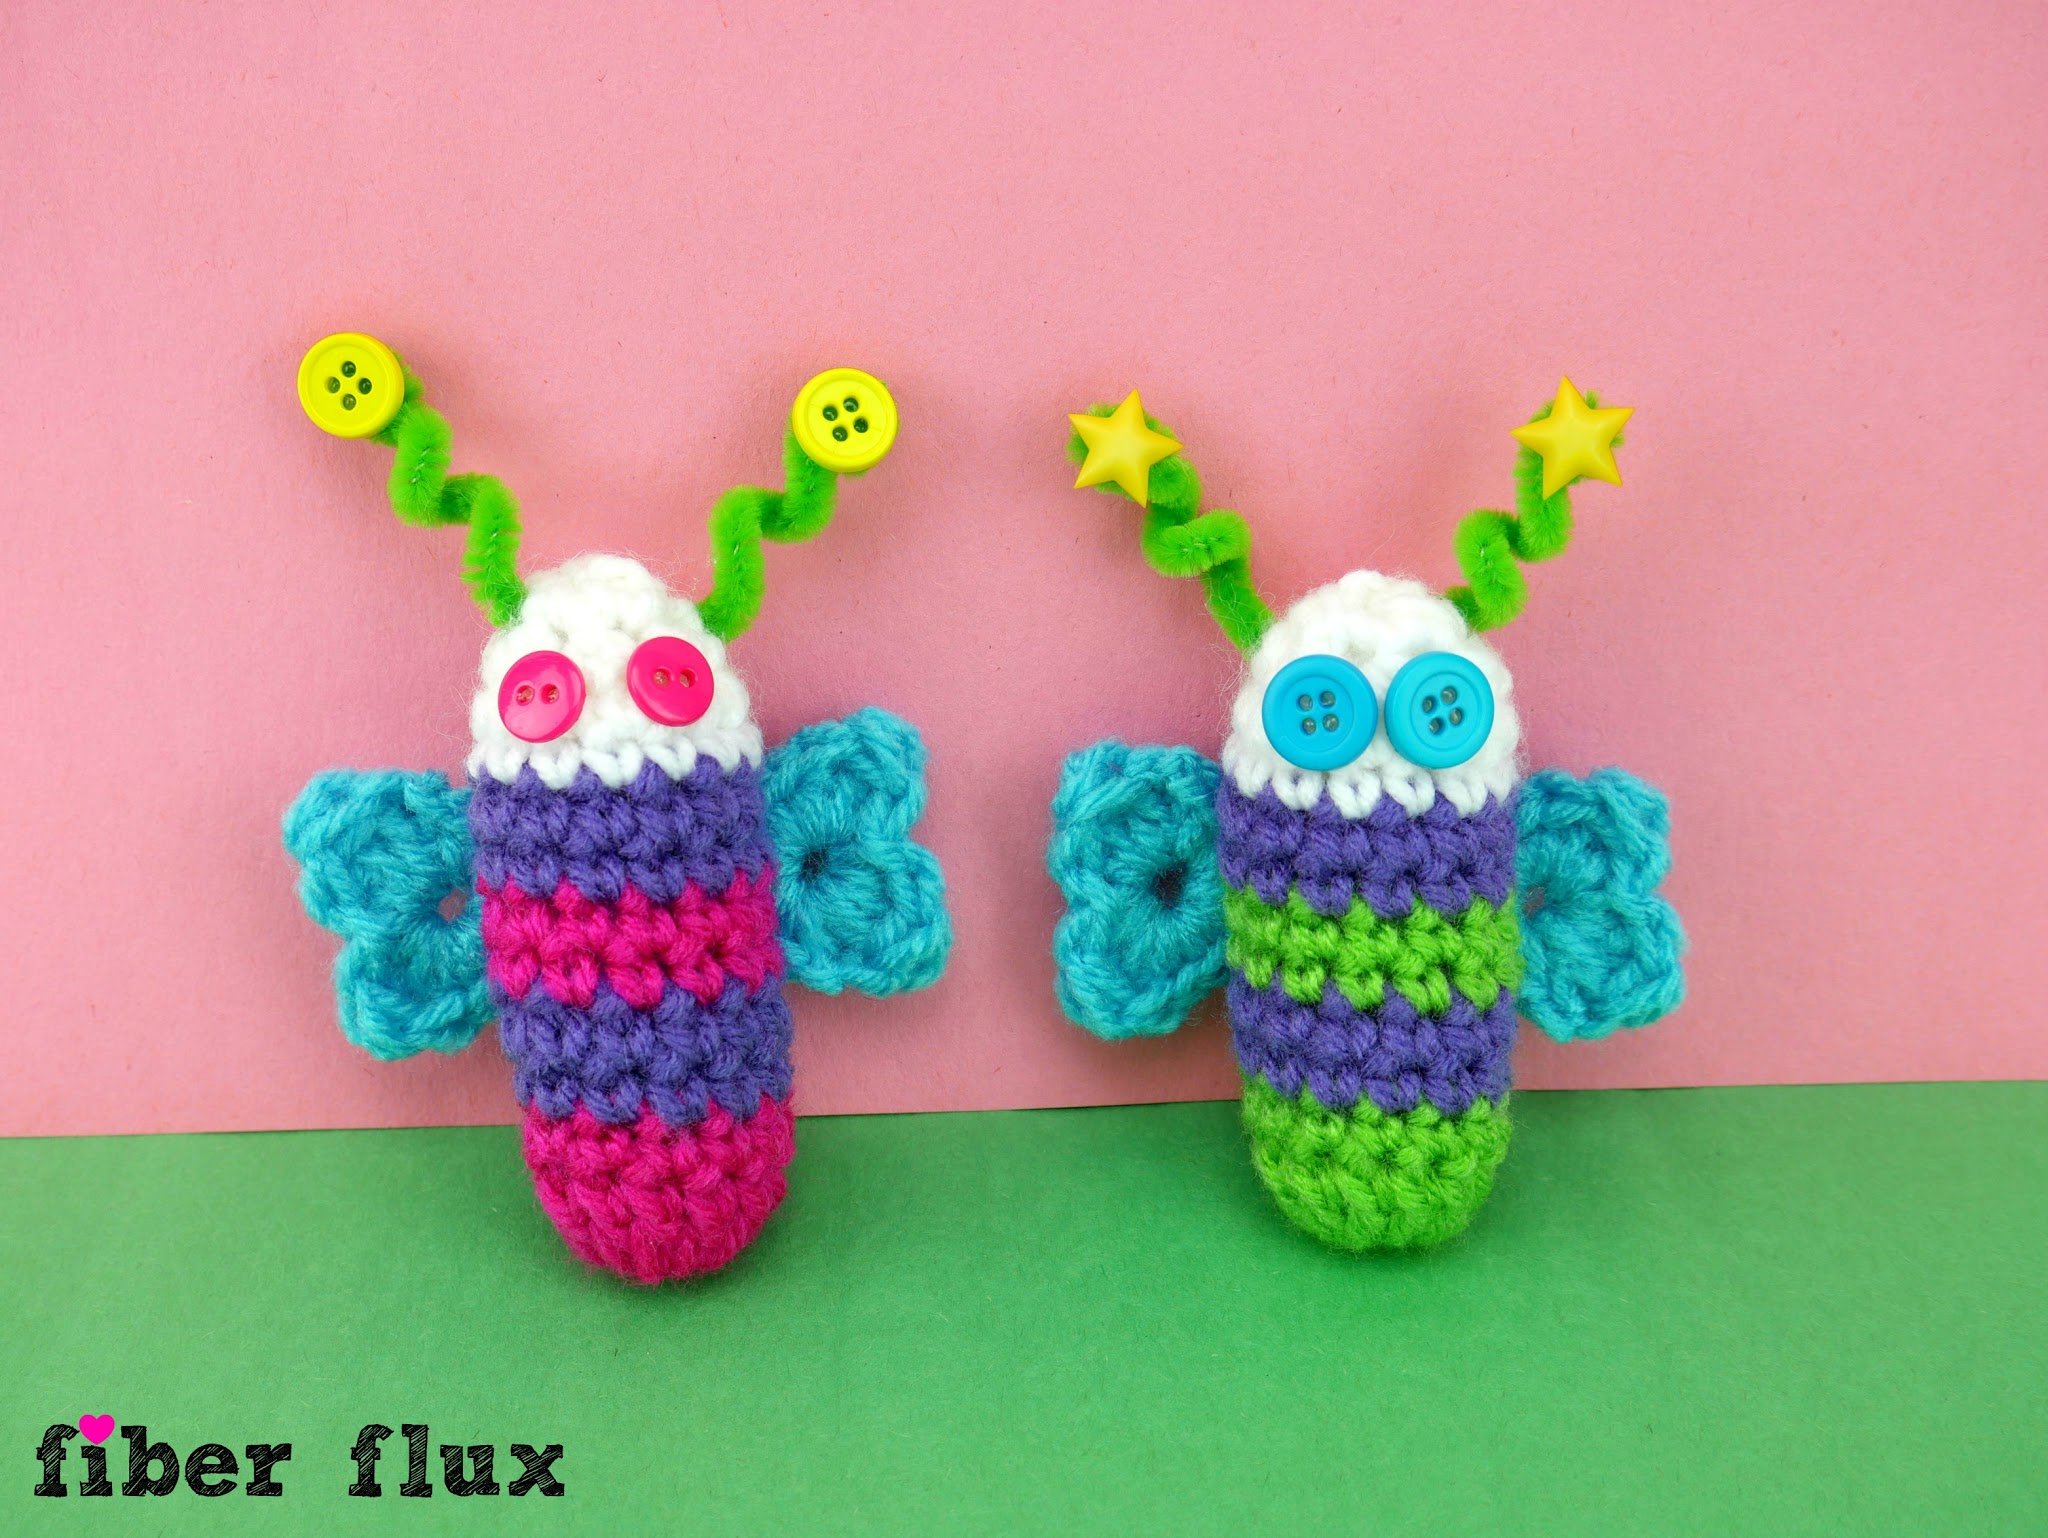
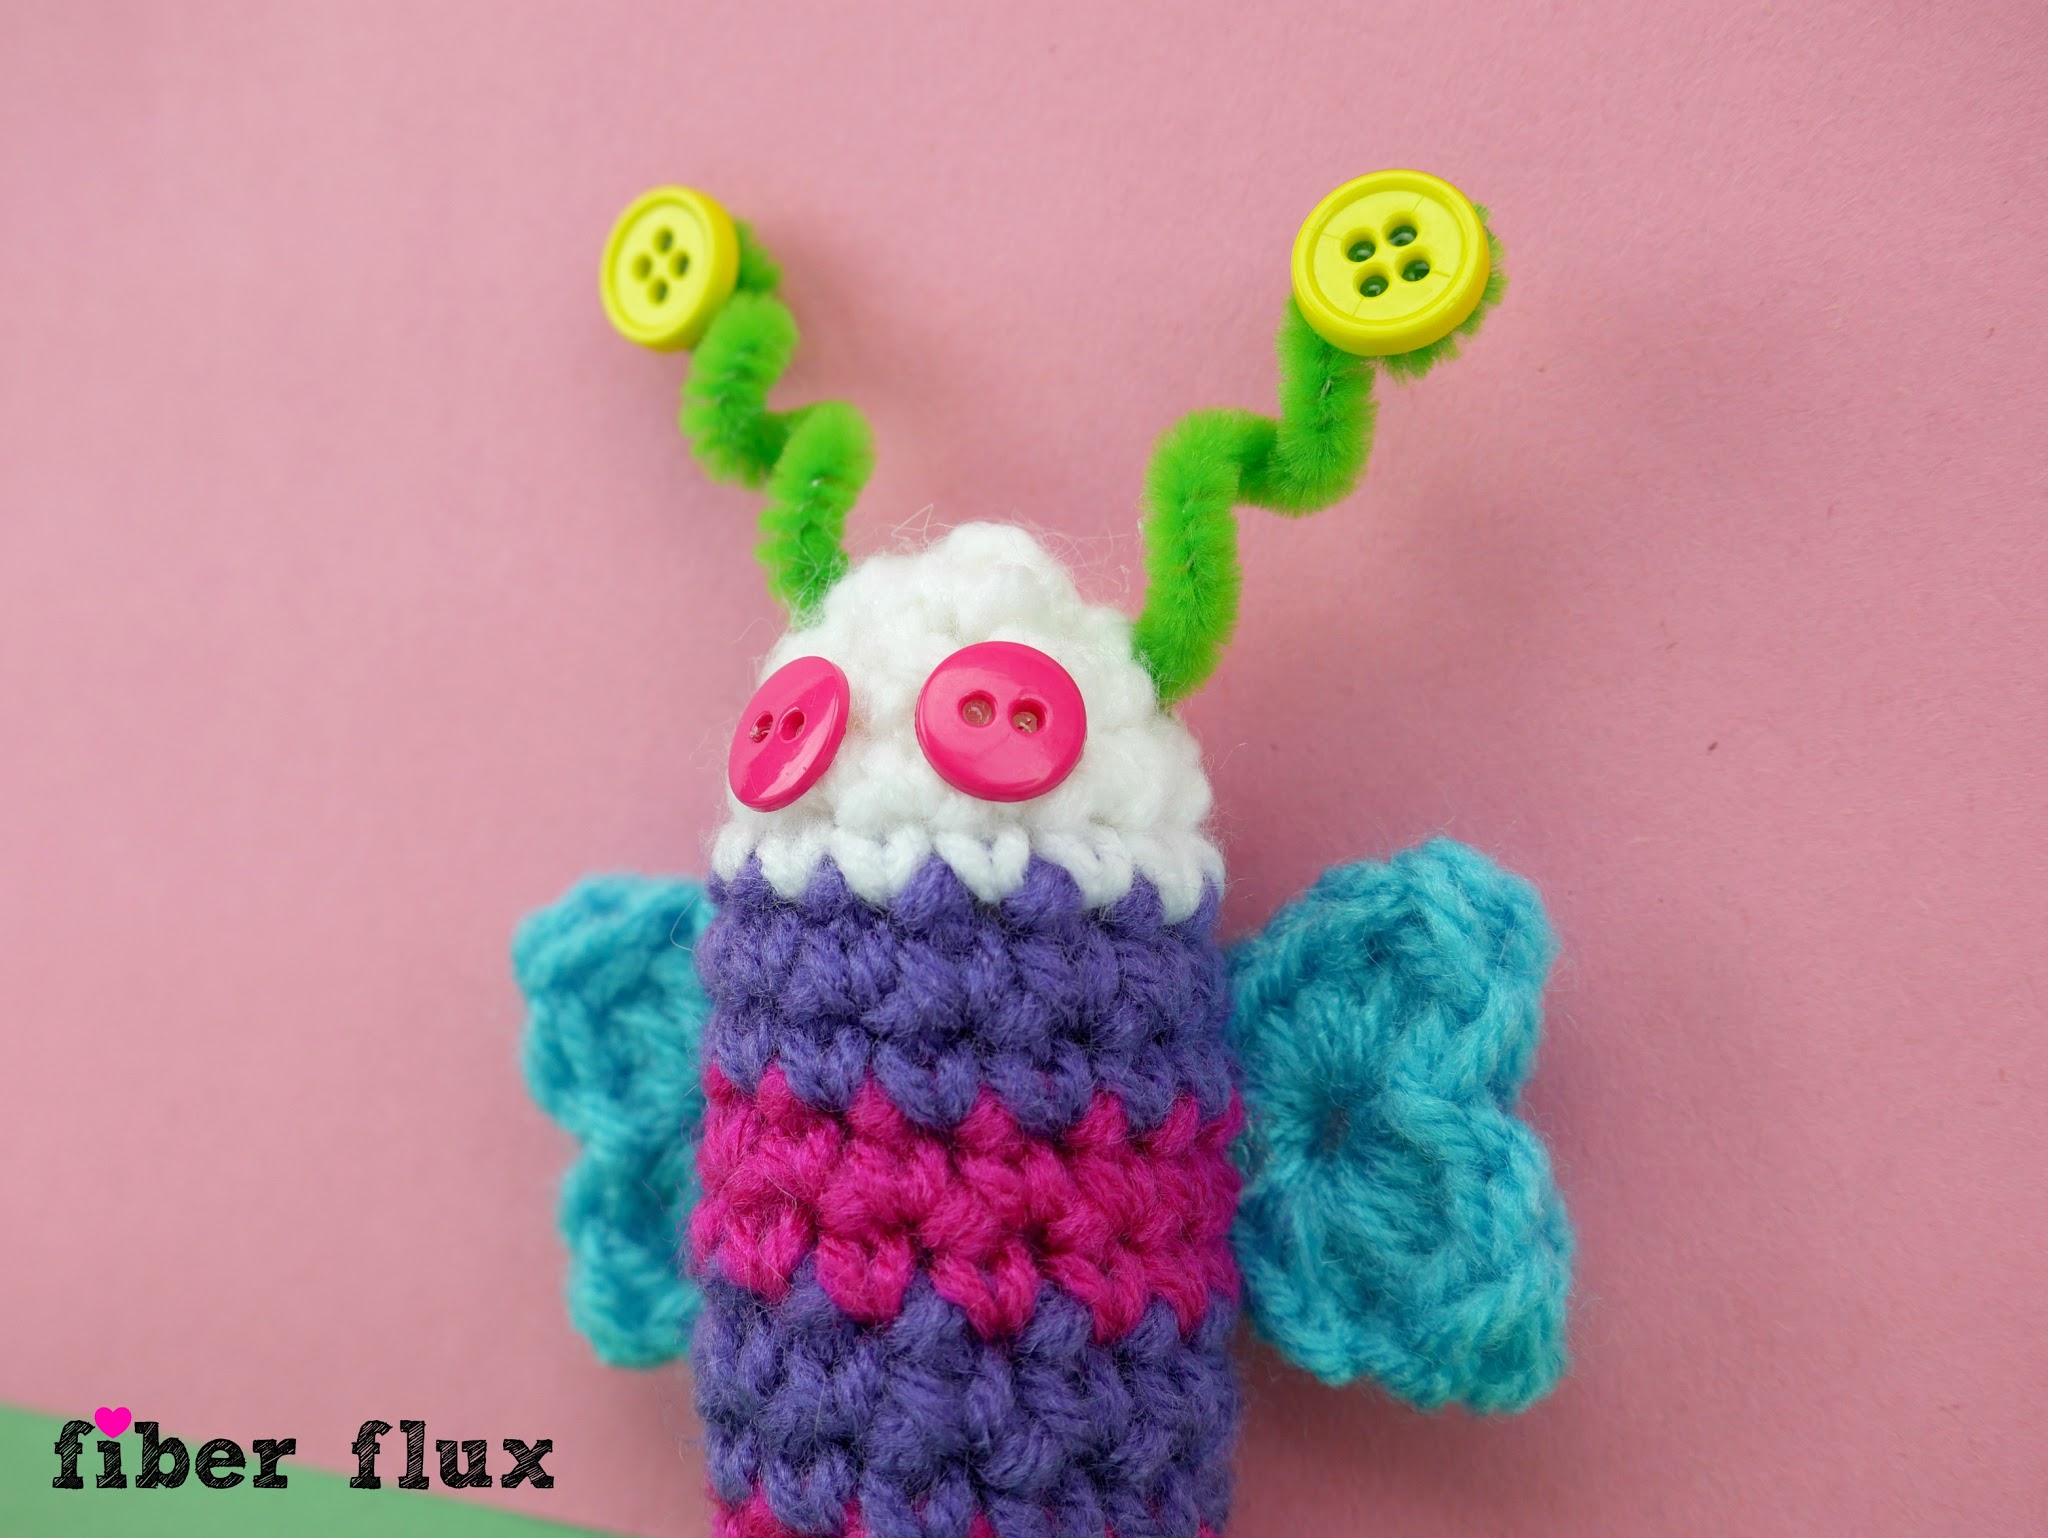
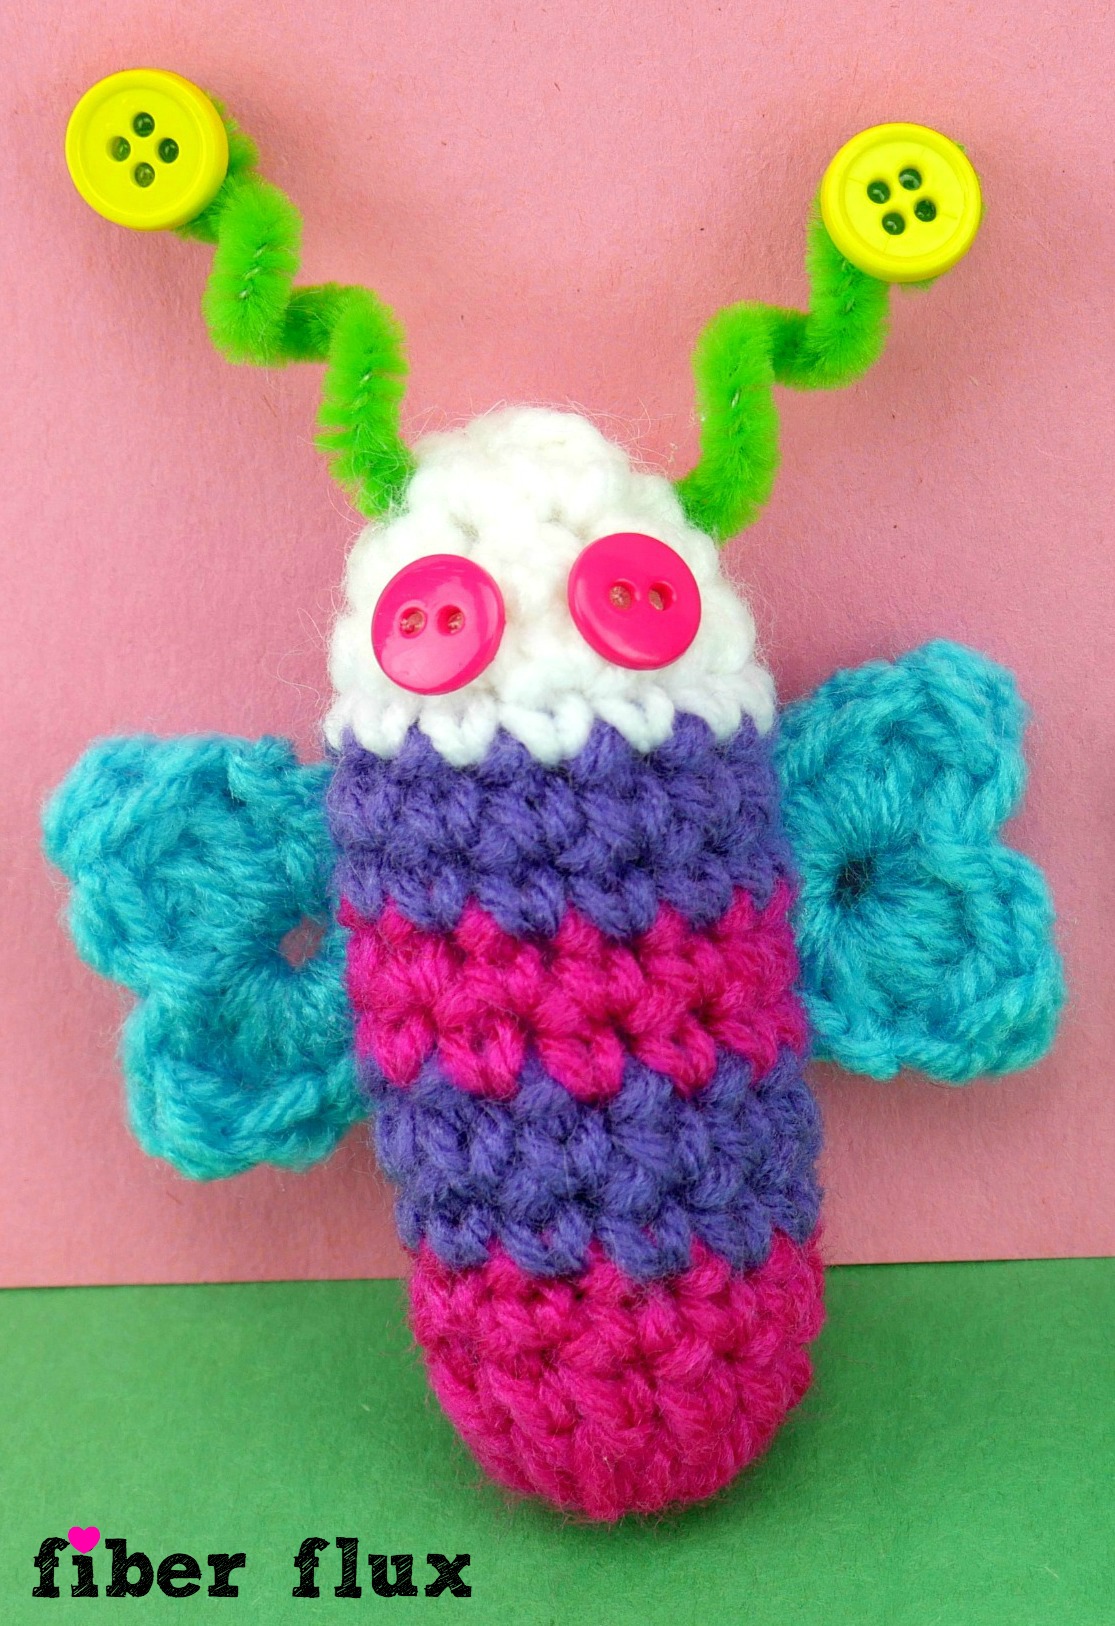
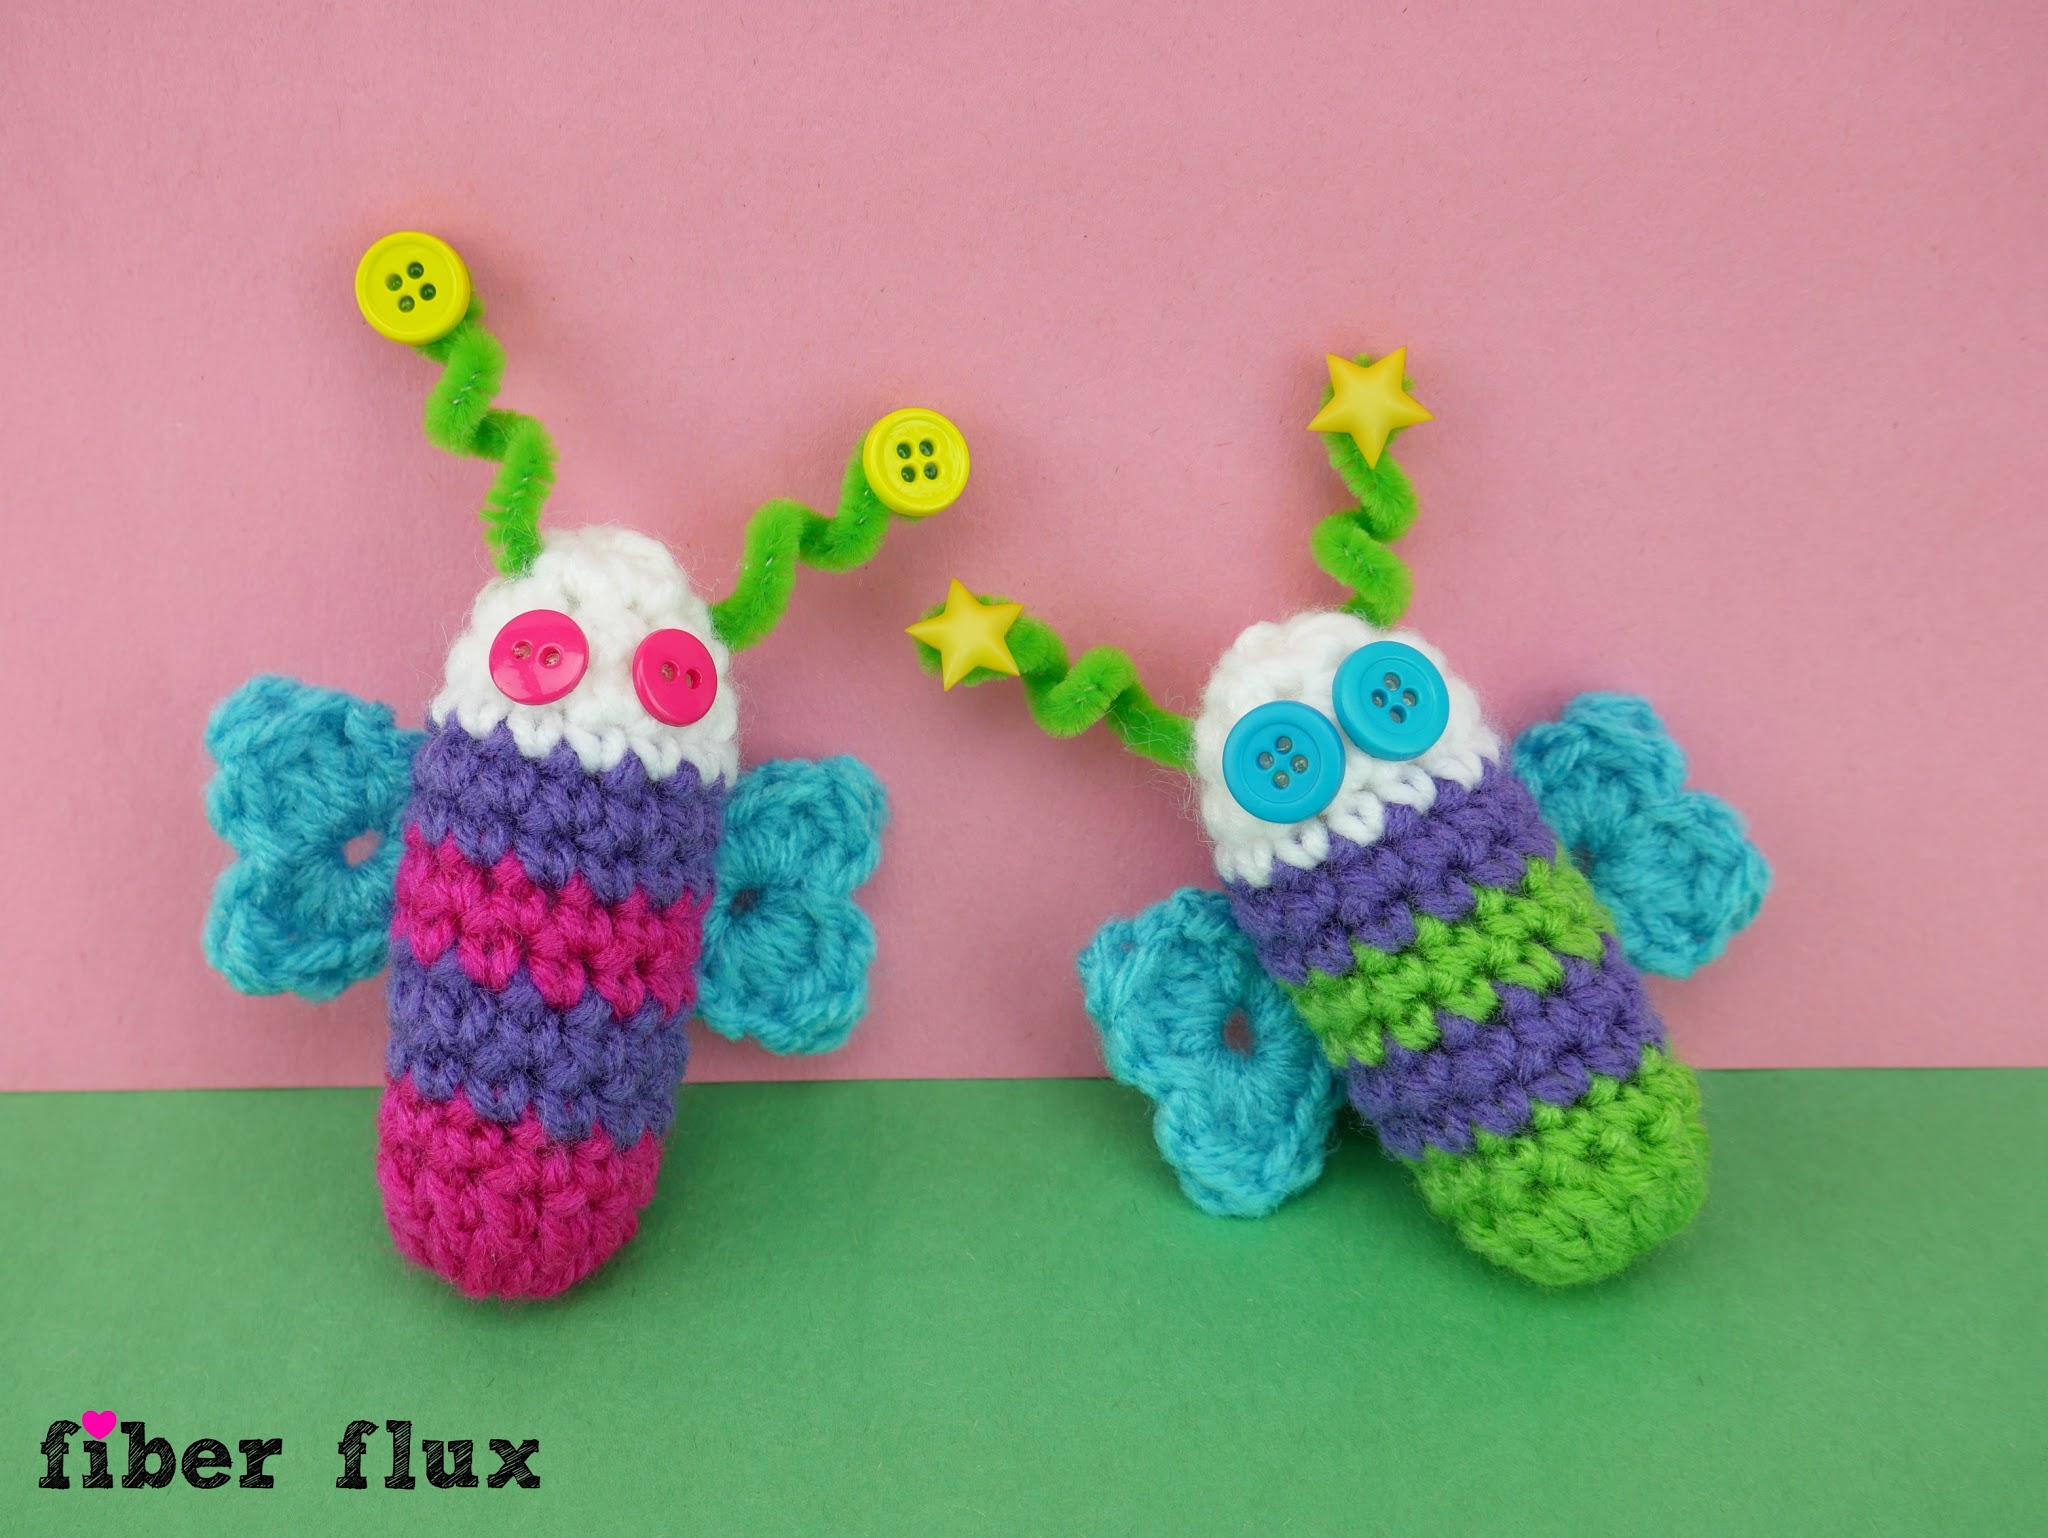
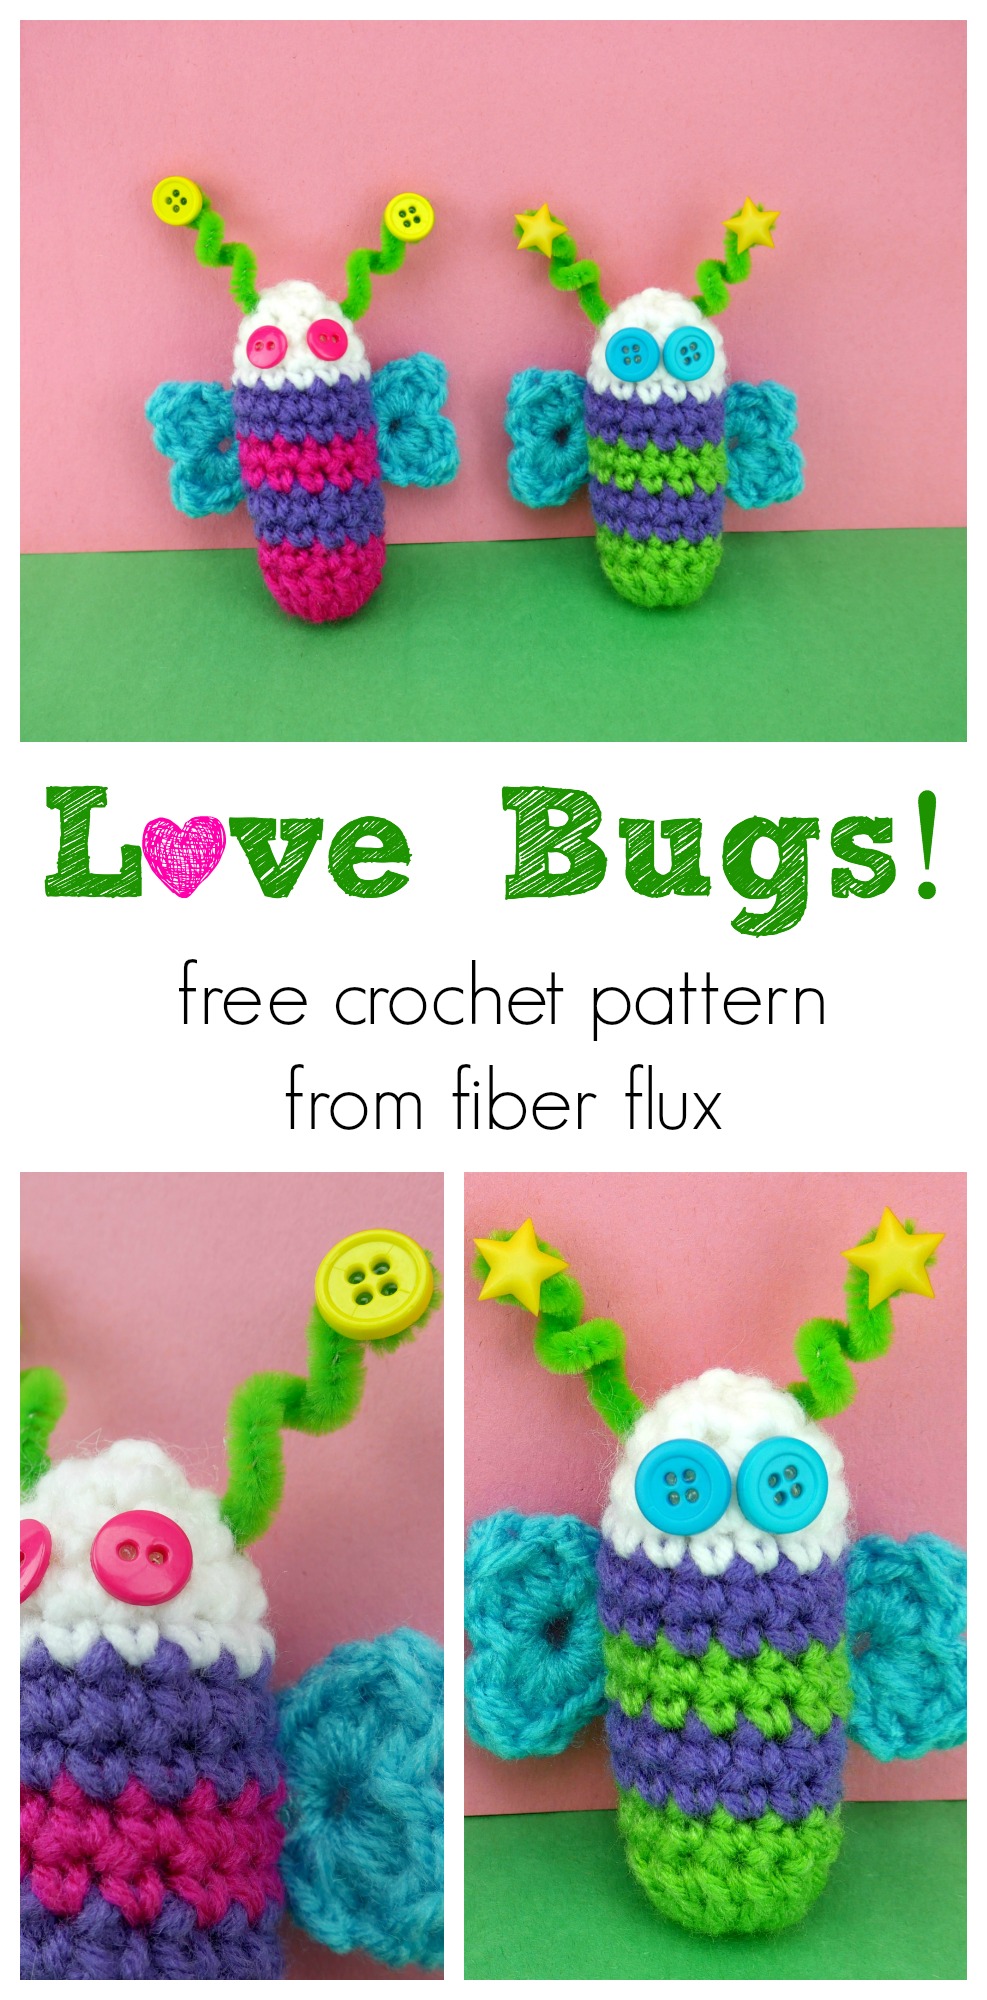
Love Bugs are cute, super easy, fun to work up! Make a few for a Valentine, gift topper, or stick one in a lunch or backpack to brighten someone’s day. The Love Bugs get their name from heart shaped wings made in just one round. I had so much fun selecting bright and happy colors for this project…so cheerful!
Need a little help? There’s a full video tutorial below too!
Let’s connect!


Love Bugs
By Jennifer Dickerson
Click the button below to add this project to your Ravelry queue:

Click below to watch a full video tutorial on how to make this project:
(Can’t see the video? Click here!)

Materials:
-
5.0 mm crochet hook
-
Worsted weight yarn of your choice ( used small amount of Red Heart Super Saver in “Aqua” “Shocking Pink” “Lavender” “Spring Green” “White”) You’ll need one color for wings, 2 colors for striped body and 1 color for the head.
-
Tapestry Needle
-
Scissors
-
Hot glue gun
-
Fiberfill (you can also repurpose yarn scraps for stuffing!)
-
6 inch long pipe cleaner
-
2 buttons for eyes
-
2 buttons for antennae
(affiliate links)
Sizing:
-
5 inches tall (antennae to bottom)
-
3 inches long (total wingspan)
Abbreviations and Tutorial Links:
Instructions for Body: (note body is worked from the bottom up, beginning with the color stripe portion.
Colors used for each round (both bugs):
Bottom Base: Pink or Green
Round 1: Pink or Green
Round 2: Lavender
Round 3: Lavender
Round 4: Pink or Green
Round 5: Pink or Green
Round 6: Lavender
Round 7: Lavender
Round 8: White
Round 9: White
Round 10 (decrease round): White
Round 11 (decrease round): White
Wings: Aqua
Ch 4, join the the ch furthest from the hook with a sl st to create a ring.
Bottom Base:
Round 1: Ch 3, then work 11 dc into the center of the ring. Join to close with a sl st and do not fasten off yarn.
Body of Bug (striped sides):
Rounds 1-9: Ch 1, then work a sc in each st. Join with a sl st to close round.
Round 10-11: Ch 1, then sc2tog in each st around. Join with a sl st to close round.
Fasten off, leaving a long tail. Stuff with fiberfill. Thread tail with a tapestry needle and seam top closed. Weave in end and trim.
Instructions for Wings (make 2):
Ch 4 and join with a slip stitch to form a ring.
Round 1 (work all stitches into the ring): dc, tr, dc, sl st, dc, tr, dc, sc, sc, sc, tr, sc, sc, sc, join with a sl st to close heart and fasten off.
Finishing & Assembly:
Weave in any ends that remain. Hot glue wings and eyes as shown. Insert pipe cleaner through top of head as shown and bend upward to create antennae. Wrap each end around a crochet hook handle or pencil to create curlicue shape. Glue buttons to each antennae tip. Allow glue to cool and dry completely.

© Jennifer Dickerson 2017
For more fun projects and pretty patterns, be sure to follow Fiber Flux on Google+, Facebook, Twitter, and Pinterest for the latest updates!

Visit the Fiber Flux Yarn Shop…lovely yarn & great prices!


 (Affiliate links, enjoy these awesome products and thanks as always for your support!)


They are so cute and transmit joy. I love their heart wings and the bright colors you chose. Thanks for your tutorial.
Too cute!