
Welcome to week 3 of the 2018 Fiber Flux Summer Crochet Along! Today marks week three (already…can you believe it?!?) of the CAL and we’ll be tackling constructing and seaming your Land & Sea Cardi!

Also, a very special thanks to Red Heart for sponsoring this CAL with their amazing new Dreamy yarn!
Today we are going to be covering:
- Review + step by step for sizing your sweater
- Seaming the cardigan
- Review of the CAL schedule
- Where to connect with other makers
For this CAL (crochet along) we are making the “Land & Sea Cardi” a lovely and lofty granny hexagon cardigan! Many of you in the Fiber Flux community have asked for a wearable for our CAL, so I am so super excited to be making this together! The CAL will be divided over the next few weeks, concluding with a fun showcase of projects in our maker gallery! Scroll down for the schedule with actual dates and what we’ll be doing on each day/week.
*This is a self-paced project, so definitely go at the speed you feel most comfortable. The instructional videos and posts will be up forever and you will always be able to go back and watch again and again!
Get yarn for this project here!
(Affiliate link)

Here is a full video tutorial for week 3 of the CAL:
Add this project to your Ravelry queue by clicking on the button below:

Just joining us? Check here for information about supplies!
OK, are you ready? Let’s jump in with the tutorial! Last week we worked on our hexagons…for today’s tutorial, you’ll need two. Several of you asked last week about the hexagon “ruffling” like this:
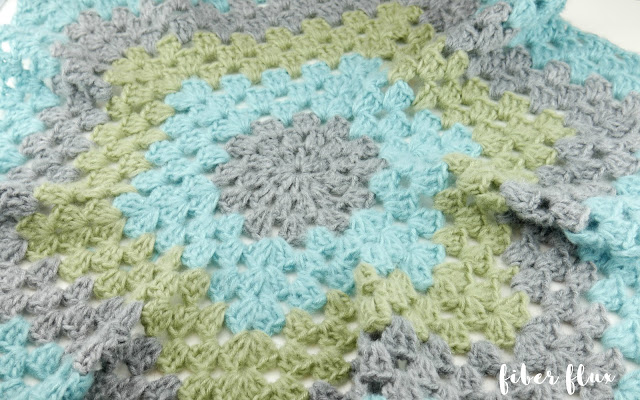
That is totally ok and perfectly normal…when we fold everything up, it will flatten out nicely (see below).
Before we start, I wanted to do a quick review of the hexagon sizing. You’ll need to measure from the base of your neck down to your wrist, this will determine how big to make each hexagon. Next, fold one of the hexagons in half like so:
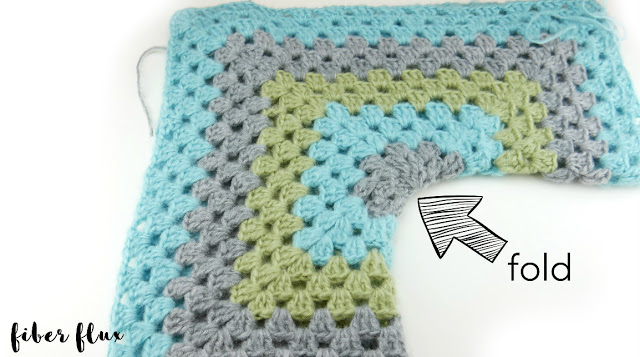
Now, with the piece laid out in front of you as shown in the photos, measure the top edge, using the photo below for reference:
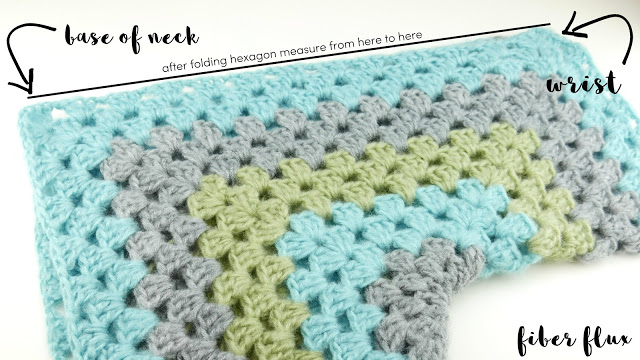
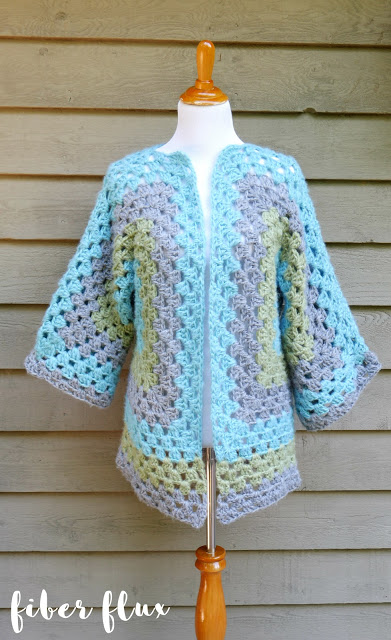
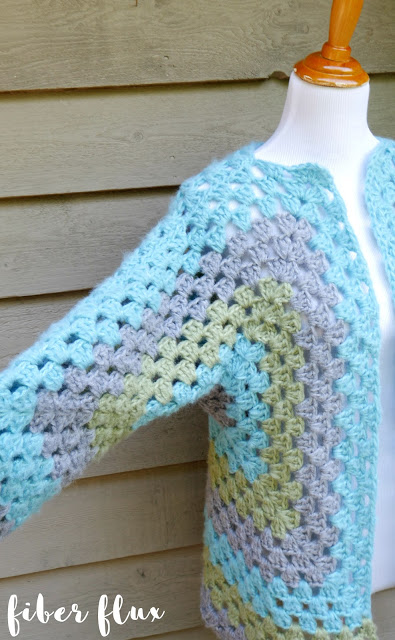
This will help determine how the sweater will fit, make it so it matches your own personal neck to wrist measurements…if it is a little short, simply add a couple more rounds. I actually wanted a little more of a slouchy fit, so I added a few more to mine beyond my own measurements. Below you can see the same shape on the finished sweater to give you an idea of what we’re after:
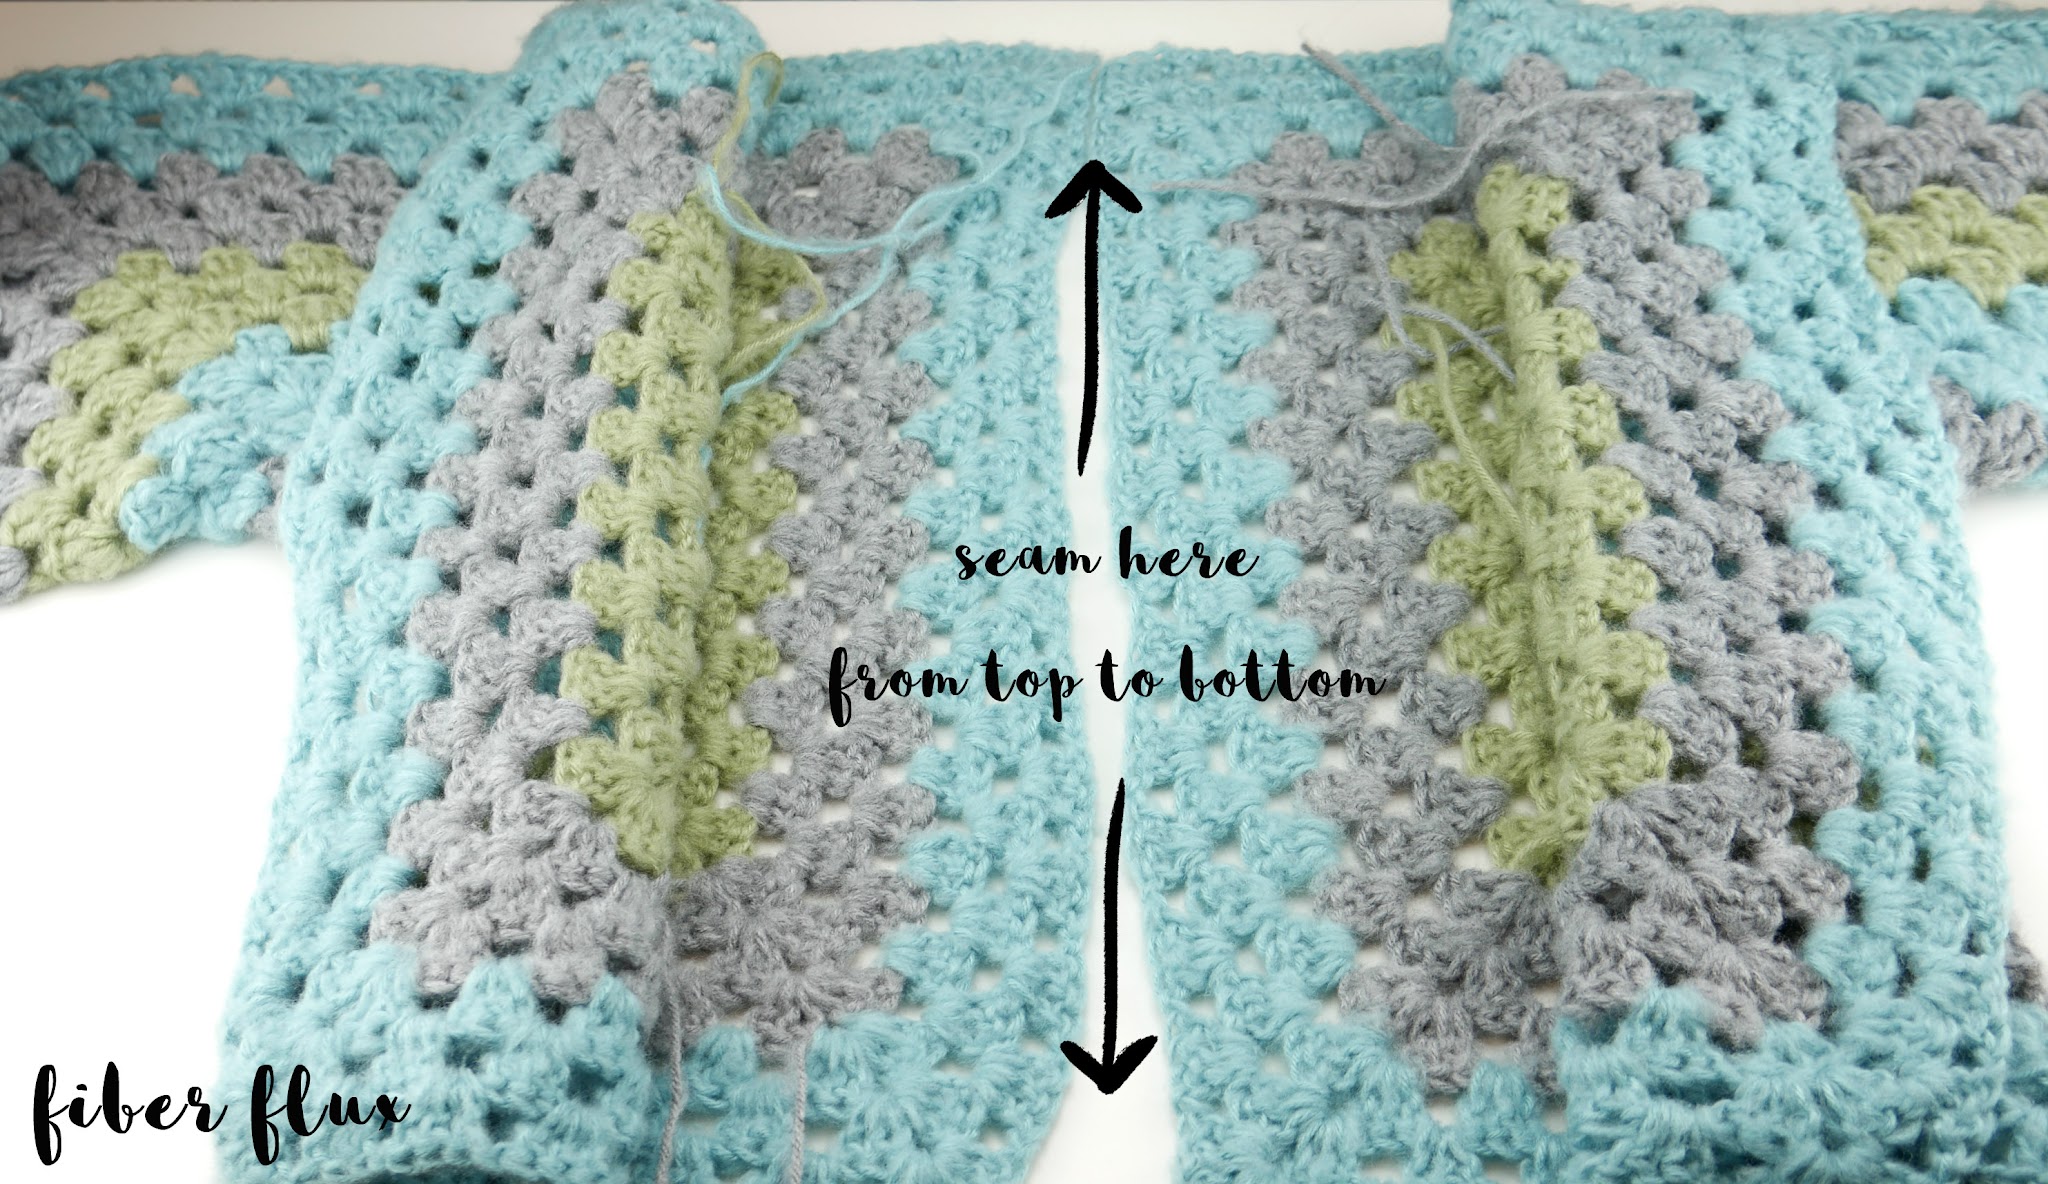
After you get your hexagons just right, we’ll be putting both folded hexagons together and seaming. First lay them out like this:

Now open up the front and seam down the inside center with a whip stitch:
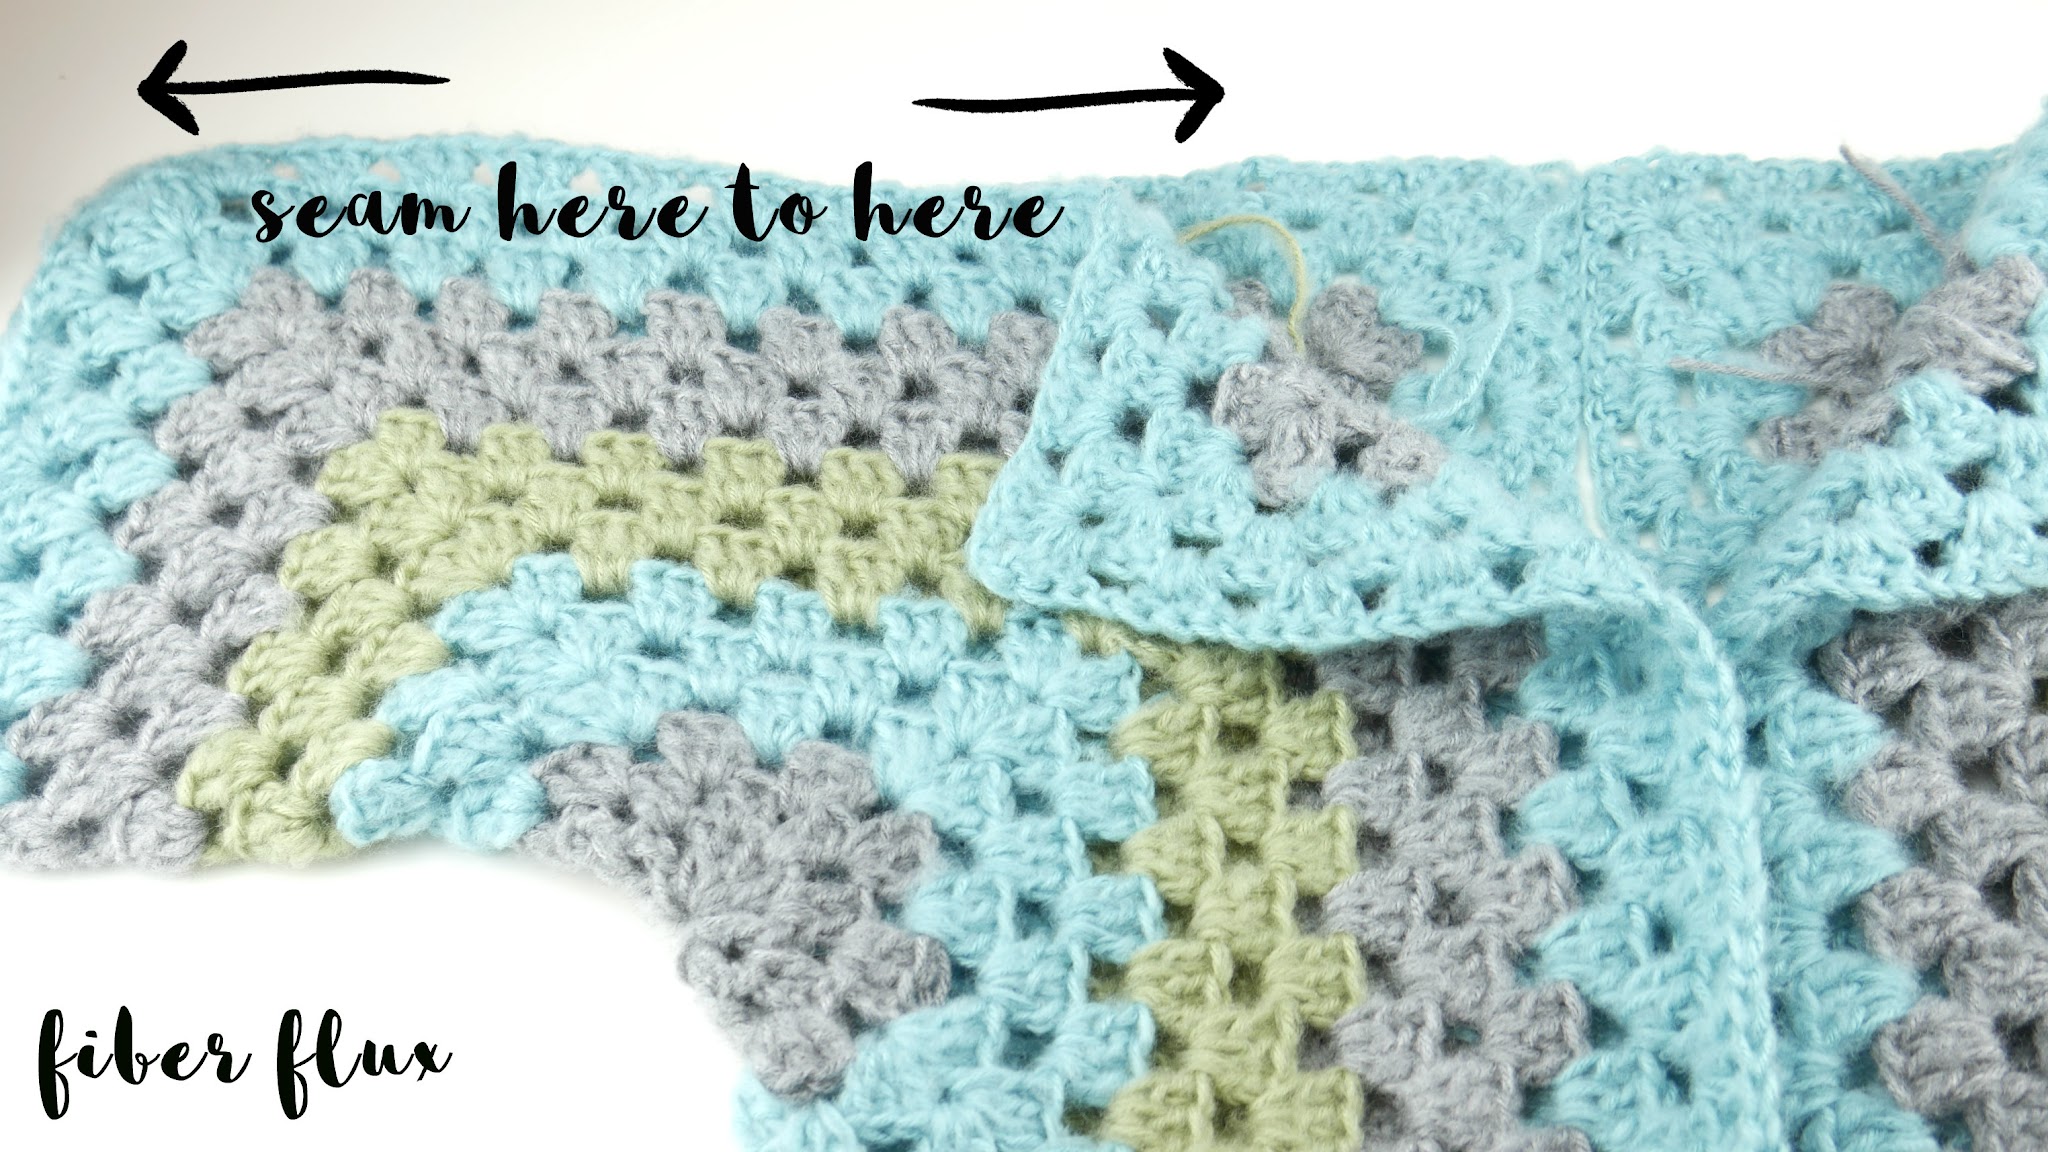
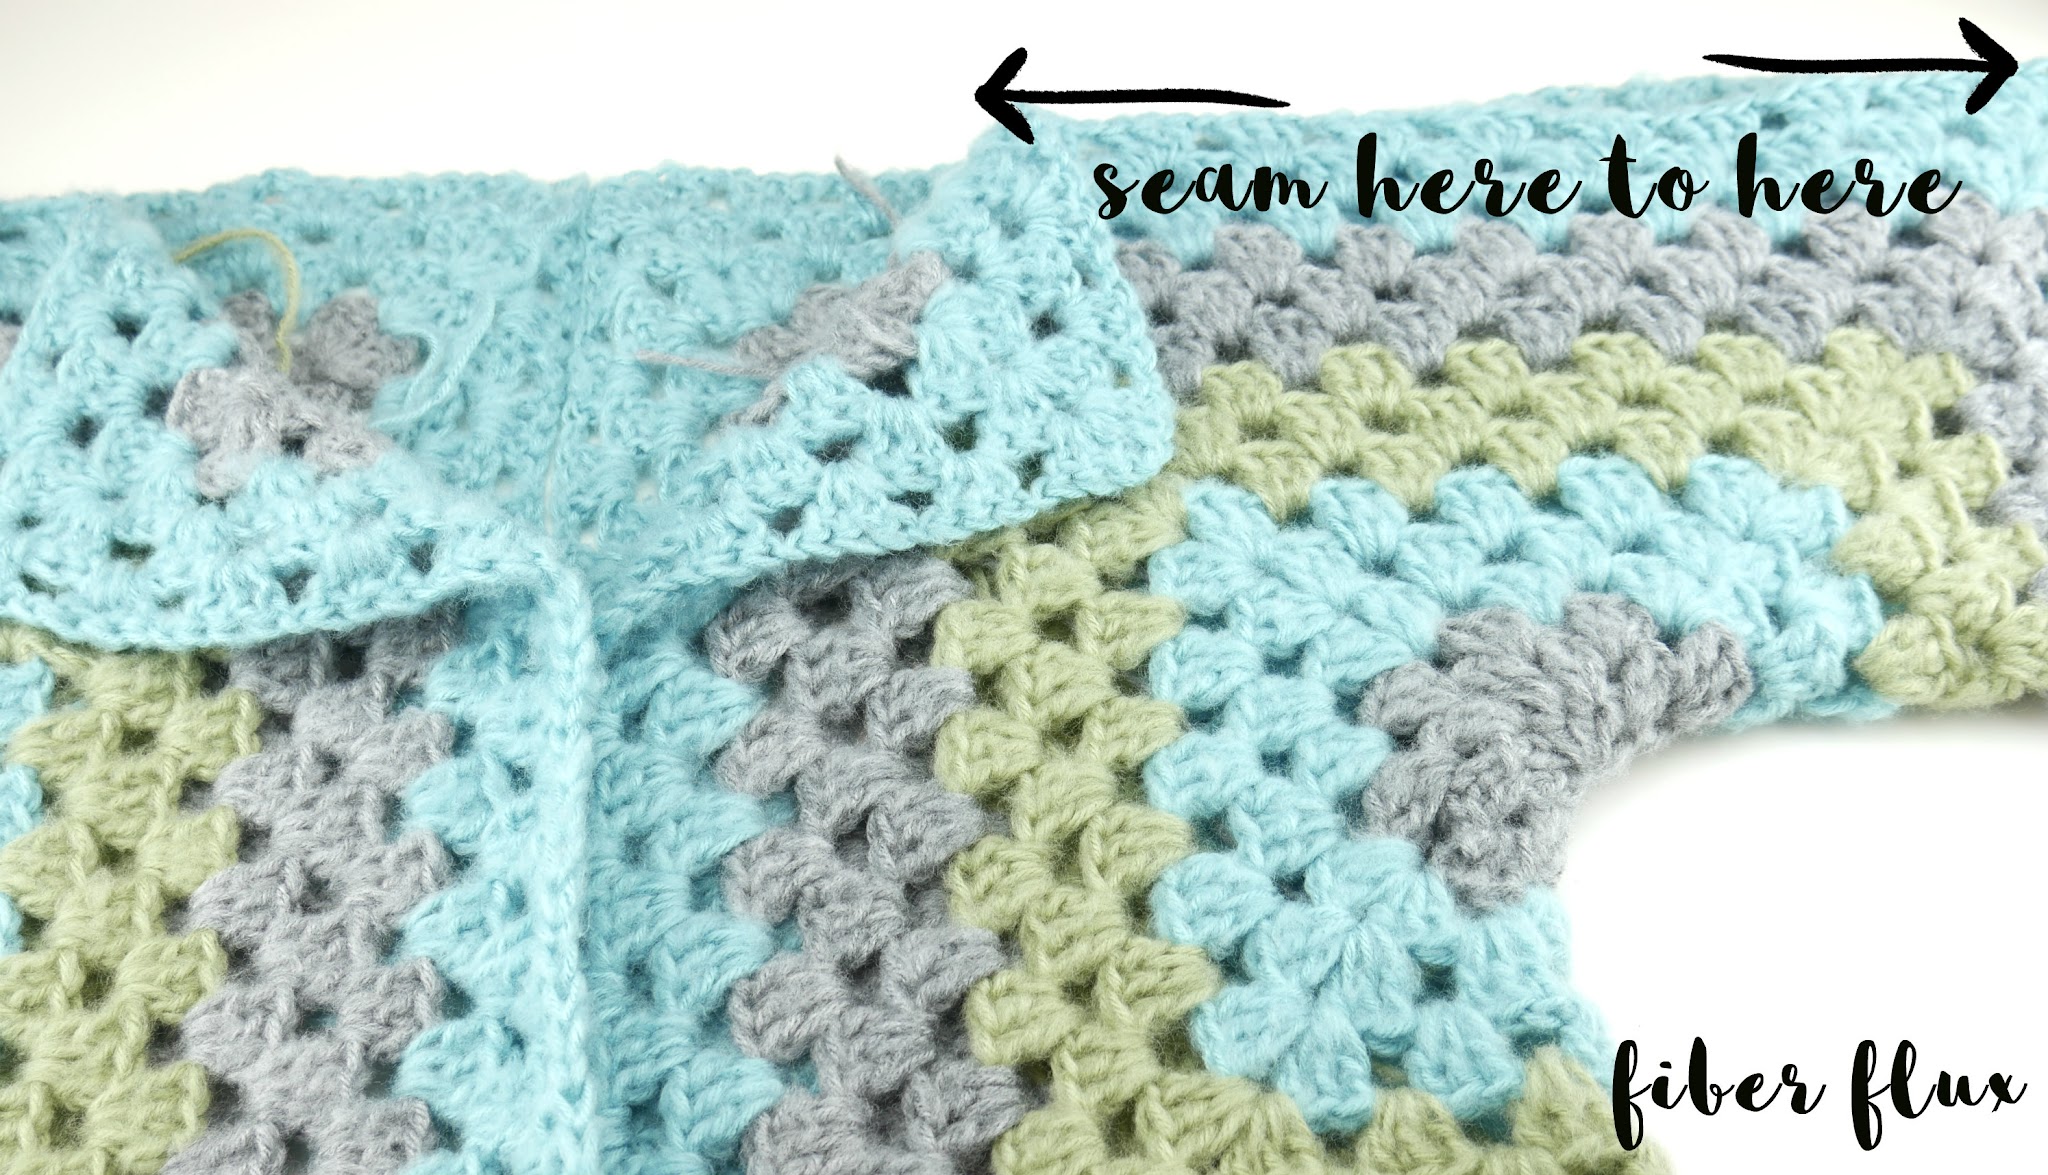
Next, turn the sweater sleeves inside out and seam where indicated below. Sew the tops of the shoulders from neck to wrist all along the top and down the center of the back (leave the front open for the cardigan, otherwise you’ll have a pullover!) I used the whip stitch and then wove in the ends when I was finished. You can see all of the seaming in action in the video too!
I seamed the top left (turn your sleeve inside out first) Note how I folded down the collar a bit to give it a more natural neck hole:
Then, I seamed the top right:
When you are finished seaming, you’ll have the basic cardigan…it really comes together like magic!!
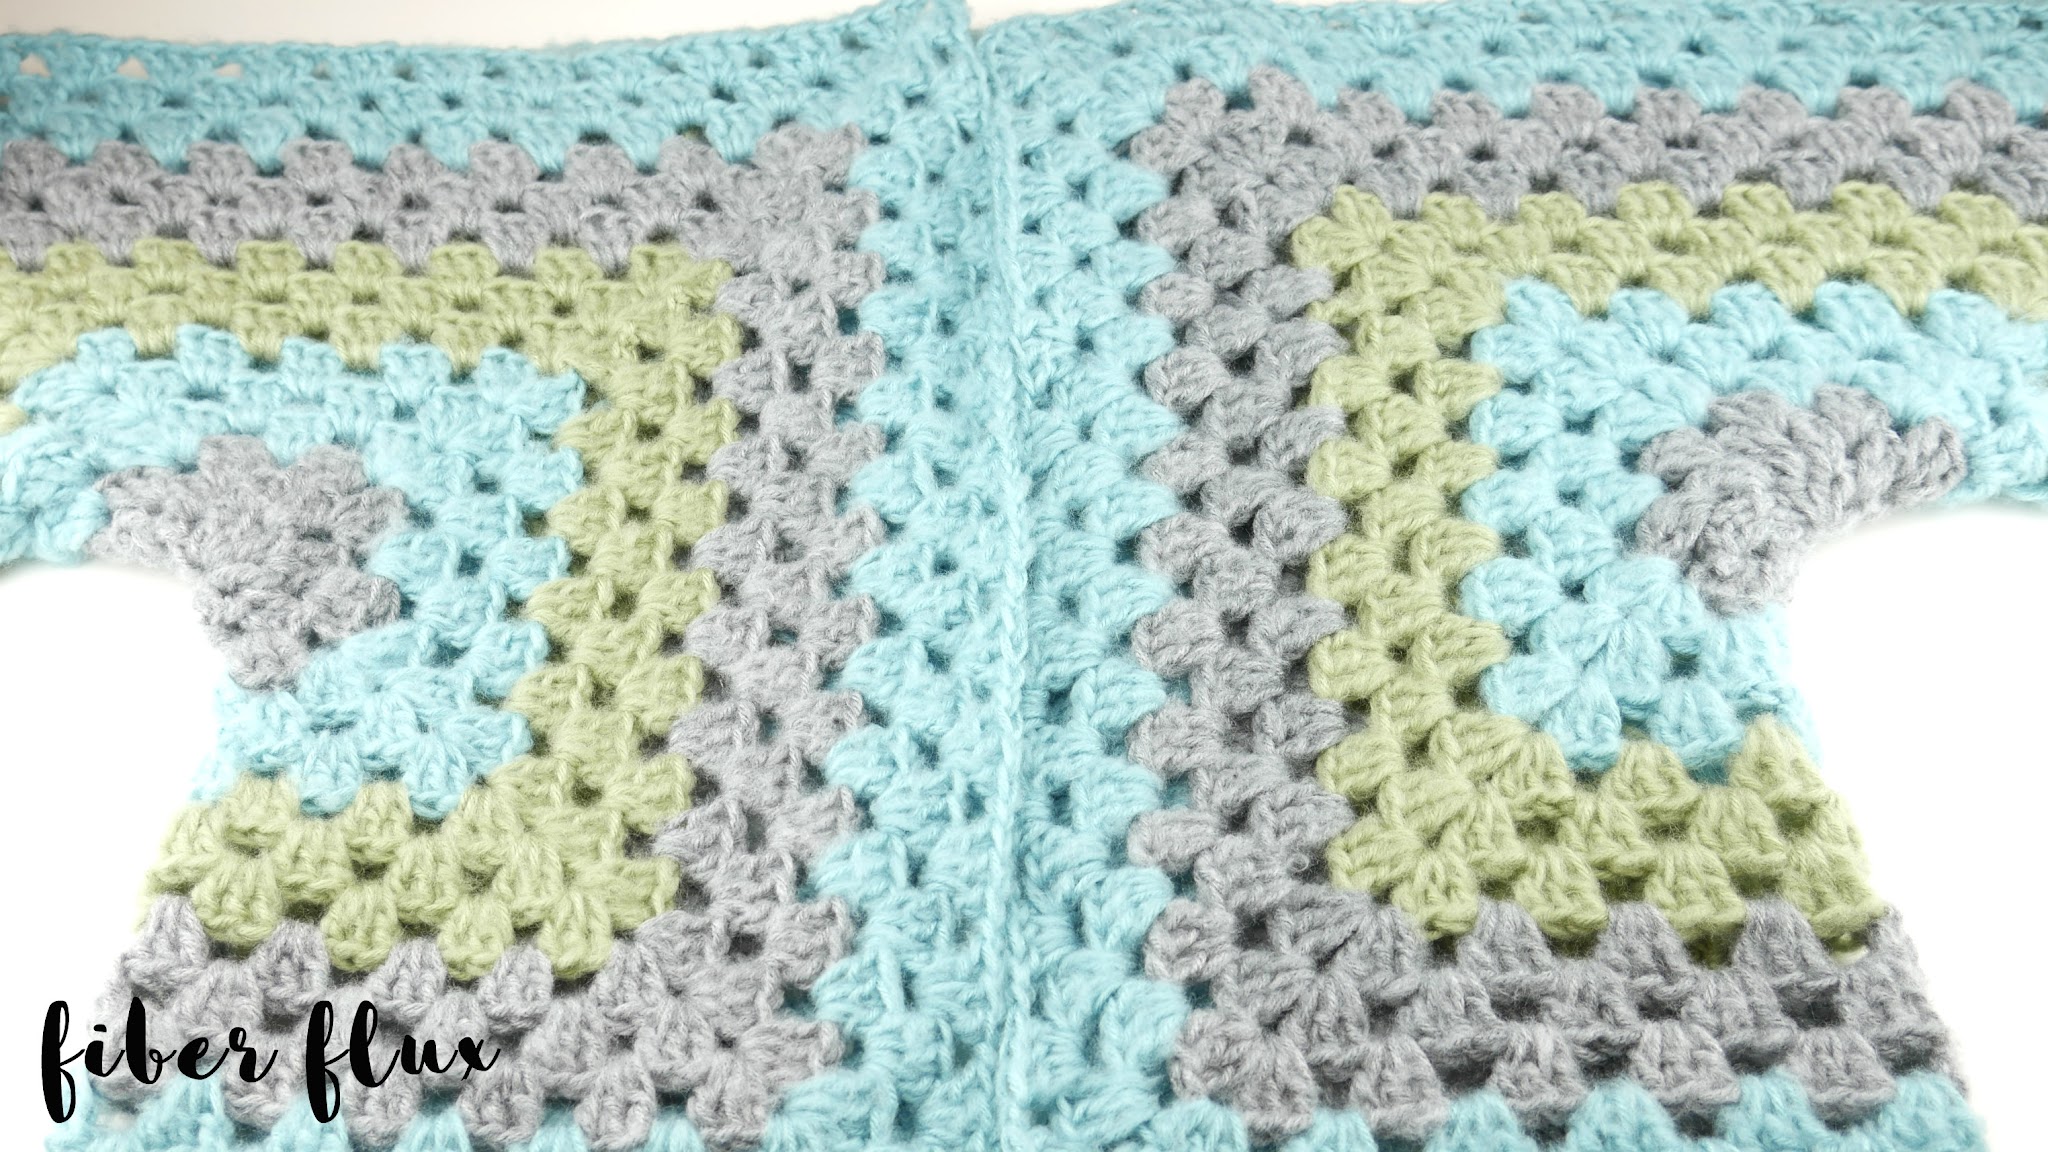
If you choose, you can wear it just like it is, or you can follow next week’s tutorial to lengthen the sleeves and bottom of the sweater. Make it waist length, knee length, or even floor length if you choose!

Here’s our CAL schedule below for easy reference:
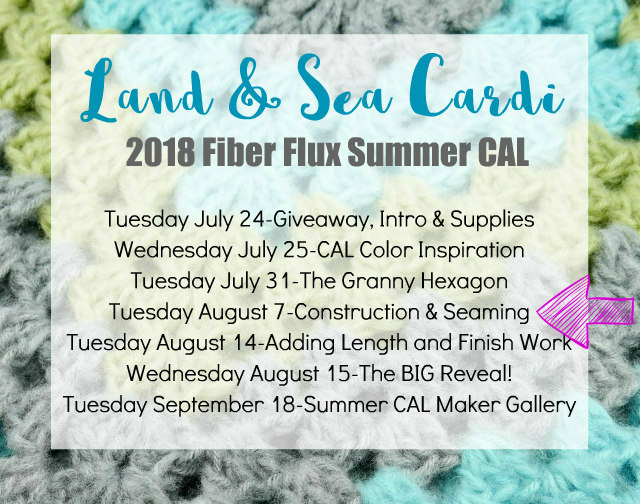
Tuesday July 24: Introduction to the CAL, GIVEAWAY, the project, yarn, and supplies needed.Tuesday July 31 (that’s today!): Giveaway winner announced & the granny hexagon tutorial- Tuesday August 7 (that’s today!): Construction & Seaming
- Tuesday August 14: Adding Length & Finish Work
- Wednesday August 15: The BIG CAL reveal!
- Tuesday September 18: Today is Spring CAL Maker Gallery Day! Check it out to see all of the gorgeous projects from the Fiber Flux community!
Let’s connect! You can connect at any of the social media outlets below, be sure to use the tag #fiberfluxcal for your photos.


Also, we have a special group for us on Ravelry, the “Fiber Flux CAL Group” There is a welcome area, so please hop on and introduce yourself. You can get info, ask questions, help each other, see what everyone is doing, and show off your work too!

Click HERE to visit and join the group!
That’s all for today lovelies! See you next week for the lengthening of the cardigan + some finish work too…happy crocheting!
© Jennifer Dickerson 2018
For more fun projects and pretty patterns, be sure to follow Fiber Flux on Google+, Facebook, Twitter, and Pinterest for the latest updates!
Visit the Fiber Flux Yarn Shop…lovely yarn & great prices!


 (Affiliate links, enjoy these awesome products and thanks as always for your support!)
© Jennifer Dickerson 2018
For more fun projects and pretty patterns, be sure to follow Fiber Flux on Google+, Facebook, Twitter, and Pinterest for the latest updates!
Visit the Fiber Flux Yarn Shop…lovely yarn & great prices!
(Affiliate links, enjoy these awesome products and thanks as always for your support!)


This looks so easy! I assume the same concept will work for a toddler or child’s cardigan?
I am leaving a comment about the KnitCrate giveaway, I like the gray colorway it is beautiful.
i love your patterns they are easy to follow and your tutorials are also easy to follow weather you are a seasoned crocheter or new to the craft you never stop learning thank you for your time and teachings