
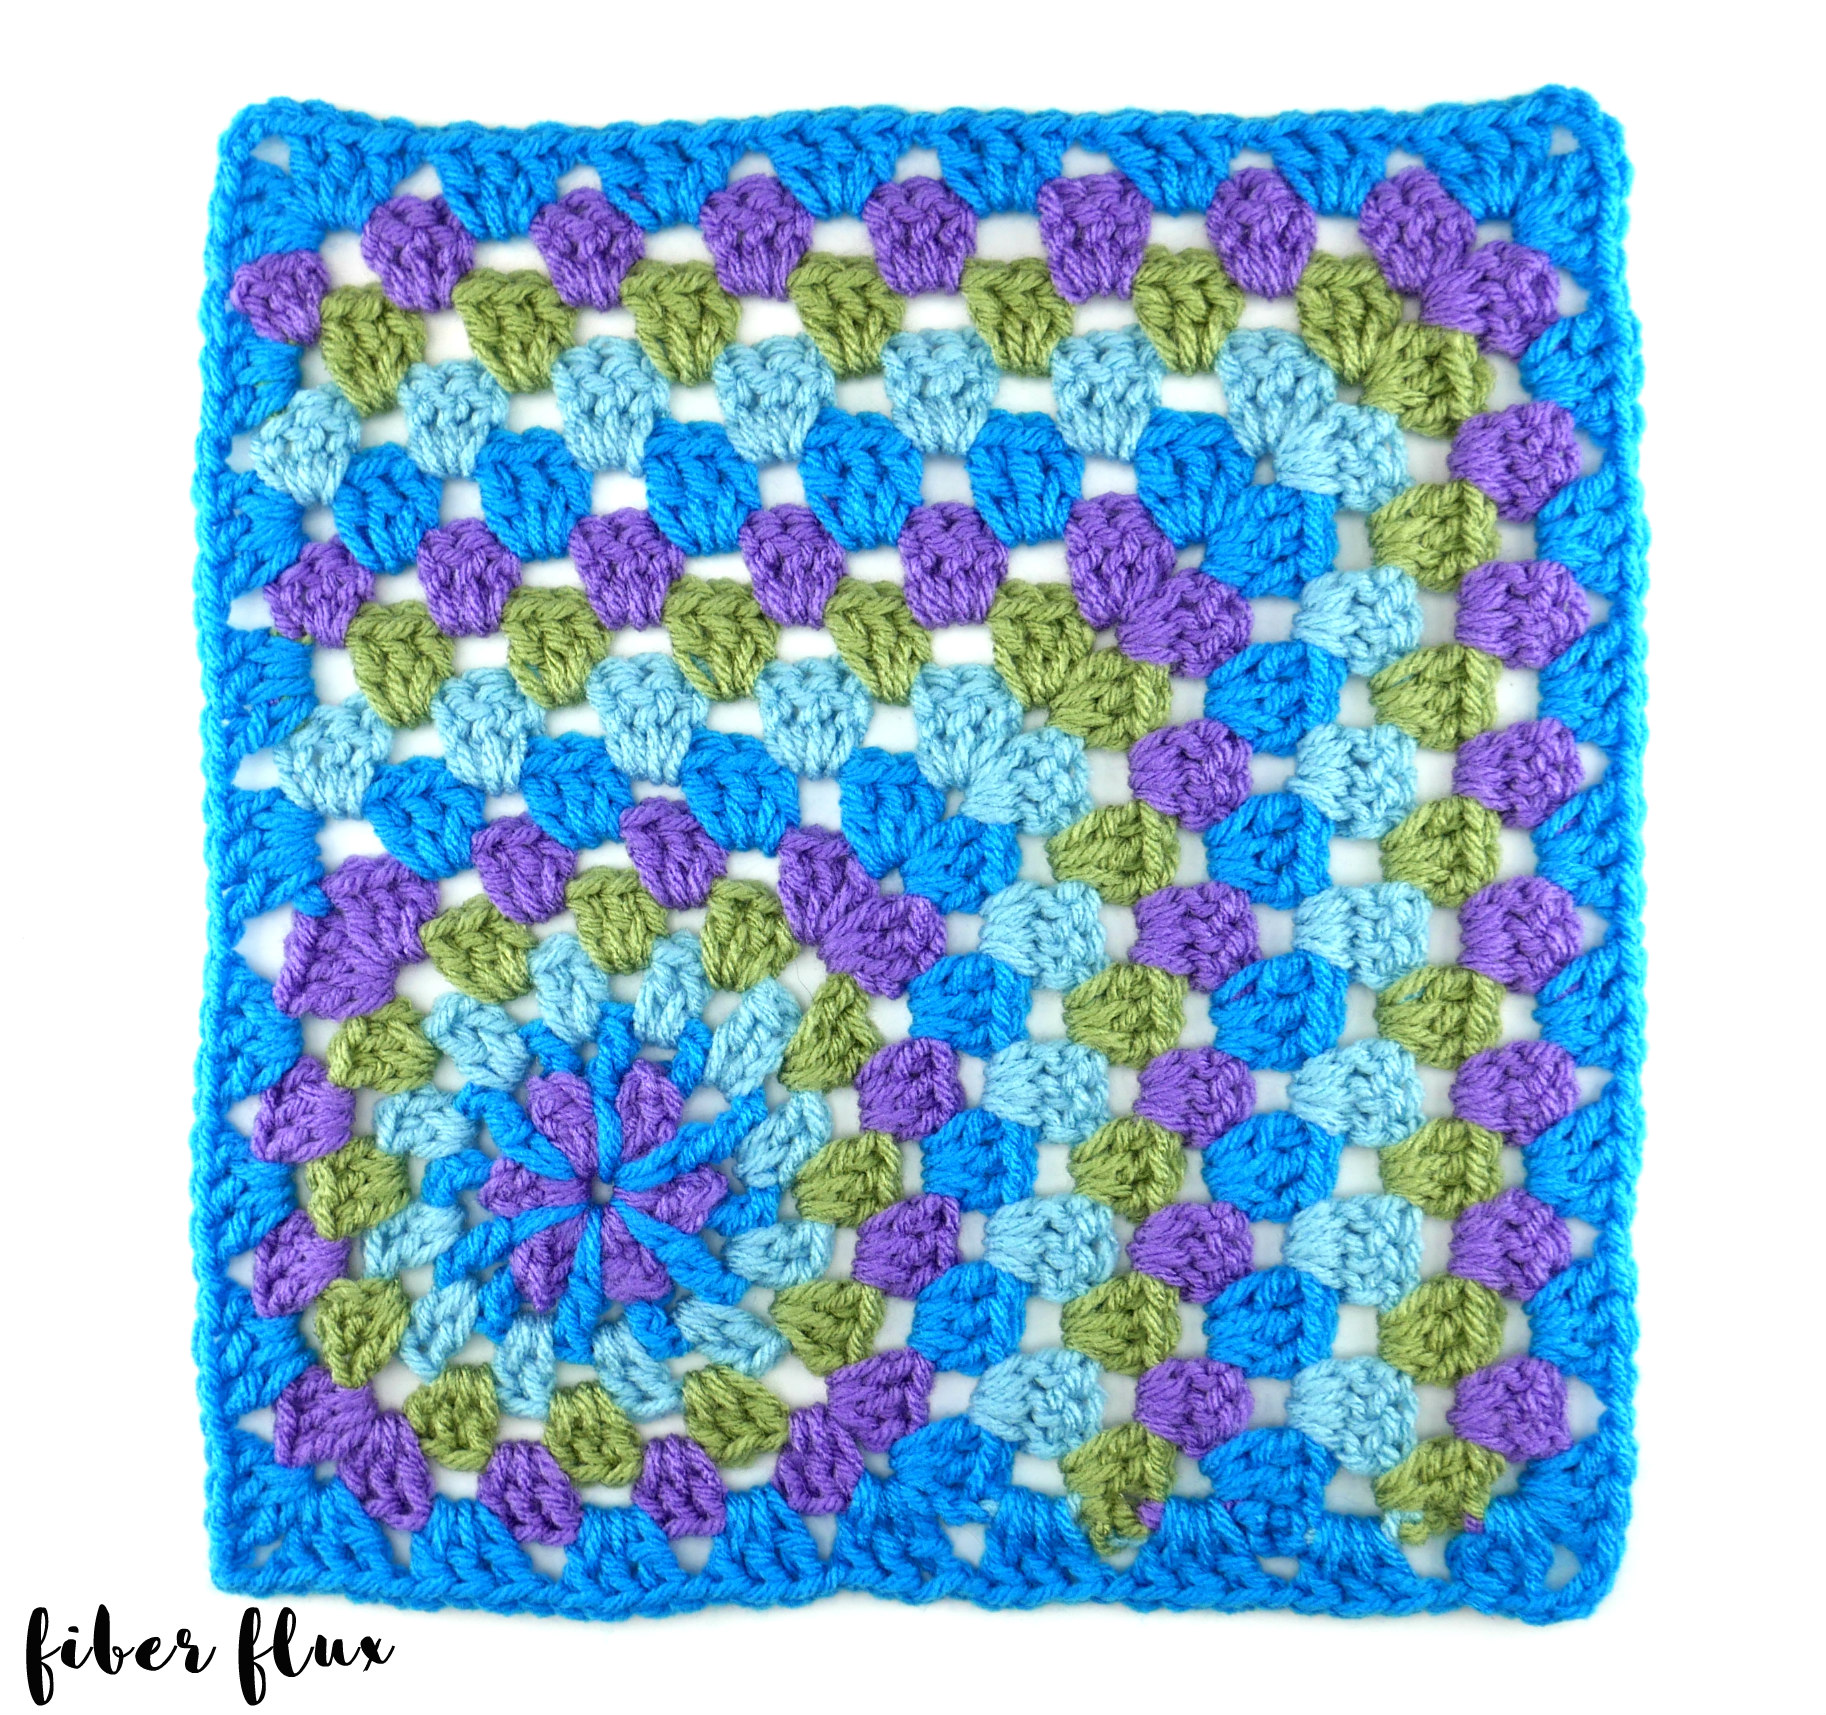
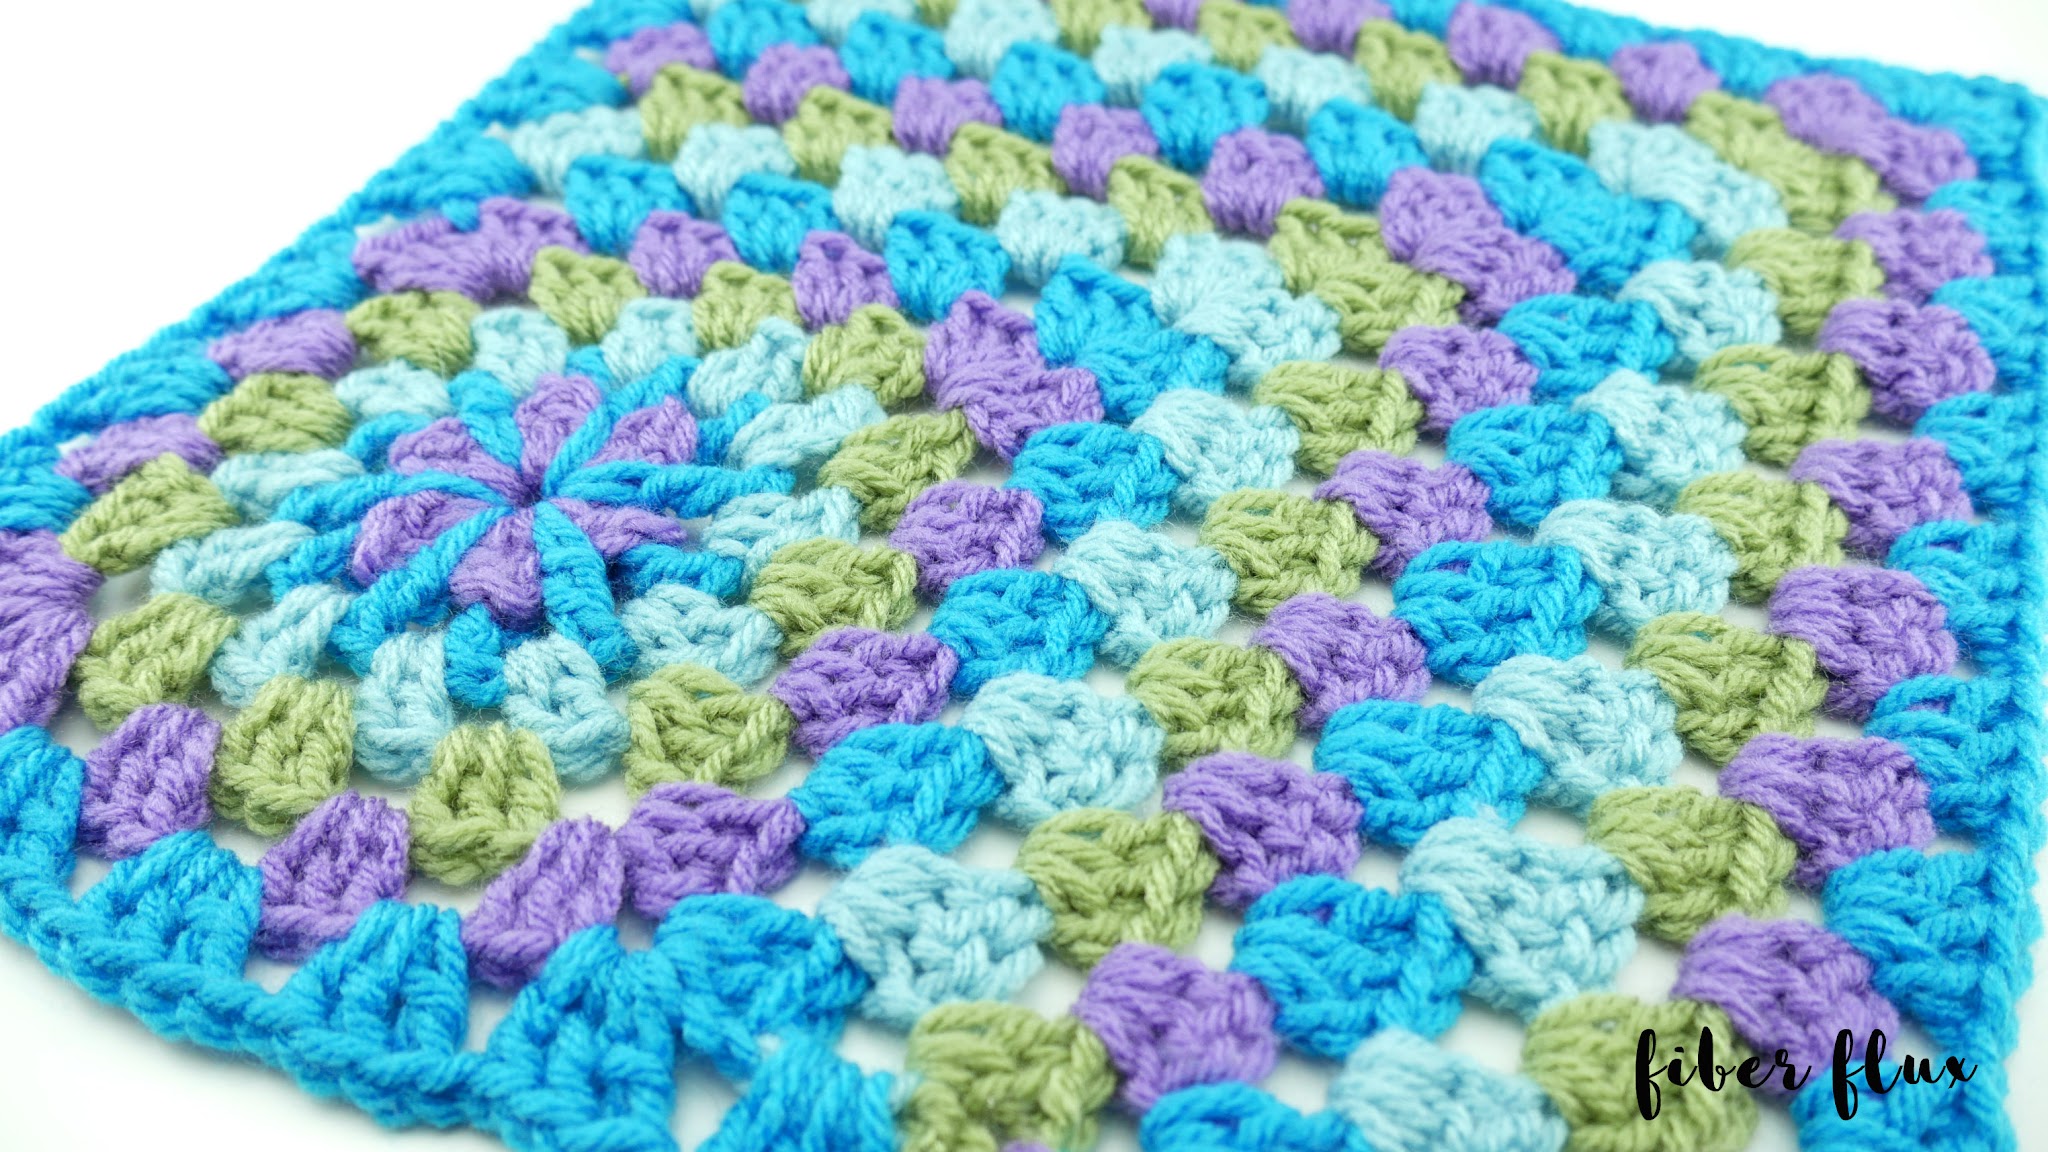
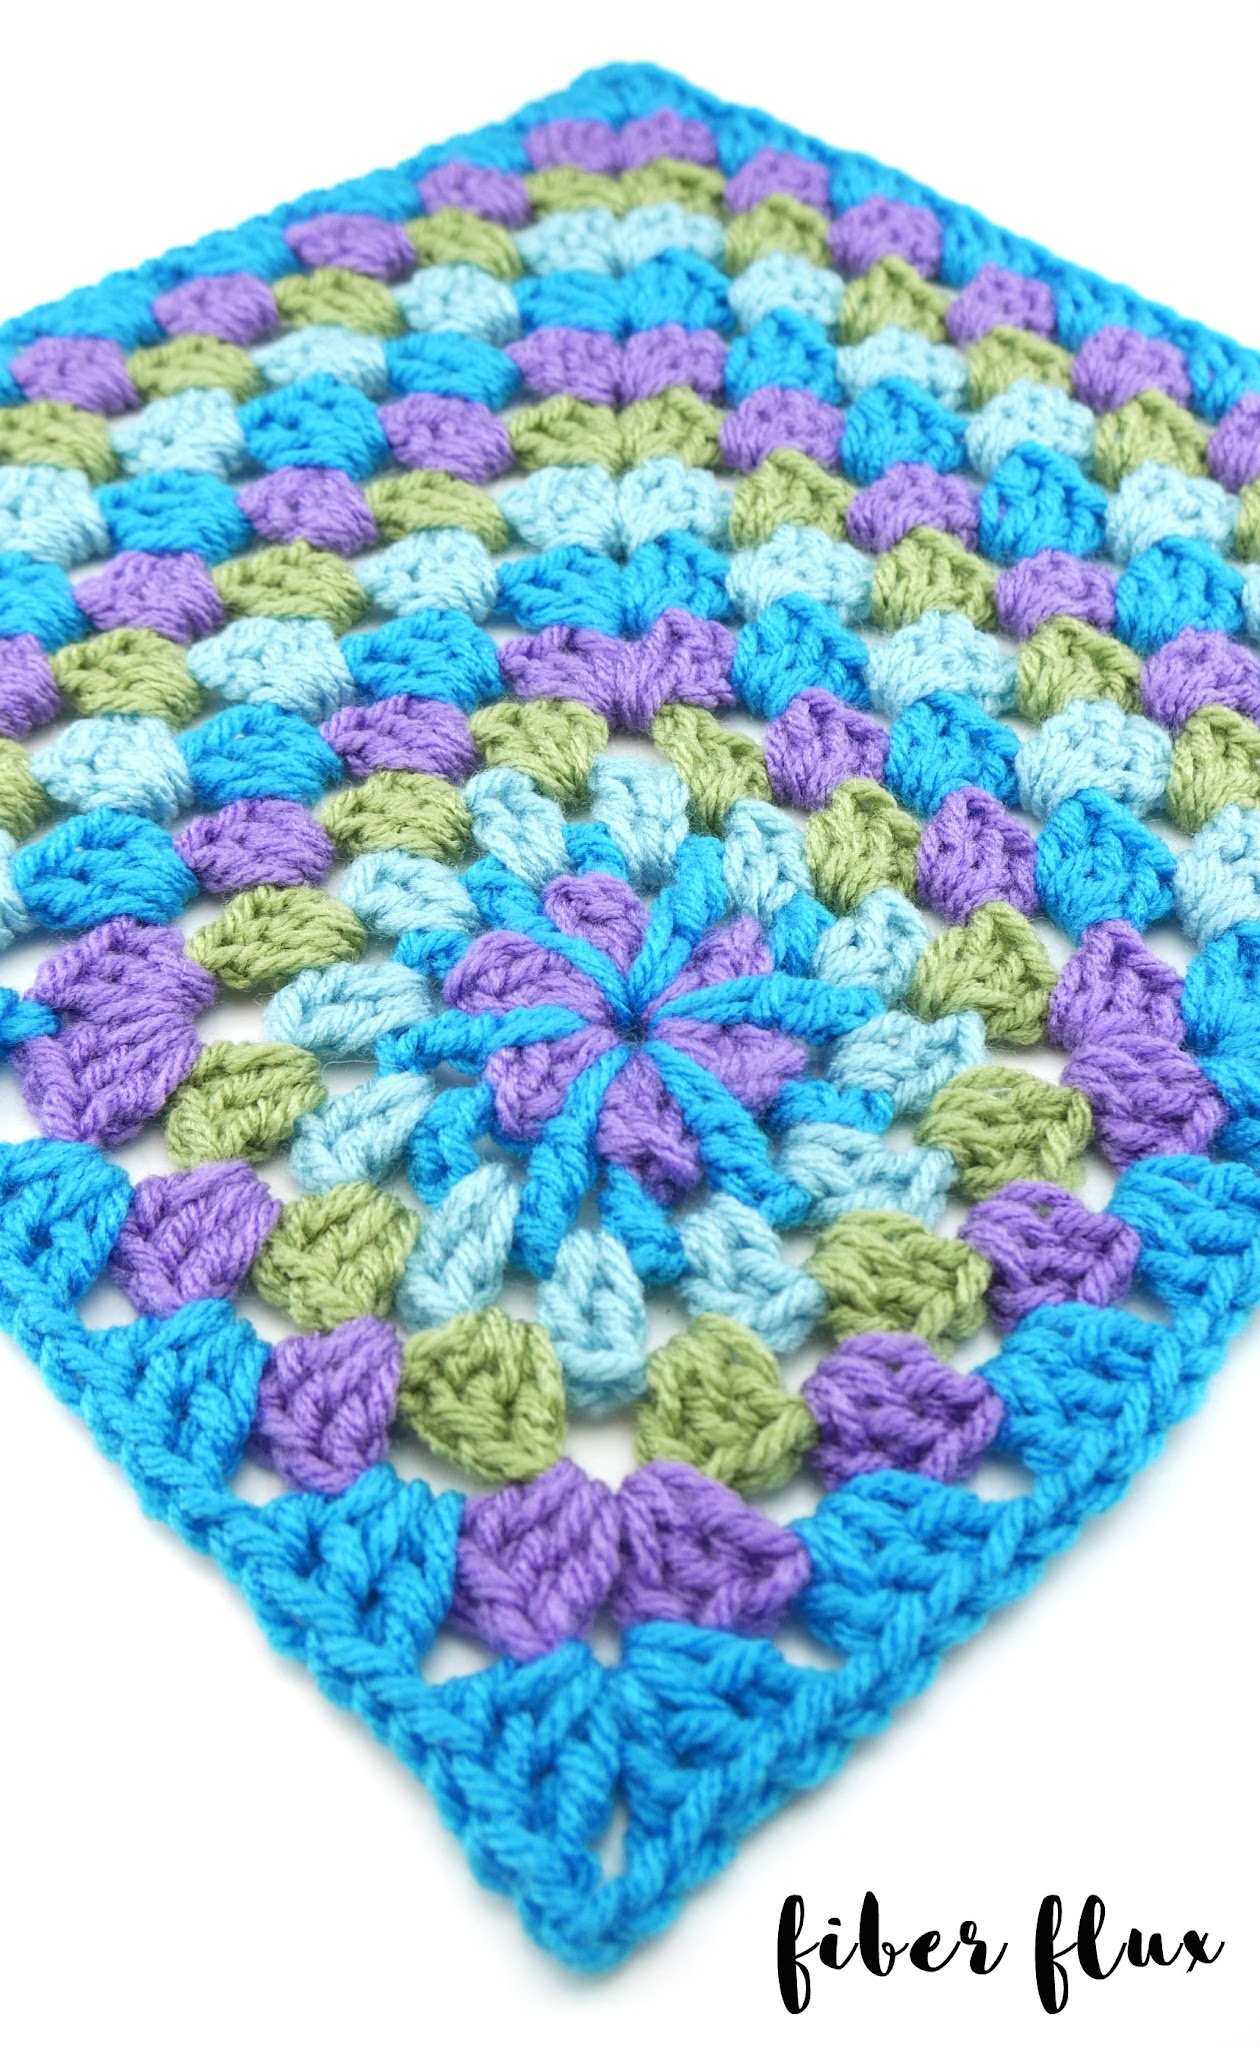
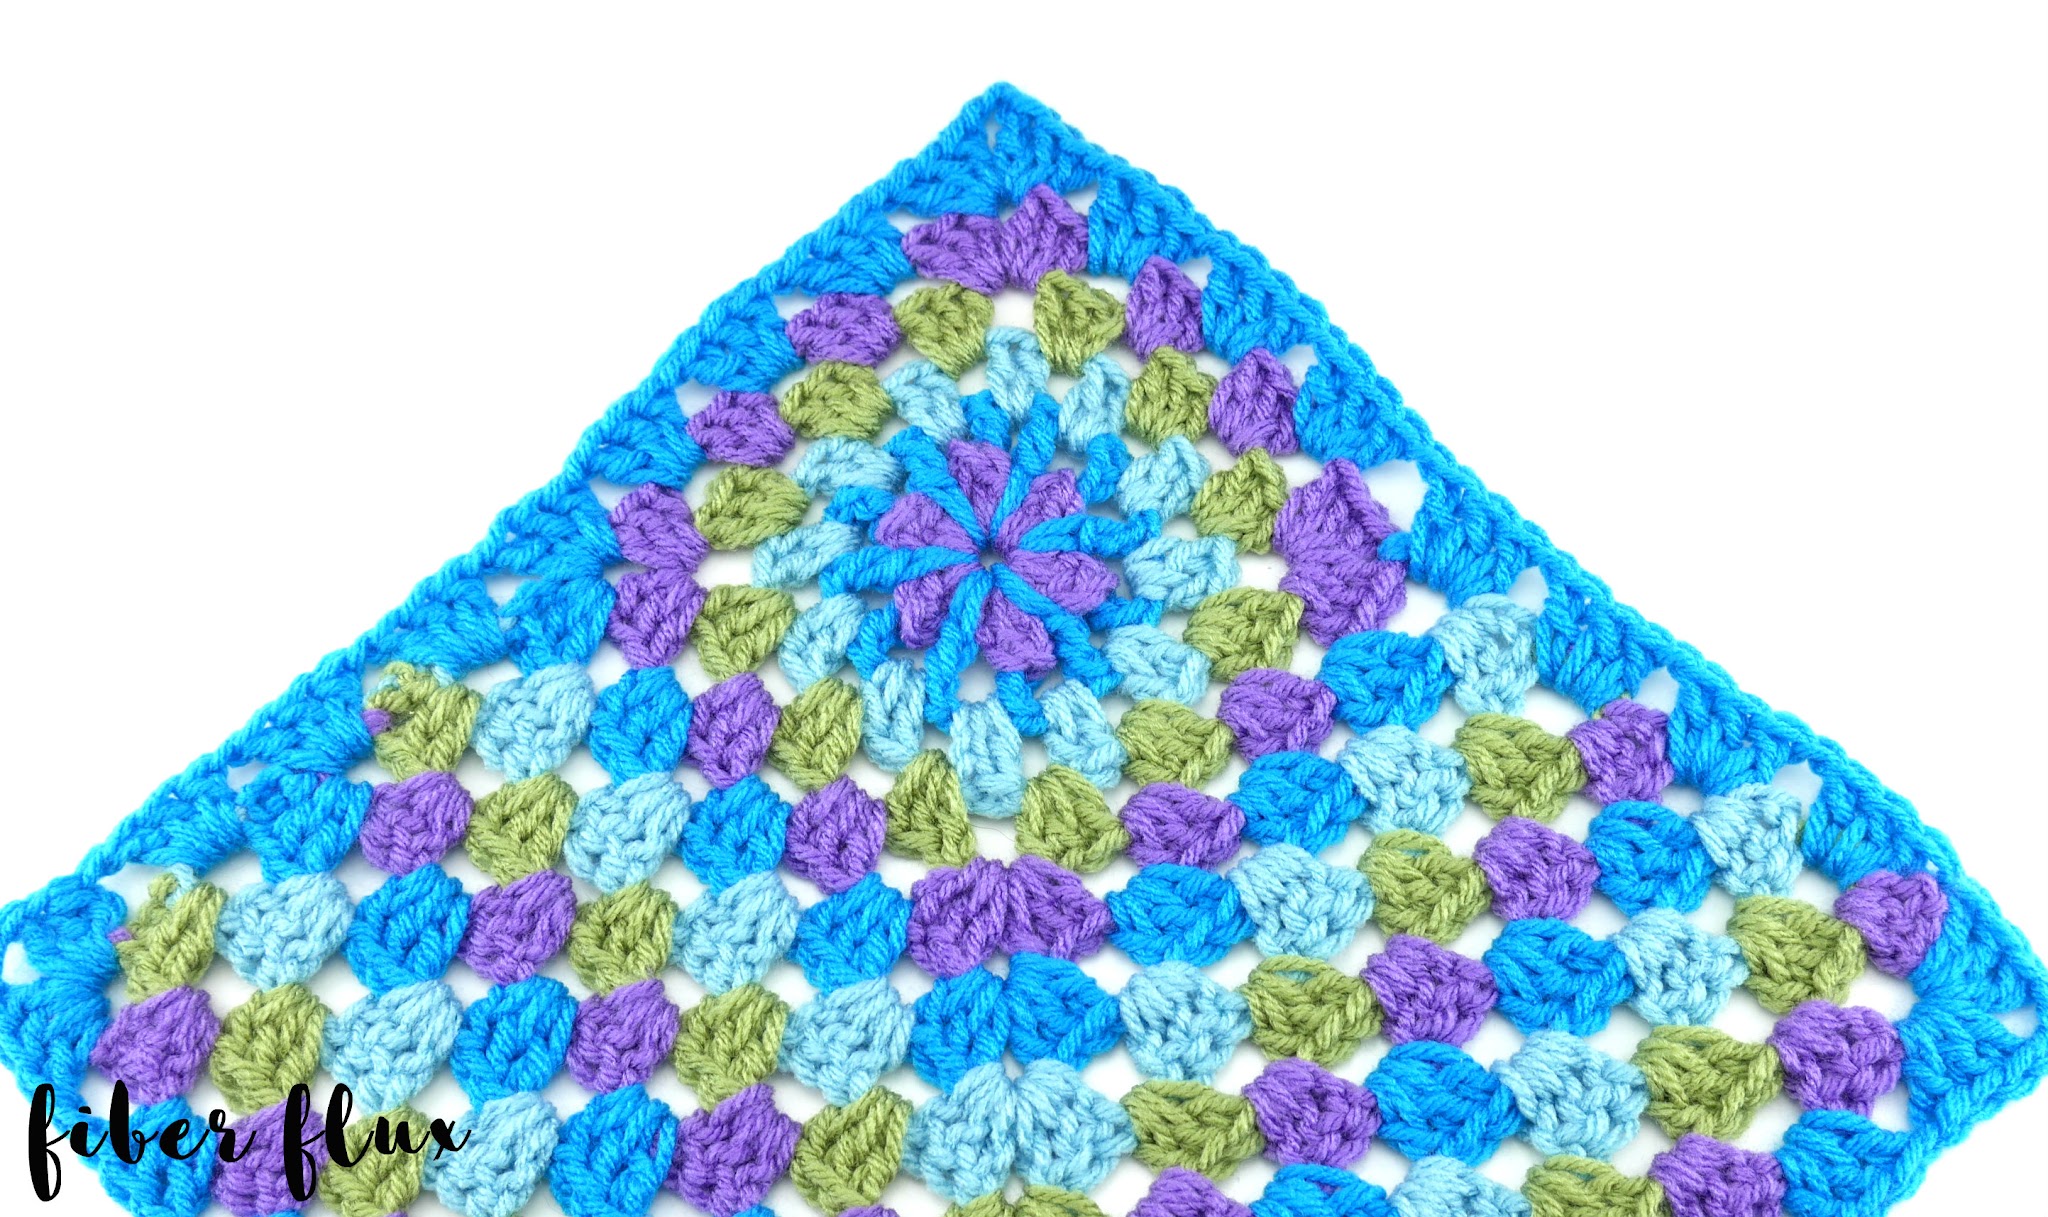
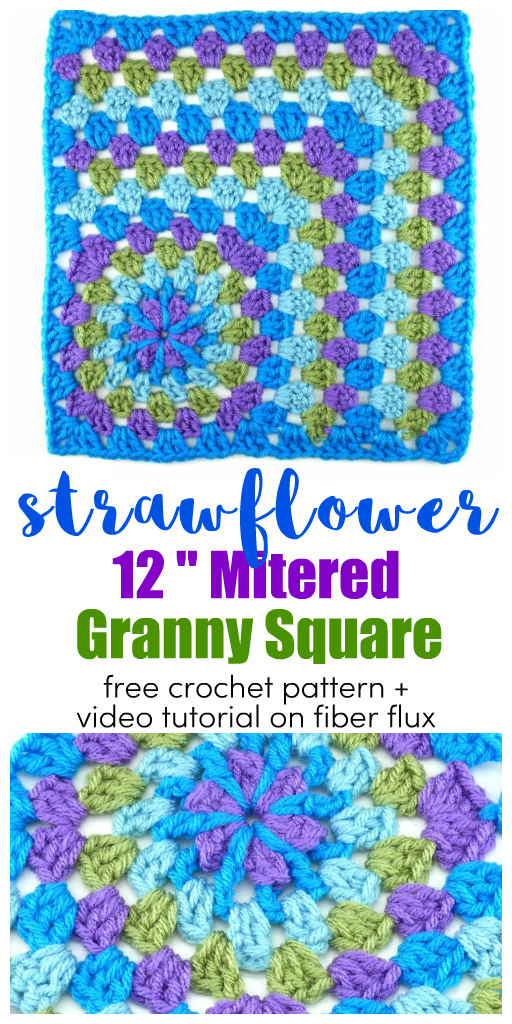
The Strawflower 12″ Granny Mitered Square is a fun square that takes a classic granny and adds two twists, an off-center miter and a pretty flower in its center. This is quick to stitch up and super fun to play around with colors too!
A couple of you have been requesting more variations on my Strawflower Hexagon Motif, I thought the mitered square would be a fun one! Love those requests…keep ’em coming!
Need a little extra help? There’s a full video tutorial too!
Let’s connect!


Like the Strawflower center of this square? Check out my other Strawflower Motif Projects!
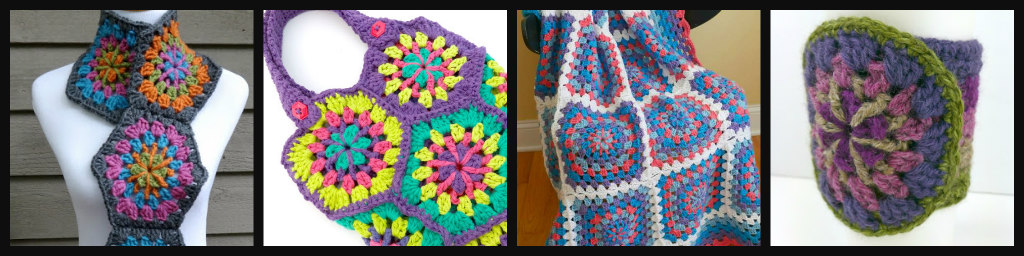
From Left to Right:
- Strawflower Hexagon Scarf
- Strawflower Hexagon Tote
- Tropical Getaway Blanket
- Strawflower Medallion Cup Cozy
Click below to watch the full video tutorial:
Click the button below to add this project to your Ravelry queue:

Tutorial Links:
Materials:
- Red Heart With Love (For the photos in this post, I used odds and ends of “Lettuce” “Aqua” “Blue Hawaii” and “Lilac.” In the video I used “Lettuce” “Aqua” and “Lilac”
- 6.0 mm J crochet hook
- Tapestry needle
- Scissors
Get yarn for this project here!
(Affiliate link)
Sizing:
- 12 inches square
Instructions:
Note: I used one color per round, but feel free to mix it up!
Ch 4, join with a sl st in the furthest ch from hook to form ring.
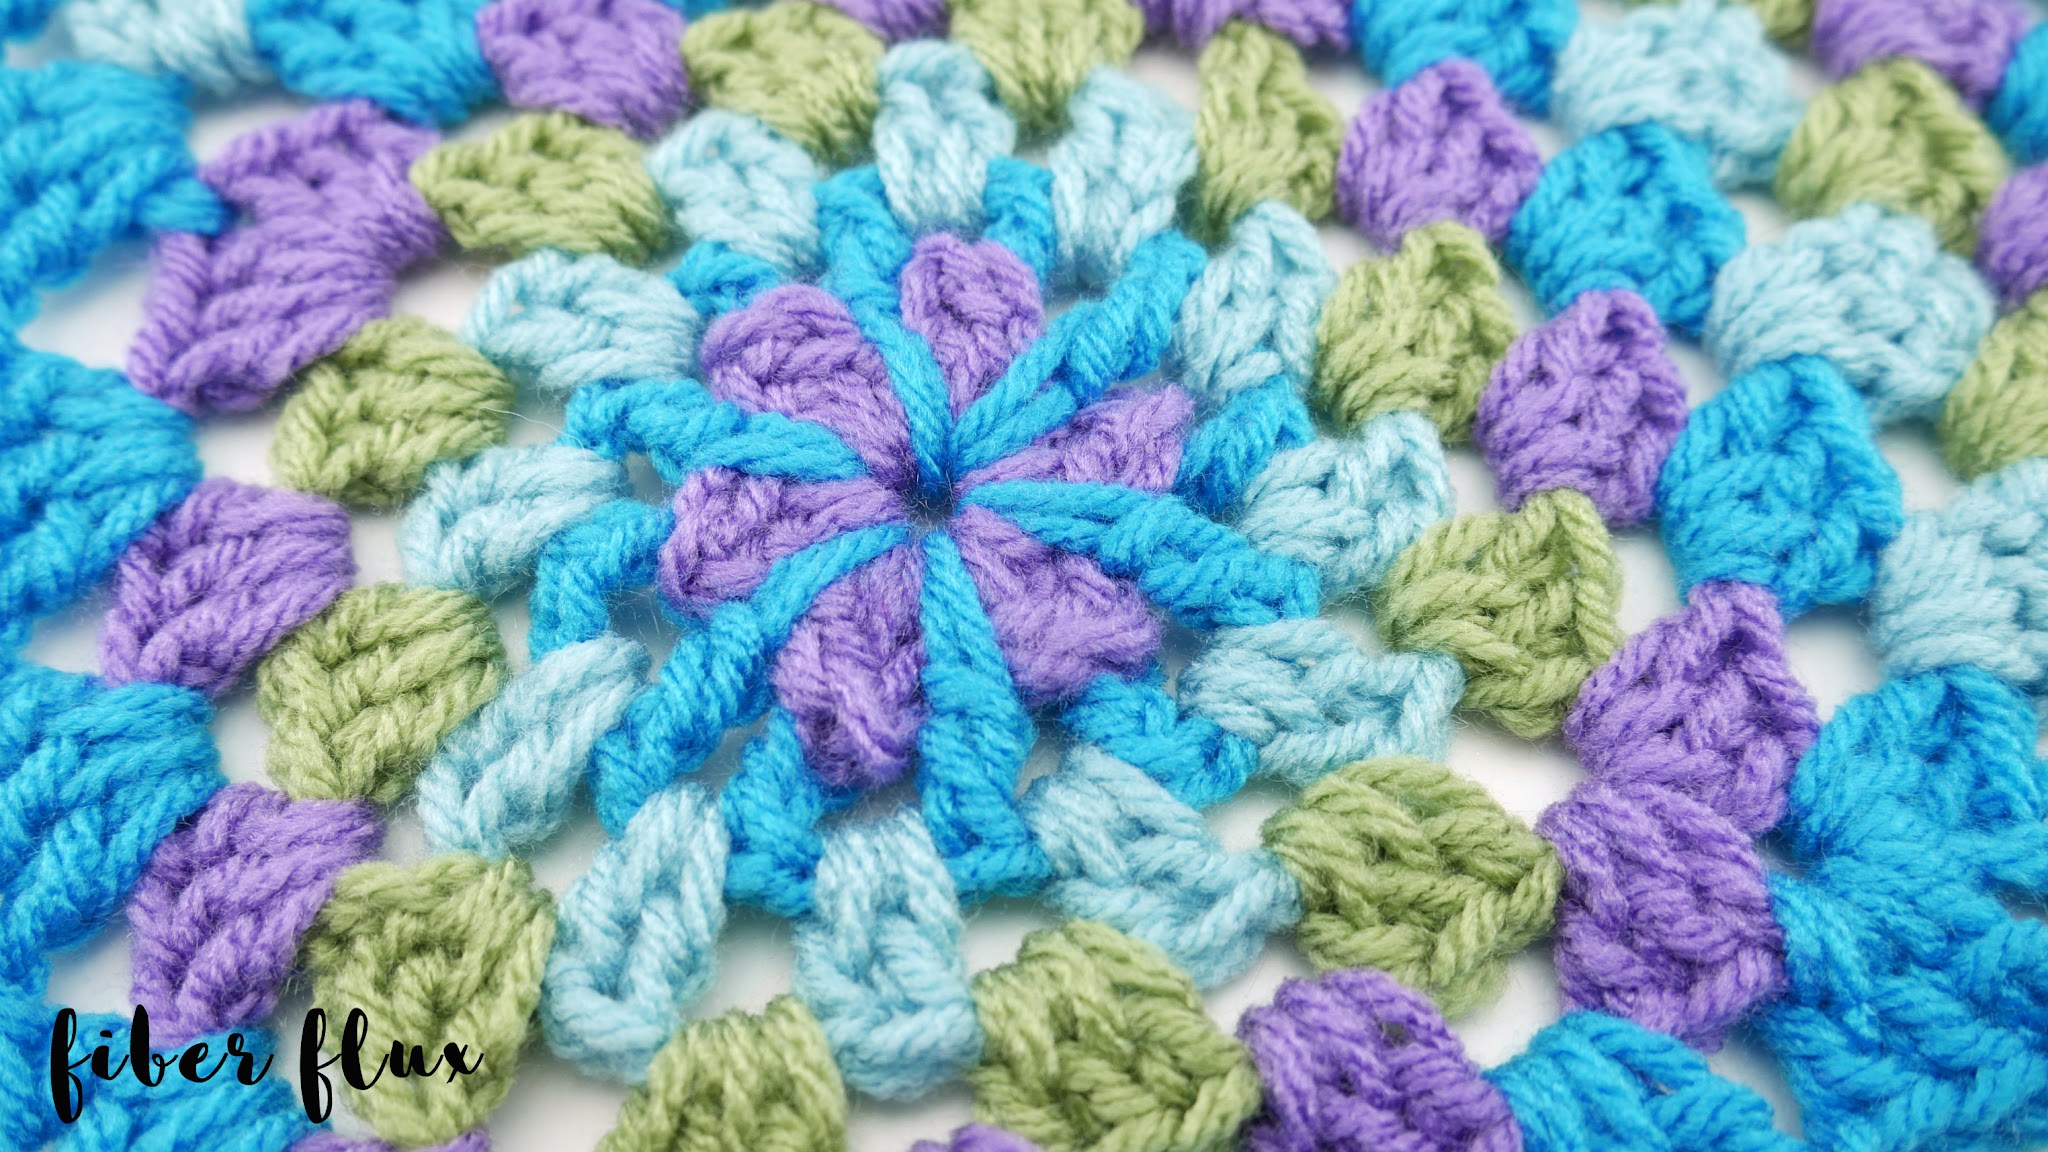
Round 1: ch 3, then work 2 dc, then a sl st into the center of the ring. Work *(3 dc, sl st) five times for a total of 6 petals. Join with a sl st to close round.
Round 2: Tie on new color onto the back loops at the top of one of the petals. Insert your hook (same place at the top of petal) as if to work a back post stitch and ch 3 (working it this way will make the chain look more consistent with the other stitches). Ch 1, then in the next space (in between petals) work a tr into the center of the ring. Ch 1, then work a bpdc into the center most dc of the next petal. Continue in this manner around the circle, working a tr, ch 1 into the center of the ring (in between petals), then a bpdc, ch 1 in center dc of each petal. Join to close round with a sl st.
Round 3: Tie on a new color into any space and ch 3. In the same space, work a dc, ch 1. Work 2 dc, ch 1 in each space around. Join to close round with a sl st.
Round 4: Tie on a new color into any space and ch 3. In the same space, work a 2 dc, ch 1. Work 3 dc, ch 1 in each space around. Join to close round with a sl st.
Round 5: Tie on a new color into any space and ch 3. In the same space, work (2 dc, ch 3, 3 dc, ch 1) (this will create first corner of the square). In the next space, work 3 dc, ch 1 (this will create the first side of the square. In the next space, (work 3 dc, ch 1) to make the next side. In the next corner, work 3 dc, ch 3, 3 dc, ch 1). Continue in this manner, working corner, side, side, corner, side, side, etc. Join to close round with a sl st.
***This is the part where we transform the traditional square into the mitered square. So far we’ve worked rounds, for the mitered part we’ll work rows, then back to one last round around the whole thing for the last round.
Row 6: Tie new yarn into any corner space and ch 3. In the same corner space work (2 dc, ch 1). Work (3 dc, ch 1) in each ch 1 space until you reach the corner. Work 3 dc, ch 3, 3 dc, ch 1) in the corner, then work (3 dc , ch 1) down the next side. At the end of the row, work a dc into the corner space.
Row 7-13: Tie new yarn into last stitch worked and ch 3. Turn. Work (2 dc, ch 1) into the first ch 1 space. Work (3 dc, ch 1) in each ch 1 space until you reach the corner. Work (3 dc, ch 3, 3 dc, ch 1) in the corner, then work (3 dc, ch 1) down the next side. At the end of the row, work a dc in the top of the turning chain.
Now for the last round to frame it all in. This one is worked as a round. You’ll be working into spaces like you did perviously, but also working into side spaces as well.
Round 14: Tie new yarn into the turning chain space between the two rows at the beginning of the previous row (the space that the turning chain from the previous row created). Ch 3, then work (2 dc, ch 3, 3 dc, ch1 ) to make first corner. Work (3 dc, ch 1) in each ch 1 space over to the next corner. In the last ch 1 space of the row (this is located between the last 3 dc cluster and the turning chain), work (3 dc, ch 3, 3dc, ch1). Next, work (3 dc, ch 1) down the next side (the first half will be side spaces–where turning chains are, but laying on their sides in between groups of 3 dc laying on their sides as well. The second half of this side the (3 dc, ch 1) will be worked into the ch 1 spaces. Work the next corner (3 dc, ch 3, 3 dc). Work the last side of the square by working (3 dc, ch 1) into each ch 1 space for the first half of the side, then into each side space. Join with a sl st to close round.
Weave in any ends that remain and you’re finished!

© Jennifer Dickerson 2018
For more fun projects and pretty patterns, be sure to follow Fiber Flux on Google+, Facebook, Twitter, and Pinterest for the latest updates!

Visit the Fiber Flux Yarn Shop…lovely yarn & great prices!


 (Affiliate links, enjoy these awesome products and thanks as always for your support!)


I love the design and am wanting to keep it.
Since you have all of the vertical ads on the left I am going to have to print your instructions in a very tiny font.
I am not happy about that.
My set up prints manly from the left of the page.