
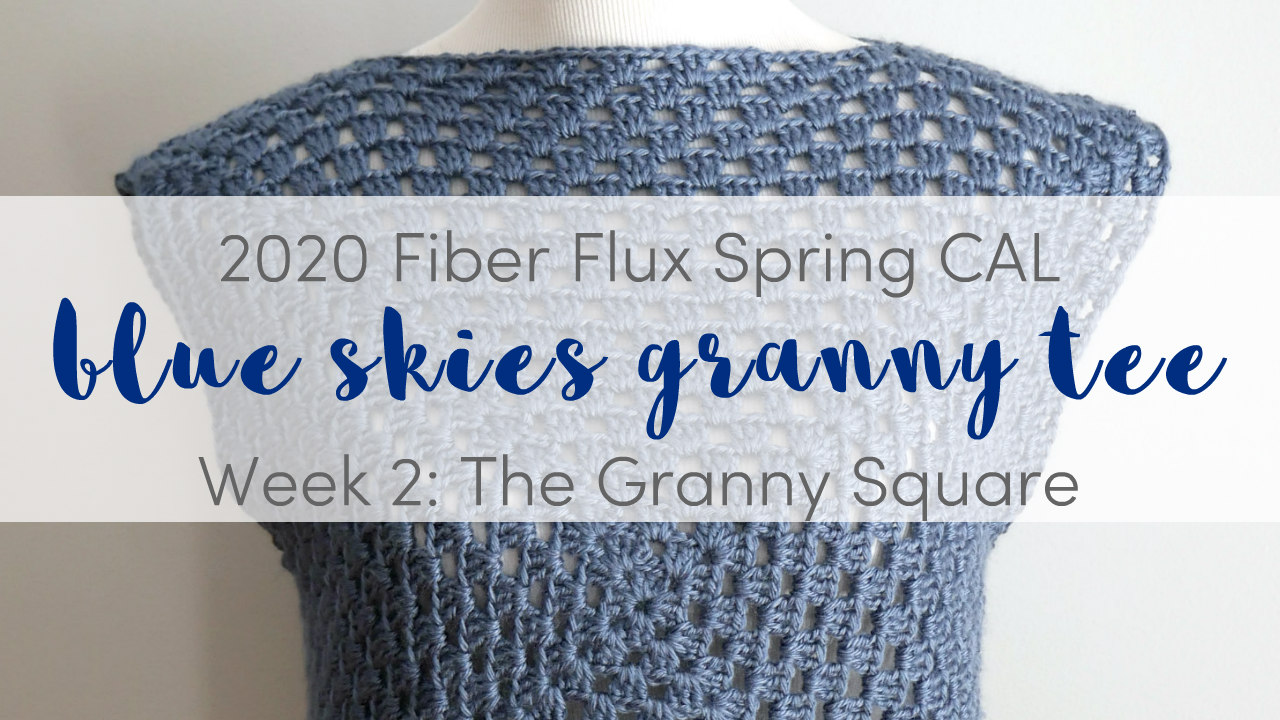
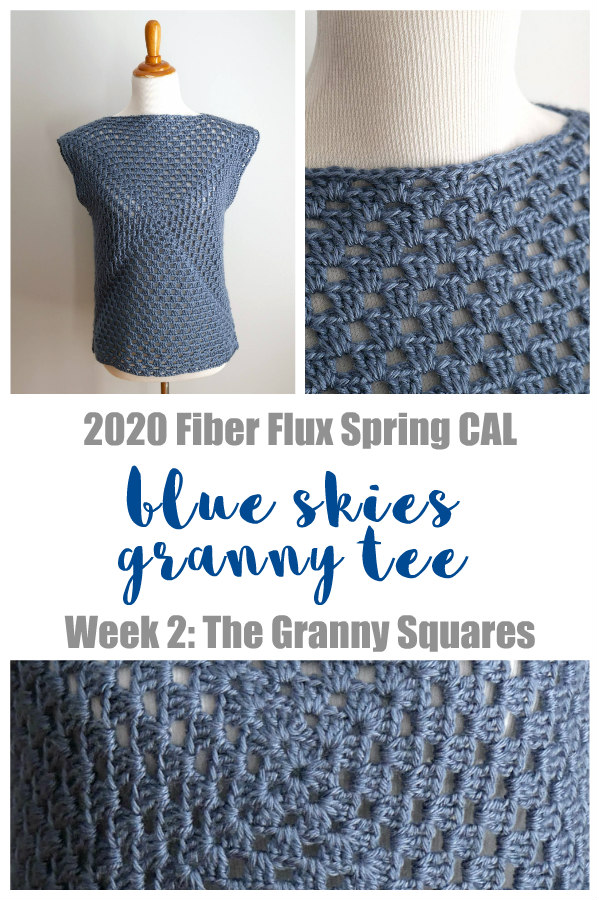
Welcome to the 2020 Fiber Flux Spring Crochet Along…hooray! Today is week 2 of the CAL and we’re working on the gorgeous Blue Skies Granny Tee! This project is a fabulous garment for the warmer months ahead!
Here’s what we’ll be doing today:
- How to crochet the granny square
- Sizing tips
- Schedule of the CAL
- Where to connect with other makers
The CAL will be divided over the next few weeks, so we’ll tackle each part bit by bit. Scroll down for the schedule with actual dates and what we’ll be doing on each day/week.
Check out this week’s video here:
*This is a self-paced project, so definitely go at the speed you feel most comfortable. The instructional videos and posts will be up forever and you will always be able to go back and watch again and again!
Missed week 1? Learn all about the project and supplies here:
Add this project to your Ravelry queue by clicking on the button below:

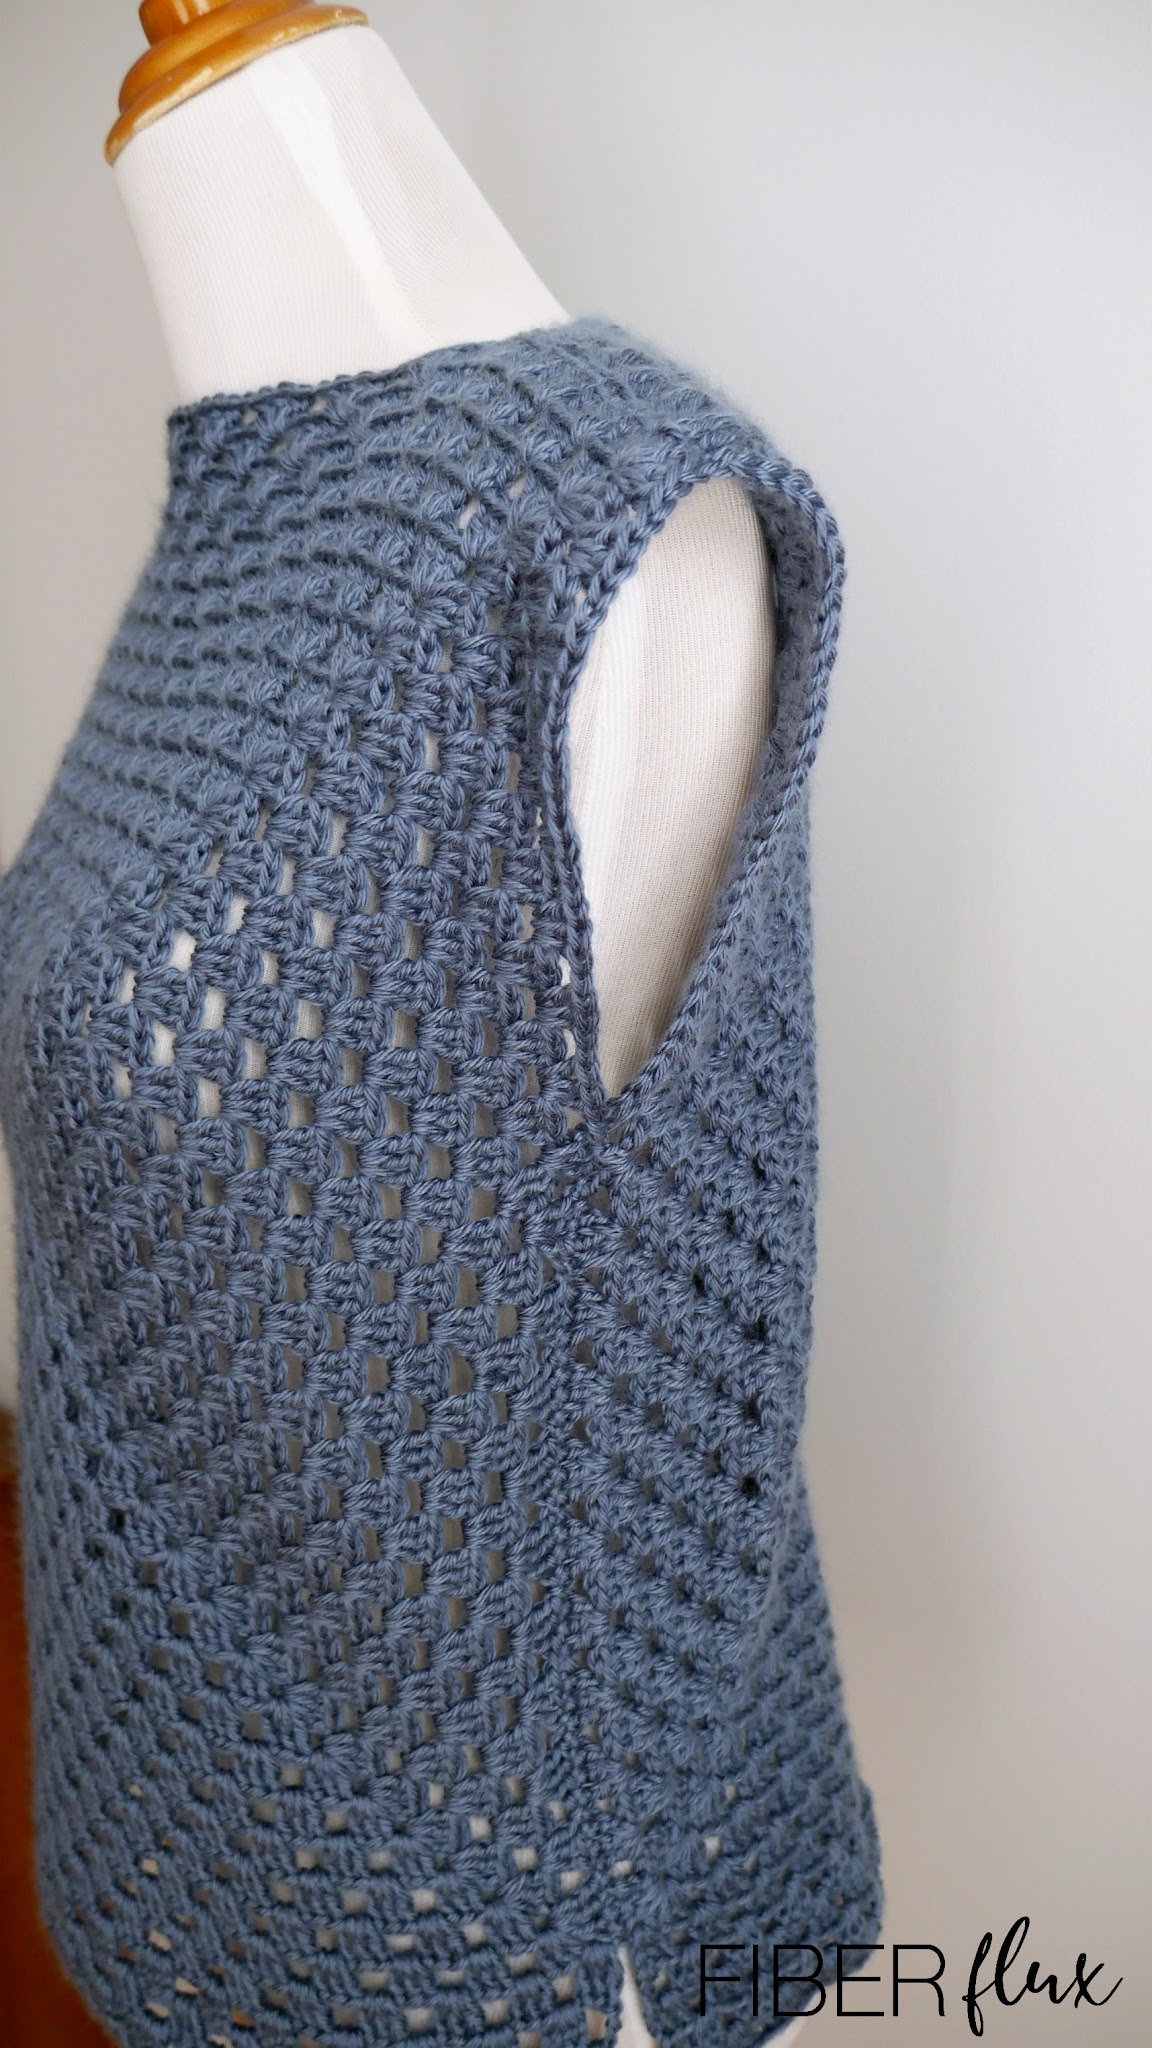
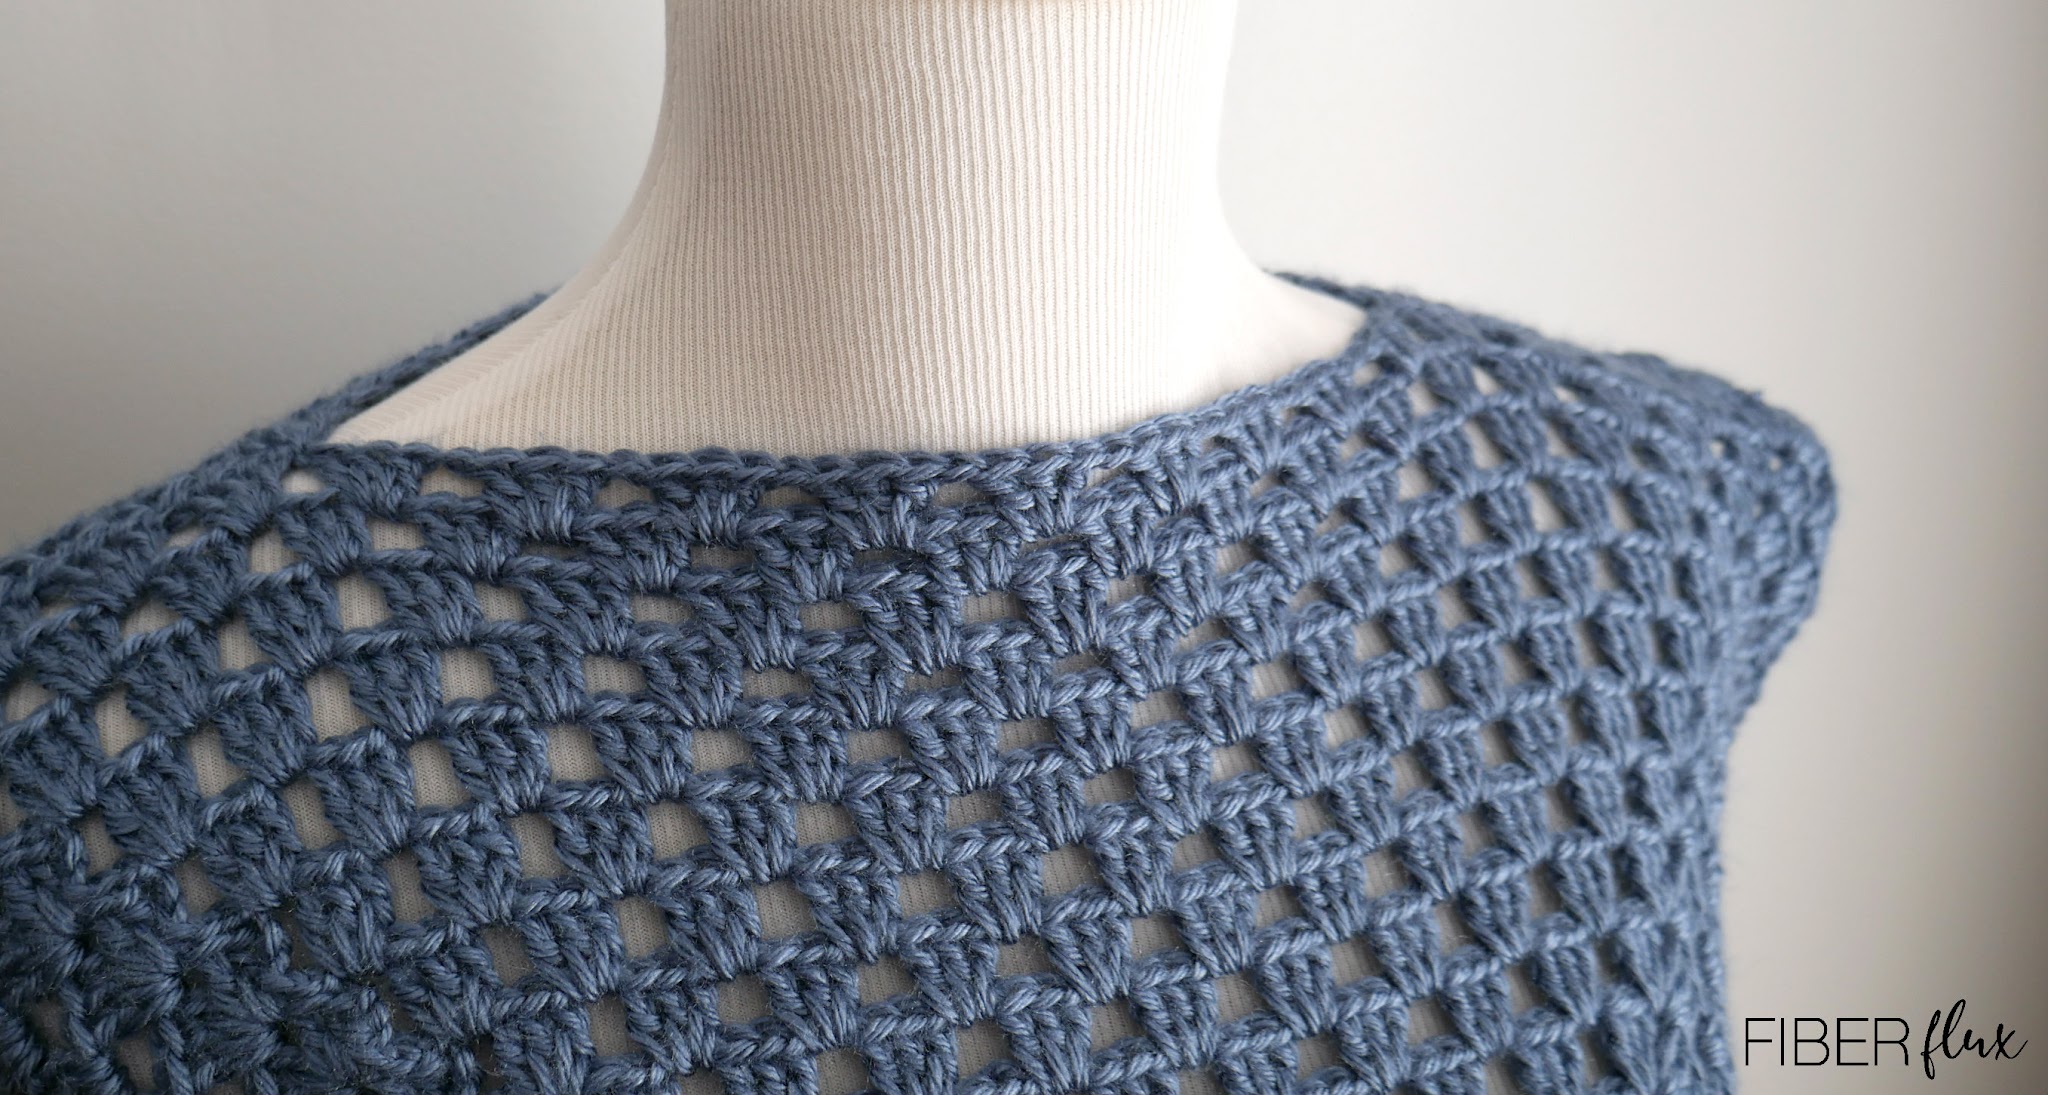
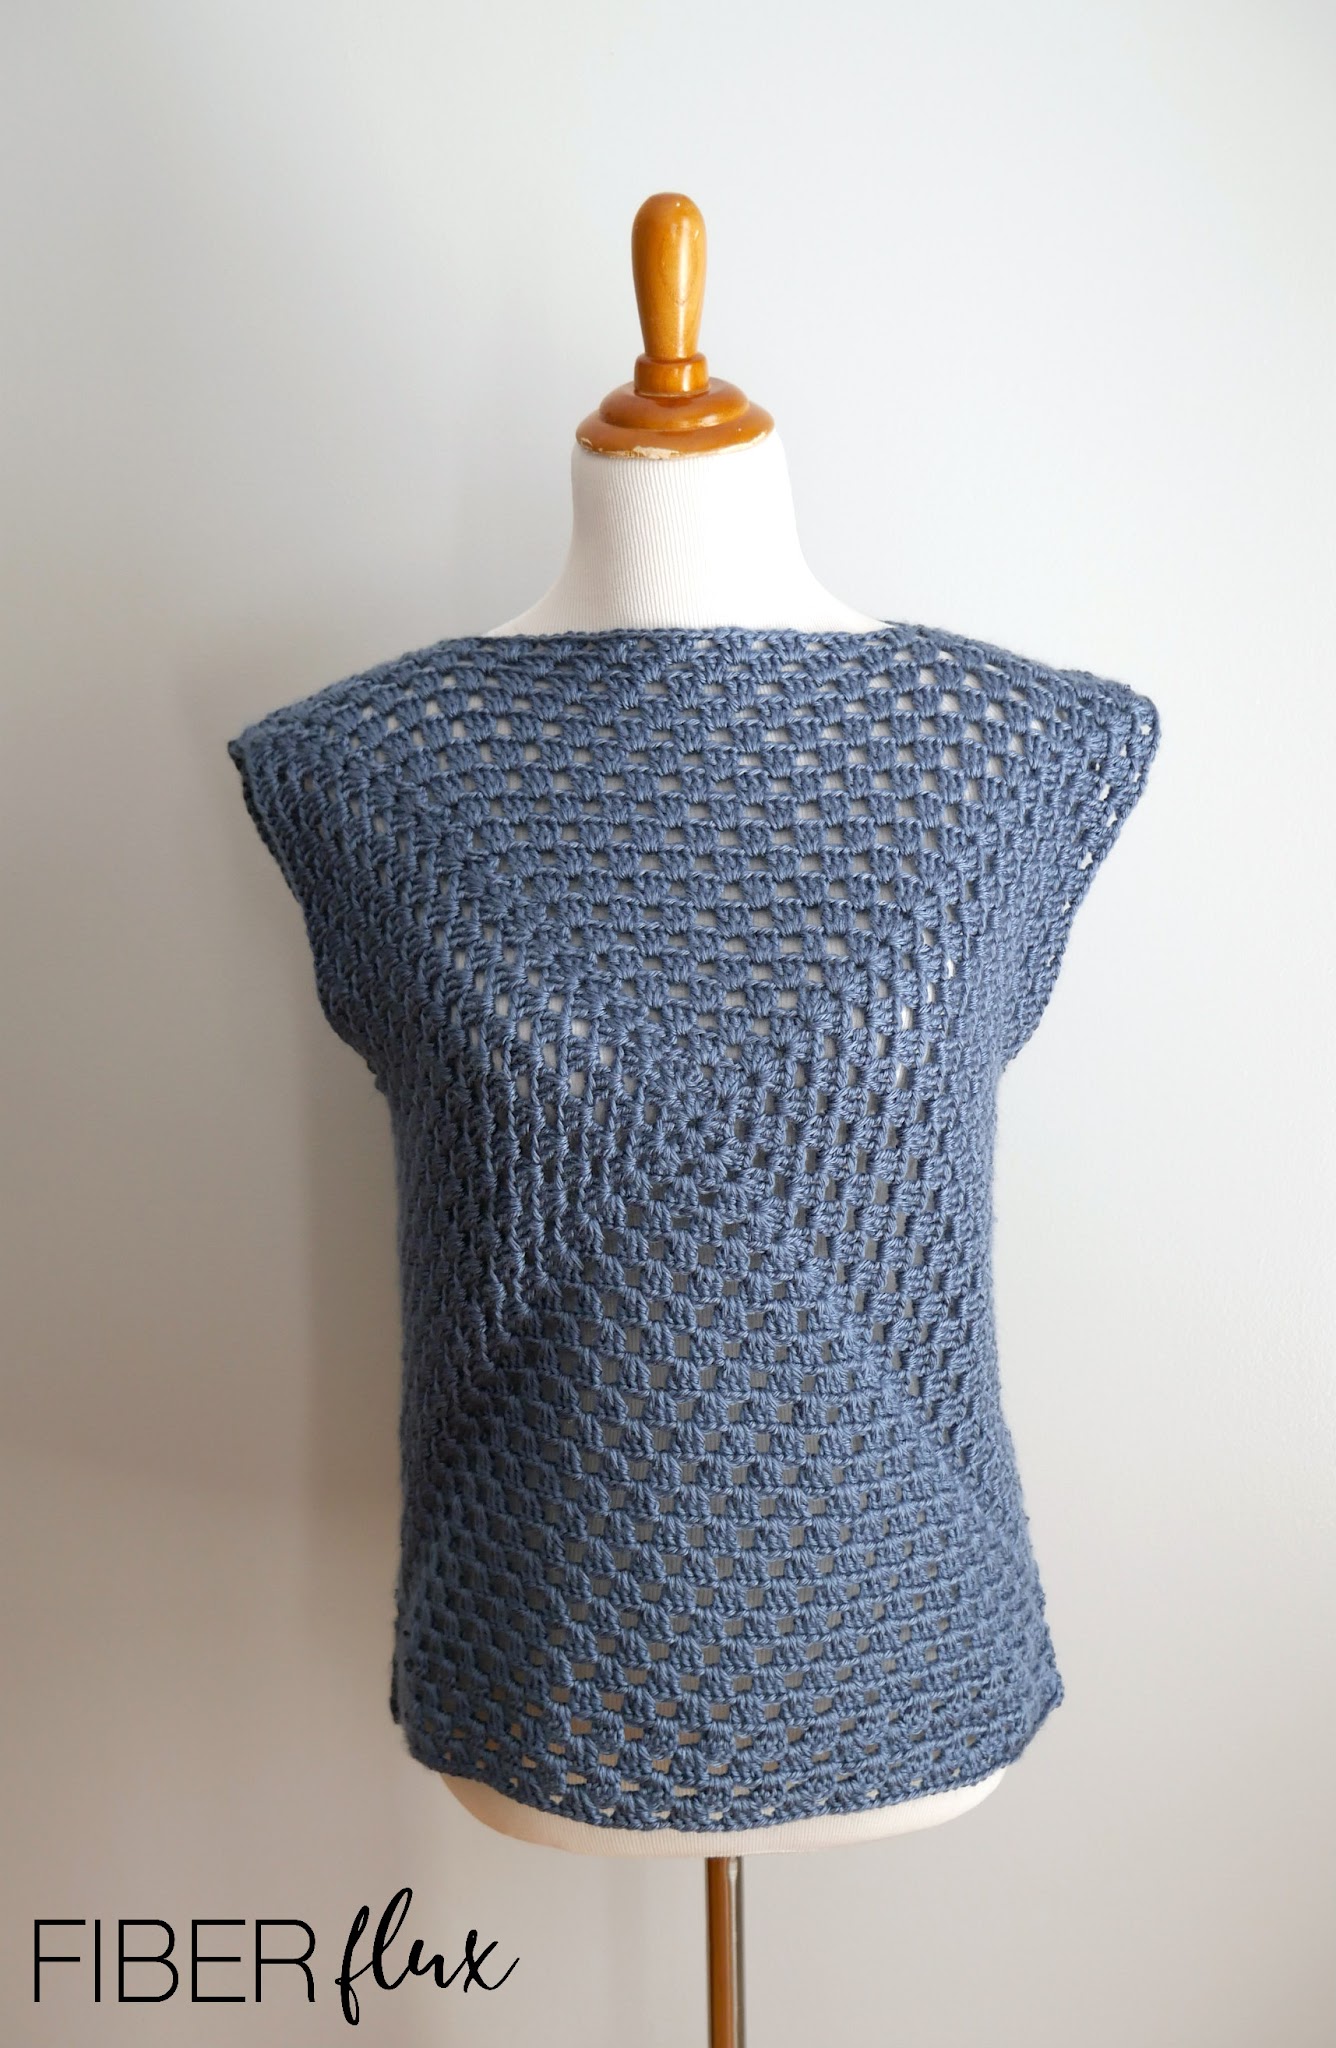
Let’s talk about sizing a bit…the tee is extremely customizable and will require you to experiment a bit with the size of the granny square to be sure you get the best fit. Basically when you are making your square, you’ll want to be sure the square is able to go across the bust and waist comfortably without any pulling or puckering. You can use clips, stitch markers, etc. to temporarily attach the two squares together and even slip it on if you like. If it feels too tight, simply add more rounds. This will add to both the width and height of your piece. Later on in the CAL, we’ll also be adding additional length to the bottom as well.
As a side note, my squares were each 19 rounds and were each 20 inches wide and 20 inches tall.
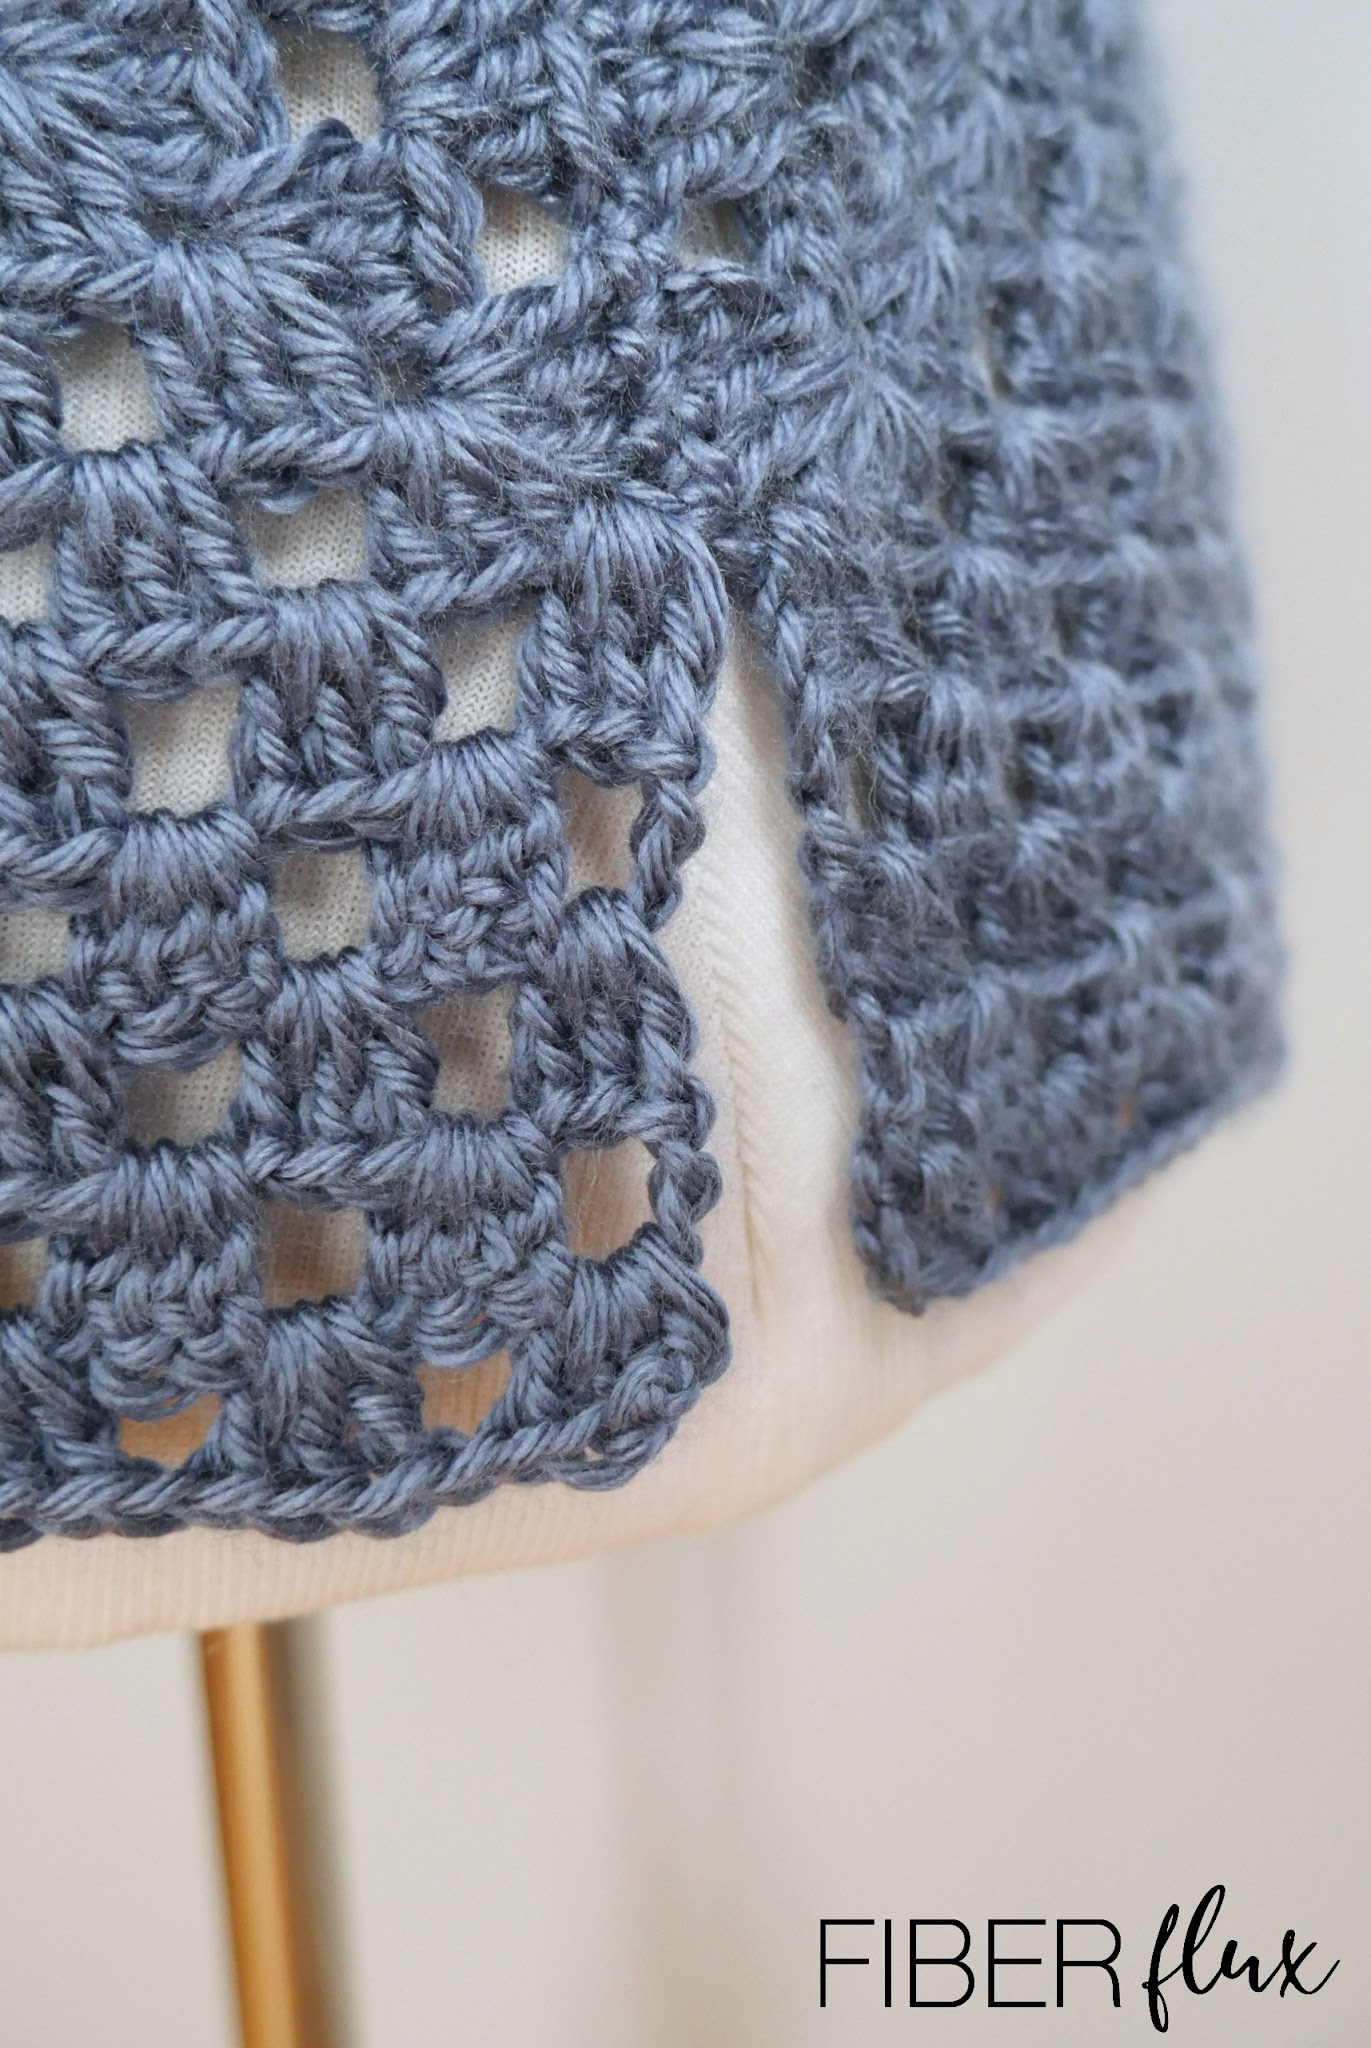
Granny Square Instructions (Make 2 of the same size and number of rounds):
Note: At the beginning of each round if you are sticking with the same color as I did, you will need to slip stitch over to the corner space to begin the round. If you are switching colors for a new round, finish the round, then cut the yarn and fasten off. Tie new yarn into any corner space and begin the round.
Chain 4, join into a ring with a slip stitch.
Round 1: Chain 4, work (3 dc into center of ring, chain 1) 3 times, then 2 dc into center of ring. Join to close with a slip stitch.
Round 2: To work the corner of round 2, first chain 3, then 2 dc in same space, then chain 1, then 3 dc in the same space…first corner done! Then chain 1, then work the next corner by working 3 dc in next space, chain 1, then 3 dc in same space, chain 1, repeat two more times to complete the round.
Round 3: Work the corner in the same manner as the previous round: chain 3, 2 dc in same space, chain 1, 3 dc in same space, chain 1. To work the sides, simply work 3 dc in the next space then chain 1…repeat until you reach a corner again.
Round 4 and beyond: keep working in this manner, with two clusters in the corners and one cluster on the sides until you finish the round. Just be sure there is a ch 1 in between each grouping of 3 dc as you work each round. That is what gives you those pretty spaces in between each cluster and keeps it nice and flat.
Here’s our CAL schedule below for easy reference:

- Tuesday April 7: Introduction to the CAL, the project, sizing, yarn, and supplies needed.
- Tuesday April 14 (that’s today!): The granny squares
- Tuesday April 21: Assembly & Seaming
- Tuesday April 28: Bottom extension & finish work
- Tuesday May 5: The BIG reveal!
Last part…let’s connect! You can connect at any of the social media platforms below, and don’t forget to use the hashtag #fiberfluxcal


Also we have two special communities for our CAL makers! Each has a welcome area/thread, so please hop on and introduce yourself. You can get info, ask questions, help each other, see what everyone is doing, and show off your work too!
Click HERE to join the Facebook group!

Click HERE to visit and join the Ravelry group!
Also, don’t forget to use the hashtag, #fiberfluxcal to share your work on social media!
I can’t wait to see all of your gorgeous projects…please share those pictures and above enjoy, take some time to relax with your hook, and have fun! That’s all for today lovelies, see you next week for part three!!

© Jennifer Dickerson 2020
For more fun projects and pretty patterns, be sure to follow Fiber Flux on Facebook, Instagram, Twitter, and Pinterest for the latest updates!

