
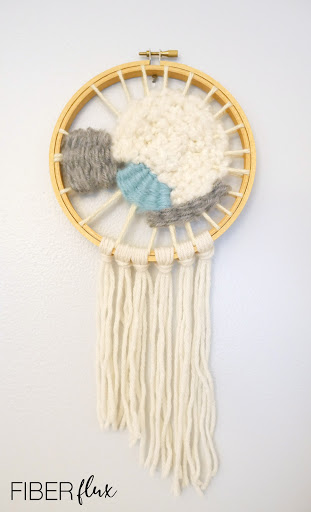
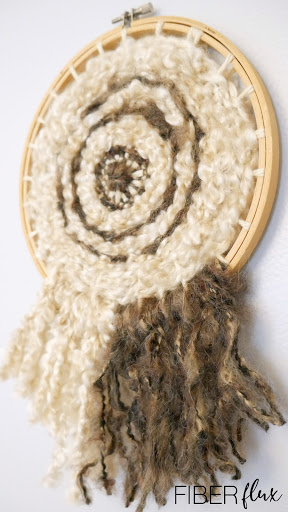
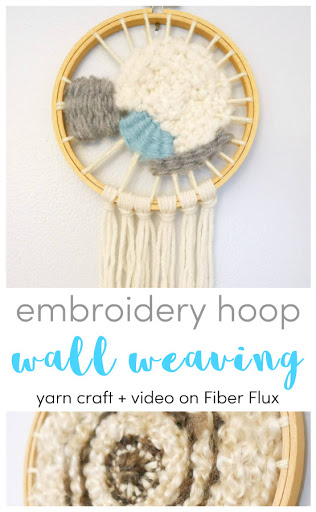
I love finding new ways of displaying yarn, don’t you? This embroidery hoop wall weaving is a beautiful way to use up some yarn scraps or showcase a really special yarn you may have. A simple embroidery hoop doubles up as both a loom and frame too!
Want a little help? There’s a full video tutorial below too!
Embroidery Hoop Wall Weaving
By Jennifer Dickerson
Click below to watch a full video tutorial on how to make this project:
Love video tutorials? Click here to subscribe to the Fiber Flux YouTube channel for more stitchy fun!
Materials:
- Yarn scraps of different textures and weight
- Embroidery Hoop (I used a 7 inch hoop)
- Scissors
- Tapestry needle
Sizing:
- I used a 7 inch hoop, but you can use any size hoop you like!
Instructions:
- Remove the inner hoop and set the outer hoop aside for now.
- Tie yarn in a secure knot to the top of hoop.
- Begin creating a series of criscrosses all the way around the hoop.
- Once you’ve gone all the way around, tie a knot onto the hoop again to finish.
- Take a moment before your start weaving to center and straighten everything out.
- Choose a yarn you’d like for the center and cut a piece about 24 inches or so.
- Thread your tapestry needle with the yarn.
- To start weaving, bring up the needle from back to front and begin creating a crisscross pattern in the center.
- Once your center has been “filed in” after a few passes, you’re ready to start weaving around.
- With your needle and same yarn, come up from the back and work the needle under, over, under, over etc all the way around.
- After each completed pass all the way around, snug things in toward the center before starting a new pass.
- Continue working around, changing colors as often as you like until hoop has been filled in.
- If you want group of color, try working back and forth in rows for sections of color.
- You can also add beads, feathers, and lots more for additional texture.
- When completed, tie off the last strand with a secure knot.
- Replace the outer hoop around the inner hoop and tighten in place.
- If you like, you can add fringe to the bottom Pull a long length of yarn and fold in half several times.
- Fold it around your finger and send the loop through the bottom edge.
- Send tails through and pull gently to tighten.
- Trim bottom as desired for the look you like. You can cut it straight across, at an angle, or a chevron shape too.
- Hang and enjoy!

© Jennifer Dickerson 2020
For more fun projects and pretty patterns, be sure to follow Fiber Flux on Facebook, Instagram, Twitter, and Pinterest for the latest updates!


This comment has been removed by a blog administrator.
This comment has been removed by a blog administrator.
This comment has been removed by a blog administrator.
This comment has been removed by a blog administrator.
This comment has been removed by a blog administrator.
This is such a neat and easy craft my grandchildren will love to make. It is of high quality outcome as well. Bravo thank you very much for sharing!
This comment has been removed by a blog administrator.