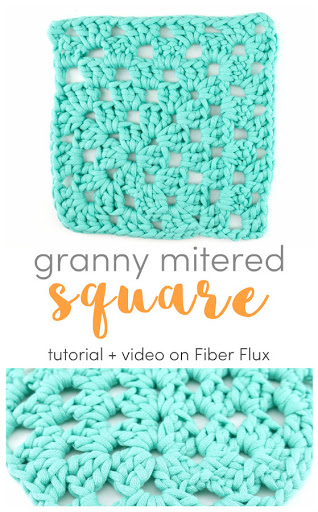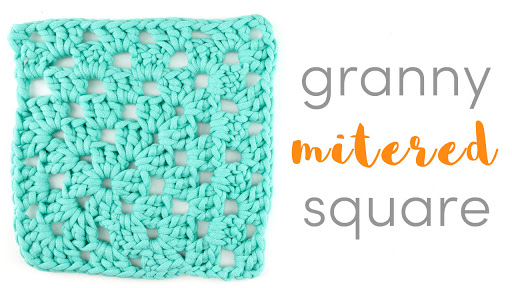
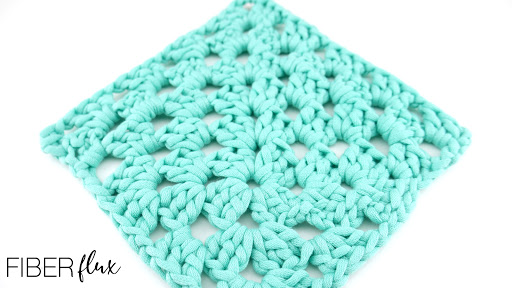
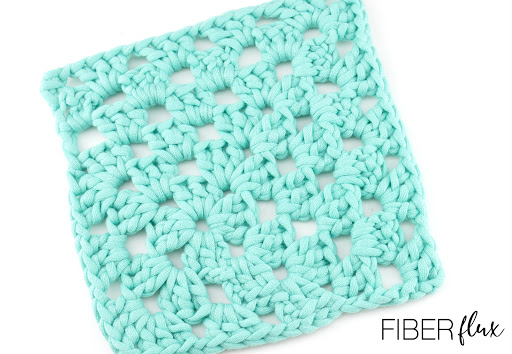
The granny mitered square is a fun twist on a traditional granny square. Starting off like a regular square, then adding rows worked back and forth to two sides, makes this fun, unique, and super easy too!
Watch a full video tutorial on how to make the granny mitered square:
Love video tutorials? Click here to subscribe to the Fiber Flux YouTube channel for more stitchy fun!
Instructions:
Chain 4, join into a ring with a slip stitch.
- Round 1: Chain 4, work (3 dc into center of ring, chain 1) 3 times, then 2 dc into center of ring. Join to close with a slip stitch.
- Round 2: To work the corner of round 2, first chain 3, then 2 dc in same space, then chain 1, then 3 dc in the same space…first corner done! Then chain 1, then work the next corner by working 3 dc in next space, chain 1, then 3 dc in same space, chain 1, repeat two more times to complete the round.
- Round 3: Work the corner in the same manner as the previous round: chain 3, 2 dc in same space, chain 1, 3 dc in same space, chain 1. To work the sides, simply work 3 dc in the next space then chain 1…repeat until you reach a corner again.
Note: If you wish, you can keep working the rounds if you want a larger traditional granny square center. When you’re ready to switch, continue to row* 4. (Switches to rows vs. rounds for the mitered part).
*This is the part where we transform the traditional square into the mitered square. So far we’ve worked rounds, for the mitered part we’ll work rows instead. If switching colors, tie the new yarn into any corner space. If sticking with the same color, slip stitch over to the ch 3 space.
- Row 4: Tie new yarn into any corner space and ch 3. In the same corner space work (2 dc, ch 1). Work (3 dc, ch 1) in each ch 1 space until you reach the corner. Work 3 dc, ch 3, 3 dc, ch 1) in the corner, then work (3 dc , ch 1) down the next side. At the end of the row, work a dc into the corner space.
- Row 5: Tie new yarn into last stitch worked and ch 3. Turn. Work (2 dc, ch 1) into the first ch 1 space. Work (3 dc, ch 1) in each ch 1 space until you reach the corner. Work (3 dc, ch 3, 3 dc, ch 1) in the corner, then work (3 dc, ch 1) down the next side. At the end of the row, work a dc in the top of the turning chain.
Repeat row 5 until your square is as large as you like. Weave in any ends that remain and you’re finished!
Want more crochet tutorials? Check out my crochet tutorial library here!