
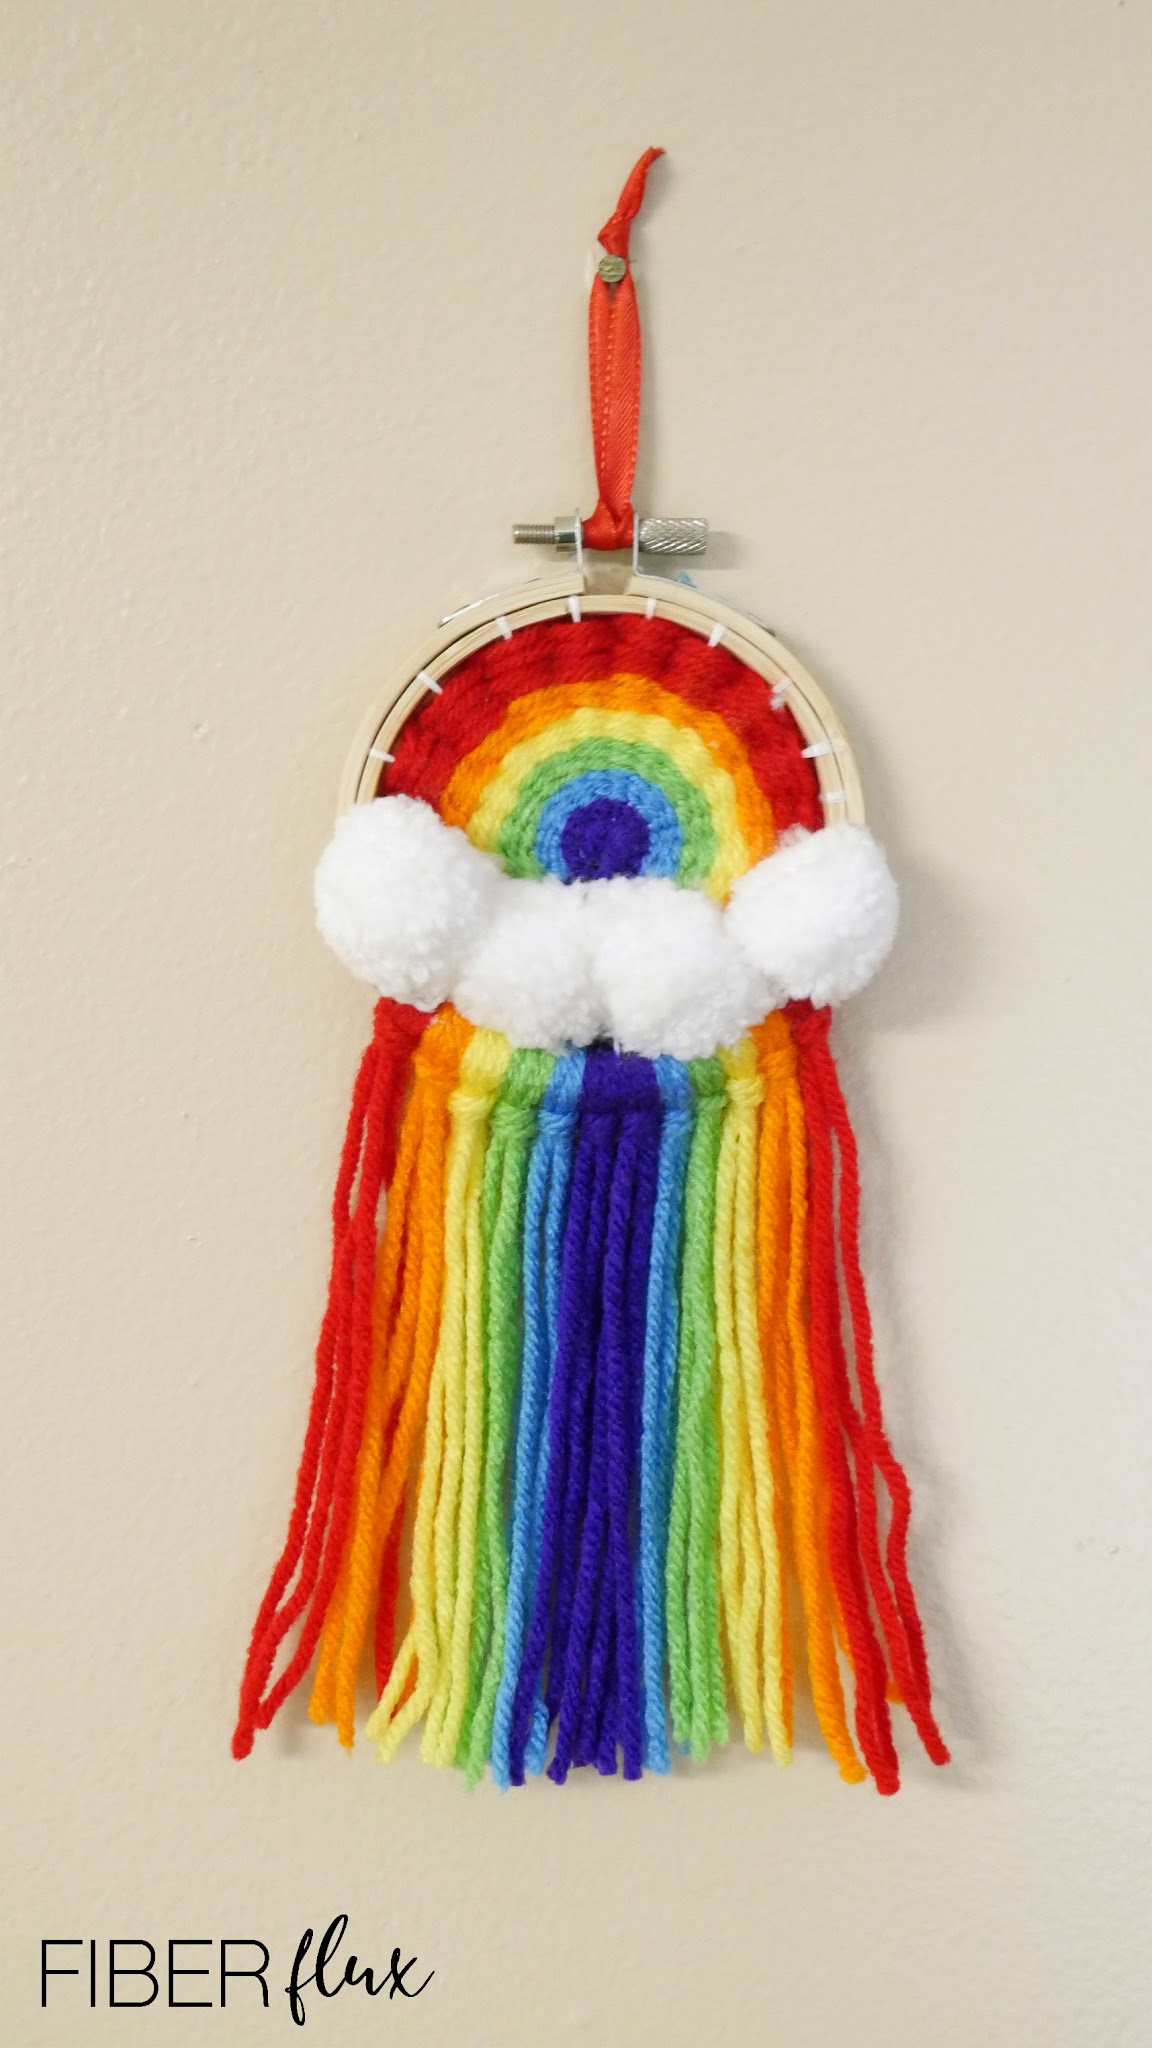
Grab some yarn leftovers and let’s get weaving! This mini weaving is simple as pie and uses basic materials like yarn scraps and a small embroidery hoop. A fun rainbow arch is incorporated into the center, with fringe cascading down the front. Fluffy pom pom clouds add a finishing touch!
Want a little help? There’s a full video tutorial below too!
Rainbow Mini Wall Weaving
By Jennifer Dickerson
Click below to watch a full video tutorial on how to make this project:
Love video tutorials? Click here to subscribe to the Fiber Flux YouTube channel for more stitchy fun!
Materials:
- Worsted weight yarn of your choice (rainbow colors-purple, blue, green, yellow, orange, red, and white for the clouds)
- Embroidery floss (I used white)
- Embroidery Hoop (Any size is ok, I used a 3 inch hoop)
- Scissors
- Tapestry needle
Sizing:
- I used a 3 inch hoop, but you can use any size hoop you like!
- Fringe is about 6 inches long, but can be cut to the length you want.
Instructions:
- Remove the inner hoop and set the outer hoop aside for now.
- Tie the embroidery floss in a secure knot to the top of hoop.
- Begin creating a series of crisscrosses all the way around the hoop.
- Once you’ve gone all the way around, tie a knot onto the hoop again to finish.
- Take a moment before your start weaving to center and straighten everything out.
- Choose a yarn you’d like for the center (I began with purple) and cut a piece about 24 inches or so.
- Thread your tapestry needle with the yarn.
- To start weaving, bring up the needle from back to front and begin creating a crisscross pattern in the center.
- Once your center has been “filled in” after a few passes, you’re ready to start weaving around.
- With your needle and same yarn, come up from the back and work the needle under, over, under, over etc all the way around.
- After each completed pass all the way around, snug things in toward the center before starting a new pass.
- Continue working around, changing colors as often as you like until hoop has been filled in the rainbow pattern.
- When completed, tie off the last strand with a secure knot.
- Replace the outer hoop around the inner hoop and tighten in place.
- If you like, you can add fringe to the bottom Pull a long length of yarn (about 8 inches) and fold in half several times.
- Fold it around your finger and send the loop through the bottom edge.
- Send tails through and pull gently to tighten.
- Continue across and
- Trim bottom as desired for the look you like. You can cut it straight across, at an angle, or a chevron shape too.
- Hang and enjoy!

© Jennifer Dickerson 2020
For more fun projects and pretty patterns, be sure to follow Fiber Flux on Facebook, Instagram, Twitter, and Pinterest for the latest updates!

