
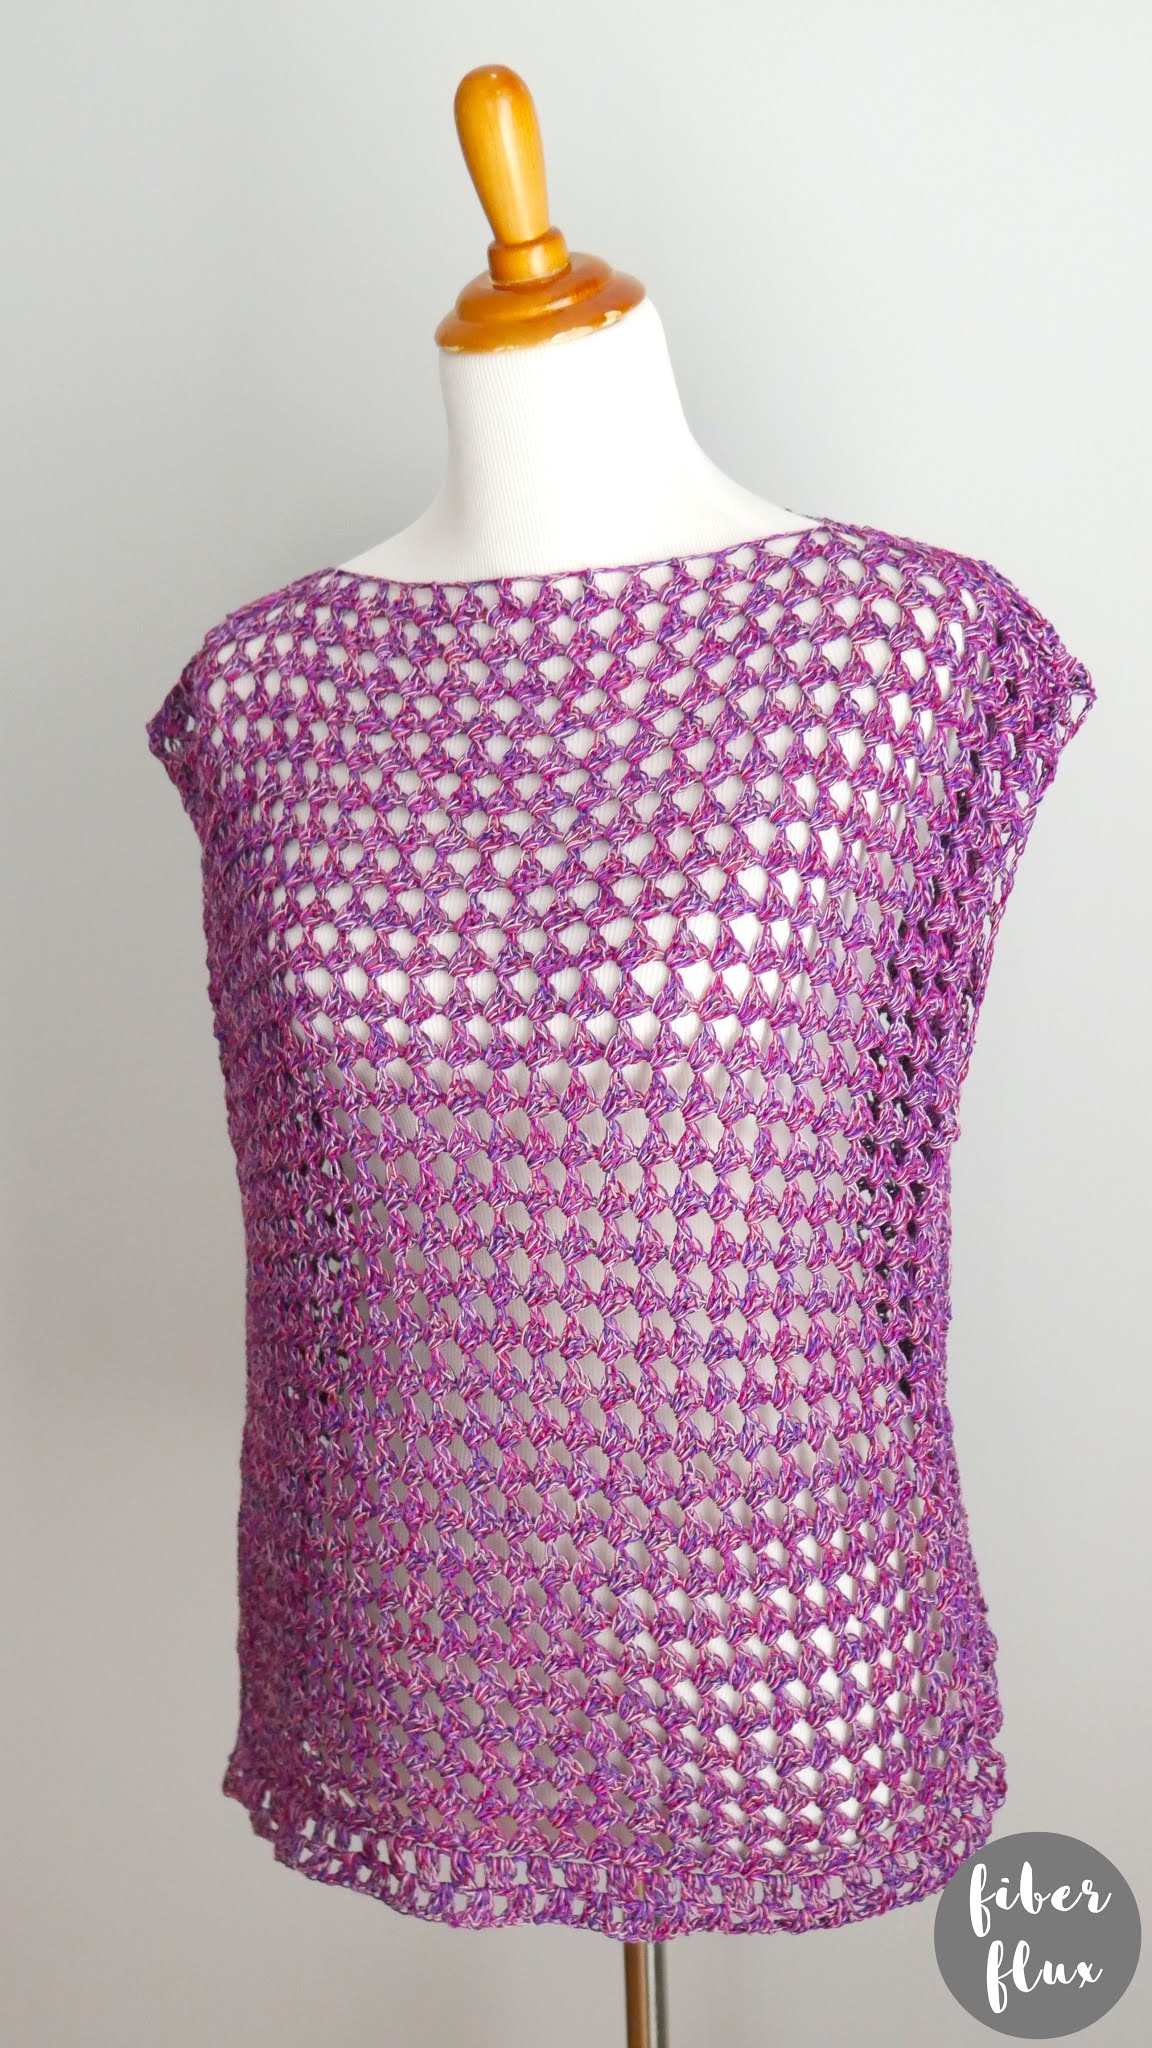
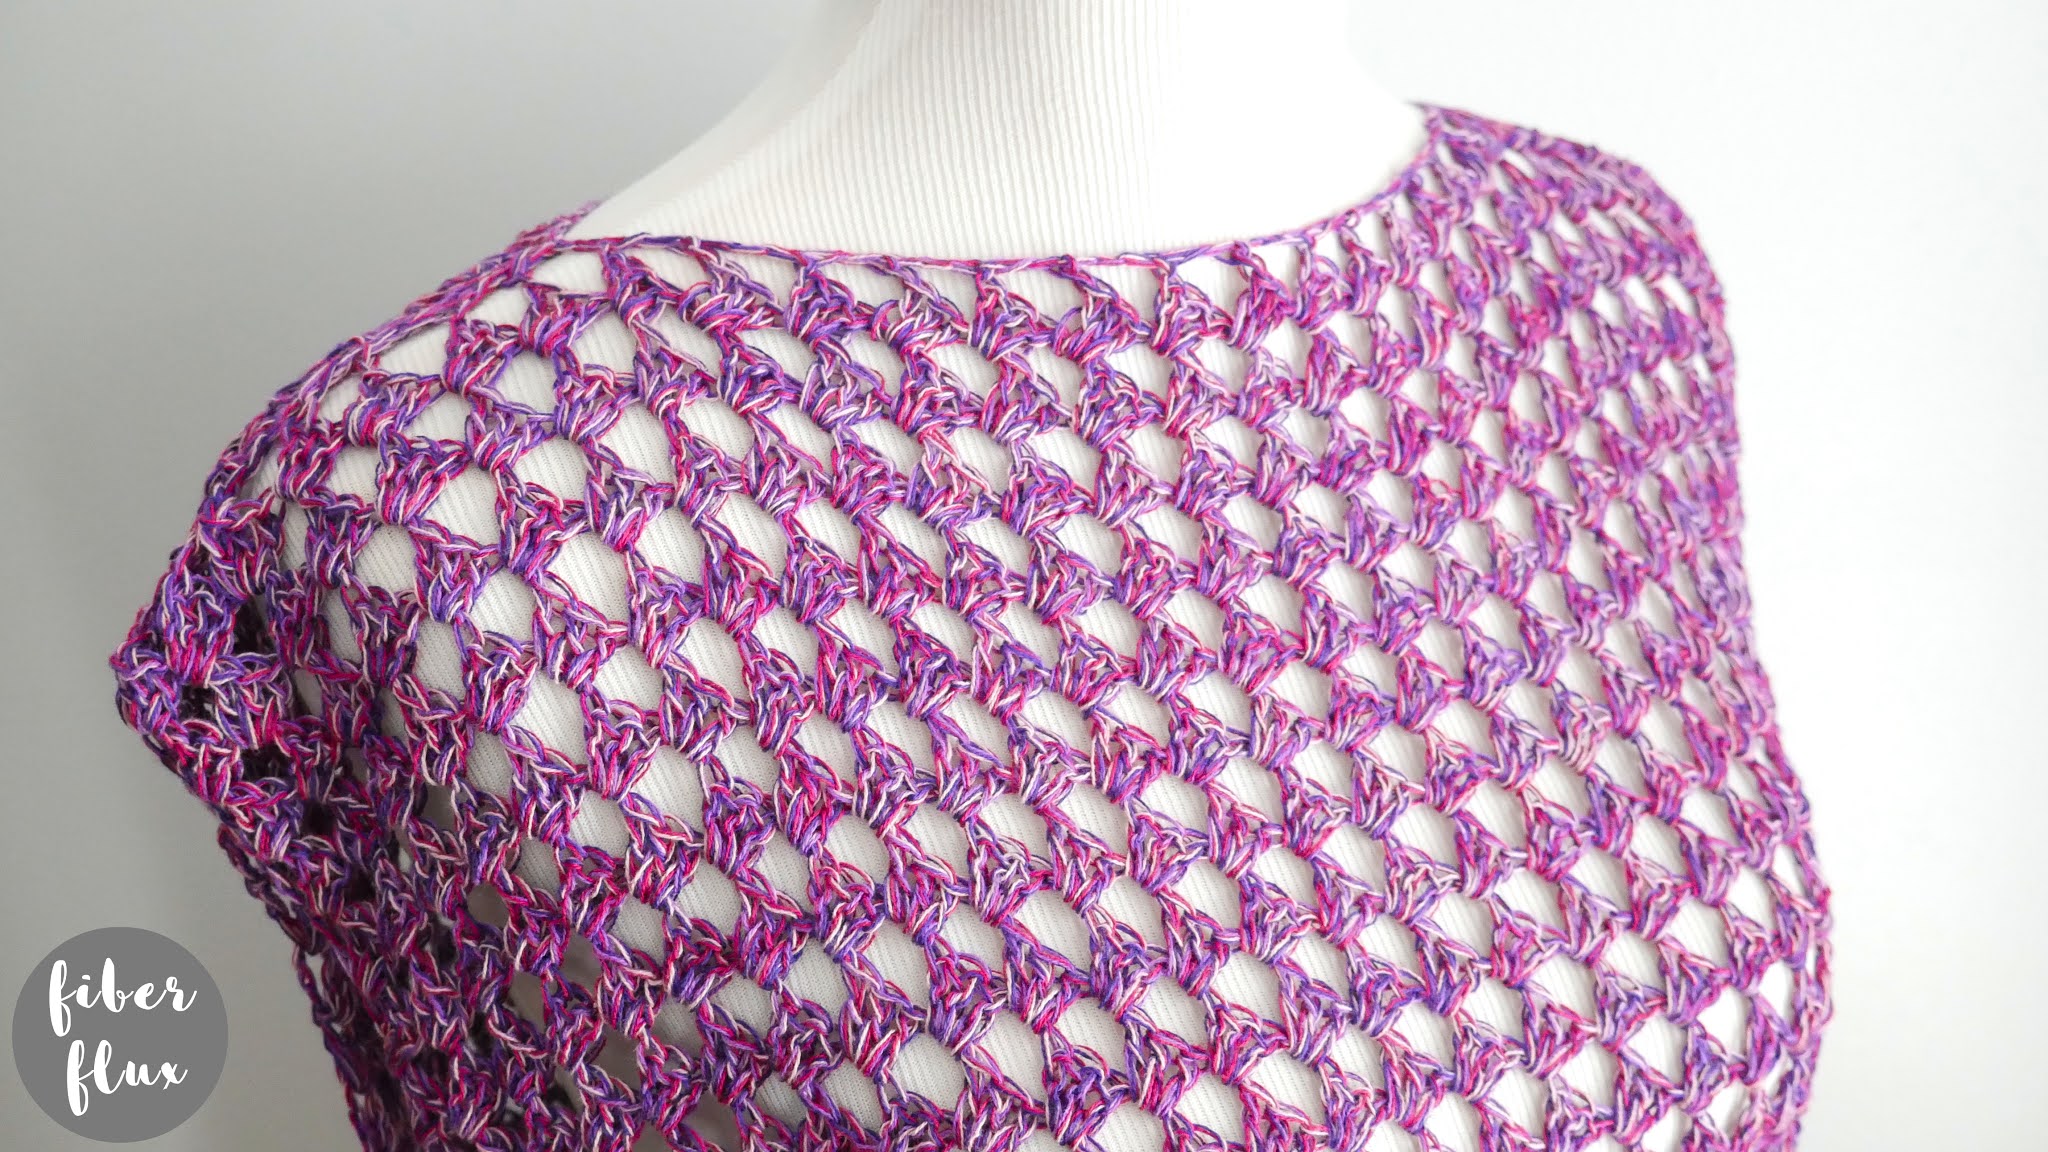
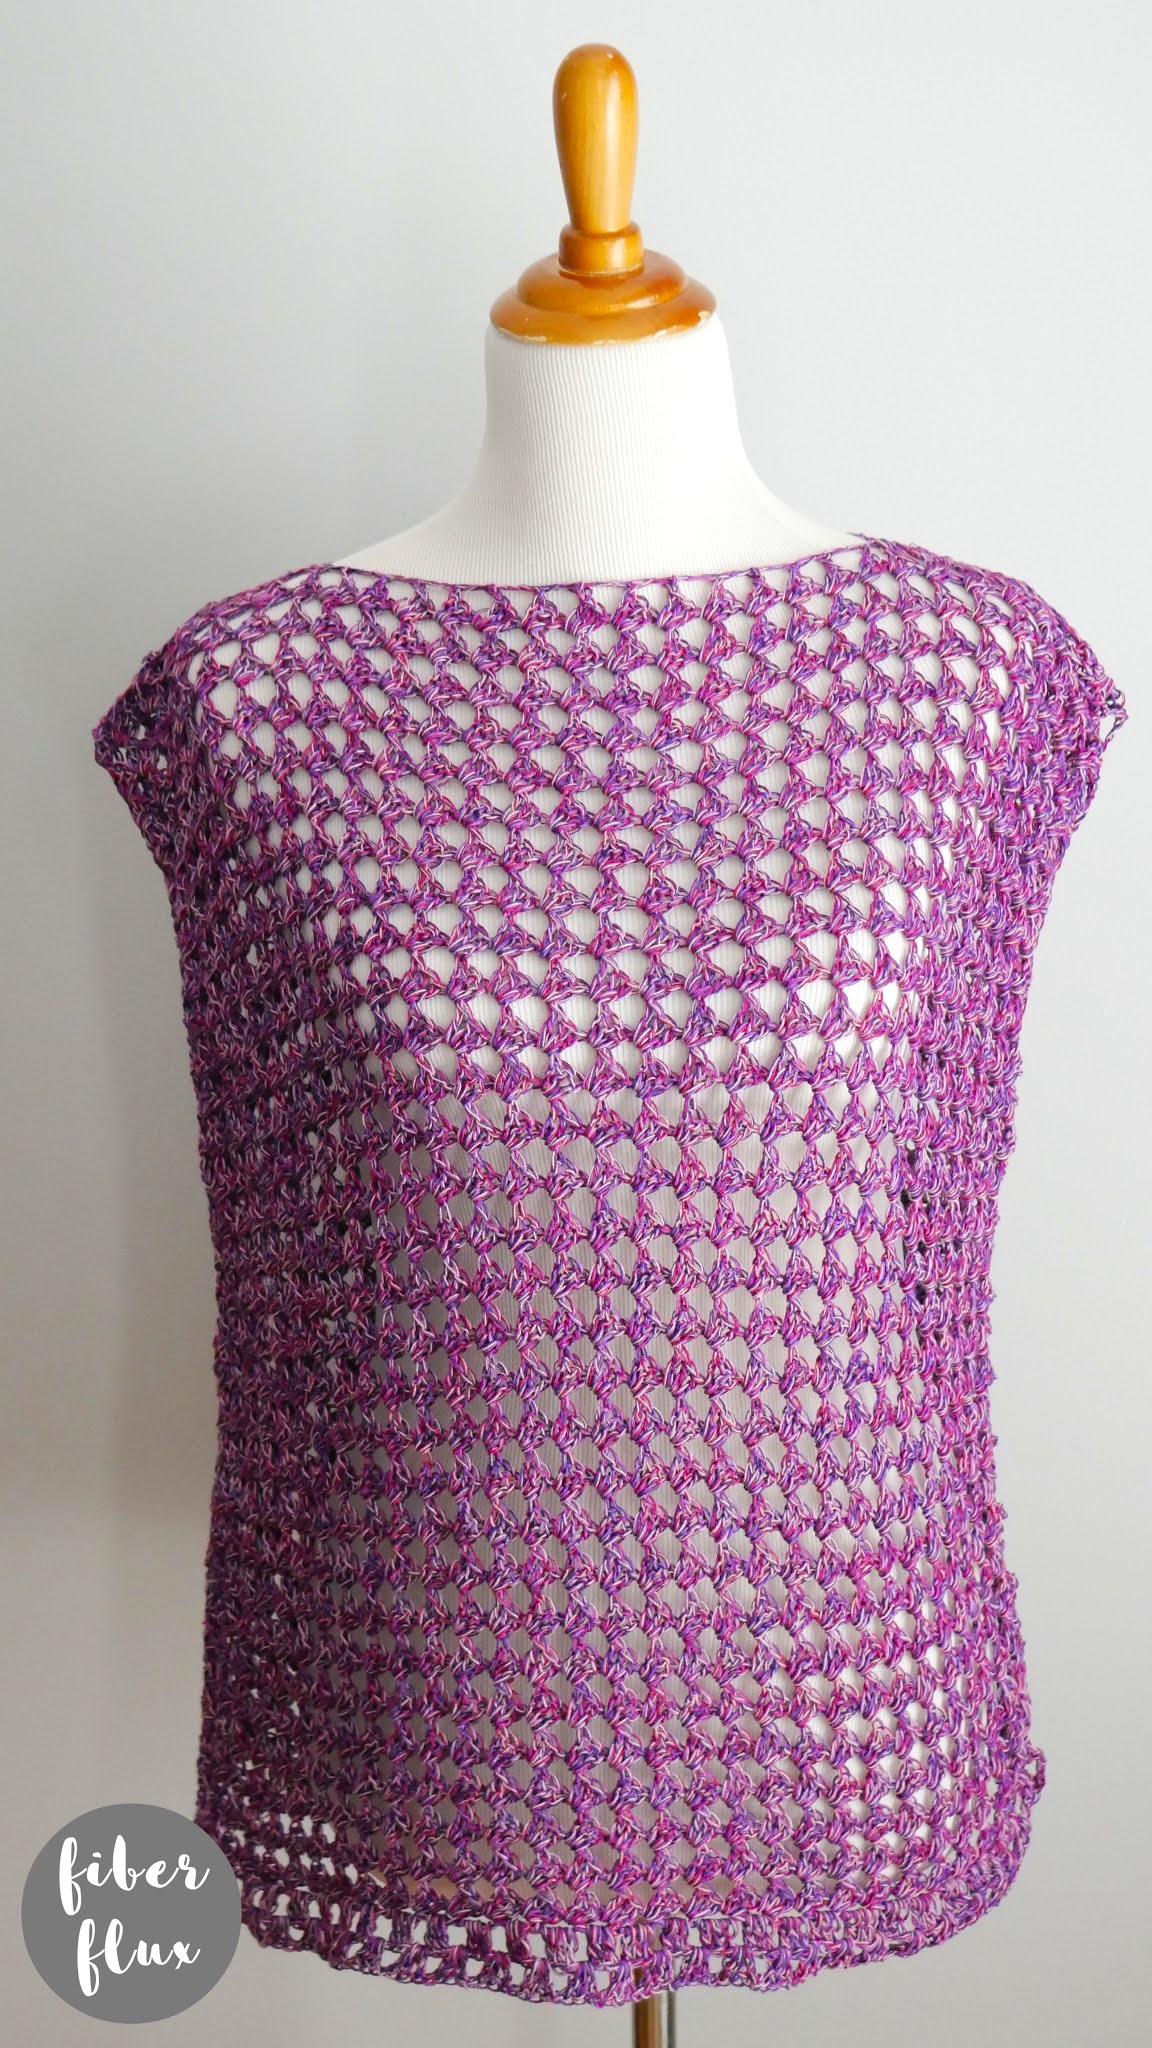
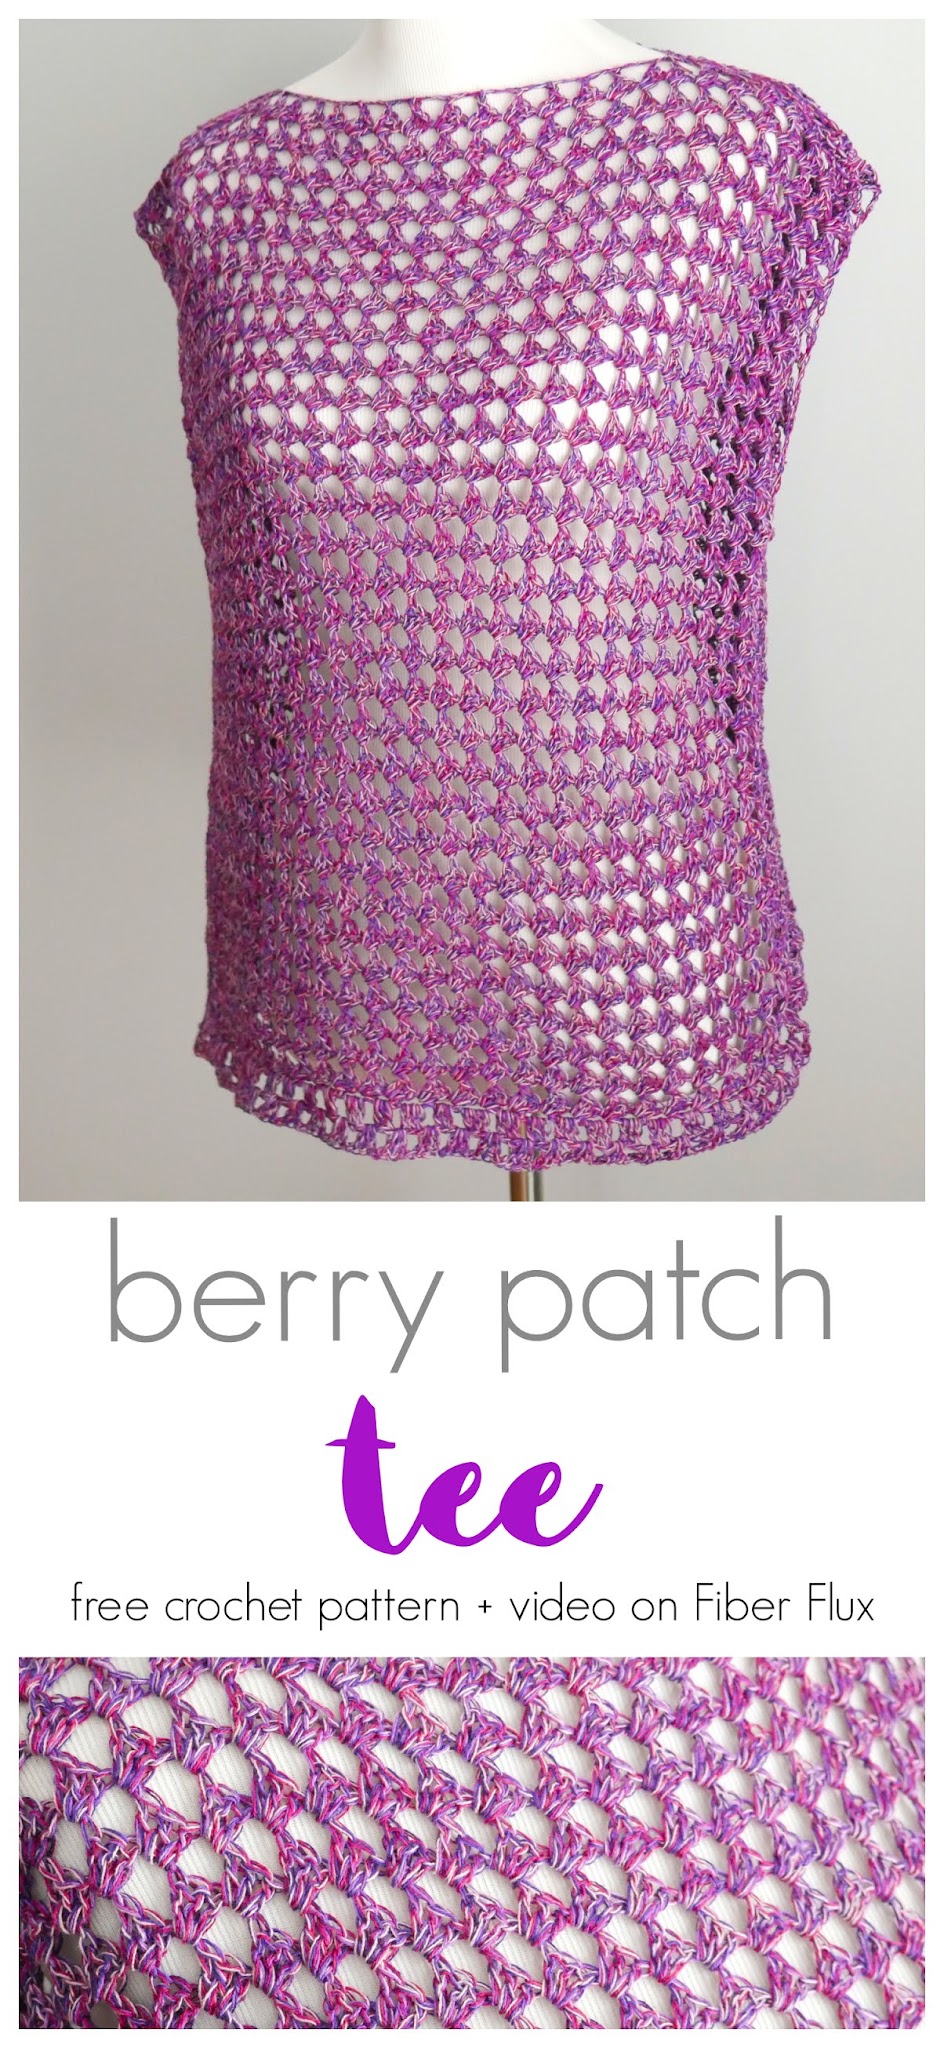
The Berry Patch Crochet Tee is a sweet and simple top with lots of airy drape! Easy corner to corner squares are seamed together and a lovely, slightly ruffled bottom edge can be added if you like, giving it more of a tunic look. Easy to make and fun to wear!
I’m especially excited about this design because it was created by many of you! On my Instagram I asked everyone to re-imagine the Blue Skies Granny Tee and together we changed the square used and some of the details…the result was so much fun! Special thanks to Hobbii yarn and their #dalwithhobbii
👉Get the ad-free crochet pattern PDF from my shop here!👈
Watch a full video tutorial on how to make the Berry Patch Crochet Tee stitch by stitch:
Love video tutorials? Click here to subscribe to the Fiber Flux YouTube channel for more stitchy fun!
Materials:
- 5.0 mm H crochet hook
- 1 cake of Dahlia Mixo by Hobbii yarn, I used the “Forest Fruit” colorway
- Tapestry needle
- Scissors
- Tape measure
- Stitch markers or scrap yarn
Finished Sizing (as shown):
- 22 inches tall
- 19 inches wide
*Please note the dimensions above are for the Berry Patch Crochet Tee shown in the pictures. This tee can be made to fit any size, simply adjust the squares as needed. Square should be able to loosely and comfortably wrap around the hips, midsection, and bust without any stretching or pulling.
Instructions for squares (make 2):
Part 1-C2C Increase Portion:
- Chain 6, then work a sl st into the furthest ch from the hook to create a ring.
- Row 1: Ch 4 (counts as a dc, ch 1), then work 3 dc into the ring. Then ch 1, then work a dc into the center of the ring.
- Row 2: Ch 4, then work (3 dc, ch 1) into the first ch 1 space of the row. Work (3 dc, ch 1, 1 dc) into the last ch 1 space of the row.
- Row 3: Ch 4, then work (3 dc, ch 1) into the first ch 1 space of the row. Work (3 dc, ch 1) into each ch 1 space across. Then work (3 dc, ch 1, 1 dc) into the last ch 1 space of the row.
- Repeat row 3 until your square is roughly half the size you’d like it to be (or you’ve used half of your yarn), then continue onto the next section to begin the decrease part.
Important! Be sure the number of rows for your increase is an EVEN number before you begin the decrease. I worked a total of 30 rows before decreasing.

Part 2-C2C Decrease Portion:
- Row 1: Ch 4, then skip the first ch 1 space. Work (3 dc, ch 1) in each ch 1 space across until just before the last space (turning chain space). Instead of working into this space, work a dc into the top chain of the turning chain.
- Repeat row 1 of the decrease until just a top point remains. Fasten off and weave in ends that remain. Note: if the top is challenging for you, be sure to check out the video for this part (or any other part) to see me walk through it step by step!
Seaming:
- Sandwich squares together with diagonal lines lined up.
- Pin together using stitch markers or small pieces of scrap yarn.
- Attach together at both upper square corners, then a few inches in on both sides to create the neck opening.
- Place markers under the arm, then down to both bottom corners.
- Below is a picture with stitch markers in place so you can see how it is placed:
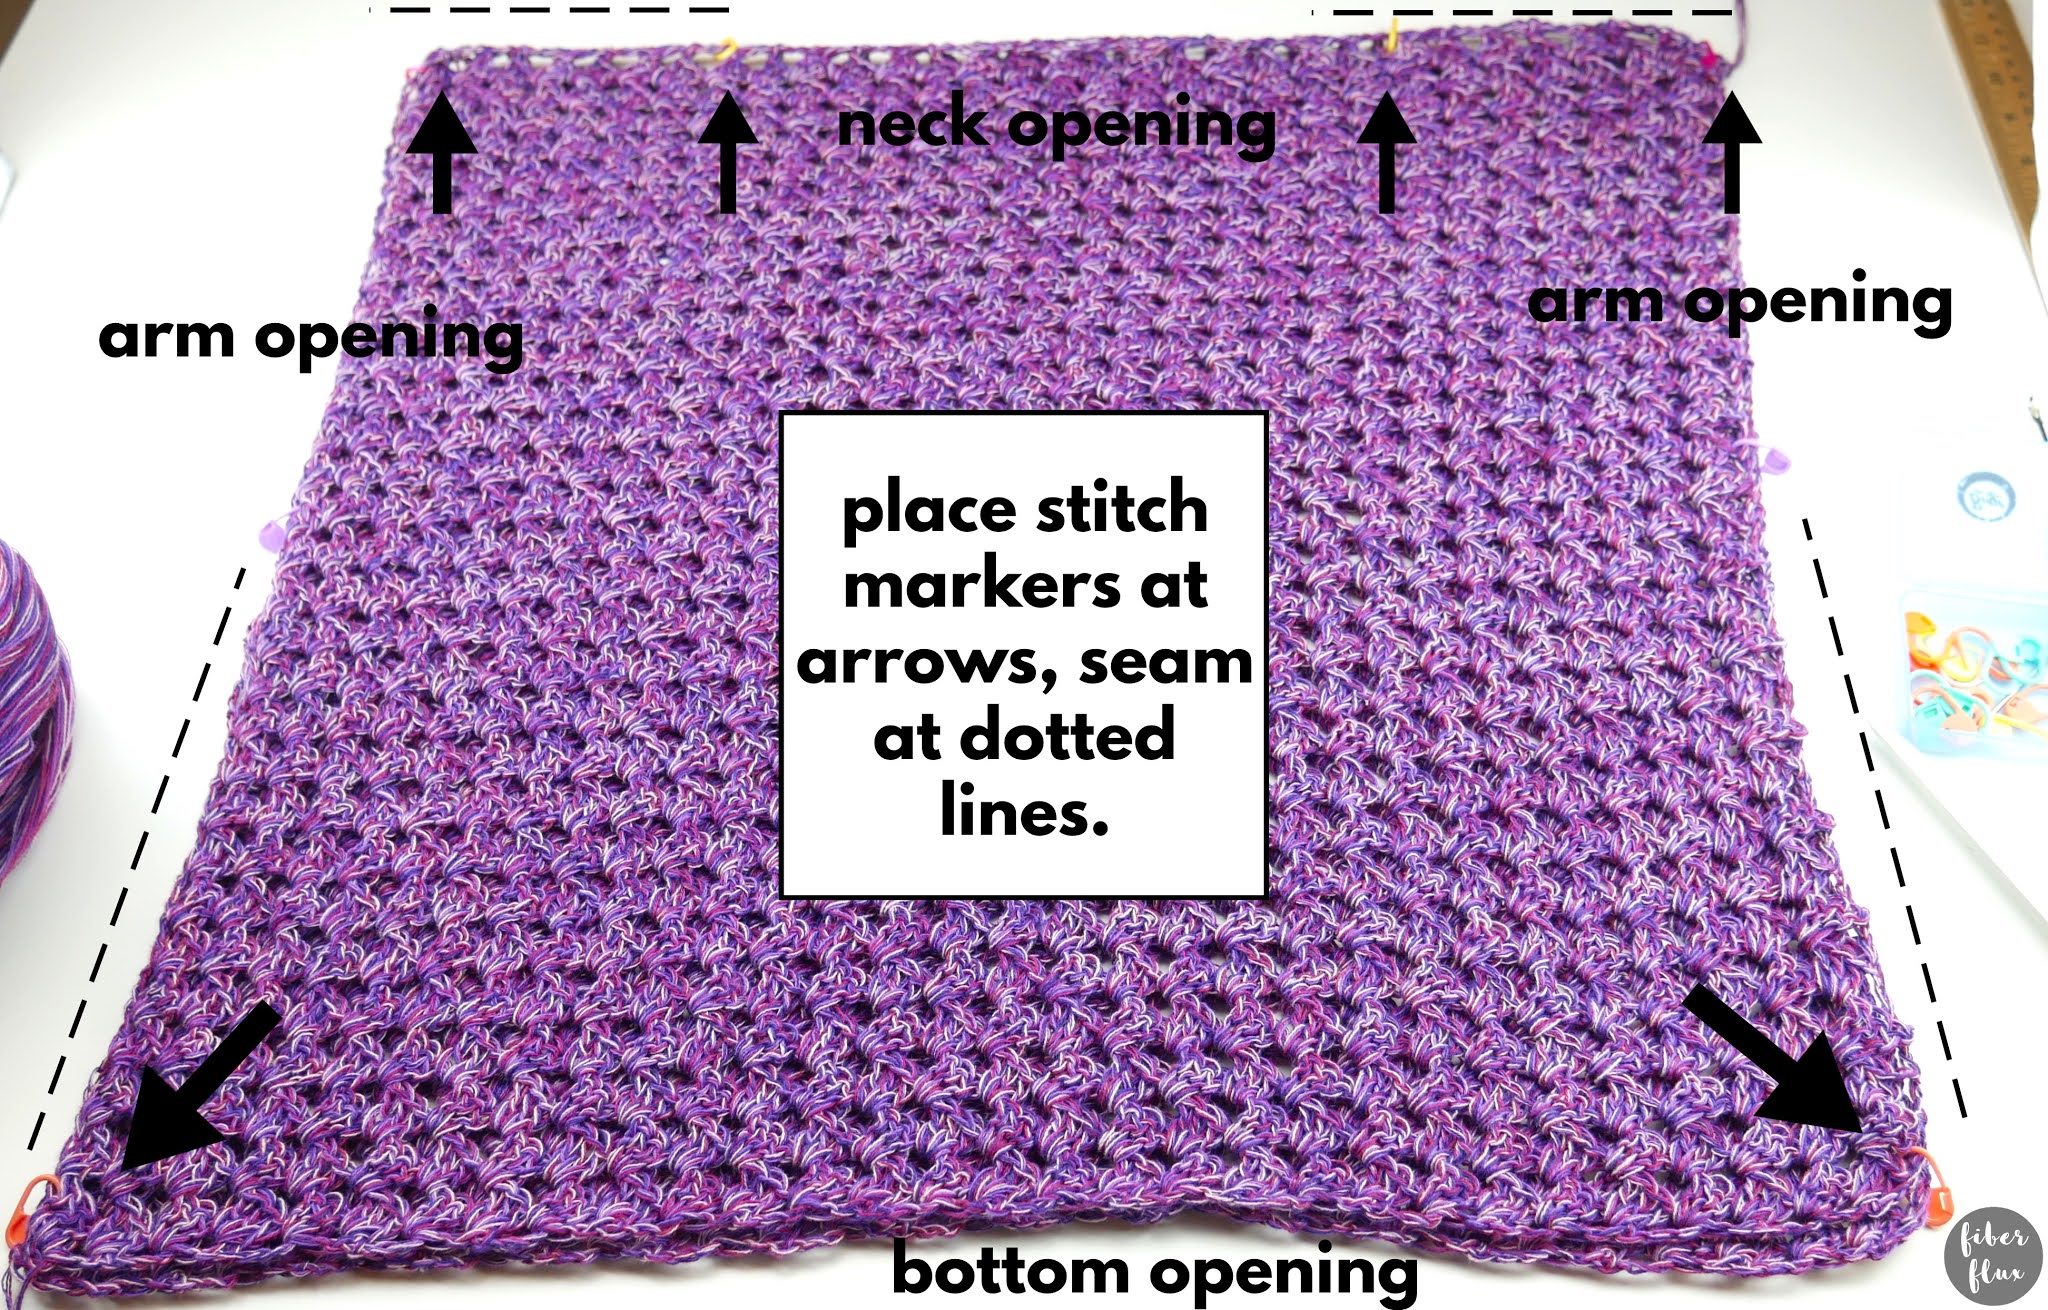
- With a matching piece of yarn and a tapestry needle, seam across the tops of the shoulders and the underarm down each side to the bottom.
- Weave in all ends.
- Turn right side out and move down to the next section.
Instructions for tunic edging (optional):
- Spin your project around so that the bottom edge is facing upward and your neck hole is at the bottom. It may be helpful to place stitch markers where you plan to begin and end the row too.
- Row 1: Tie the yarn into the corner space on the left of the front granny square and Chain 3 into the corner space. Work 2 dc into the same space. *Ch 1, then work 3 dc into the next space. Repeat from * across until you get to the last corner space. Work 3 dc into the corner space at the end of the row.
- Row 2: Ch 4 and turn. In the first space, work (3 dc, ch 1). Work (3 dc, ch 1) in each space across. Work a dc into the topmost chain of the turning chain at the end of the row.
Note: if you want your tunic edge to be longer, repeat rows one and two. Weave in all ends that remain and its ready to wear!


I like this project. I was tryin to find something quick and easy to make with this yarn and I can see swimsuit cover ups.
This comment has been removed by a blog administrator.
Hi Jennifer,when decreasing is the fourth chain the topmost chain or is it the third chain of the turning chain? Thanks, Gail
Thank you for this beautiful pattern. Your instructions were easy to follow and simply clear. I appreciate your thoughtfulness in sharing!