
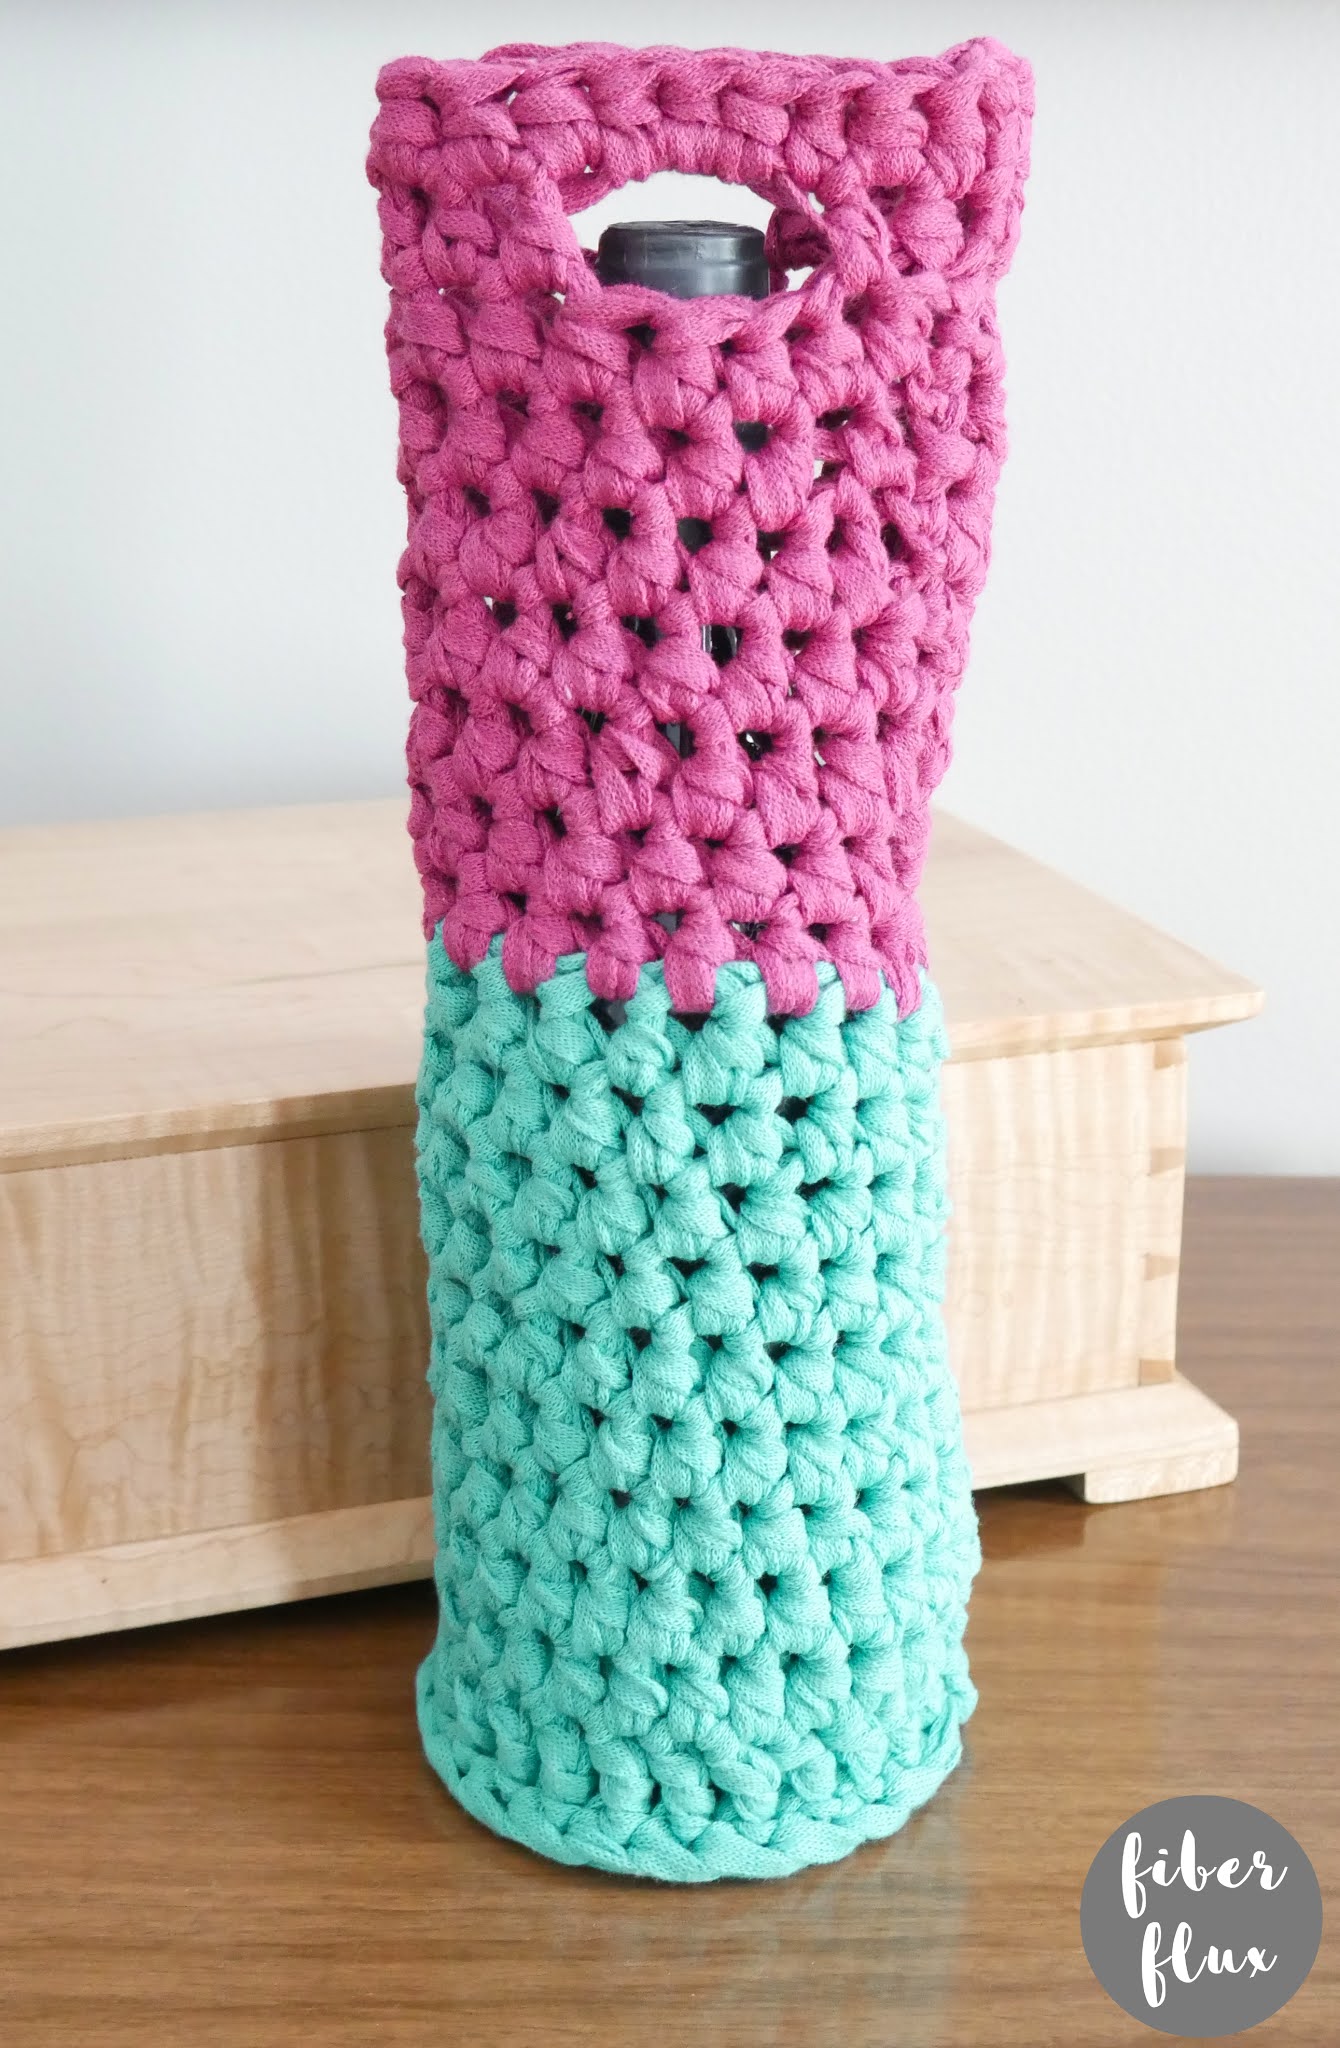
The Summer Picnic Wine Tote is a fun, quick and super cute little bag for a favorite bottle of wine! Make one to accompany a gift, or use it for your next outdoor dining adventure! Thick and bulky yarn creates a great cushion to protect the glass from breaking too during transport. Happy summer friends!
Need a little help? There’s a full video tutorial below!
Summer Picnic Wine Tote
By Jennifer Dickerson
Click below to watch a full video tutorial on how to make this project:
Love video tutorials? Click here to subscribe to the Fiber Flux YouTube channel for more stitchy fun!
Materials:
- 10.0 mm P crochet hook
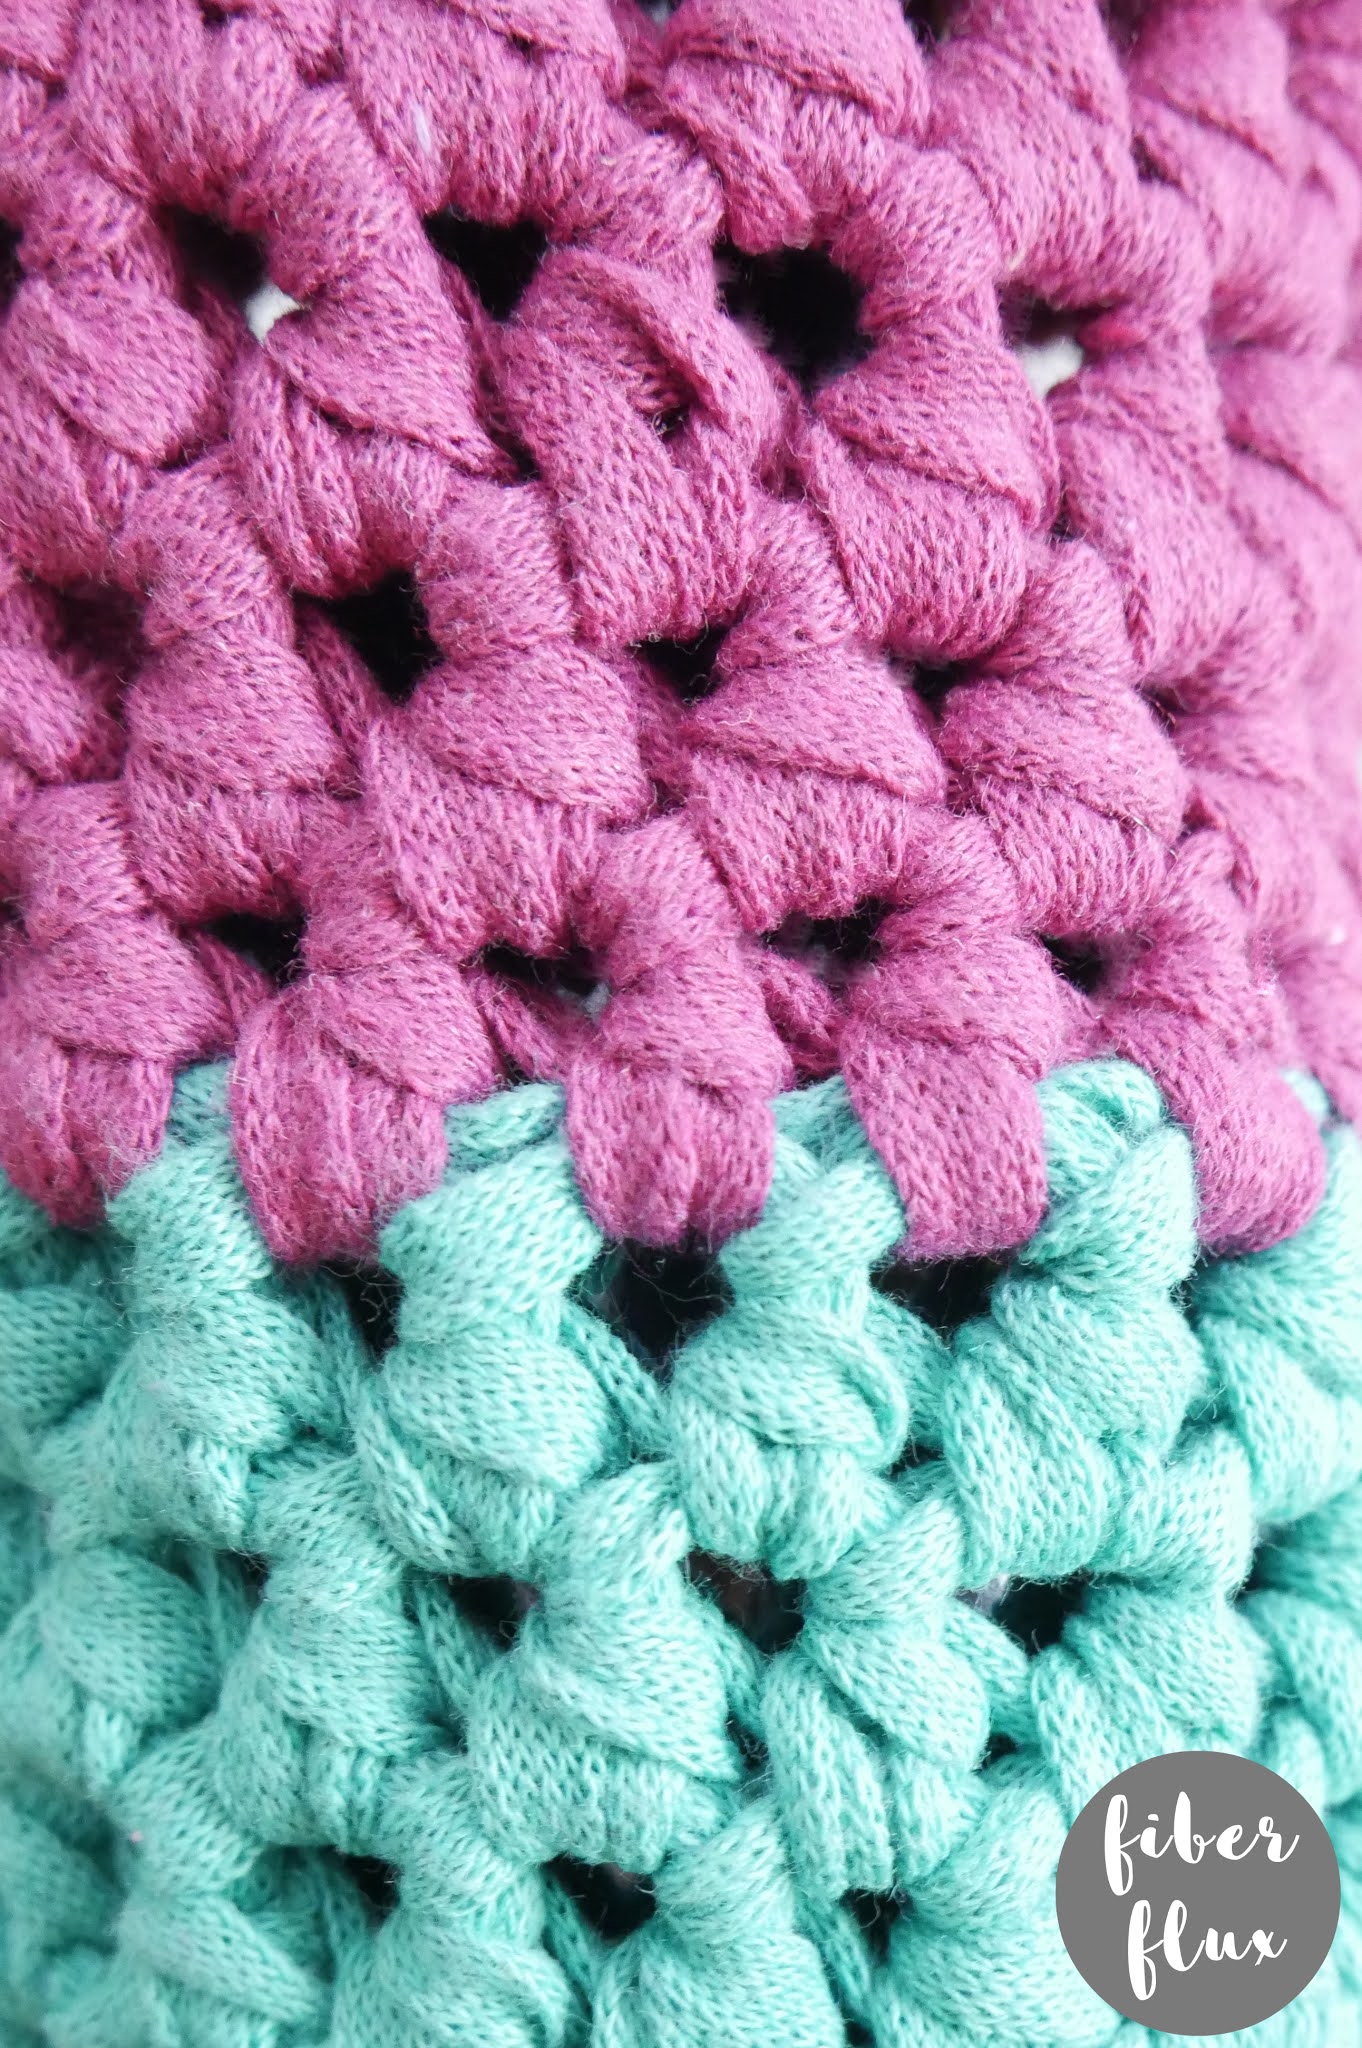
- Super bulky yarn of your choice (I used Hoooked Ribbon XL in the “Crazy Plum” and “Happy Mint” colorways. I used less than half a ball per color of each yarn for the tote)
- Tapestry Needle
- Scissors
- Tape Measure
Sizing:
(Note: this tote is fitted for a standard size 12 inch tall wine bottle)
- 14 inches tall
- 10.5 inch circumference
- Circular base is 3.5 inches wide
Instructions for the main part of the tote:
Ch 4, join in the furthest ch from the hook to make a ring.
Round 1: Ch 3, then work 11 dc into the center of the ring. Join to close round with a sl st.
Round 2: Ch 3, then work 2 dc into each st around. Join to close round with a sl st.
Round 3: Ch 3, the work a bpdc (back post double crochet) in each st around. Join to close round with a sl st.
Round 4: Ch 2, the work a hdc in each st around. Join to close round with a sl st.
Repeat round 4 until the sides come up just to the top of the wine bottle when placed inside the tote.
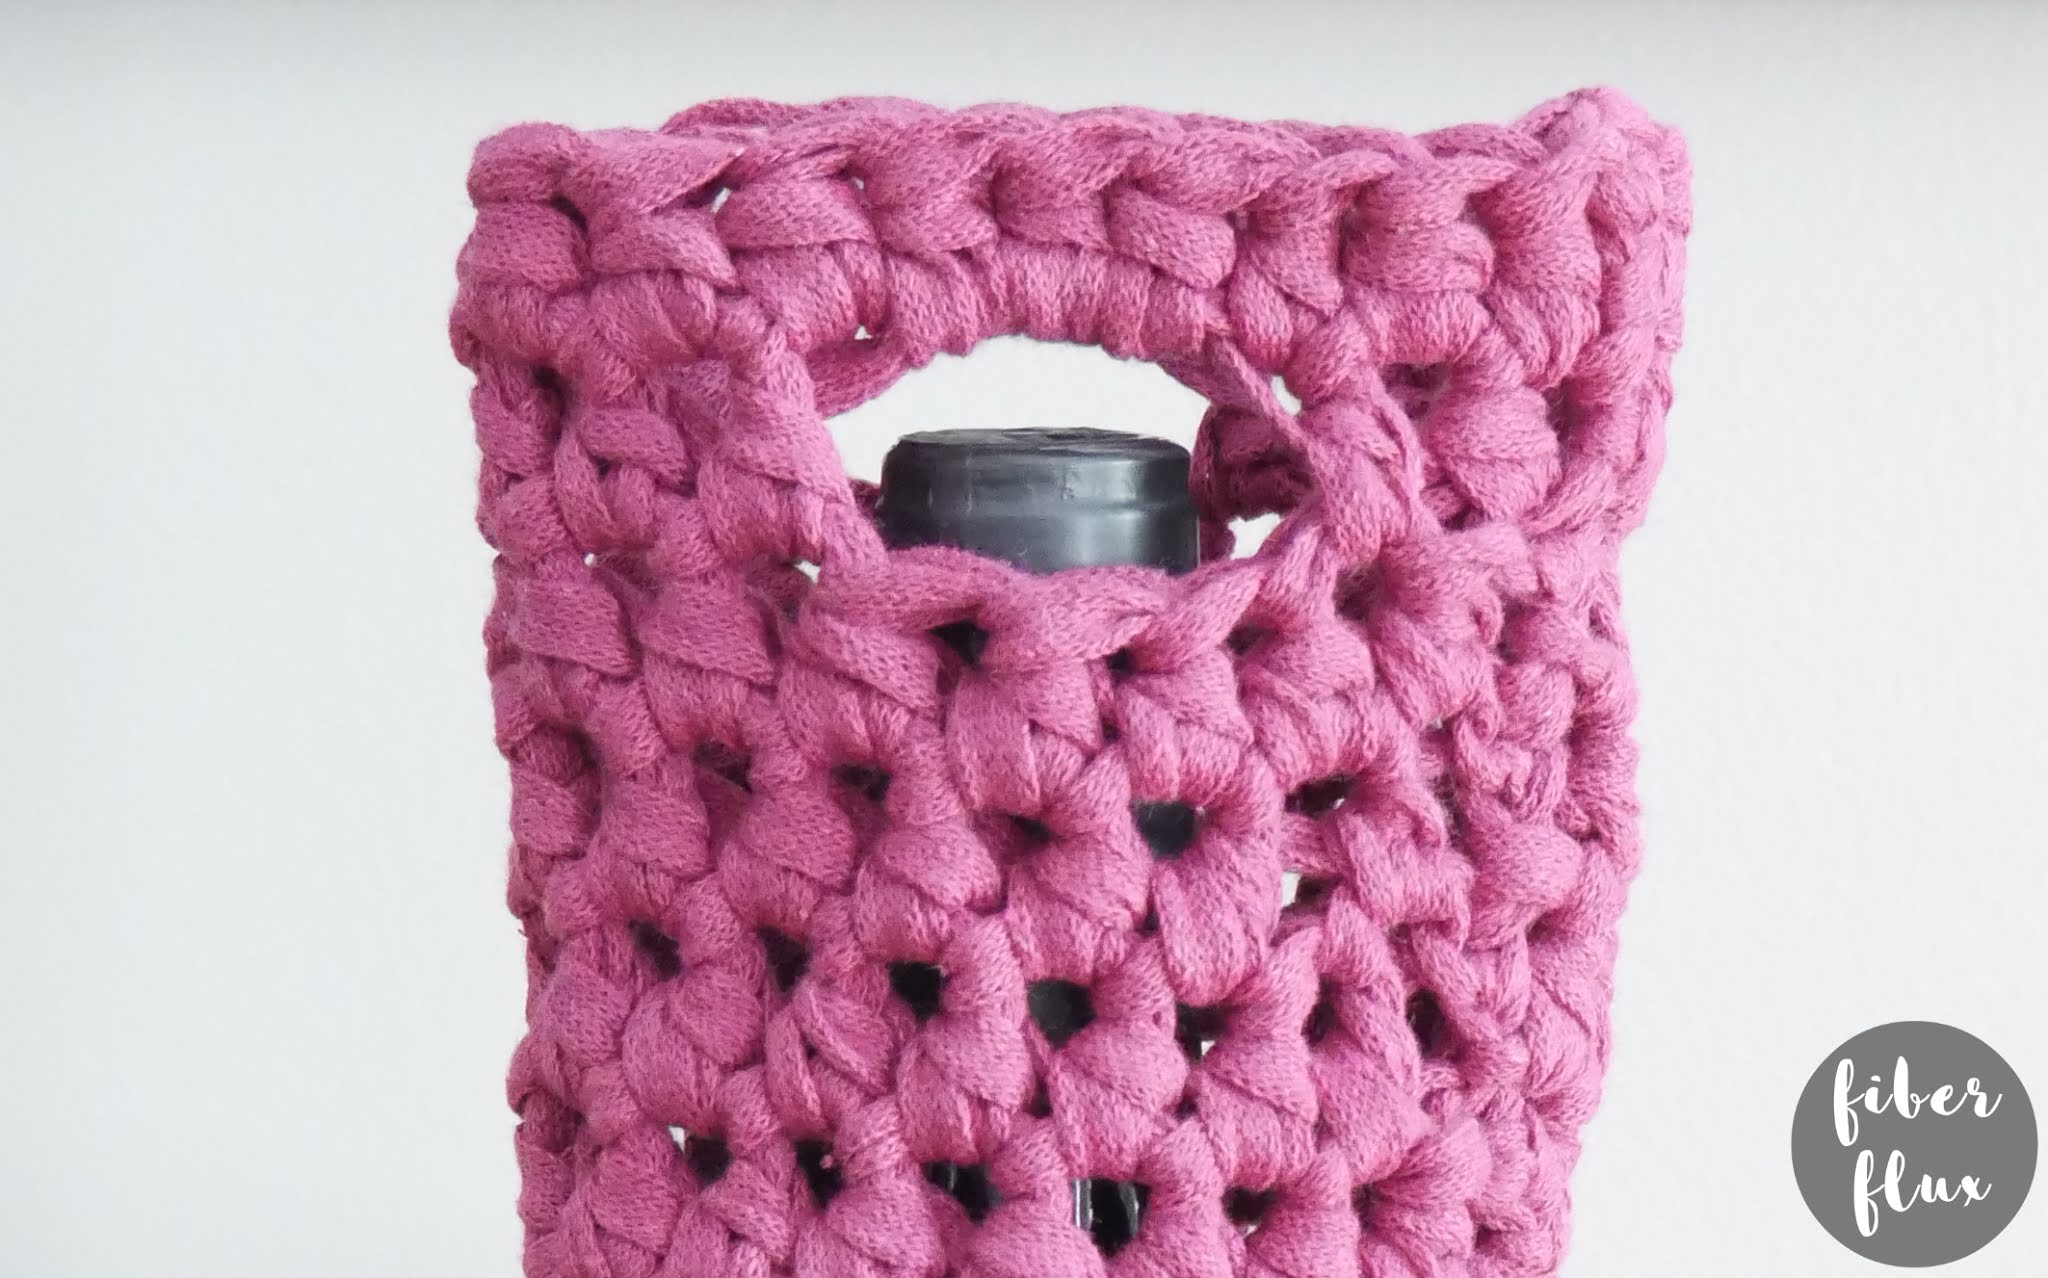
Instructions for the handles:
Before you begin, place stitch markers where you want the handles. Be sure they are evenly placed. I did mine so that there are three stitches between each marker, but if you’d like a different sized handle
Round 1: Ch 2 (counts as a hdc), then work a hdc into the first stitch, then a hdc into the next stitch. Ch 3 and skip the next three stitches, then work a hdc into the next stitch and into each of the next two stitches. Ch 3 and skip the next three stitches, then work a hdc into the next stitch and into each of the next two stitches. Work a slip stitch into the topmost chain to complete the round.
Round 2: Ch 2, then work a hdc into each stitch until you come to the first handle. Next work 3 hdc into the handle space. Work a hdc into each of the next three hdc stitches. Work 3 hdc into the next handle space, then a hdc into each of the remaining stitches. Join with a slip stitch to close the round.
Weave in any ends that remain and you’re finished!


© Jennifer Dickerson 2021
For more fun projects and pretty patterns, be sure to follow Fiber Flux on Facebook, Instagram, Twitter, and Pinterest for the latest updates!
Love PDF patterns? Join our Fiber Flux Gold Pattern Club on Patreon!


The first 2 rows seem to give a count of 24. I’m almost at the end and the final row seems to have a stitch count of 12 – wondering if I’ve misread? Thank you for the pattern. First time working with ribbon.
This comment has been removed by a blog administrator.