

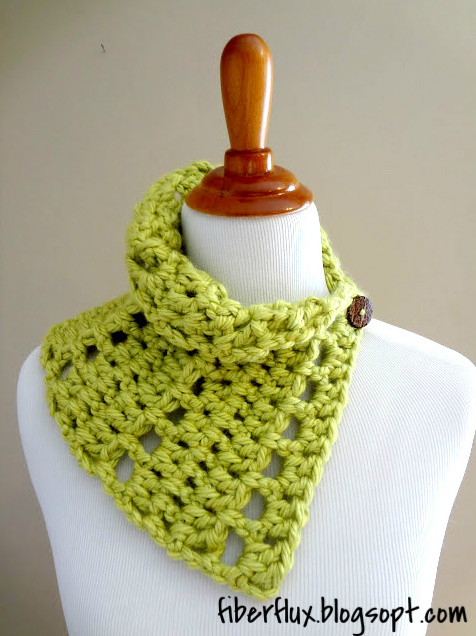
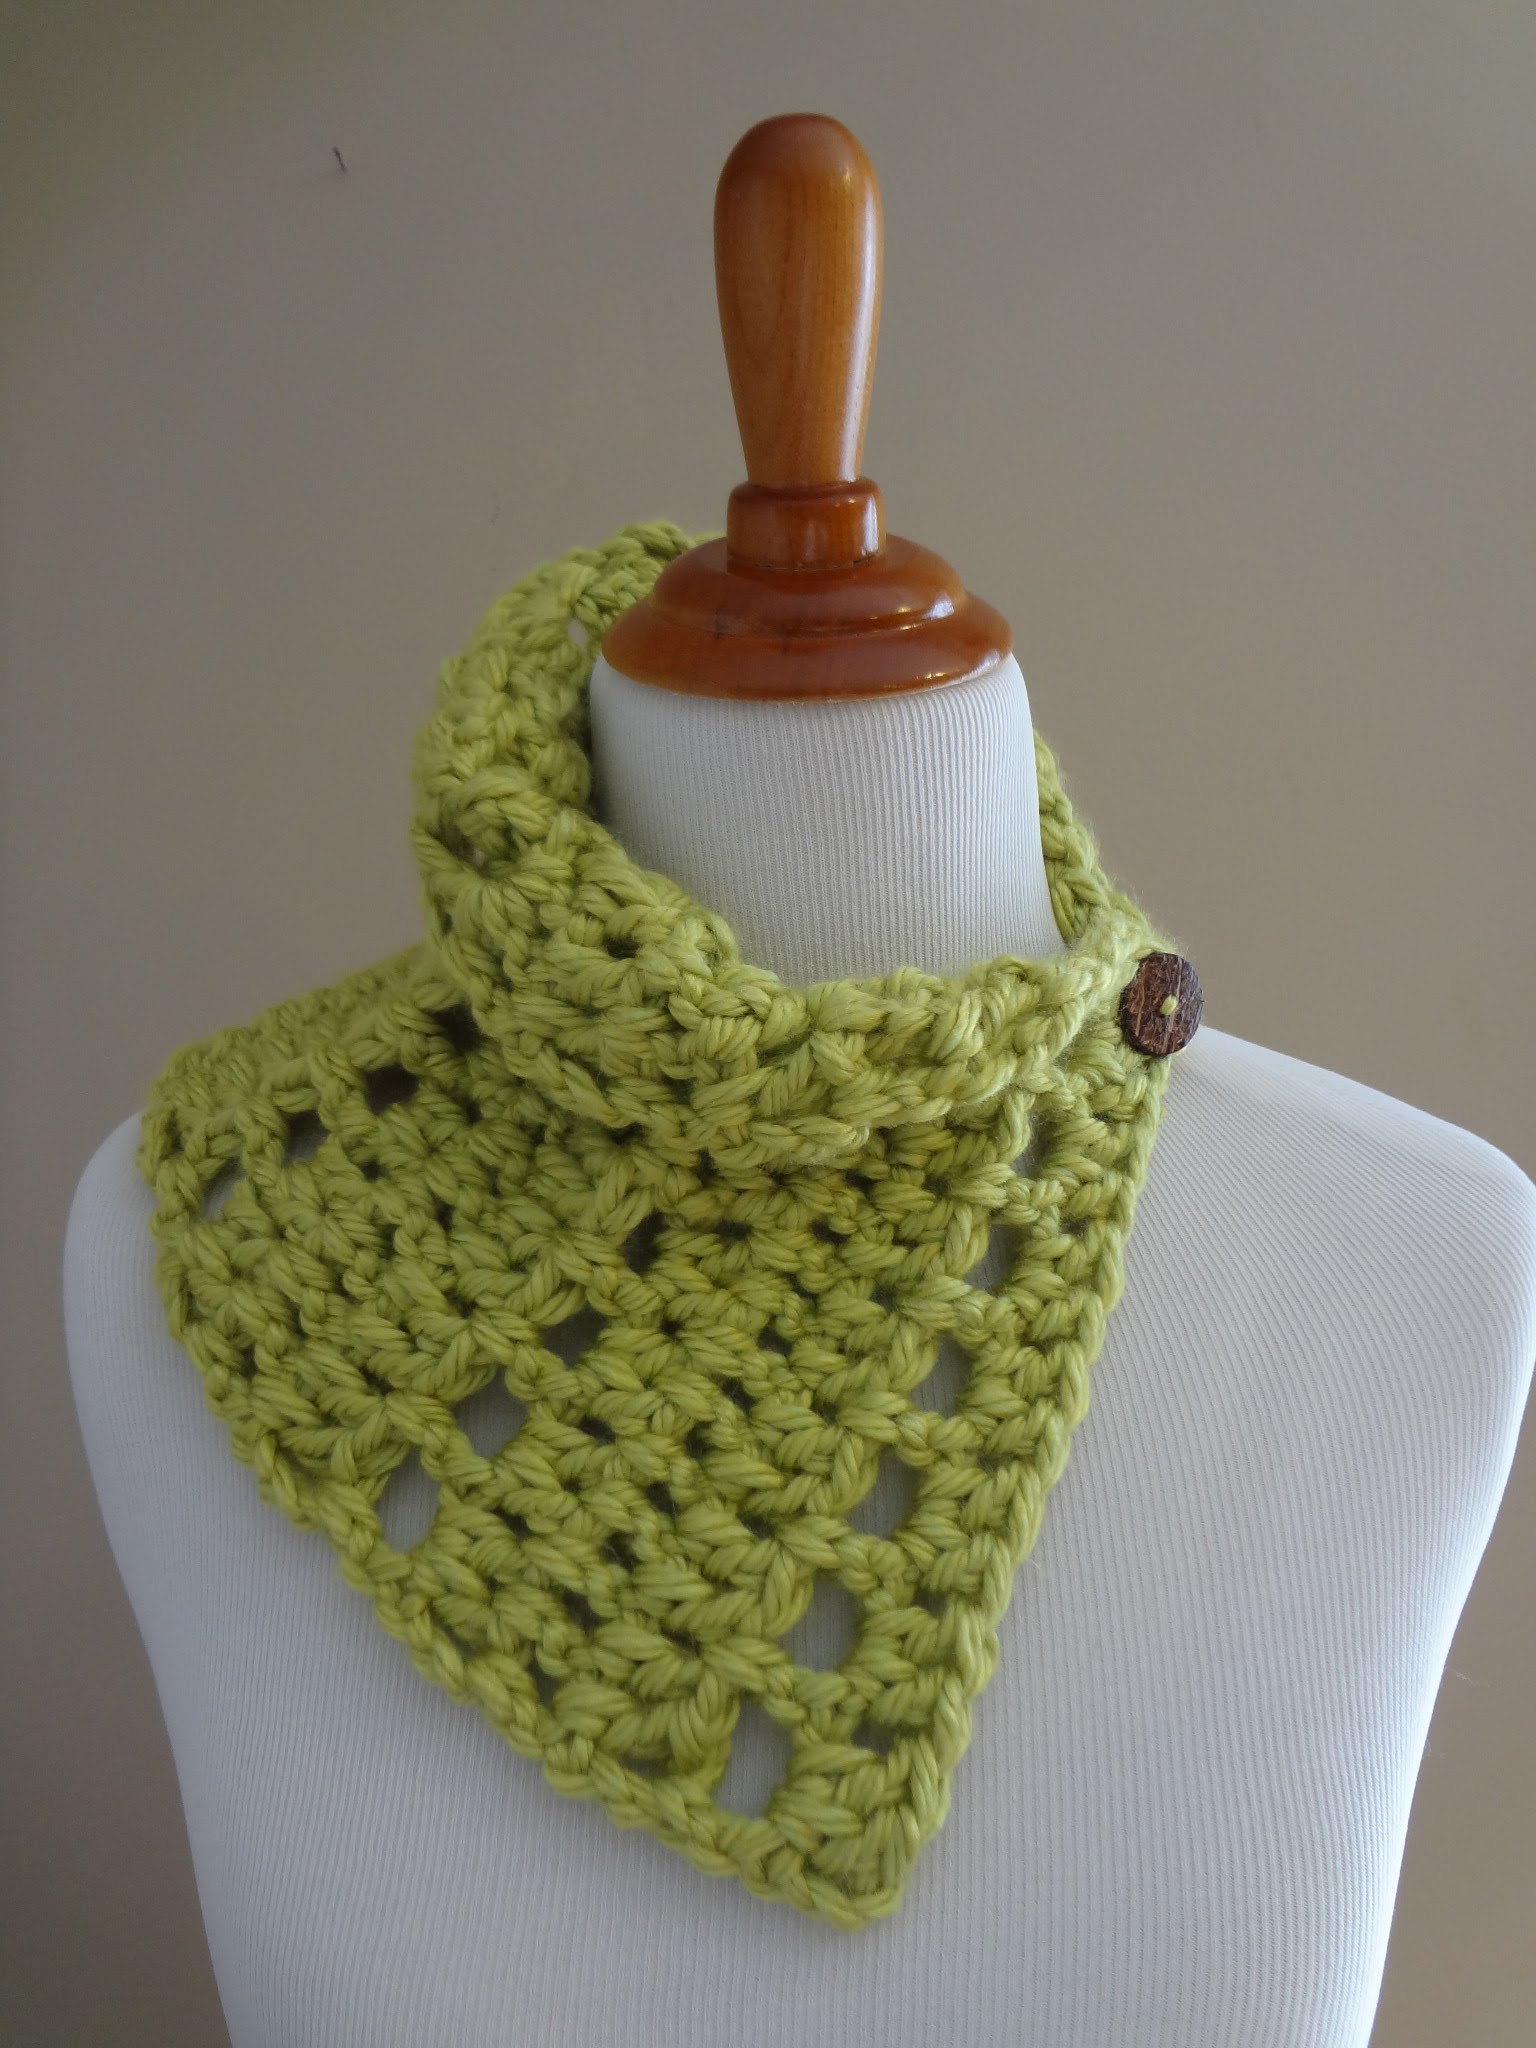
The Key Lime Crochet Neck Wrap is a pretty accessory that adds a splash of color to a gray day. A simple stitch sequence with a pretty eyelet row is super simple for beginners, but is equally engaging for seasoned crocheters as well. Worked with a large hook, the result is a very quick project that is warm, lofty, and beautiful.
Watch a video to crochet the Key Lime Neck Wrap stitch by stitch:
Materials:
- 1 Skein Lion Brand Hometown USA Solids, 81 yards (Colorway shown: “Monterrey Lime”) (Note: If you choose to use some of the tweeds and prints in the Hometown line, be sure to check the yardage, some of them are only 64 yards, so you’ll need more than one skein).
- N (9.0 mm) crochet hook
- 1 Button
Tapestry Needle (for weaving in ends)
Sizing:
- Length-18 inches
- Width-7.5 inches
Instructions:
- Ch 18.
Foundation Row: dc in the 4th ch from hook, 1 dc in each ch across row. - Row 1: Ch 3 and turn, dc in first space and each space to end of row.
- Row 2: Ch 3 and turn, dc in first space, ch 2, skip one space, *dc in next space, ch 2, skip next space, rpt from * to end of row, dc in last space (ch 3 turning space)
- Row 3: Ch 3 and turn, 2 dc in first space (ch 2 space from previous row), 2 dc in each ch 2 space across row, 1 dc in last space (ch 3 turning space)
- Row 4: Ch 3 and turn, dc in first space and each space to end of row.
- Row 5: Repeat row 4.
Repeat rows 2-5 until length is reached (see sizing above).
Finishing:
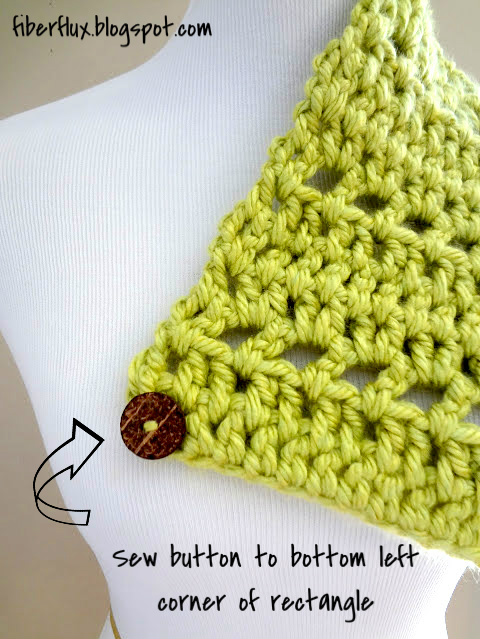
Before sewing the button to your neck wrap, test it first by slipping it through one of the eyelet holes to make sure it is the correct size. Sew button onto the bottom corner (as shown below) and weave in any ends.
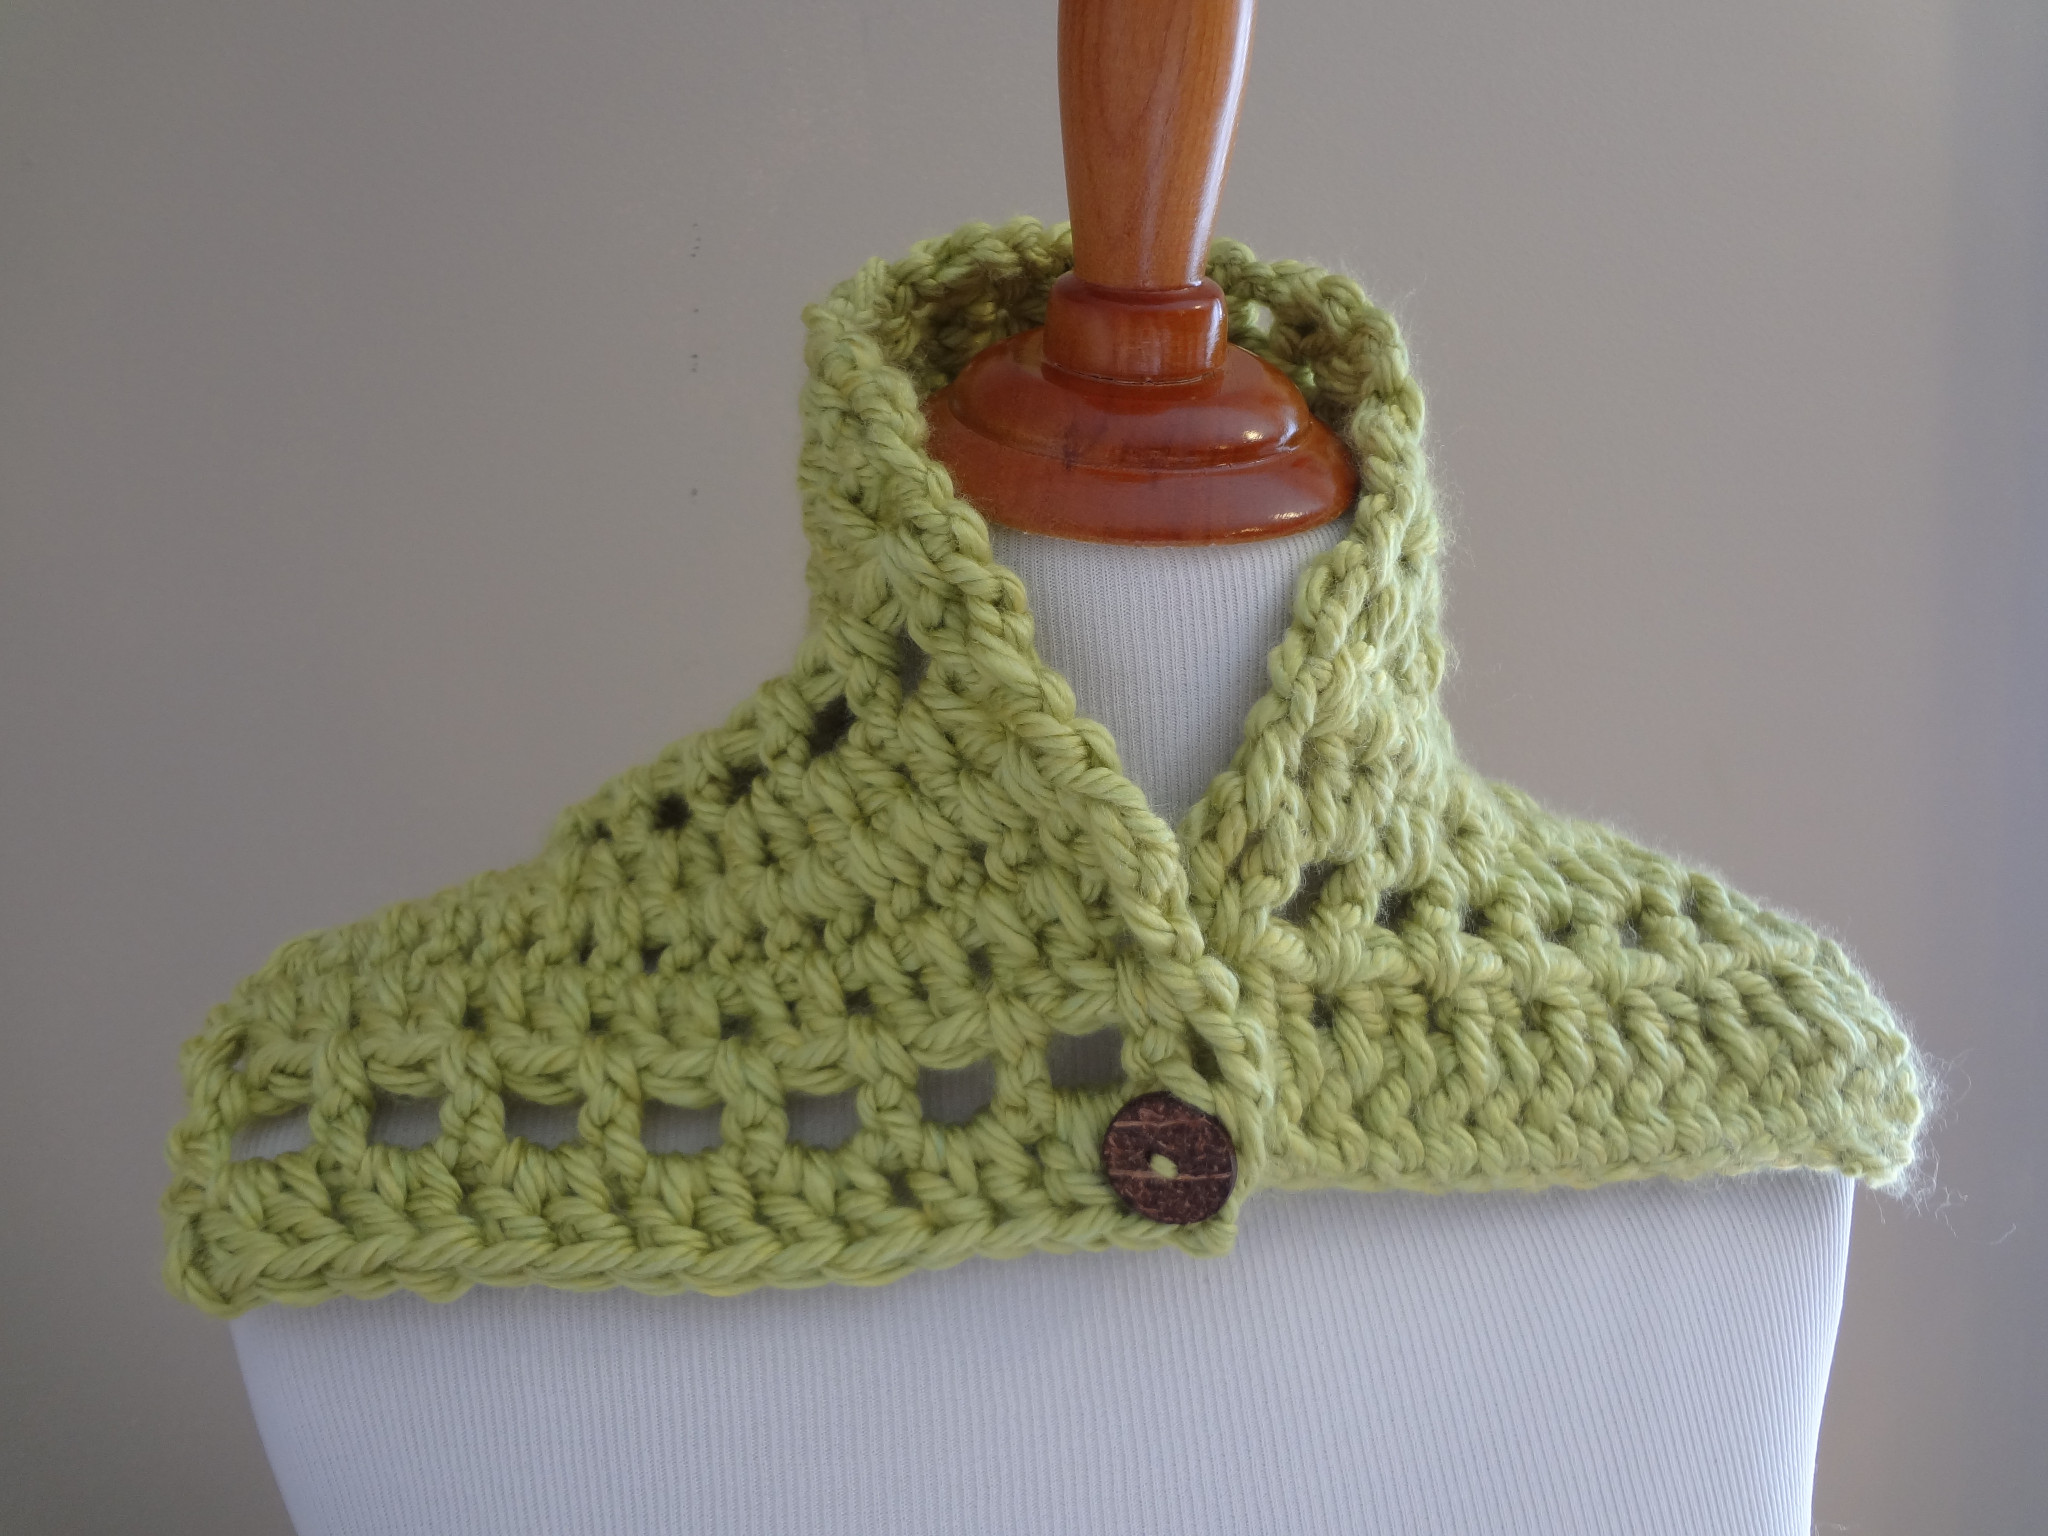
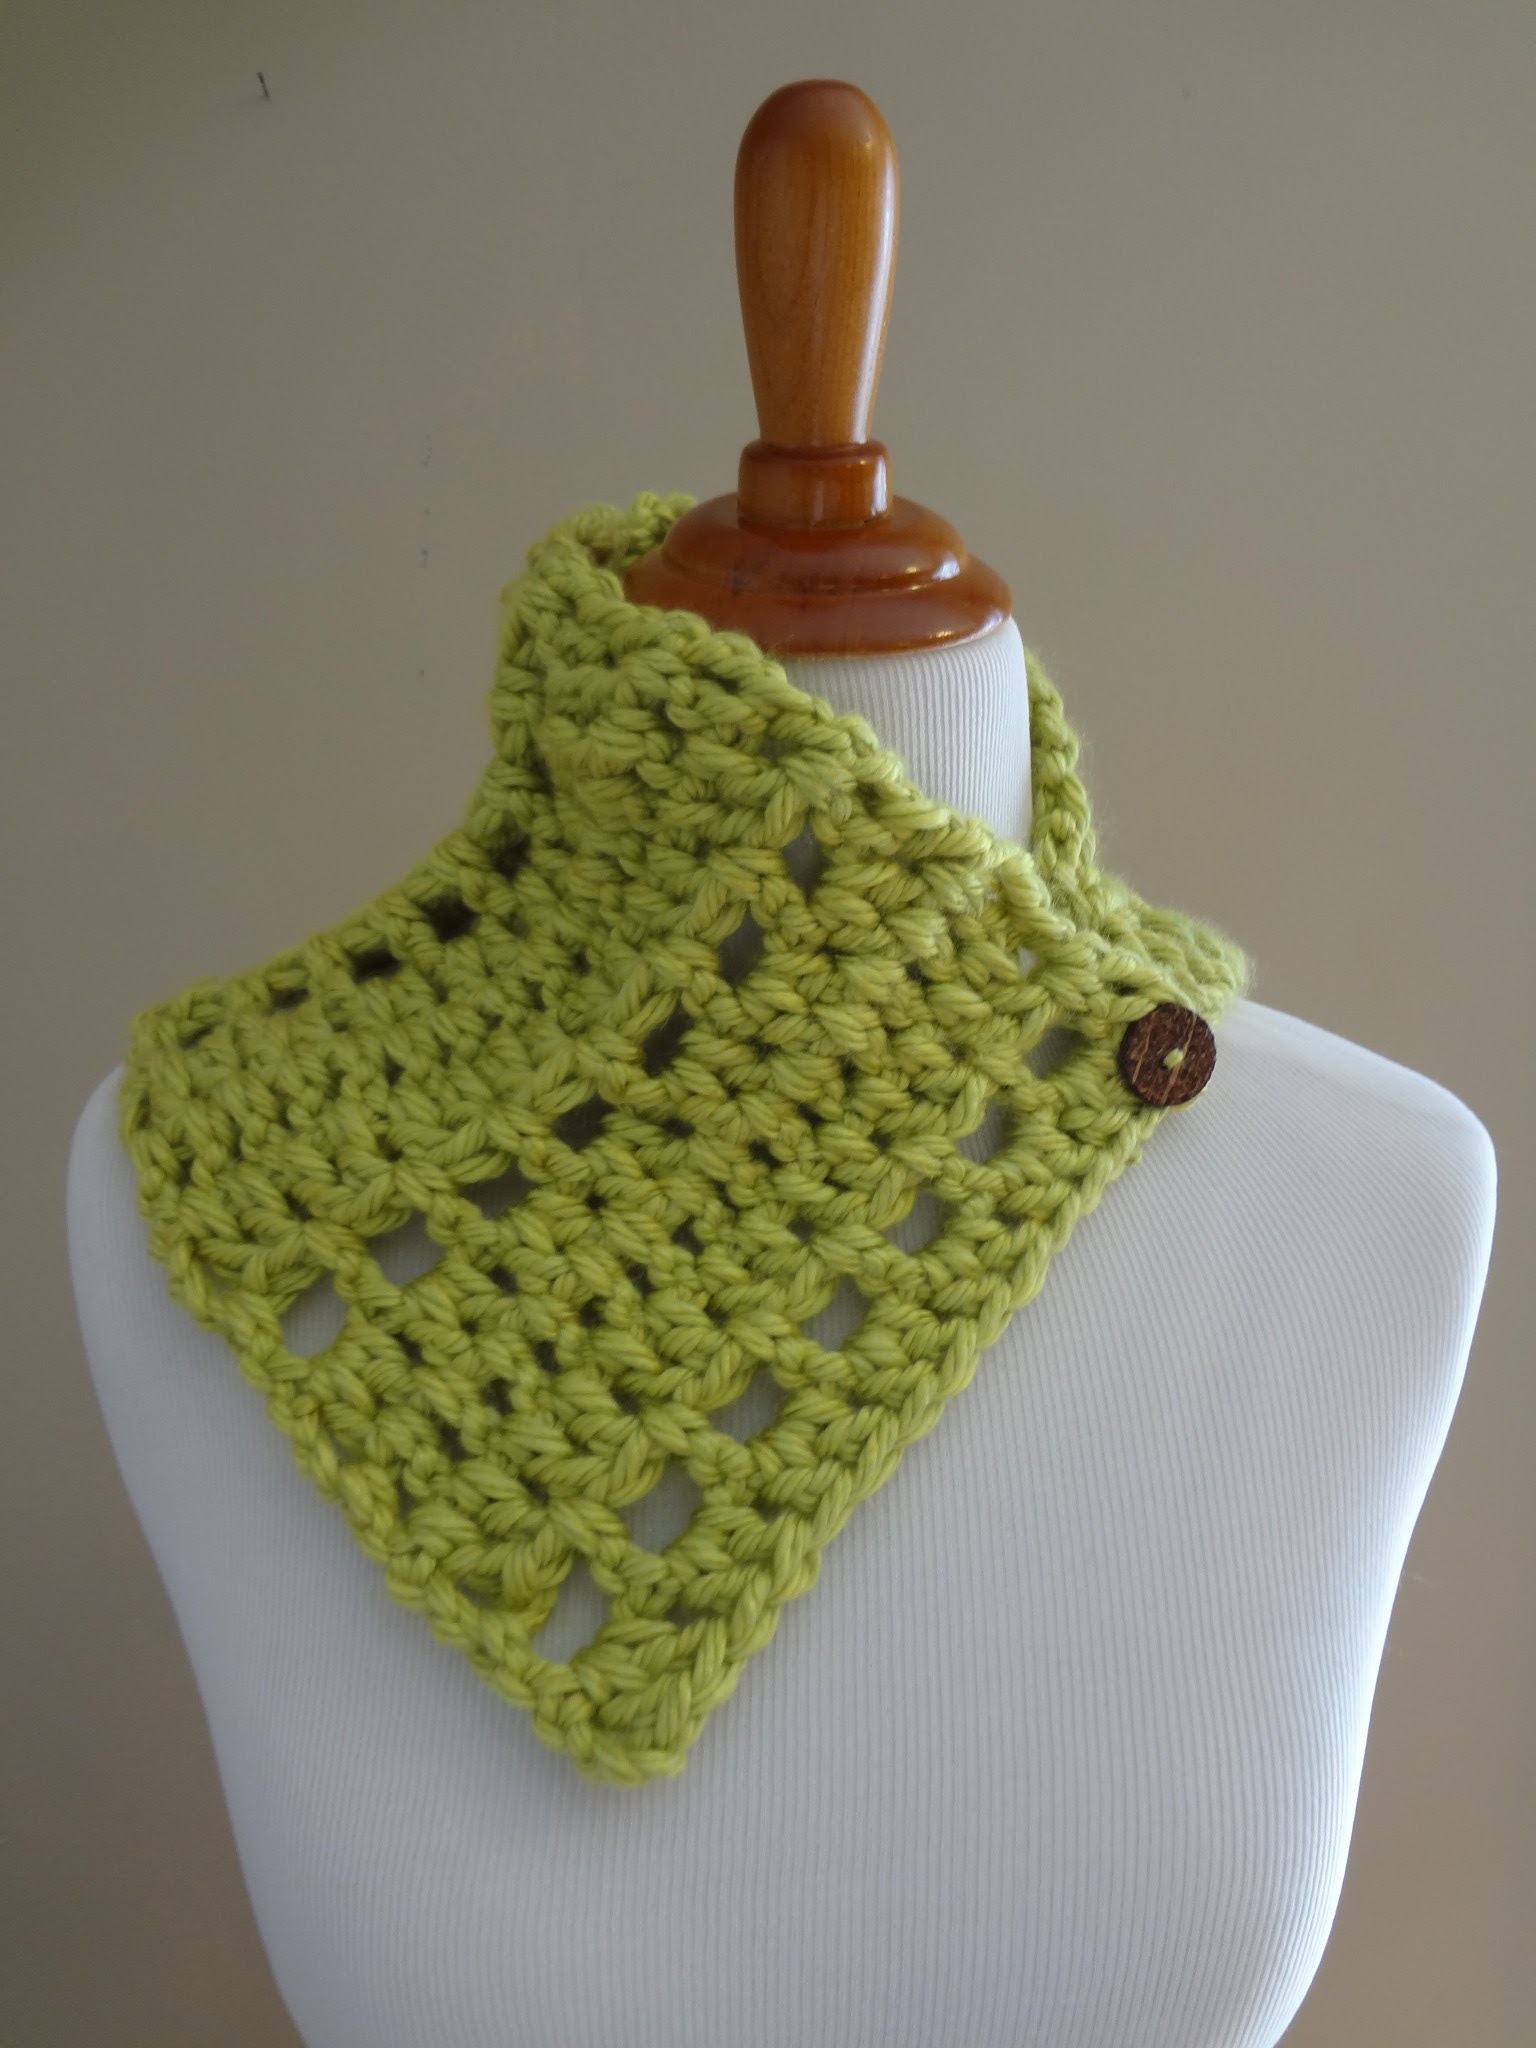
Check out all the ways to wear your neck wrap…try spinning it around with the button in the back for a cowl/turtle neck look. Or, wear it with the button in the center for a collar-like shoulder wrap.

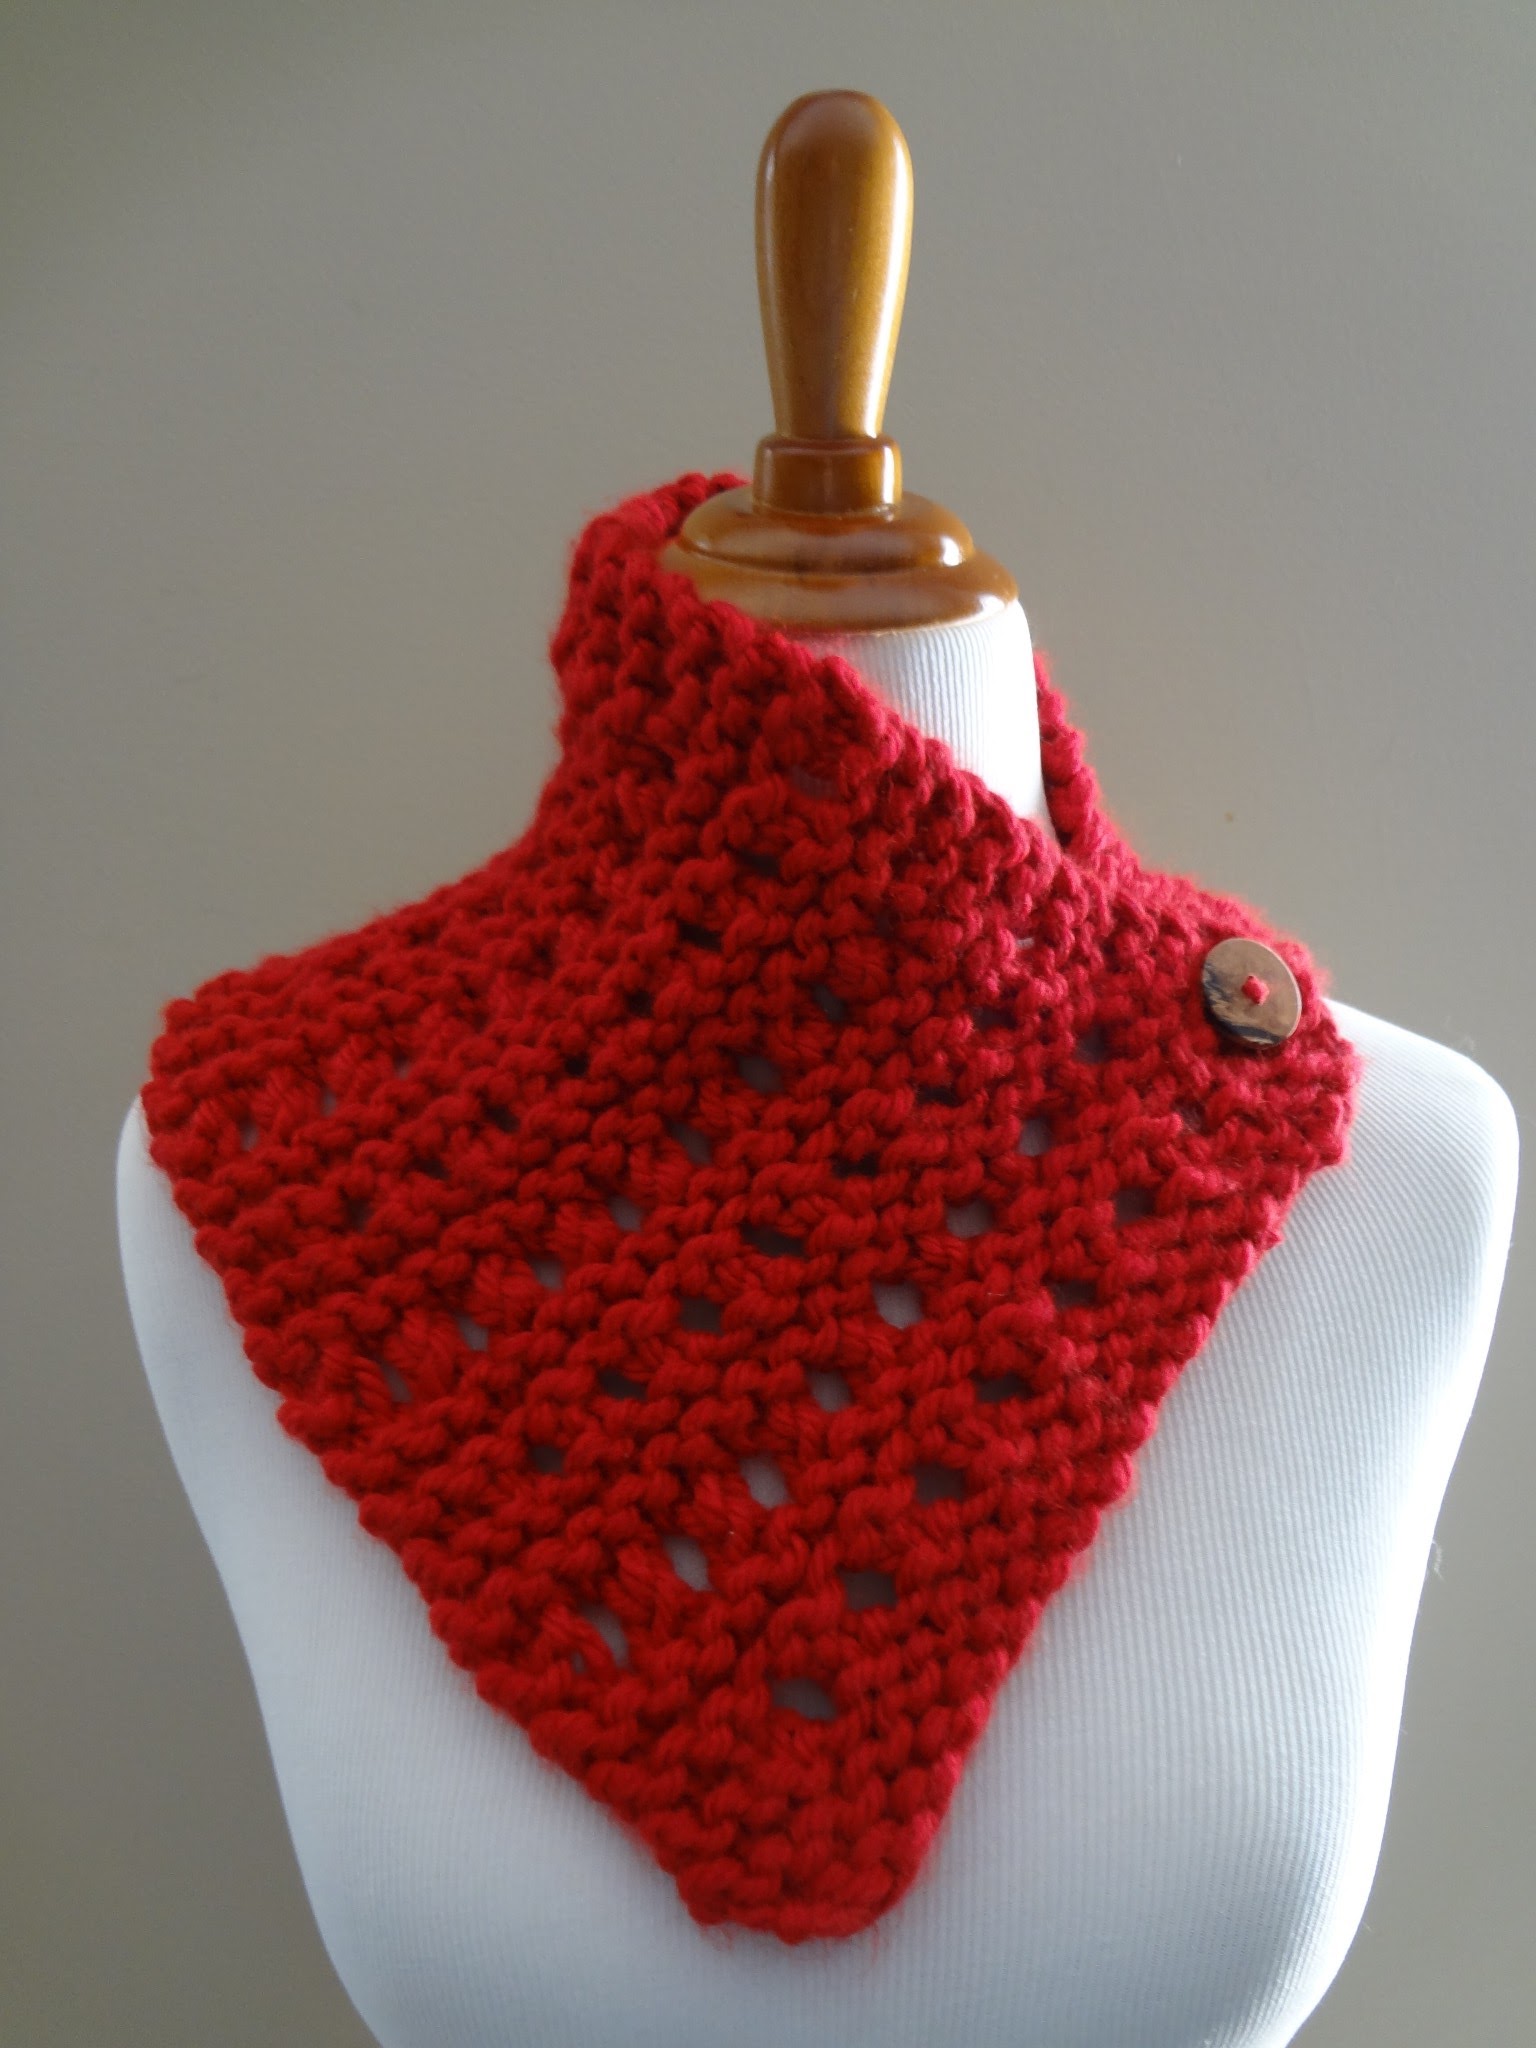
Here is a similar neck wrap pattern for the knitters too…
Click here for Strawberry Jam Neck Wrap Pattern


Thanks Jennifer, you are amazing.
Meredith
And you are so lovely with your kind words…hugs!
Your pattern is really nice – thank you. Love the colours that you've used for both and definitely what we need for the winter!
Thanks! I thought that pretty green would be nice for when the days are gray and cold…nice little pop of greenery!
Oh, I just love this key lime neck wrap. Can't wait to start!
Yay! Let me know how it turns out!
Yipee, I finished it in about 2 hours minus the button! Excited to link my work with yours. I only have thanks for you!
Yay!!! Can't wait to see it, I know it will be lovely. 🙂
Hi Jennifer,
First, I have to say I just LOVE your blog. It is one of my favorites to look at. You have amazing posts and patterns and I thank you! I made the neck wrap (two of them) and both times ran short of yarn by one whole rotation of the pattern. It happened twice so I am wondering if I am doing something wrong. I tend to knit tightly so I was surpised that this happened. I don't mind buying two skeins as I can use extra for a little scarf that I can donate. Is it just me? Thank you again for all you do!
Thanks for your great question! I did a little research and found that some of the prints and tweeds in the Hometown line have a different yardage than the solids. The solids measure 81 yards and the tweeds and prints measure only 64 yards.
Maybe it could be that? I updated the pattern with a special note too for others making their yarn selections. I hope that helps!
Hi Karen!
I LOVE the Barley colarway…yours sounds like it's going to be gorgeous! Have fun and happy crocheting!
Love this one. I can't wait to make it!
This comment has been removed by the author.
Ok, I am half way through after an hour and I LOVE it! I will be making more as Christmas gifts. Thank you for posting this pattern.
You're welcome, they make super fast gifts! 🙂
This is such a lovely pattern. I am a rusty "beginner" and found this a good way to return to crocheting after many years. A couple of false starts – one, due to not being loose enough with my tension (6" width as opposed to a more relaxed 7-5 to 8") and Row 4 – it wasn't quite clear to me that I was to DC inbetween each of the 2DC's from the previous row. However, your excellent photos showed me were I went wrong.
I crocheted with "Katia Montezuma", and used a toggle as the fastening. I used approx 70 grams of the wool/acrylic mix. I'm wearing my creation as I type.
thankyou so much 🙂
Sounds beautiful, thanks for sharing! 🙂
First attempt came out huge with the N hook so third attempt I used an L hook and was much better but still about an inch bigger in length and width than your measurememts…it looks really cute with the top folded down like a collar!
I am almost done with this pattern. I am not sure what I did wrong, but the piece gets wider as it goes. I am going to keep going with it, it's for my 6 year old and i don't think it will be obvious once she has it on, but what do you think I did wrong? I usually count my stitches but wasn't sure how many each row should have. Thank you! Ivy
This is my 1st attempt at this pattern. I am stil a beginner, i've been crocheting for a bit over a year. I am almost done with this and it seems that the piece gets wider as it goes. I usually count my stitches as I go, but wasn't sure how many would be in each row. I think I'll just keep going as I don't think it will be obvious once it's on. It's for my daughter (6 years old). Any idea as to what I did wrong? Thank you, Ivy