
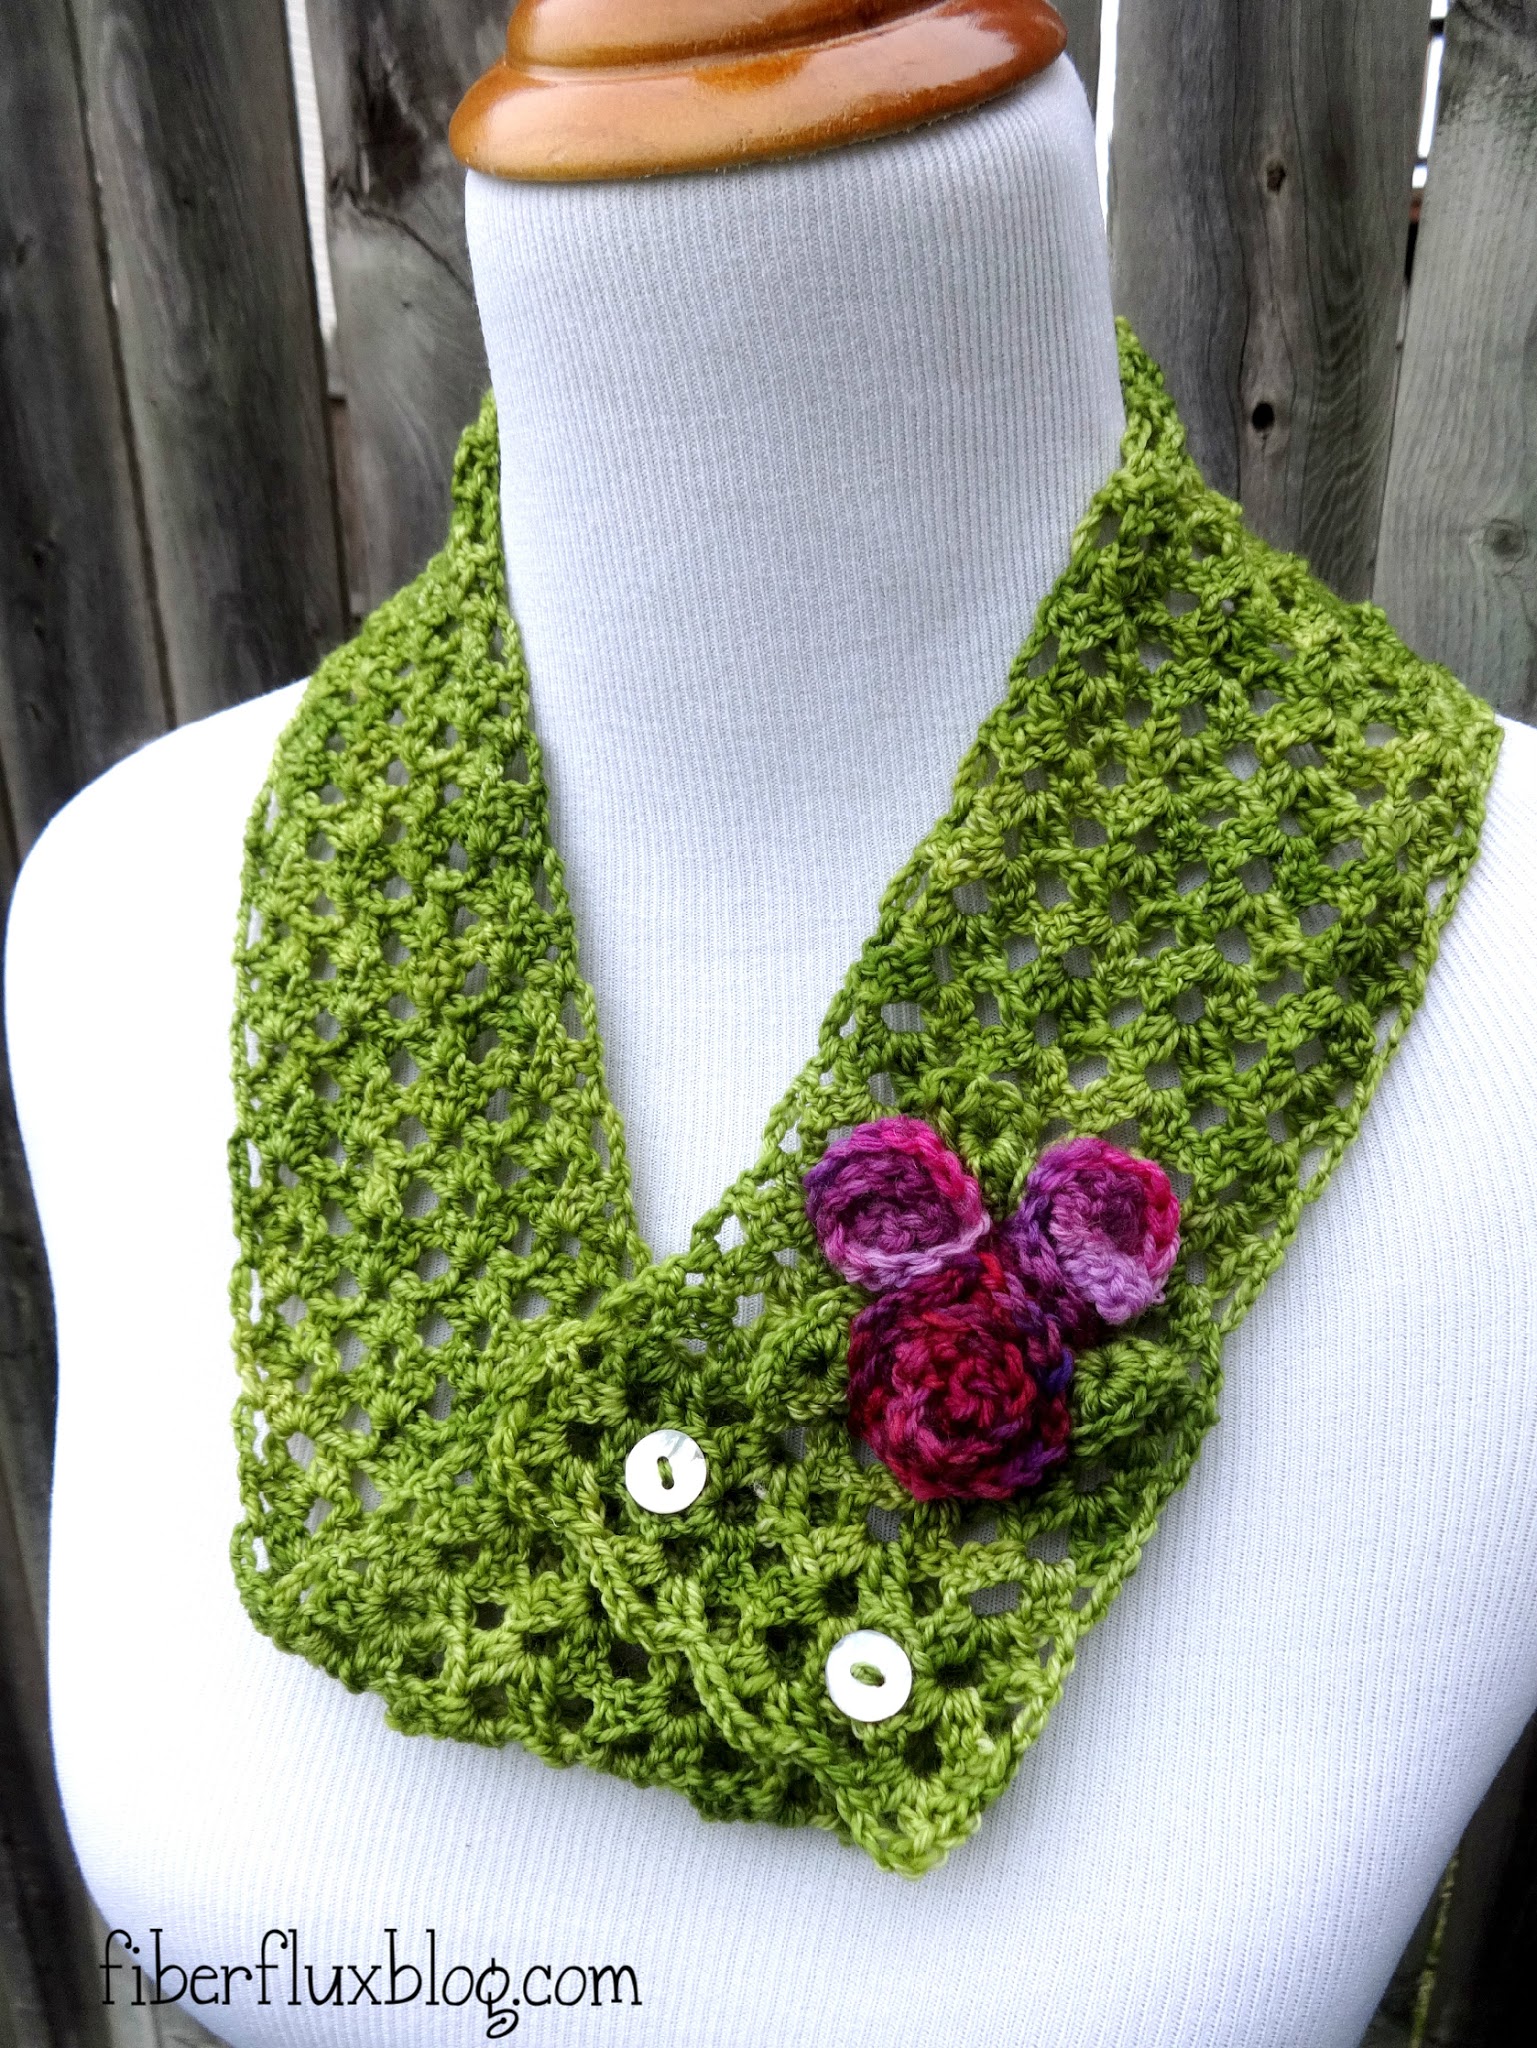
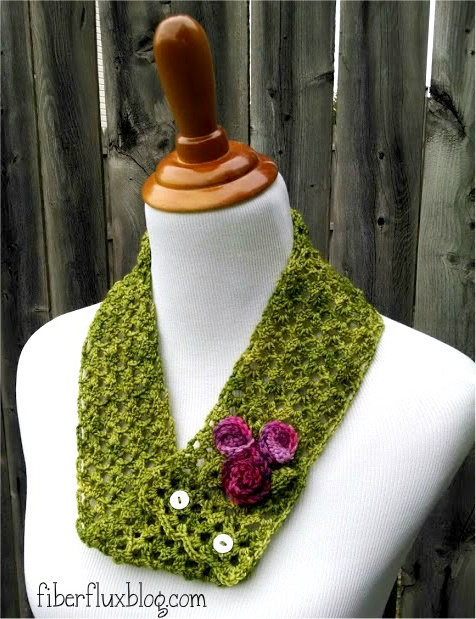
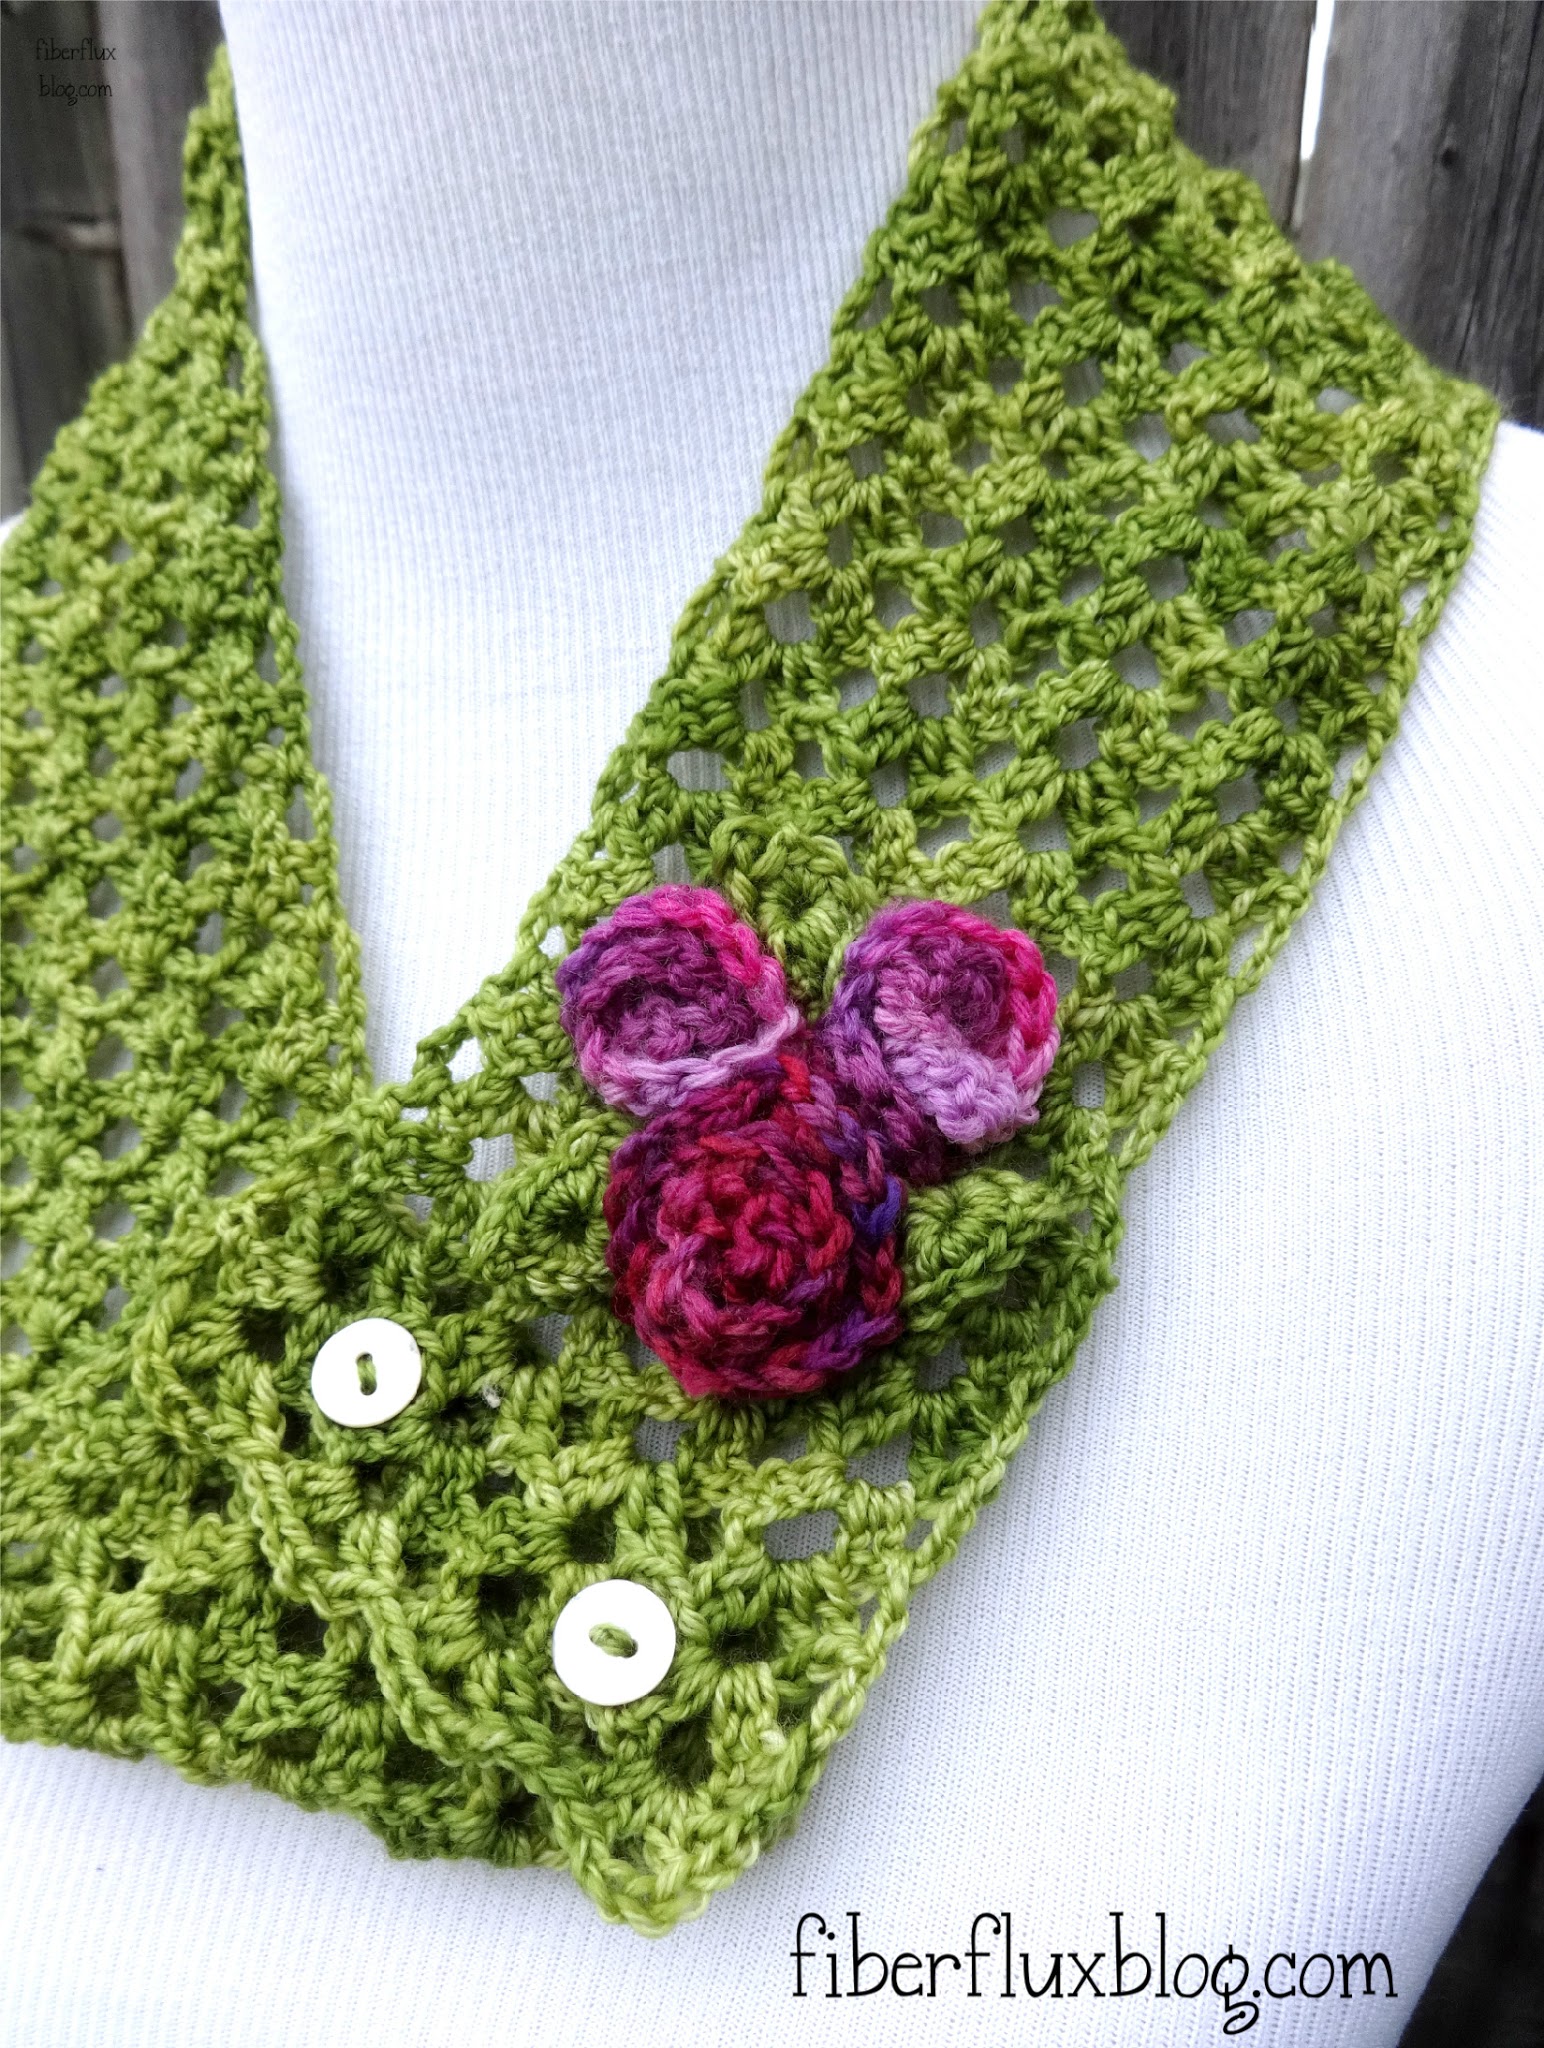
With gorgeous spring weather, holidays, and Mother’s Day on the horizon, I thought something delicate, lacy, and flowery would be in order! The Vintage Corsage Cowl is crocheted quickly in lovely and lightweight sock yarn, and two pretty shell buttons keep it together. Three blossoms and three leaves finish it off, giving it a splash of vibrant color.
The Vintage Corsage Cowl
By Jennifer Dickerson
Materials:
- Sock yarn of your choice (Yarn shown is Malabrigo Sock Yarn in “Lettuce” Dream In Color Smooshy Yarn in “Ruby River” and Knit Picks Stroll Sock Yarn)
- E (3.5 mm) crochet hook
- 2 Buttons (Lacy holes double up as buttonholes, be sure to try them out before sewing them on)
- Tapestry Needle
- Scissors
Sizing:
- Length of cowl: 32 inches
- Width of cowl: 3 inches wide
- Width of large rose: 1.5 inches
- Width of smaller roses: 1 inch
- Width of each leaf: 1/2 inch
Instructions for Cowl:
Chain 28
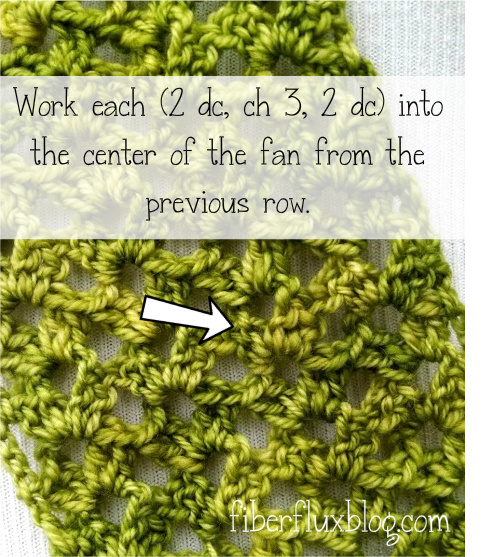
Row 1: In the 6th ch from the hook, work (2 dc, ch 3, 2 dc) all in the same chain. *Skip 5 chains, then in the next ch, work (2 dc, ch 3, 2 dc). Repeat from * to last 4 ch. Skip 3 ch, and in the last ch, work a dc.
Row 2: Ch 3 and turn. *Work (2 dc, ch 3, 2 dc) into the center of each fan from the previous row all the way across (see photo below). Work a dc in the turning chain space.
Repeat row 2 until cowl is 32 inches long (or desired length). Fasten off.
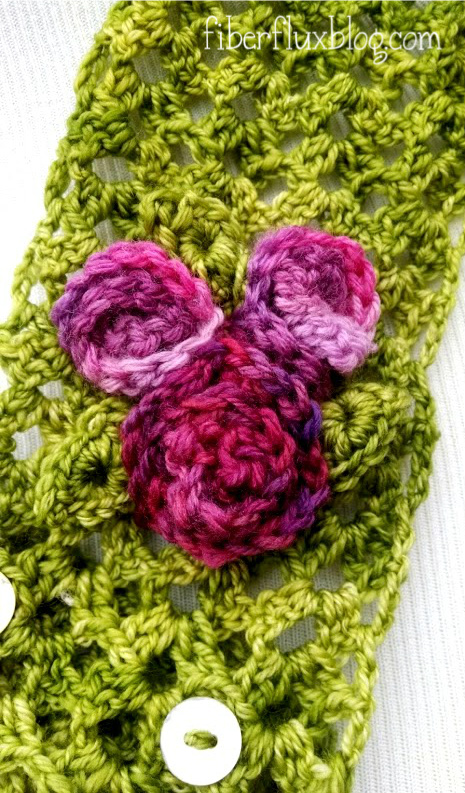
Instructions for Larger Rose:
(Make 1)
Click here for a rose photo + video tutorial…
Ch 24
In the 4th ch from the hook, work 2 dc, then work 3 dc in each chain all the way across to the end. Rose will curl naturally. Coil into desired shape, then seam together using remaining tails. Keep tails attached for sewing to the cowl later.
Instructions for Smaller Roses:
(Make 2)
Click here for a rose photo + video tutorial…
Ch 12
In the 4th ch from the hook, work 2 dc, then work 3 dc in each chain all the way across to the end. Rose will curl naturally. Coil into desired shape, then seam together using remaining tails. Keep tails attached for sewing to the cowl later.
Instructions for Leaves:
(Make 3)
Click here for a leaf photo + video tutorial…
Chain 4 and join with a slip stitch to form a ring.
Round 1: In the center of the ring, work 6 dc, 4 sc, 1 tr, 4 sc. Join with a slip stitch to close leaf and fasten off. Keep tails intact for seaming to the cowl later.
Finishing & Assembly:
Sew roses and leaves to cowl with a tapestry needle as shown in the above photo using yarn tails. I sewed the roses on first, then added the leaves to the outside edges of the “corsage”. Weave in any ends that remain.

For more fun projects and pretty patterns, be sure to follow Fiber Flux on Google+, Facebook, Twitter, and Pinterest for the latest updates!
© Jennifer Dickerson 2014
Please note: Patterns are for personal and charity use only. In addition, if you enjoy the pattern, please link to it, but do not copy the pattern to your own website or blog (including other languages). Thank you!


I needed a Mother's Day gift for a crochet swap group, and I plan to make your Vintage Corsage Cowl. It's perfect for my needs. Thank you!
Neat! So glad you like it! 🙂
Oooh, I think I've gotta make this. So pretty.
This comment has been removed by the author.
You have spoiled us again with a fabulous project.
Hugs,
Meredith
Thanks so much! 🙂
This is too pretty ! Do you think you could change it into knit, maybe with a yo stitch ? I'd love it if you could. Don't bother if you don't want to. I love your blog !
How much yarn is required?
I LOVE this pattern! But I cannot figure out how the buttons go on as it looks like one end is flipped up. Would like more details on button placemen and buttoning the cowl. Thanks!
I enjoy your videos. Thank you so much.
Thank you for the pattern. I thought I understood it perfectly until I looked at the picture. . .when you say "work into the center of each fan," do you mean the ch 3 space? Thanks!
What is the pattern repeat on this? I’m using a dk yarn and thinking maybe one more cluster.