

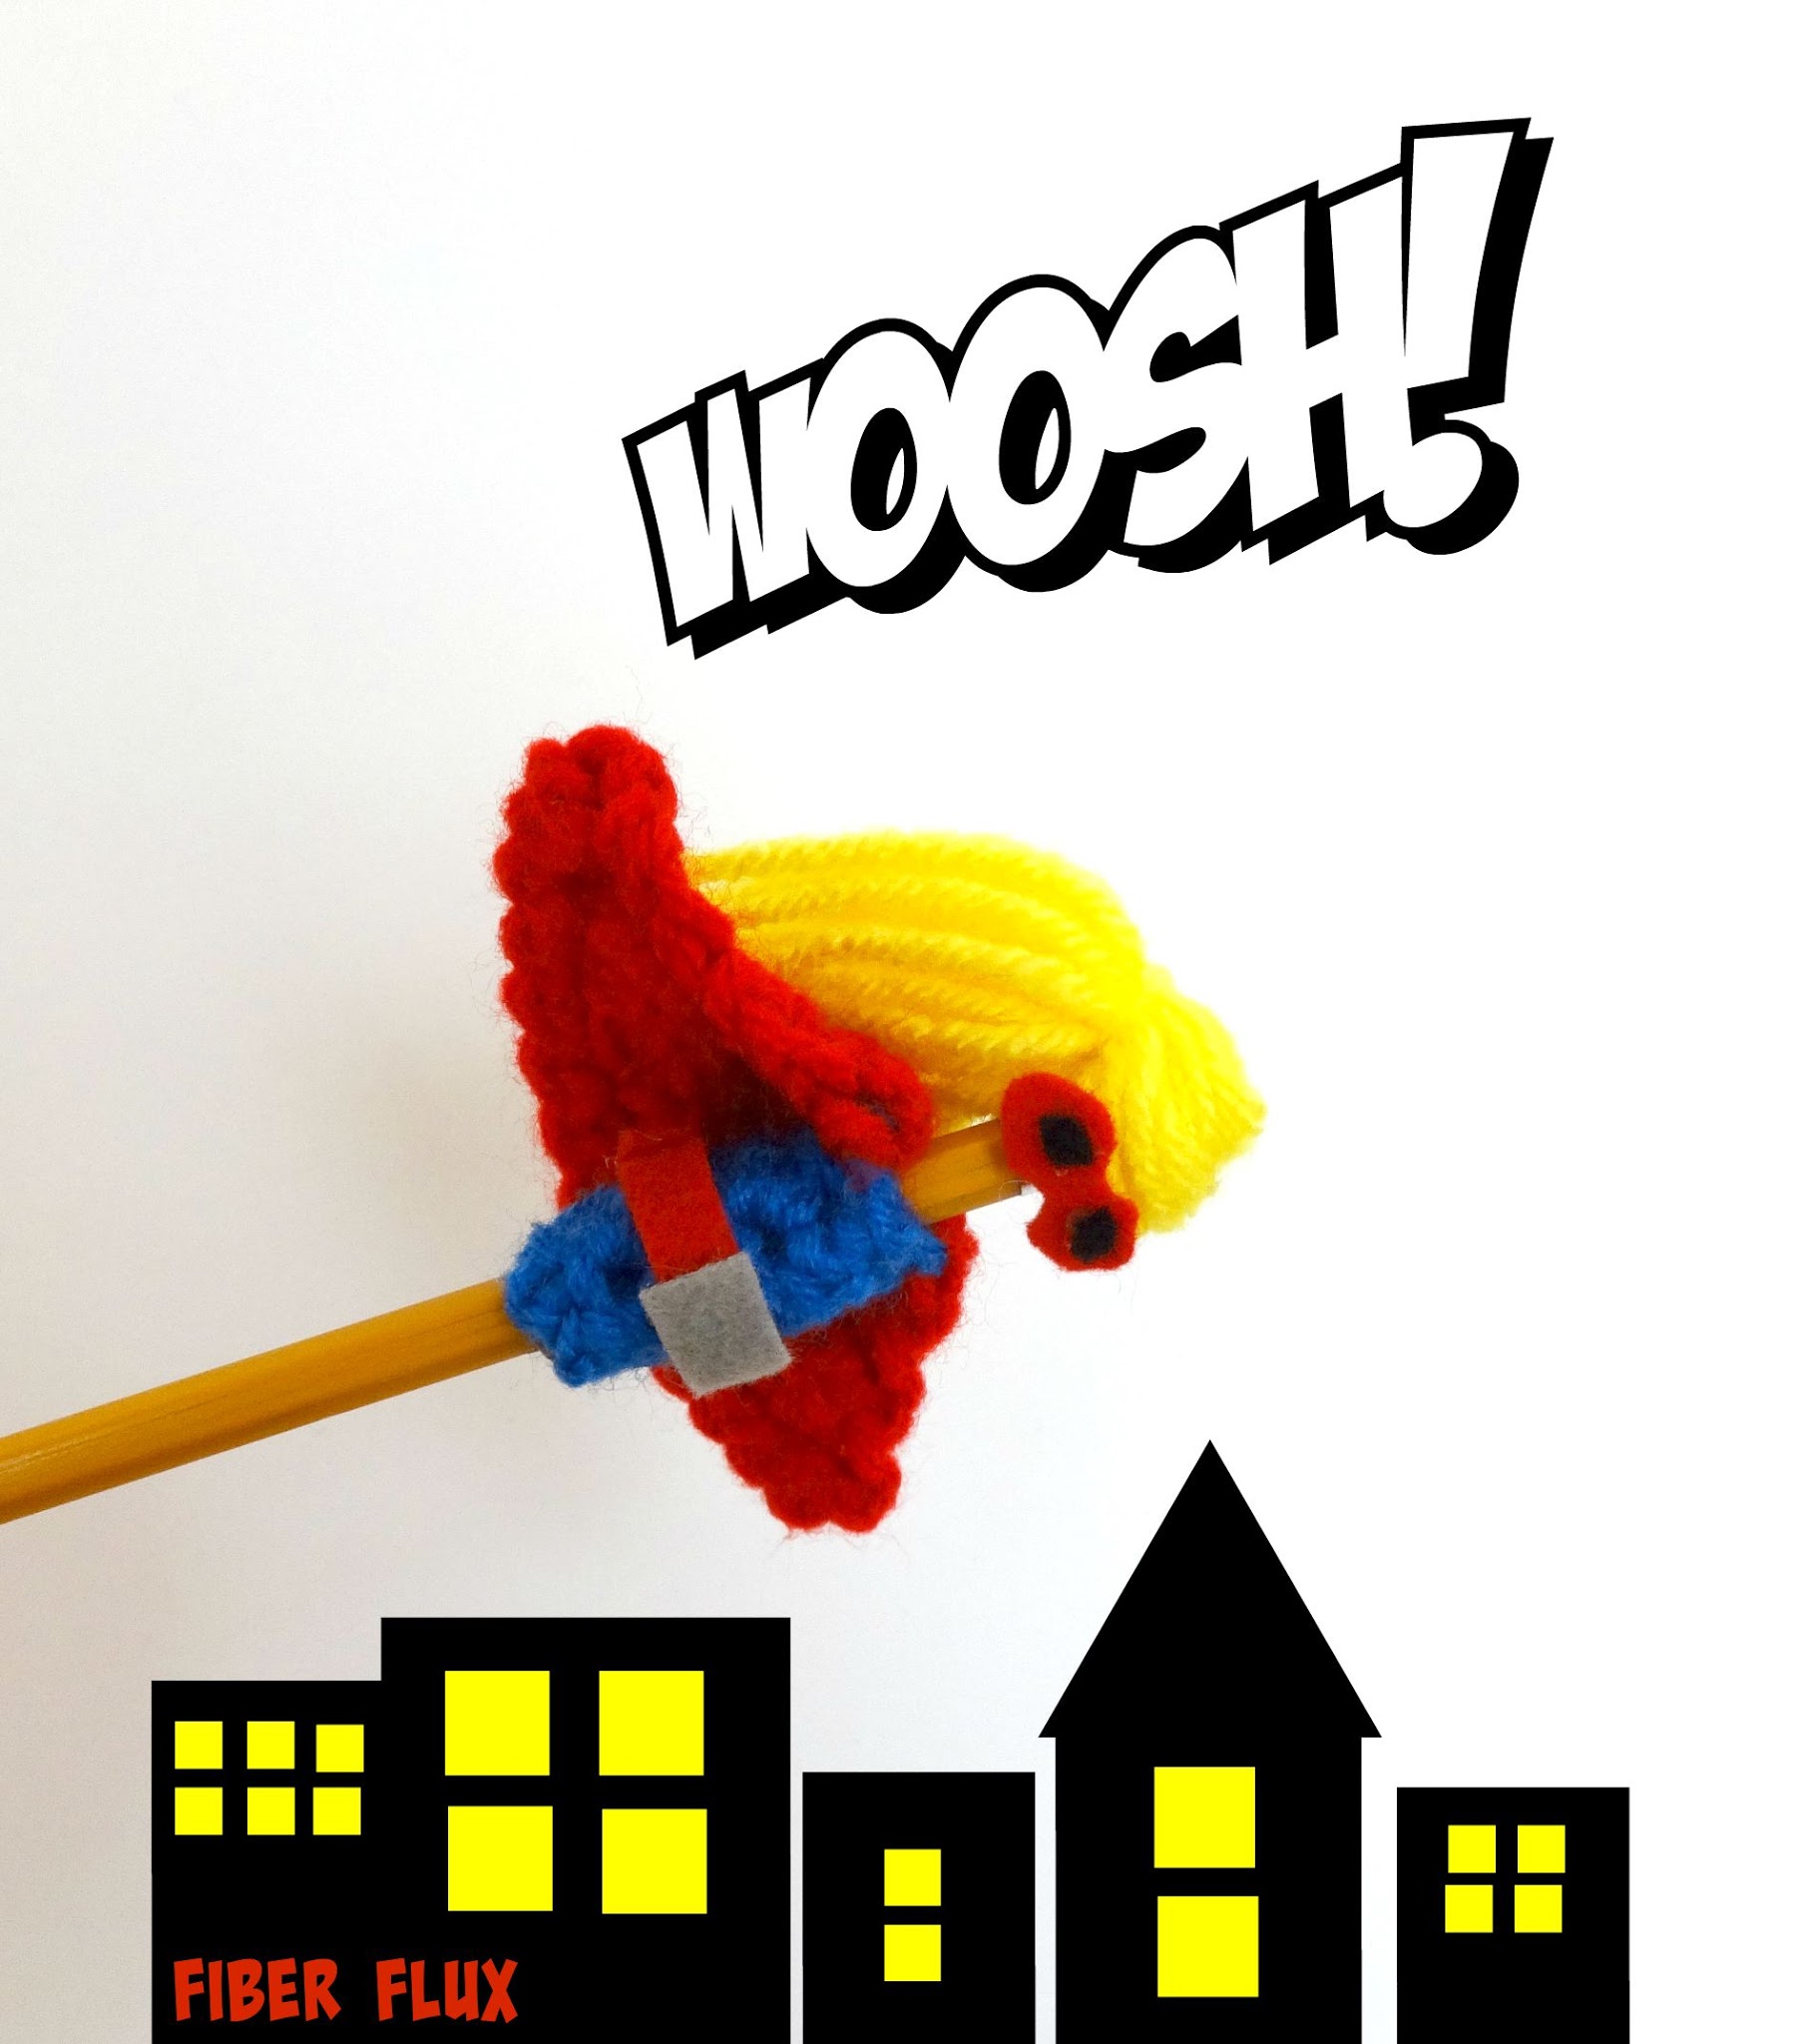
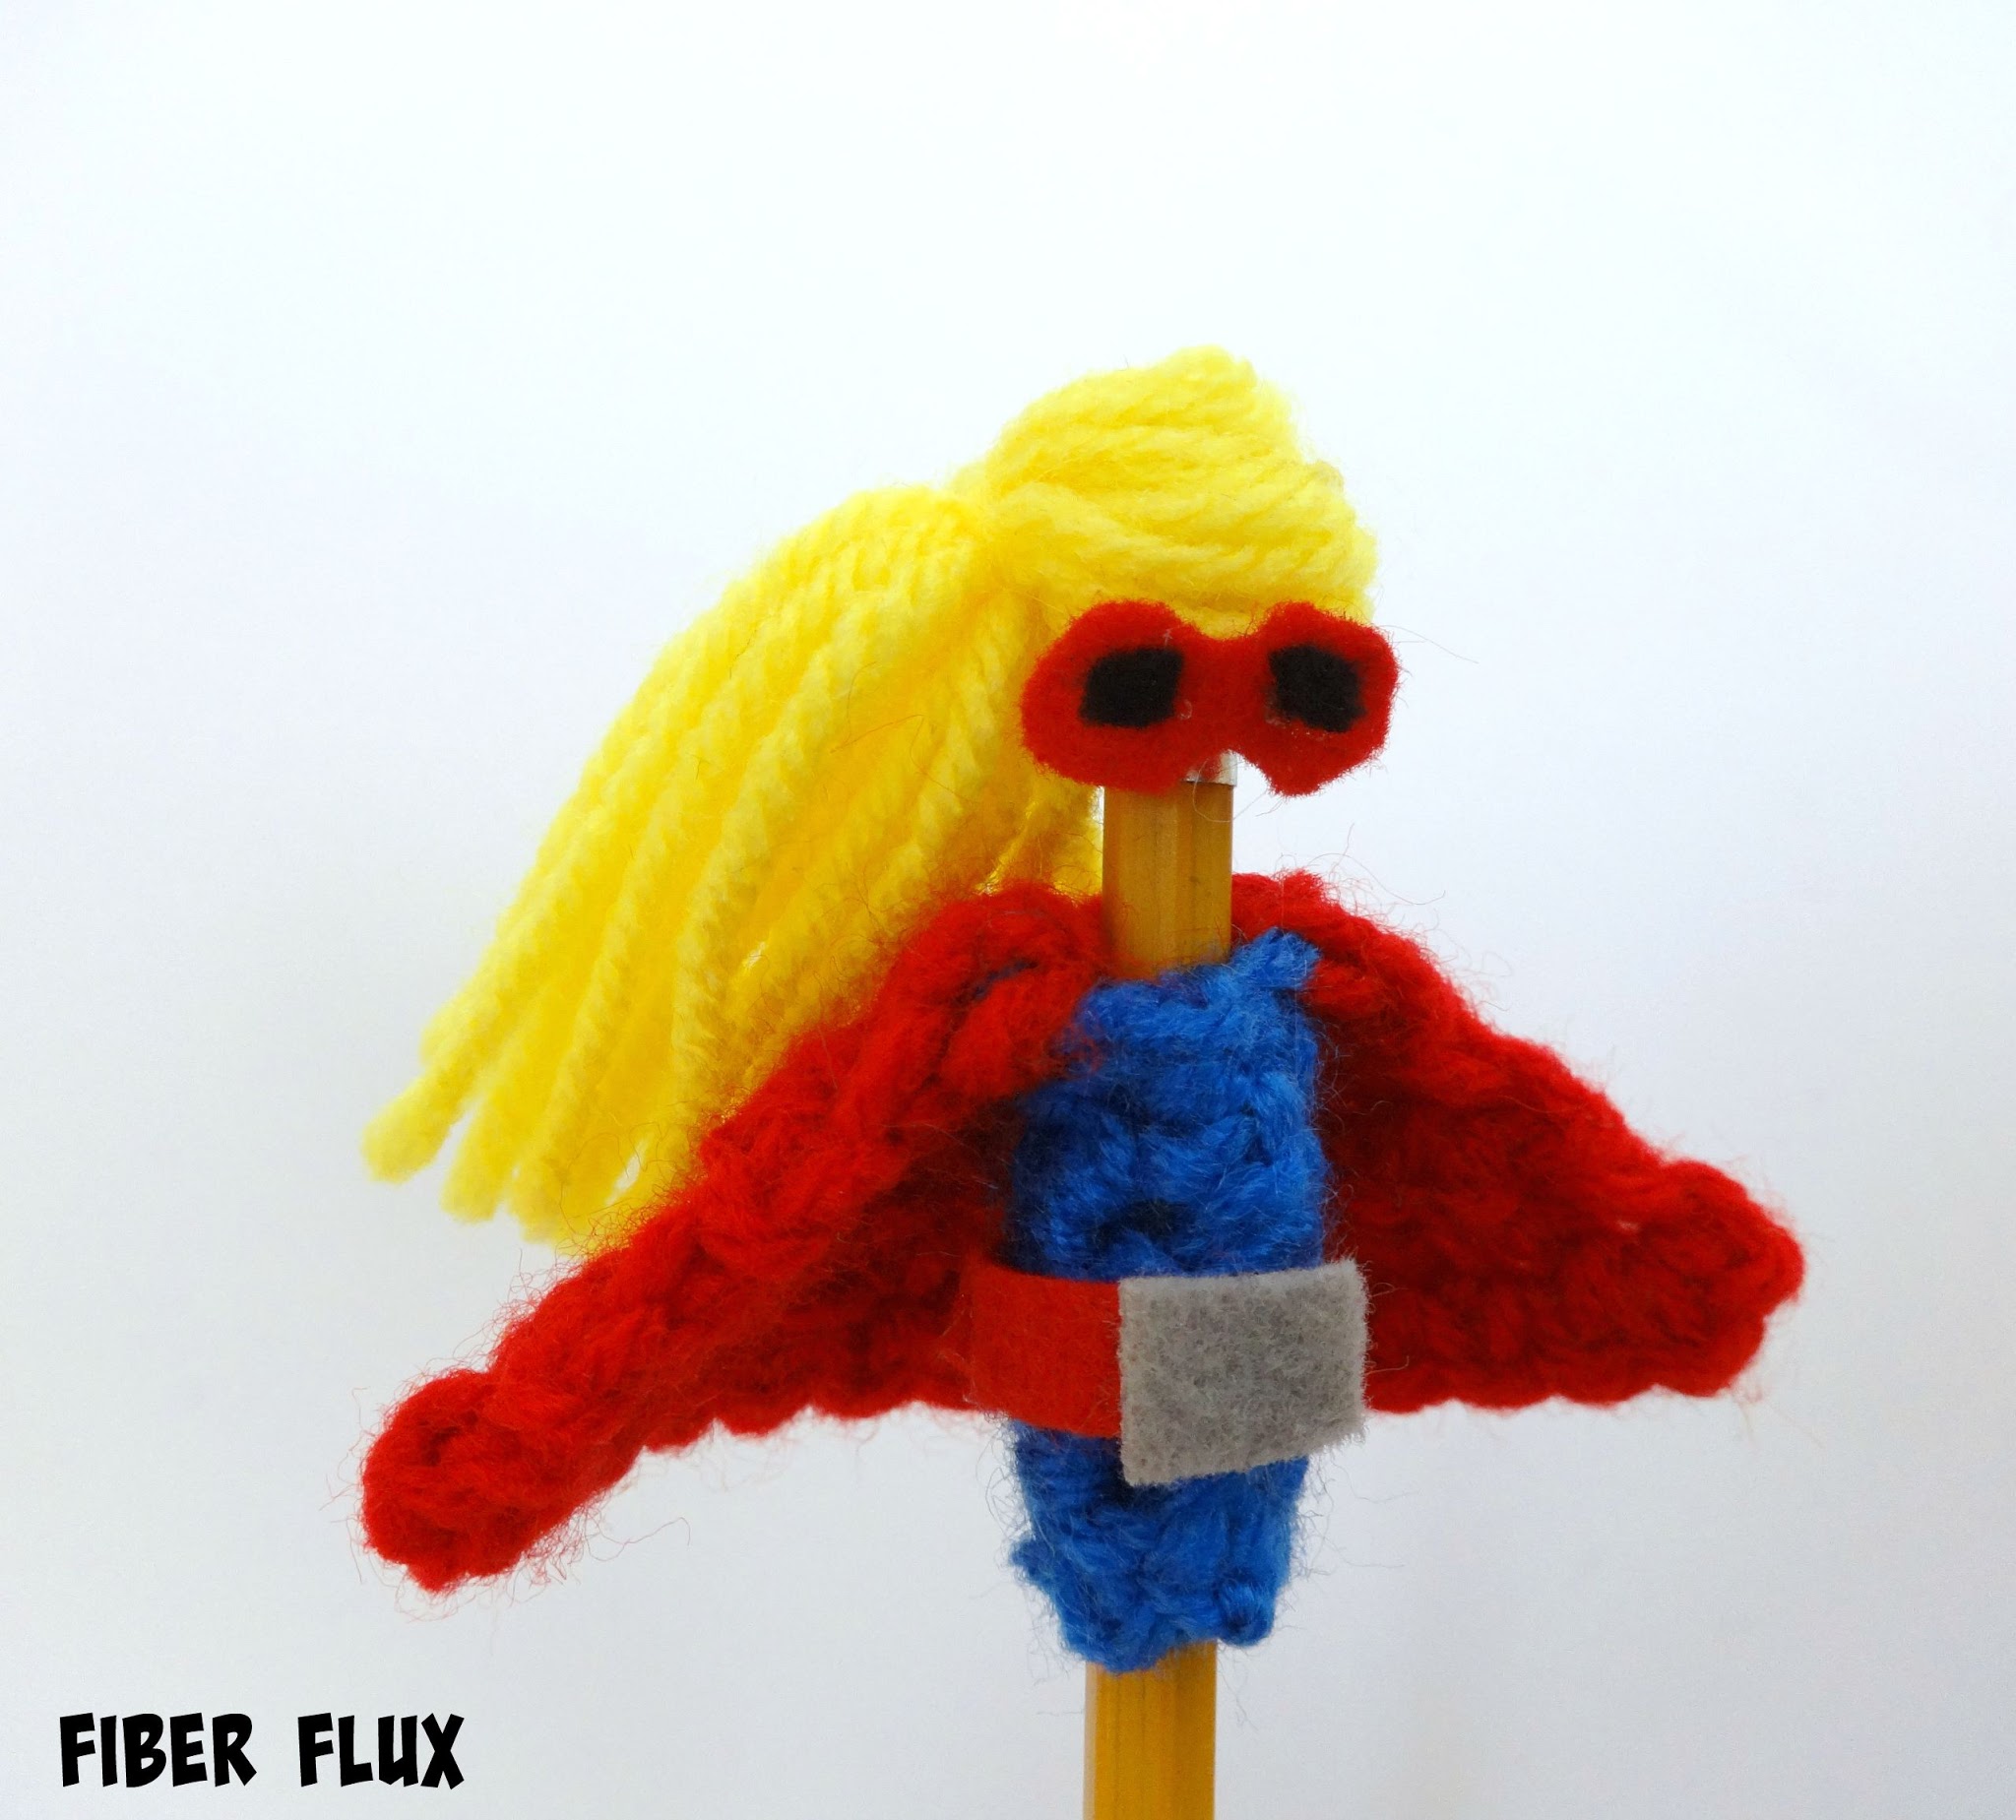
Superhero pencil toppers are fun and easy to make and will help conquer any homework assignment! Crochet one to liven up an ordinary pencil using only small amounts of yarn and bits of fabric or felt. You can also customize the cape color, plus the hair color and style too!
Superhero Pencil Toppers
By Jennifer Dickerson
Click the button below to add this project to your Ravelry queue:

Materials:
- Small amounts of worsted weight yarn (I used Red Heart Super Saver in “Cherry Red” “Blue” “Bright Yellow” and “Coffee”)
- Fabric and/or felt scraps
- H (5.0 mm) crochet hook
- Scissors
- Tapestry Needle
- Ruler or measuring tape
- Pencil
- Hot Glue
Sizing:
- Approximately 3 inches tall
Tutorial Links:
Instructions for cape and outfit:
(worked from bottom up)
Ch 6
Row 1: Work a sc in the second ch from the hook, then a sc in each ch across.
Row 2: Ch 1 and turn. Work a sc in the first st and in each st across.
Repeat row 2 for approximately 1.5 inches and fasten off color (shown in blue in the photo above). Tie on new color for the cape (shown in red in the photo above) and move on to row 3.
Row 3: Ch 1 and turn. Work 2 sc in the first st. Work a sc in each st in each st across until you reach the last st. Work 2 sc in the last st.
Repeat row 3 until cape is about 2 inches long and fasten off.
Assembly & Finishing:
- Wrap the bottom part (shown in blue above) around the pencil and whip stitch it together.
- Weave in all ends, slip onto pencil and glue in place.
- To make hair as shown, Wrap yarn 12 times around all four of your fingers. Tie a strand of yarn towards the top of the loop “bundle”
- To make a shorter hairstyle, give the pony tail a trim or simply glue a pom pom to the top.
- Trim the bottom (longer side) to give it a little hair cut.
- Hook the shorter side with the loops around the pencil eraser and glue.
- Cut a long skinny rectangle of fabric/felt and glue to “waist” of superhero for a belt. Glue a small square to the center for the belt buckle.
- Cut a small rectangle for the mask and trim corners to make a mask shape.
- Cut two tiny dots for the eyes (beads will work nicely too) and glue to mask for eyes.
- Let all glued items cool and dry thoroughly before using.
Click below to watch a full video tutorial:
Happy crocheting lovelies!
For more fun projects and pretty patterns, be sure to follow Fiber Flux on Google+, Facebook, Twitter, and Pinterest for the latest updates!
Visit the Fiber Flux Yarn Shop for fabulous yarn at great prices!


(Affiliate links, enjoy these awesome products and thanks as always for your support!)

