
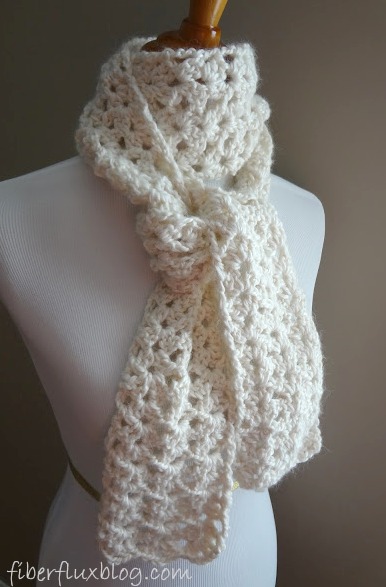
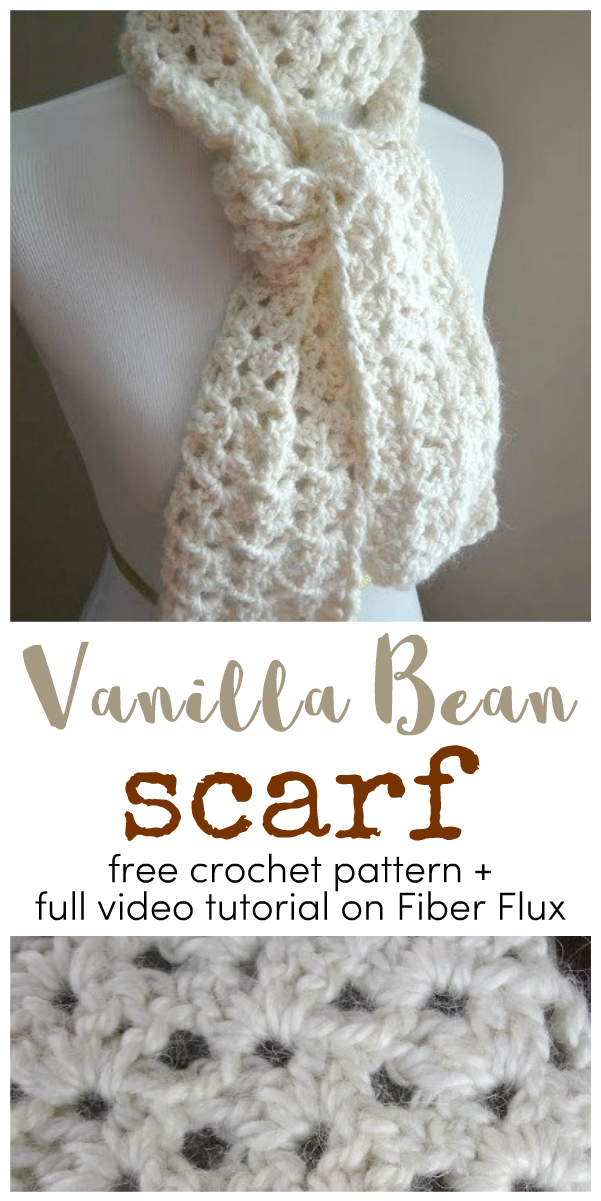
The Vanilla Bean Crochet Scarf is a chunky, lofty, and easy to crochet scarf using a variation of the V stitch. Chunky yarn and a simple stitch pattern yield beautiful results. This scarf is a beautiful and relaxing project to stitch up. A perfect scarf or gifting, and suitable for beginner and seasoned crocheters alike!
Watch the full video tutorial on how to crochet the Vanilla Bean crochet scarf stitch by stitch:
Materials:
- 6.0 mm (J) hook
- 240 yards of heavy worsted weight yarn (I used 2 Skeins of Bernat Alpaca Natural Blends)
- Tapestry Needle
- Scissors
- Measuring Tape
Sizing:
- Width-5 inches wide
- Length-as long as you like
Abbreviations:
- ch: Chain
- dc: Double Crochet
Instructions:
Chain 14
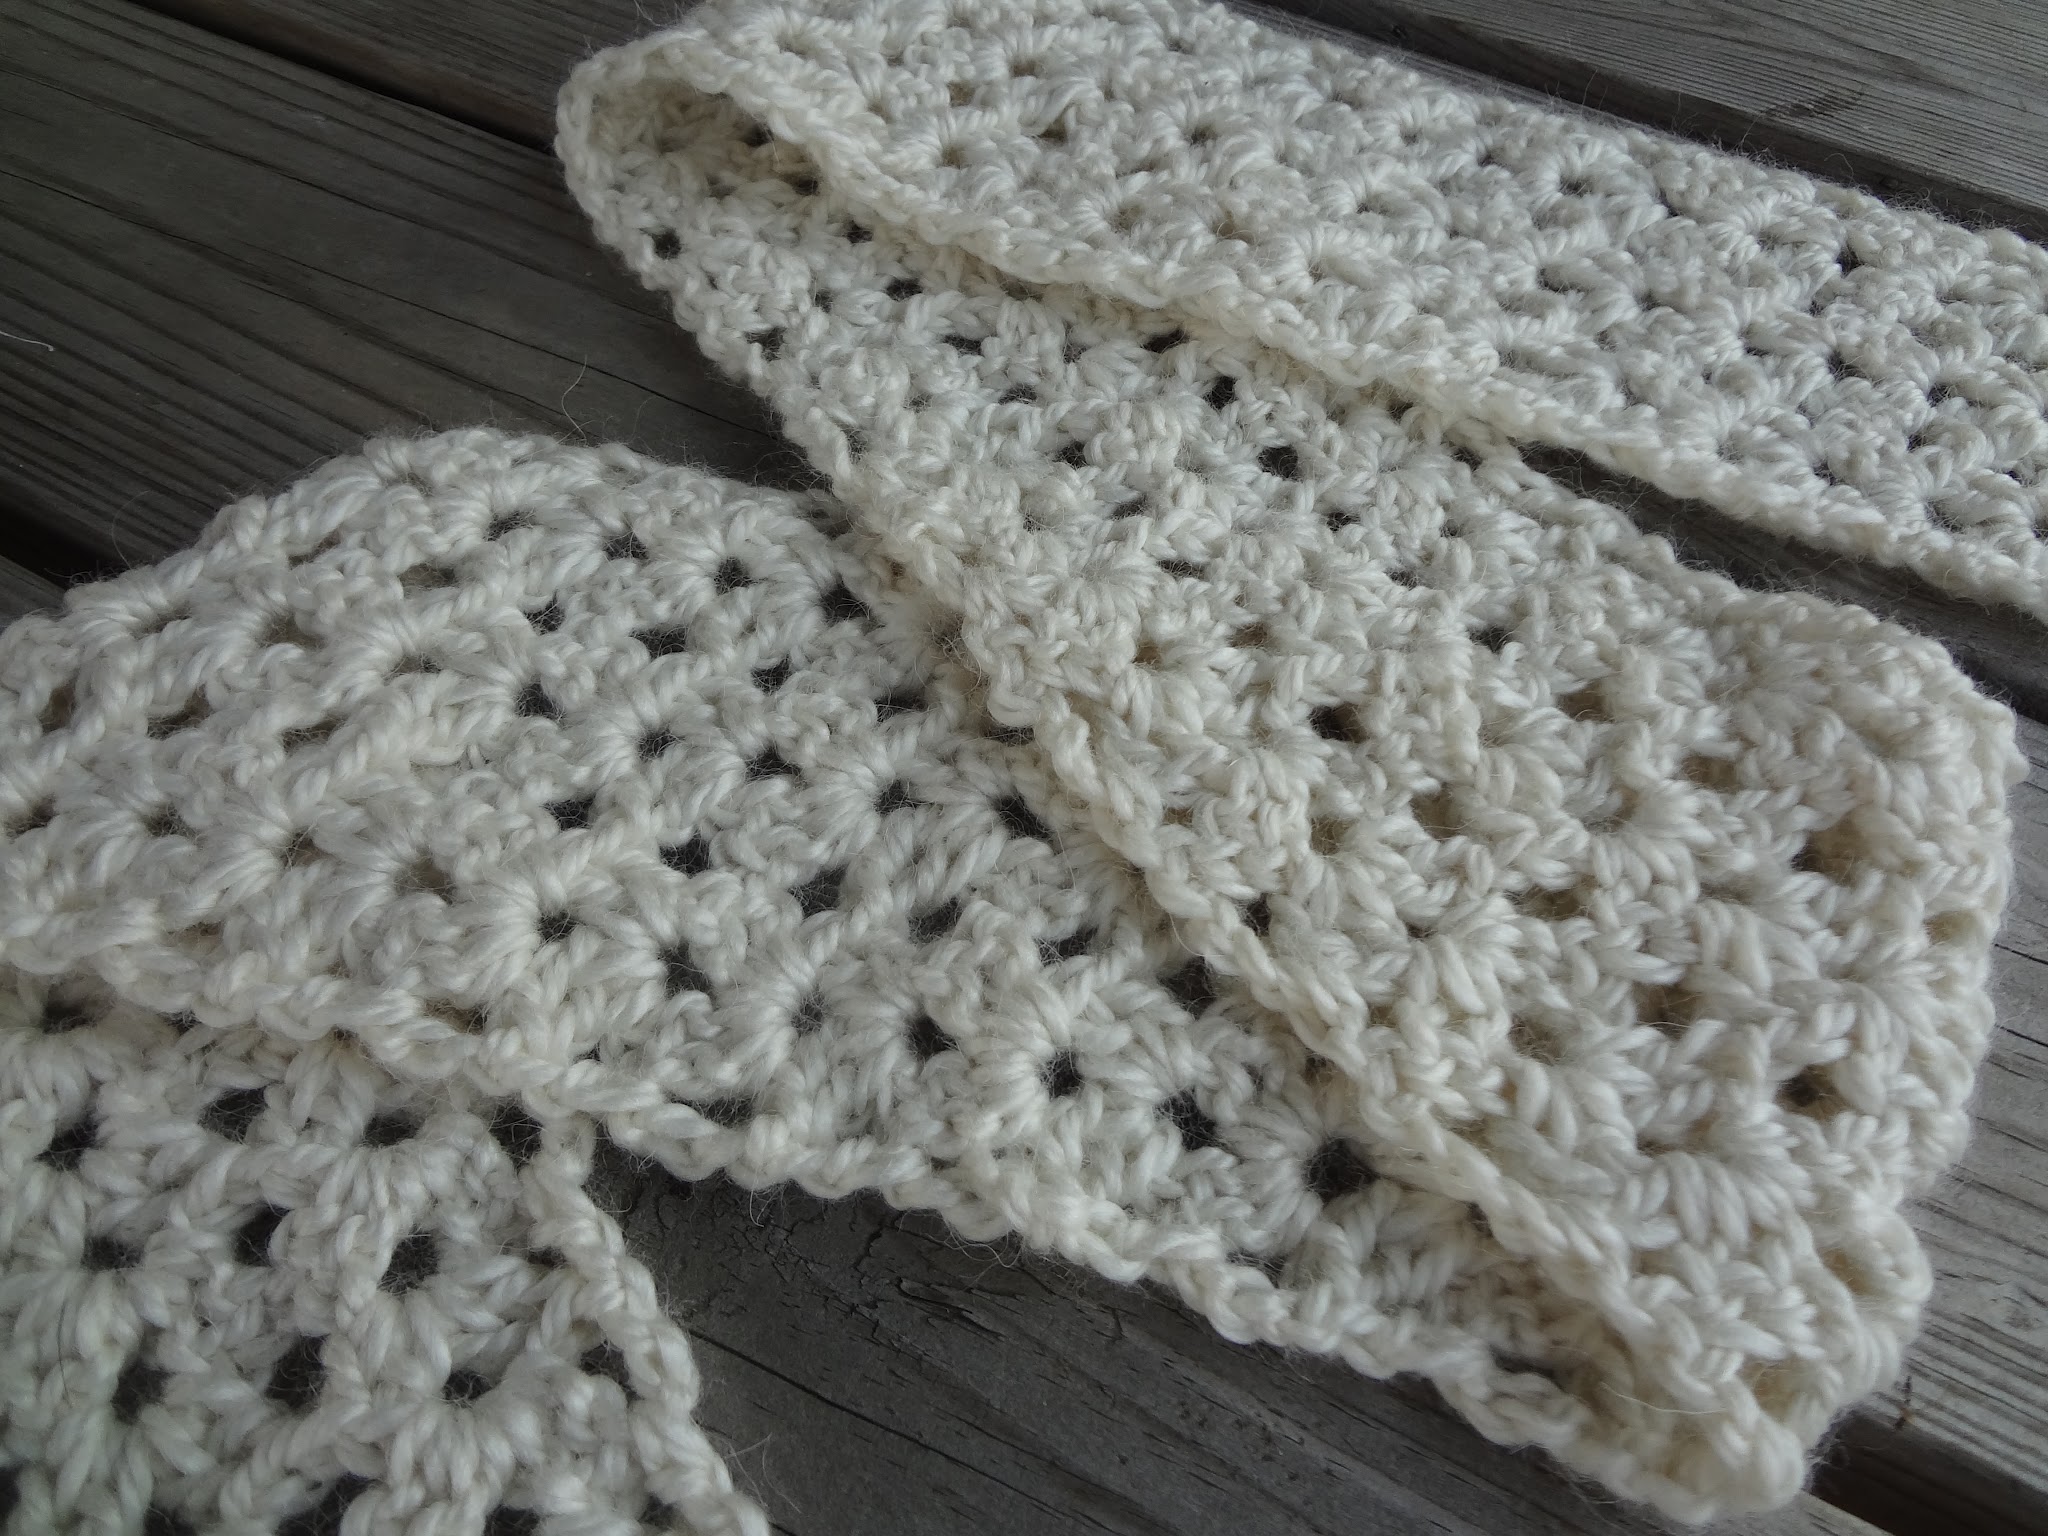
Row 1: In the 5th chain from the hook, work (2 dc, ch 2, 2 dc) in the same chain. Skip two chains and work (2 dc, ch 2, 2 dc) in the same chain, skip the next two chains and work (2 dc, ch 2, 2 dc) in the same chain, then one double crochet in the last chain.
Row 2: Ch 3 and turn. Work (2 dc, ch 2, 2 dc) in each of the chain 2 spaces from the previous row (center of each V). Work a double crochet in the turning chain space.
Repeat row 2 until the scarf is the desired length. A good rule of thumb I like to follow is going from hip to hip. Start the scarf at one hip, then crochet until it goes up, around the neck, and back down past the opposite hip. This allows it to drape nicely and wrap once or twice around your neck!
Finishing:
Weave in the ends and you’re all finished! Make one for yourself and one for a friend too!
Love crochet scarves? Check out my crochet scarf library!


How many chains do you start with? 6?
You chain 14 to start with. Says it right above row 1.
what is the width of the scarf?
It's found under sizing: Width-5 inches wide
question…from a newbie..lol.. am i stitching the second row right in the middle of the circle that the previous row left?
Are you talking about the "v" in the stitch pattern? The v's are "stacked" in this piece, so each V is made by stitching in between the one from the previous row. I hope that helps…let me know if you have any other questions! 🙂
I'm a newbie too and this is perfect; I understand the directions and already crocheted a swatch in a red wine color that should be lovely for a Christmas gift. Thank you for sharing !! Chris
Sounds like it is going to be absolutely stunning…what a lucky person to receive that for a gift!!!
How come no matter how loose my starting chain is the scarf seems to bow?
Mine was a bit curvy until I worked a few rows…I have a habit of making my beginning chain on the tight side, sometimes that can cause things to bow.
Mine too… I had to start over three times and make the chains extra loose as I my sticthes are always tight. It's turning out great though! Thanks for the pattern!!
Jennifer, mine did the same thing….until I read Denise's comments! I used a larger needle to chain the 14 stitches, then switched to the needle recommended for the pattern. I made 2 of these scarves in one weekend! So fun, fast and pretty!
JenRob, That is a great idea! Thank you for sharing!
I had the same problem and added 2 stitches to the chain…then skip3 chains in between each 2DC,CH2,2DC group. Seemed to help.
Hi Jennifer, what is the difference in the pattern between this scarf and the Pavement Infinity Scarf that you also have posted (if any)? I'm trying to determine which one to make 🙂 Thanks for sharing these patterns!
Hi and thank you! The main differences are that the Pavement scarf is super bulky and a big long loop. The Vanilla Bean is significantly less bulky and is a traditional scarf (no loop). The stitch pattern/sequence is very similar for both. Hope that helps!
Thanks it does! I think I'll start with this one and see how it goes. They are both beautiful and thank you for posting them!
Hey, Jennifer! I used your pattern to make a scarf out of light gray blulky yarn that has an occasional sequin in it. It is lovely. Then, I tried the same pattern with Caron Simply Soft Party yarn in red. It is very light weight with a sparkle thread in it. I'm starting my second scarf out of that yarn. So pretty! Thanks! I enjoy your blog!
Both sound gorgeous, and so festive!
Hi,
I, too, am a newbie…
Is it as easy as sewing the ends together to make this an infinity scarf?
Thank you,
Michelle
Yes! Just sew the ends together with a whip stitch, and voila! Instant infinity scarf!
I LOVE this pattern! I can't wait to try it! I'm new to crochet and in the middle of a scarf-making marathon to make enough for family, and will lovingly add this to the mix!
Wow! What a lucky family you have! They will be so happy to have something handmade!
I love that this pattern works up quick. I'm making this as a gift for a friend with a matching slouchy. I can't wait to buy more yarn so I can try this with the shimmer yarns. Thanks for sharing this pattern.
That sounds really cute…what a lucky friend!
Just made two in a matter of hours…love this pattern, its so easy and quick… Thank you…headed to #3!
Yay for completed projects! Glad you enjoyed it!
This is such an easy and fast scarf. I added ruffles on the ends. It turned out so cute, I almost hate to give it away. I added ruffles by crocheting 3 dc in each crochet. I did 2 rows of this to make it extra frilly.
Love it! Sounds beautiful 🙂
Great finishing idea! Thanks…I think I'll try it.
Thanks for this pattern. It is beautiful! I haven't crocheted in years, but once I got the hang if this stitch, it became so easy. I just finished my first scarf. I can't wait to make more.
Yay! So glad you enjoyed the pattern!
How can you make both ends the same? Thank you for the pattern! Judy
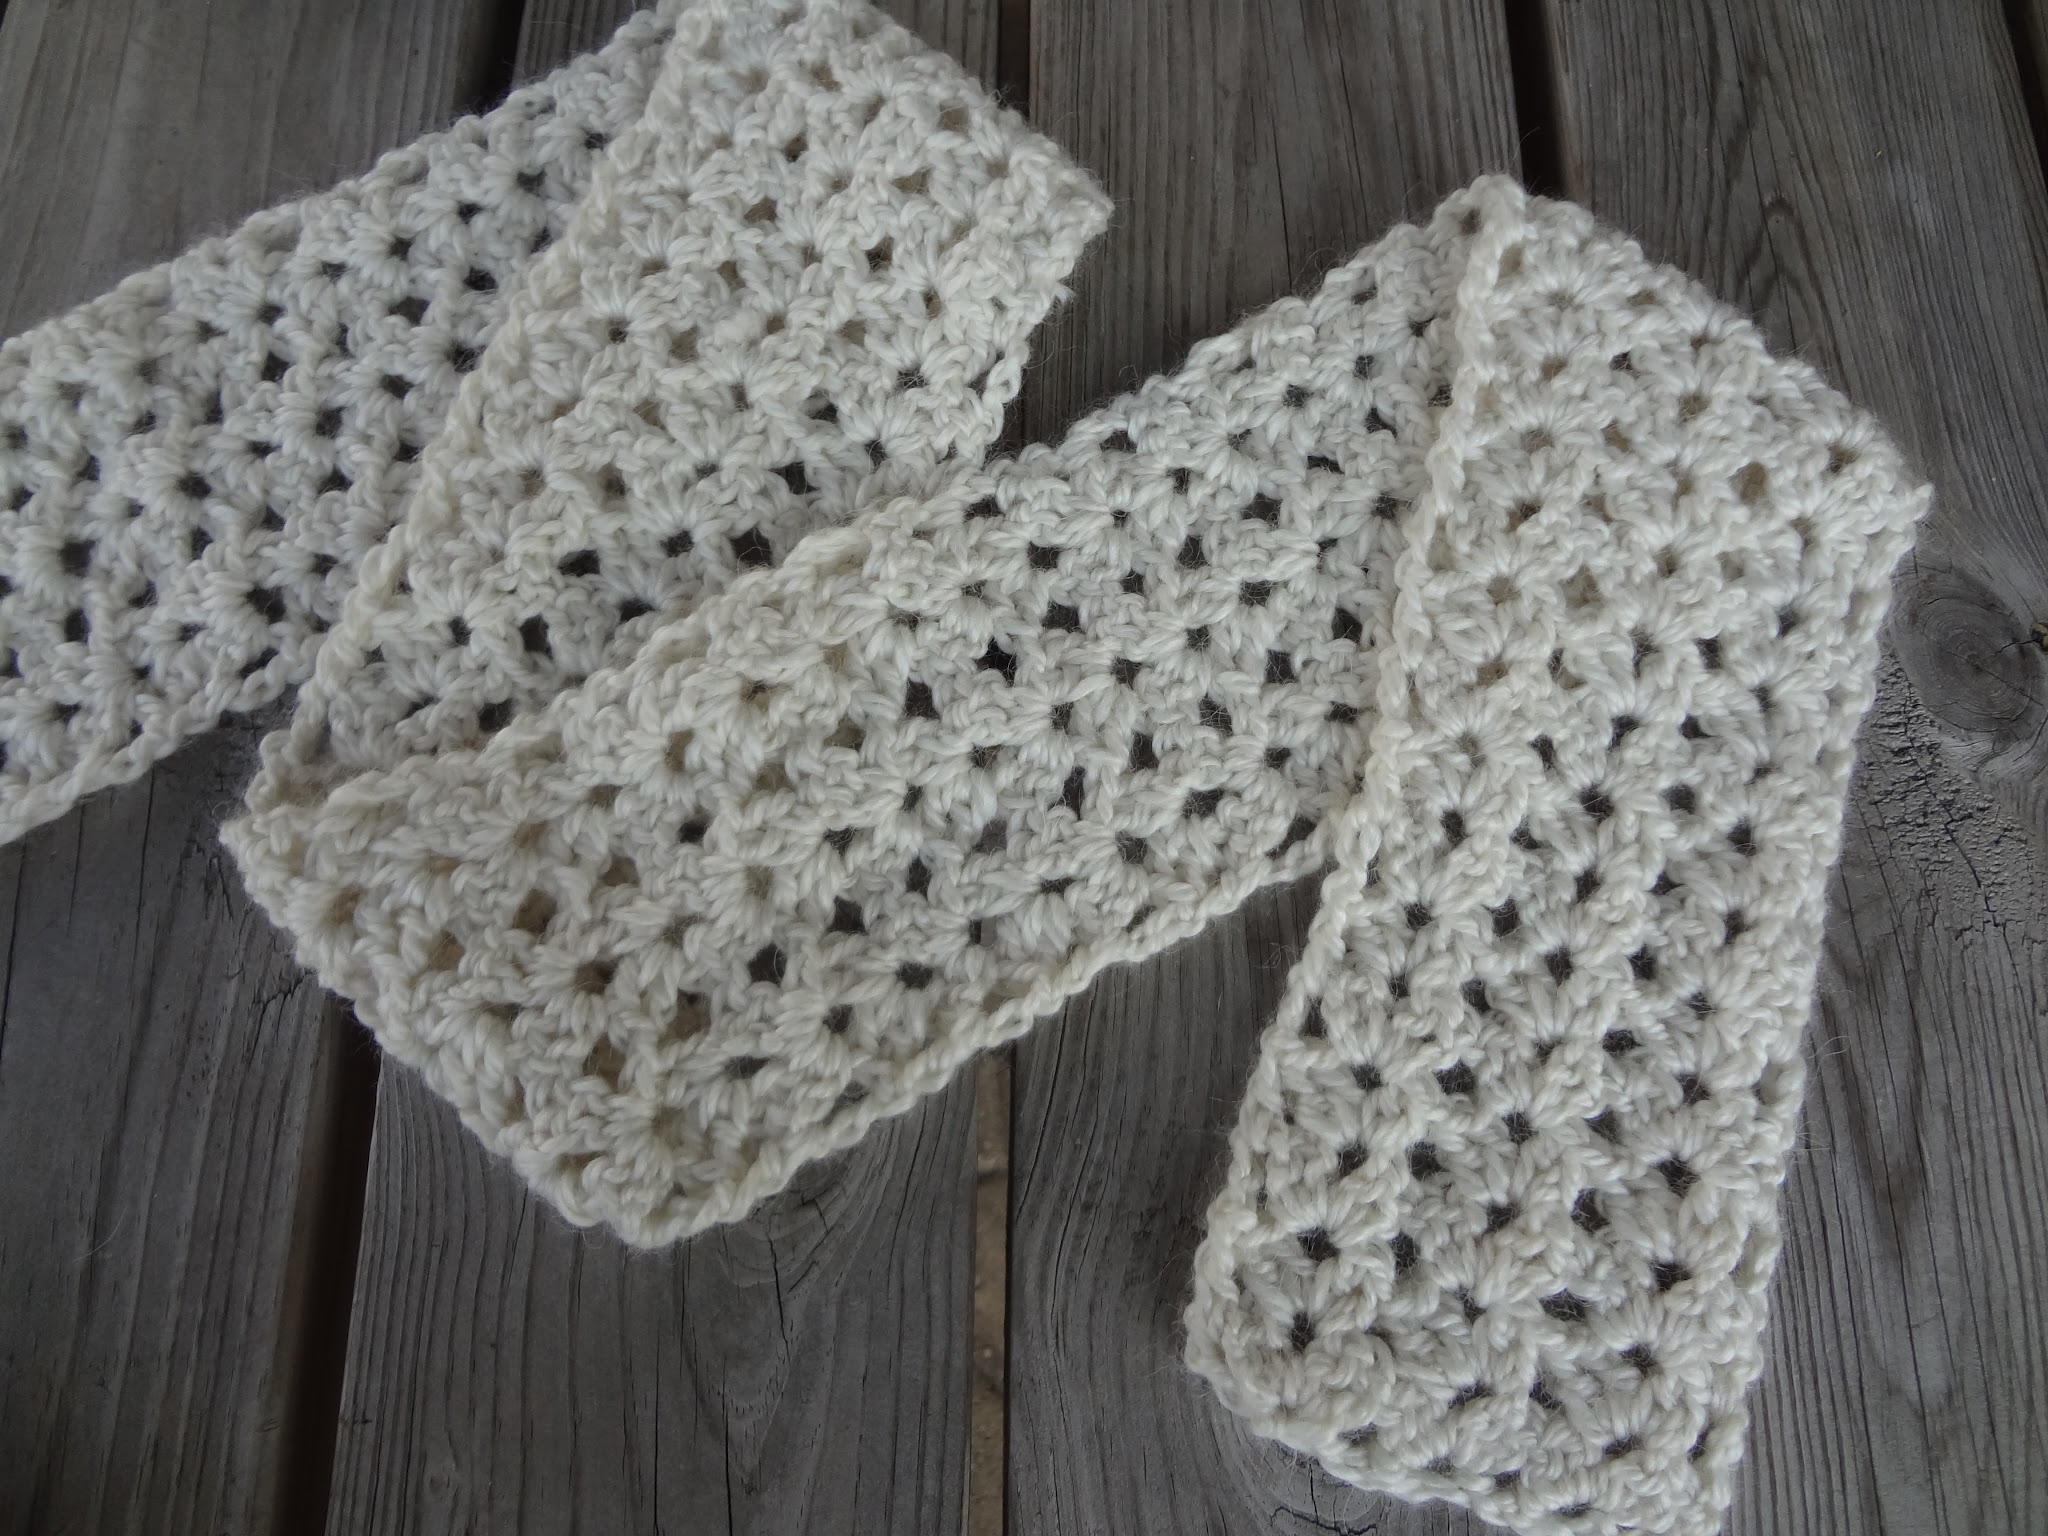
If you do it as is, the starting edge will be flat and the ending edge will be scalloped looking, just the nature of the stitch. However, If you want them to be the same, you could always add a few rows of plain single crochet to each end. I find that when I do that it helps to make edges look more uniform. Hope that helps, happy crocheting to you!
Is there anyway to make the beginning like the end? Or how would you add the sc I have it done, and it looks fantastic, except that they look different, just trying to figure it out. I am not good at improvising.
I am very new at crocheting. I am having trouble following the row 2. Anything you offer for advise.
Diane
I did too! The 2dc 2c 2dc goes in the space created by the 2c in the foundation row. I thought it wentnin each chain but thats not so. Hope that helps 🙂
Love this pattern and your blog!! I was confused at first since i am so new at crochet, but once i got going therevwas no stopping me! I plan to make an infinity scarf out of this pattern in a pale gray blue! Thanks so much!!
Thanks, I'm so glad you are enjoying it! The pale gray blue you're talking about sounds absolutely gorgeous too!
I'm having trouble once I get to starting row 2. My issue is not knowing where to put my hook in (like how many spaces should I leave before going into the first space to work 2 dc, ch 2, 2 dc)? And then after I work 2 dc, ch 2, 2 dc, how many spaces do I leave before going into another space? I can tell from the pictures that the clusters are stacked, but if I only go into the top of each cluster, my scarf has a lot more holes than yours looks to have, and less clusters. I made your infinity scarf and liked the pattern, but wanted to give this one a try too. Thanks for any advice!
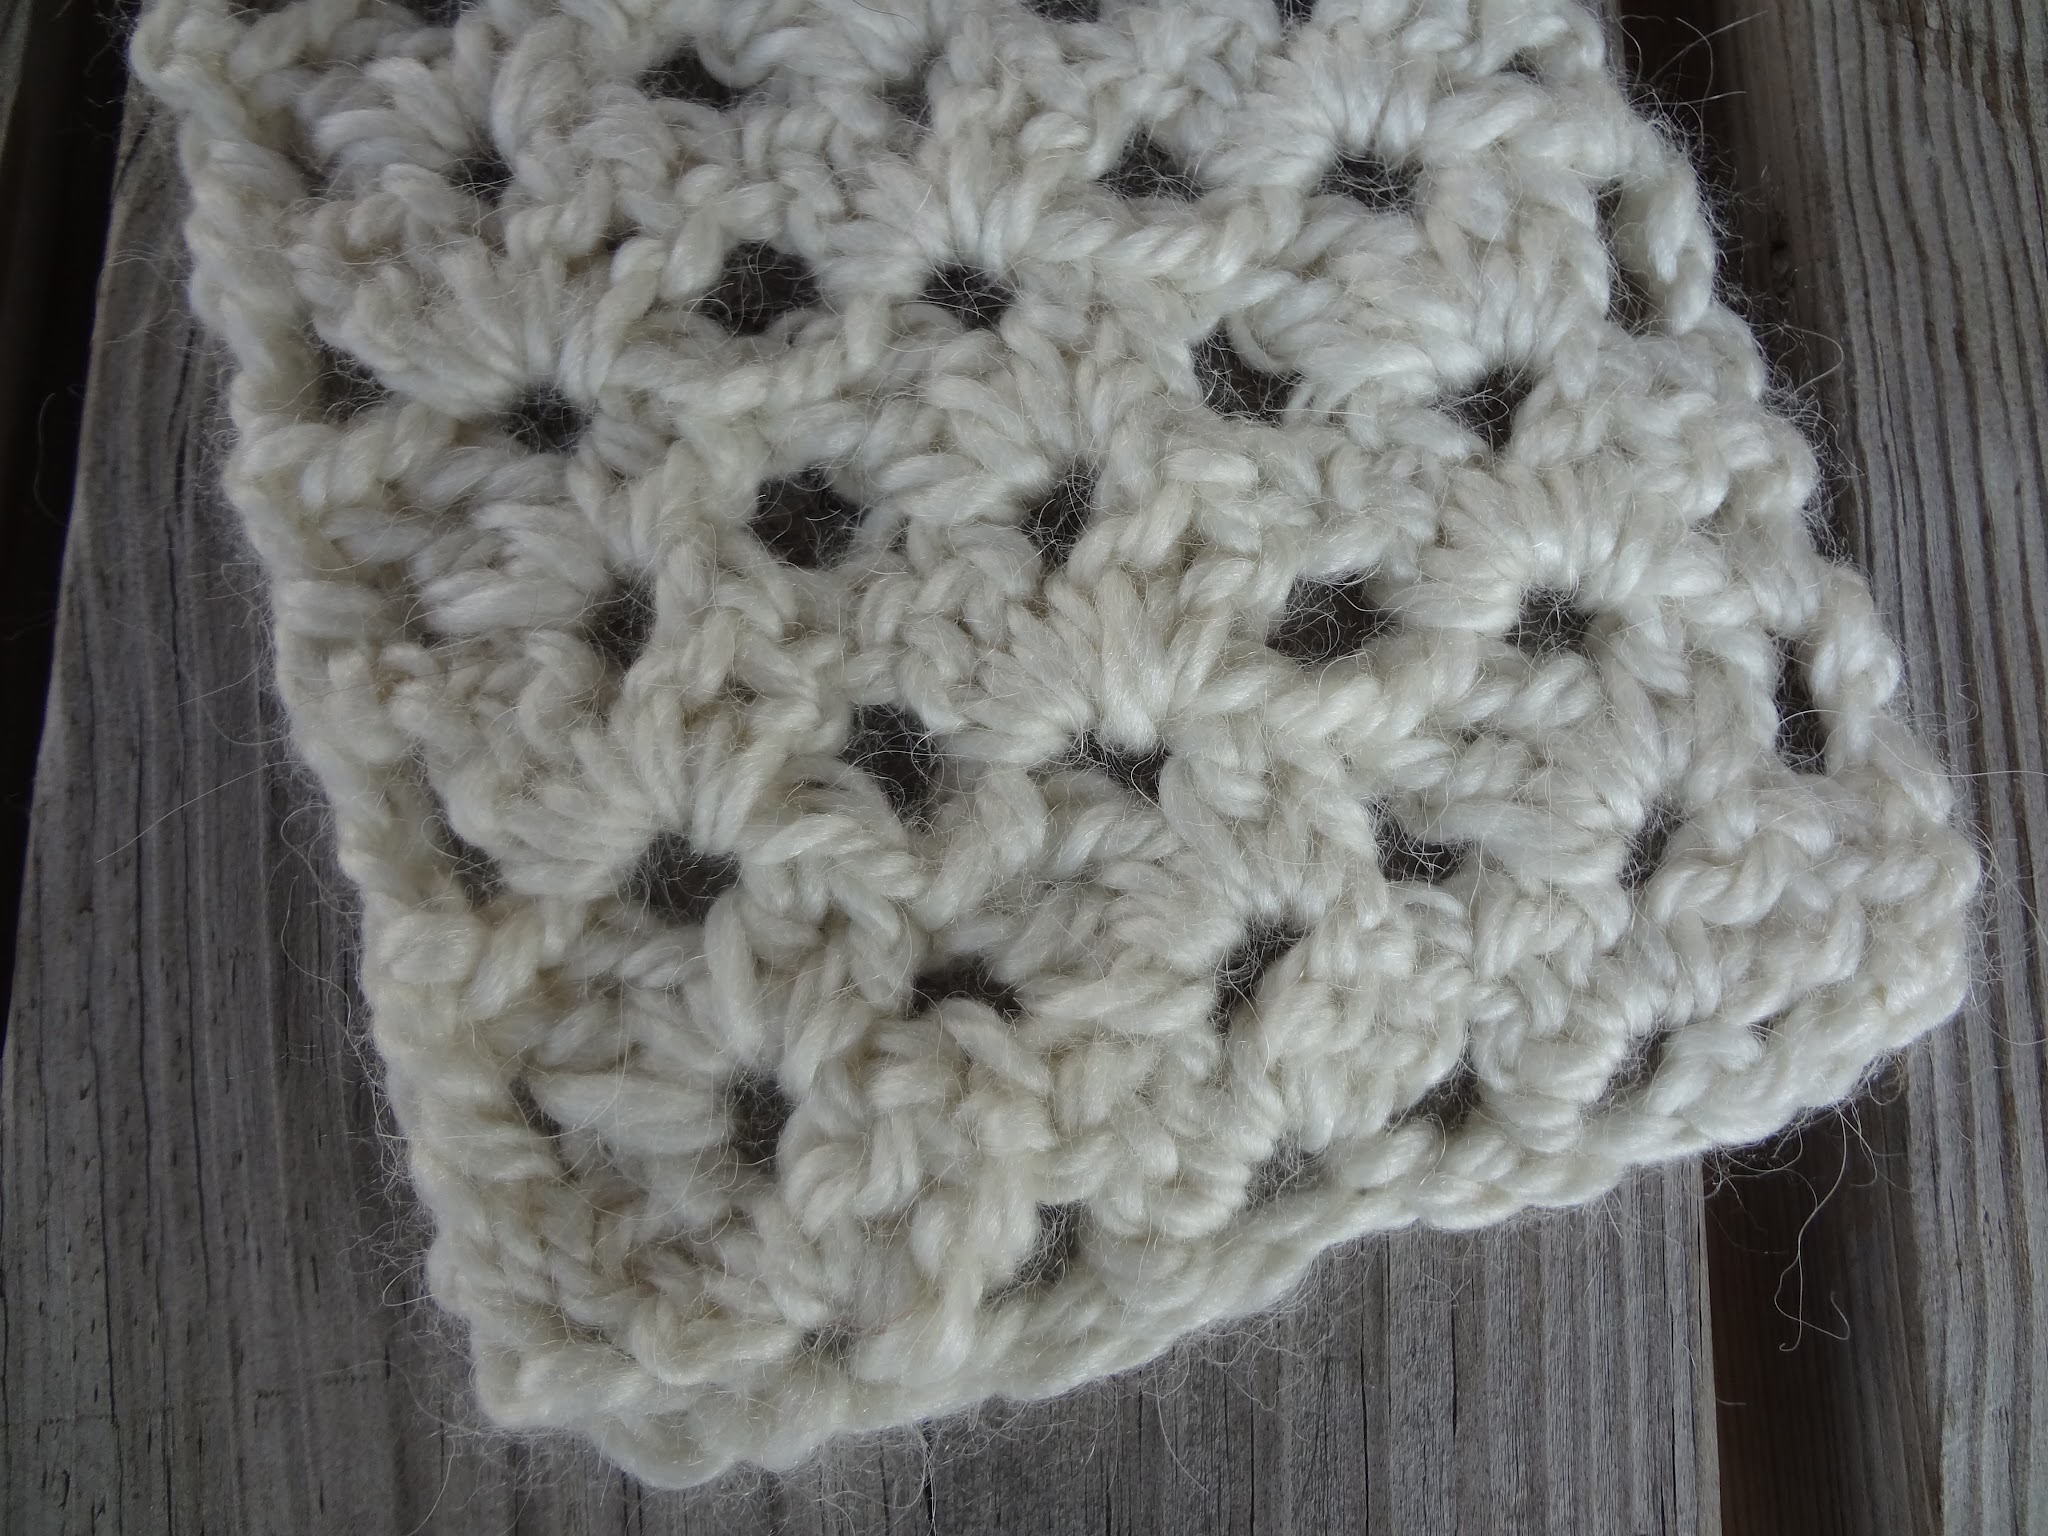
Sure! I was wondering if you are working into the chain spaces or the loops? That might be affecting the appearance…and the "stacked" look of the stitches. In this pattern, everything is worked in the spaces versus the loops. I saw that you mentioned that you have made the infinity scarf too…if so, it is worked in a similar manner with the stitches being worked into the spaces (versus the loops).
Hope that helps, let me know if you have additional questions. 🙂
I guess I was working in the loops made by the previous row.
Which spaces do I work into? After completing the first row, I have 3 clusters, each with 3 smaller spaces (kind of looks like a shell), the 1 bigger space below the 3 smaller ones, and large spaces between each of the 3 clusters. (Hopefully this isn't too confusing)
When I turn and begin row 2, which space do I begin with and then continue with?
Sorry for all the questions!
I think I may have finally figured it out with lots of trial and error! I only go into a total of 3 spaces (the tops of the 3 clusters) plus the last double crochet at the end of the row, right? I think I'll continue doing what I've been doing since it's finally working!
I'm so glad! All sounds well…happy crocheting to you!
I'm a beginner crocheter, what would you substitute for the bernat natural blends alpaca mixture?
Please respond. Thanks in advance , Diana
Jennifer, how long did you make this vanilla bean scarf? Is it as long as the Infinity scarf? I have completed two of the Infinity scarfs for friends and now am making myself the Vanilla Bean and am curious how long the one in the photo is.
I am enjoying the blog and free patterns, thanks. Christine
Yes, it is about that length, for me that length seems to work. I like to wrap mine around a lot so I like it a little longer:)
OMG I love this pattern! I just started crocheting last Christmas (2012)and I am addicted to Vanilla Bean Scarf!!! I have made 4 in a week-white like yours, red, verigated blues, verigated tan,grey,brown,white. I am going to start another one in a green today. I just want to thank you for your website. I googled crochet scarves and found it (so happy I did) Have you made the Vanilla Bean scarf real long and sewn it together to make a cowl? I was thinking of doing it but was wondering if one skein would be enough. The yarn I used for my other scarves were thrift sale find yarns. (a pkg of 10 skeins for $2.00-not bad)
Have a great day
Eva in Oklahoma
Finally … I think I've got it! Sorry, your directions are perfect, I'm just new and trying to figure things out. Thanks … your scarf looks beautiful and finally mine will too. 🙂
Thanks Linds, you are very kind…so glad you were able to figure it out. 🙂
One solution I found to avoid the bunching if you crochet tight like I do is to use a larger crochet hook to chain the first 14 stitches-about 2 sizes up-and use the regular size crochet hook for the rest of the pattern. This is a beautiful scraf. Thanks for the pattern.
That is a really great tip! Thank you for sharing!
I am confused when it says dc in the same space, does this mean where u just dc before the chaining of the 2?
YES
Thanks! I figured it out the other day! Scarf complete love it.
Hello! Another newbie here! My question is after I've done the first dc, where do I put my hook to do the second one? And I understand 2ch but where do I put the hook to do the last 2dc? And we're working the chain not the loops, right?
Thanks in advance!!
Hi! The 2 dc, ch 2, 2 dc is all done in the same space…it's kind of like a split scallop.
And yes, work in the spaces, not the loops.
Hope that helps! 🙂
Oh, and another question — When I an stitching this, the work is flat on the bottom and "hilly" (3 peaks) on top where the hook is. When stitching new rows, one stitches them into the hills as opposed to the valleys, right?
Yes you are absolutely correct! Also, the top of the scarf will form a natural "wave" because of the nature of the stitches.
I decided to use this pattern to make a scarf for my cousin but since I was only trying it I just did two rows. I actually began to single crochet around it and I've now decided to make a kind of checkered scarf with a wine Dolores yarn on two sides and grey around.
Sounds pretty! 🙂
Hi
This is my first time crocheting anything other than dishcloth. Im having trouble with a couple of things.
1. What does in the same space mean?
2. How come I run out of chains by the time I get to here:
Ch 14.
Row 1: In the 5th chain from the hook, work 2 dc, ch 2, 2 dc in the same space. Skip two chains and work 2 dc, ch2, 2dc in the same space, skip the next two chains and 1 dc
I put 1 dc on purpose because I ran out after the first of the 2 dcs.
Im so puzzled!
Thanks,
Sara
Hi Sara! Thanks for your question…when you are working your scarf, are you working each stitch in the spaces or the stitches of each row? With this scarf, each stitch is worked in the spaces from the previous row, that could be what is throwing the count off?
Let me know and we'll go from there…we'll figure it out!
Hi Jennifer, I made this scarf, and it came out beautifully! Thanks for a great pattern, and I look forward to making more of your projects!
Eva
Thanks Eva! So glad you liked the pattern and your scarf sounds lovely. Happy crocheting! 🙂
dear Jennifer
I finished 3 rows…. but mine has become frilly…. do u know y… I m kinda beginner
Is it frilly on the sides or along the bottom?
I would like to use vannas choice yarn…..is this bulky enough??? thanks so much for the pattern.
I love Vanna's…I would recommend trying a little swatch/sampling and see how you like the way it looks…Vanna's is a little smoother, whereas this yarn was a bit fuzzier, so I would definitely try it first and see.
I've made a couple of these for gifts…. Totally cute! If I want to make this scarf a little wider, how many stitches do I need to add?
What do you mean by "block lightly"?
Thank you very much for the lovely pattern.
This has now become my first-ever crochet scarf I made for my 2 year old daughter.
I chose the similar colour as yours, but used 4.5 mm needle with thinner wool to make the scarf smaller and then put a smoky pink flower at the end of the scarf. It looks gorgeous, love this very much, thank you!!!
thank you so much! unfortunately, the picture doesn't do this stitch the justice it deserves as it's much more textured than it looks. i've decided to do my scarf lengthwise (started with oodles of foundation 1/2 dc stitches and it's coming out magnificent – thanks to you!
Hi there!
I love this scarf and I can't wait to try it. I am looking to increase the width by about 1.5 inches or so. I was wondering how many I should cast on to do this so that the pattern stays true.
Thanks so much!
-Karlee
Hi
If I wanted to use this pattern for a shawl how many chains to get 24" wide shawl. ? Im kind of a beginner. I did do this pattern as a scarf already.
thank you
Arlie
Hi Jennifer,
I just made this pattern up with some silver- gray Vanna White yarn.
It turned out beautifully! Thank you so much for the great pattern instructions and videos.
I am a, well advanced beginner, and your patterns are so very clear and easy to understand.
Now I am starting on the Silver Dollar Skinny Scarf in the Lapis Colorway. 🙂
Take good care ~~
Barbara
I'm a newbie at this crochet thing and this is my first project and I'm am absolutely in love! Thank you, thank you thank you!!!!!!!!!!!! I'm going to save money on buying Christmas gifts this year, Praise God!!
Thank you for sharing these instructions. I made myself a scarf from Deborah Norville Serenity Chunky last night while watching TV. Can't wait to wear it!
Lovely pattern although when i started it I didnt realise it was in american terms rather than british and Ive done it in 2sc 2ch 2sc…surprisingly enough its come out lovely…..more dense and less lacy but still very nice 🙂
can I chain 18
Love this pattern! I am making this for a young lady i met who has Downs syndrome and was wondering if you have a pattern for a hat to match or somewhat close to it.. Thanks for any help you can give. ~Jennifer
I love your pattern I would like to add a few more chains. In multiple of what can I do this. Thank you for your help. Hellen
do you have to do multilpes of 2
help, need help ending this want it to match on both ends
Beautiful pattern. Thank you very much for sharing 🙂
Amazing blog and awesome patterns. I have tried out each and every one of them.
If I wanted to crochet an edging on this one, what would you suggest?
I would love to turn this pattern into a baby blanket. How many chain stitches would I make?
Hi Jennifer, thanks for sharing this pattern.
I fried to figure out the multiplication of chain for the starting foundation and comes out with: multiple of 3 + 5.
Hello,
Im at the length that I like and I want to finish it off. How do I do that? The video didn't show how to finish off the end to give a more even look.
good post
Jennifer do you remember the final length of the scarf in the picture?