
Blanket stitch edging is a wonderful decorative edge, but also very functional too. It not only strengthens, but can also straighten the edge of your hand stitched project. It can add a fabulous pop of color and create a clean, uniform look to the bottom of a scarf or garment. Blanket stitch edging is also a useful stitch for joining pieces together.
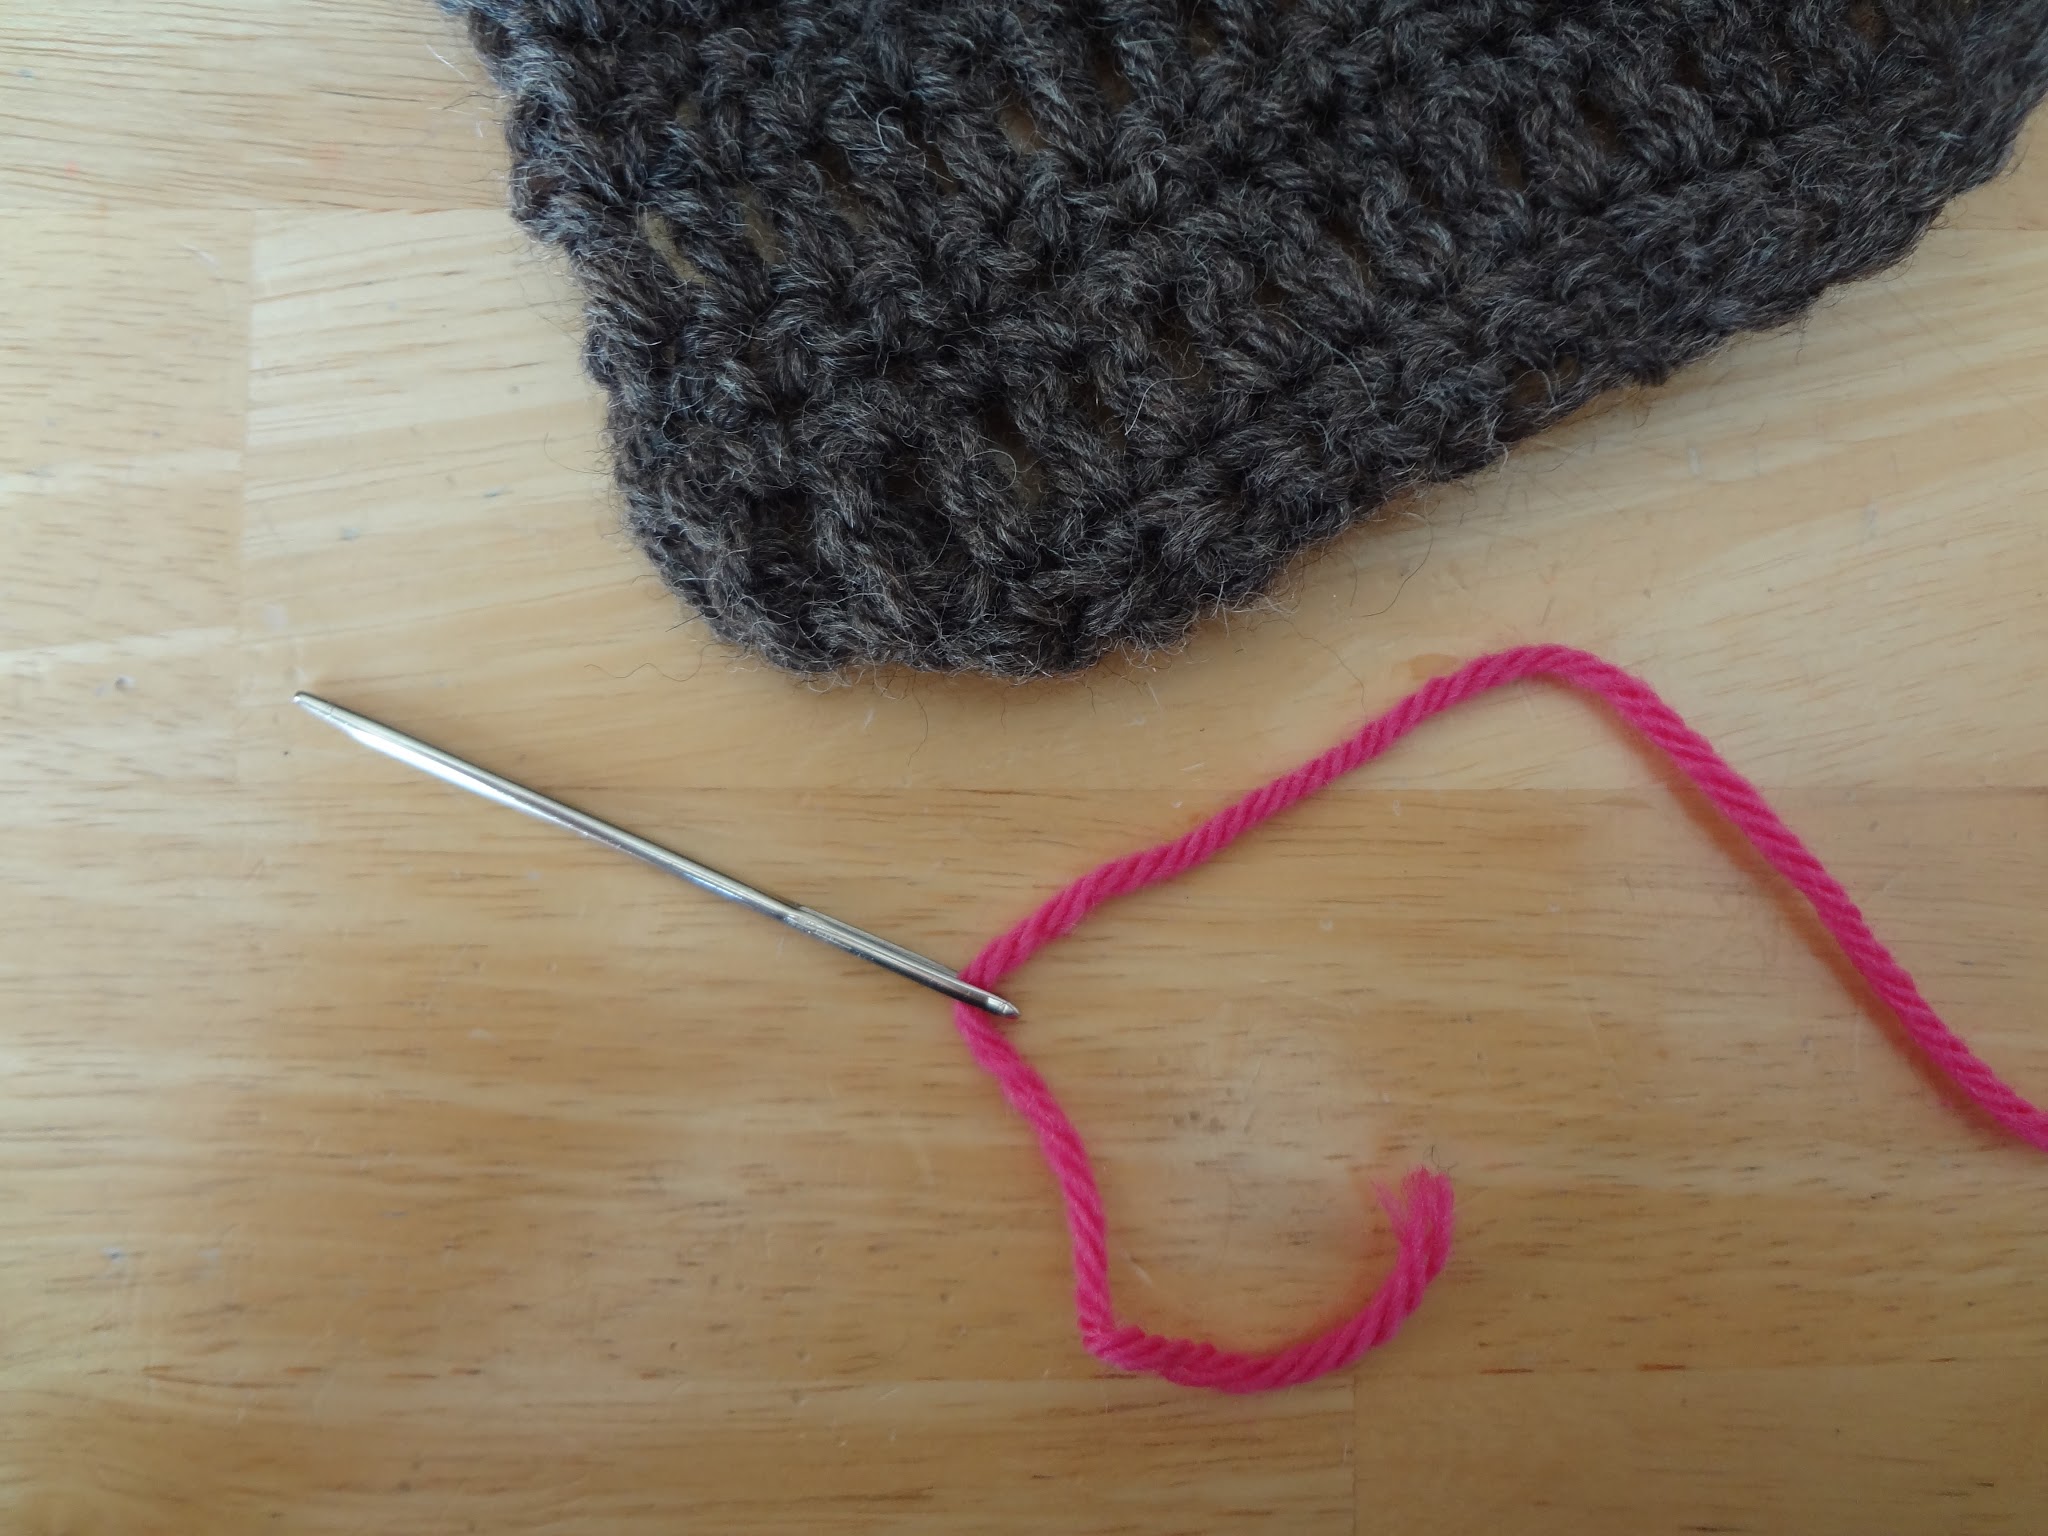
To begin, all you’ll need is a tapestry or yarn needle, yarn of your choice, and the item that you’ll be stitching on.

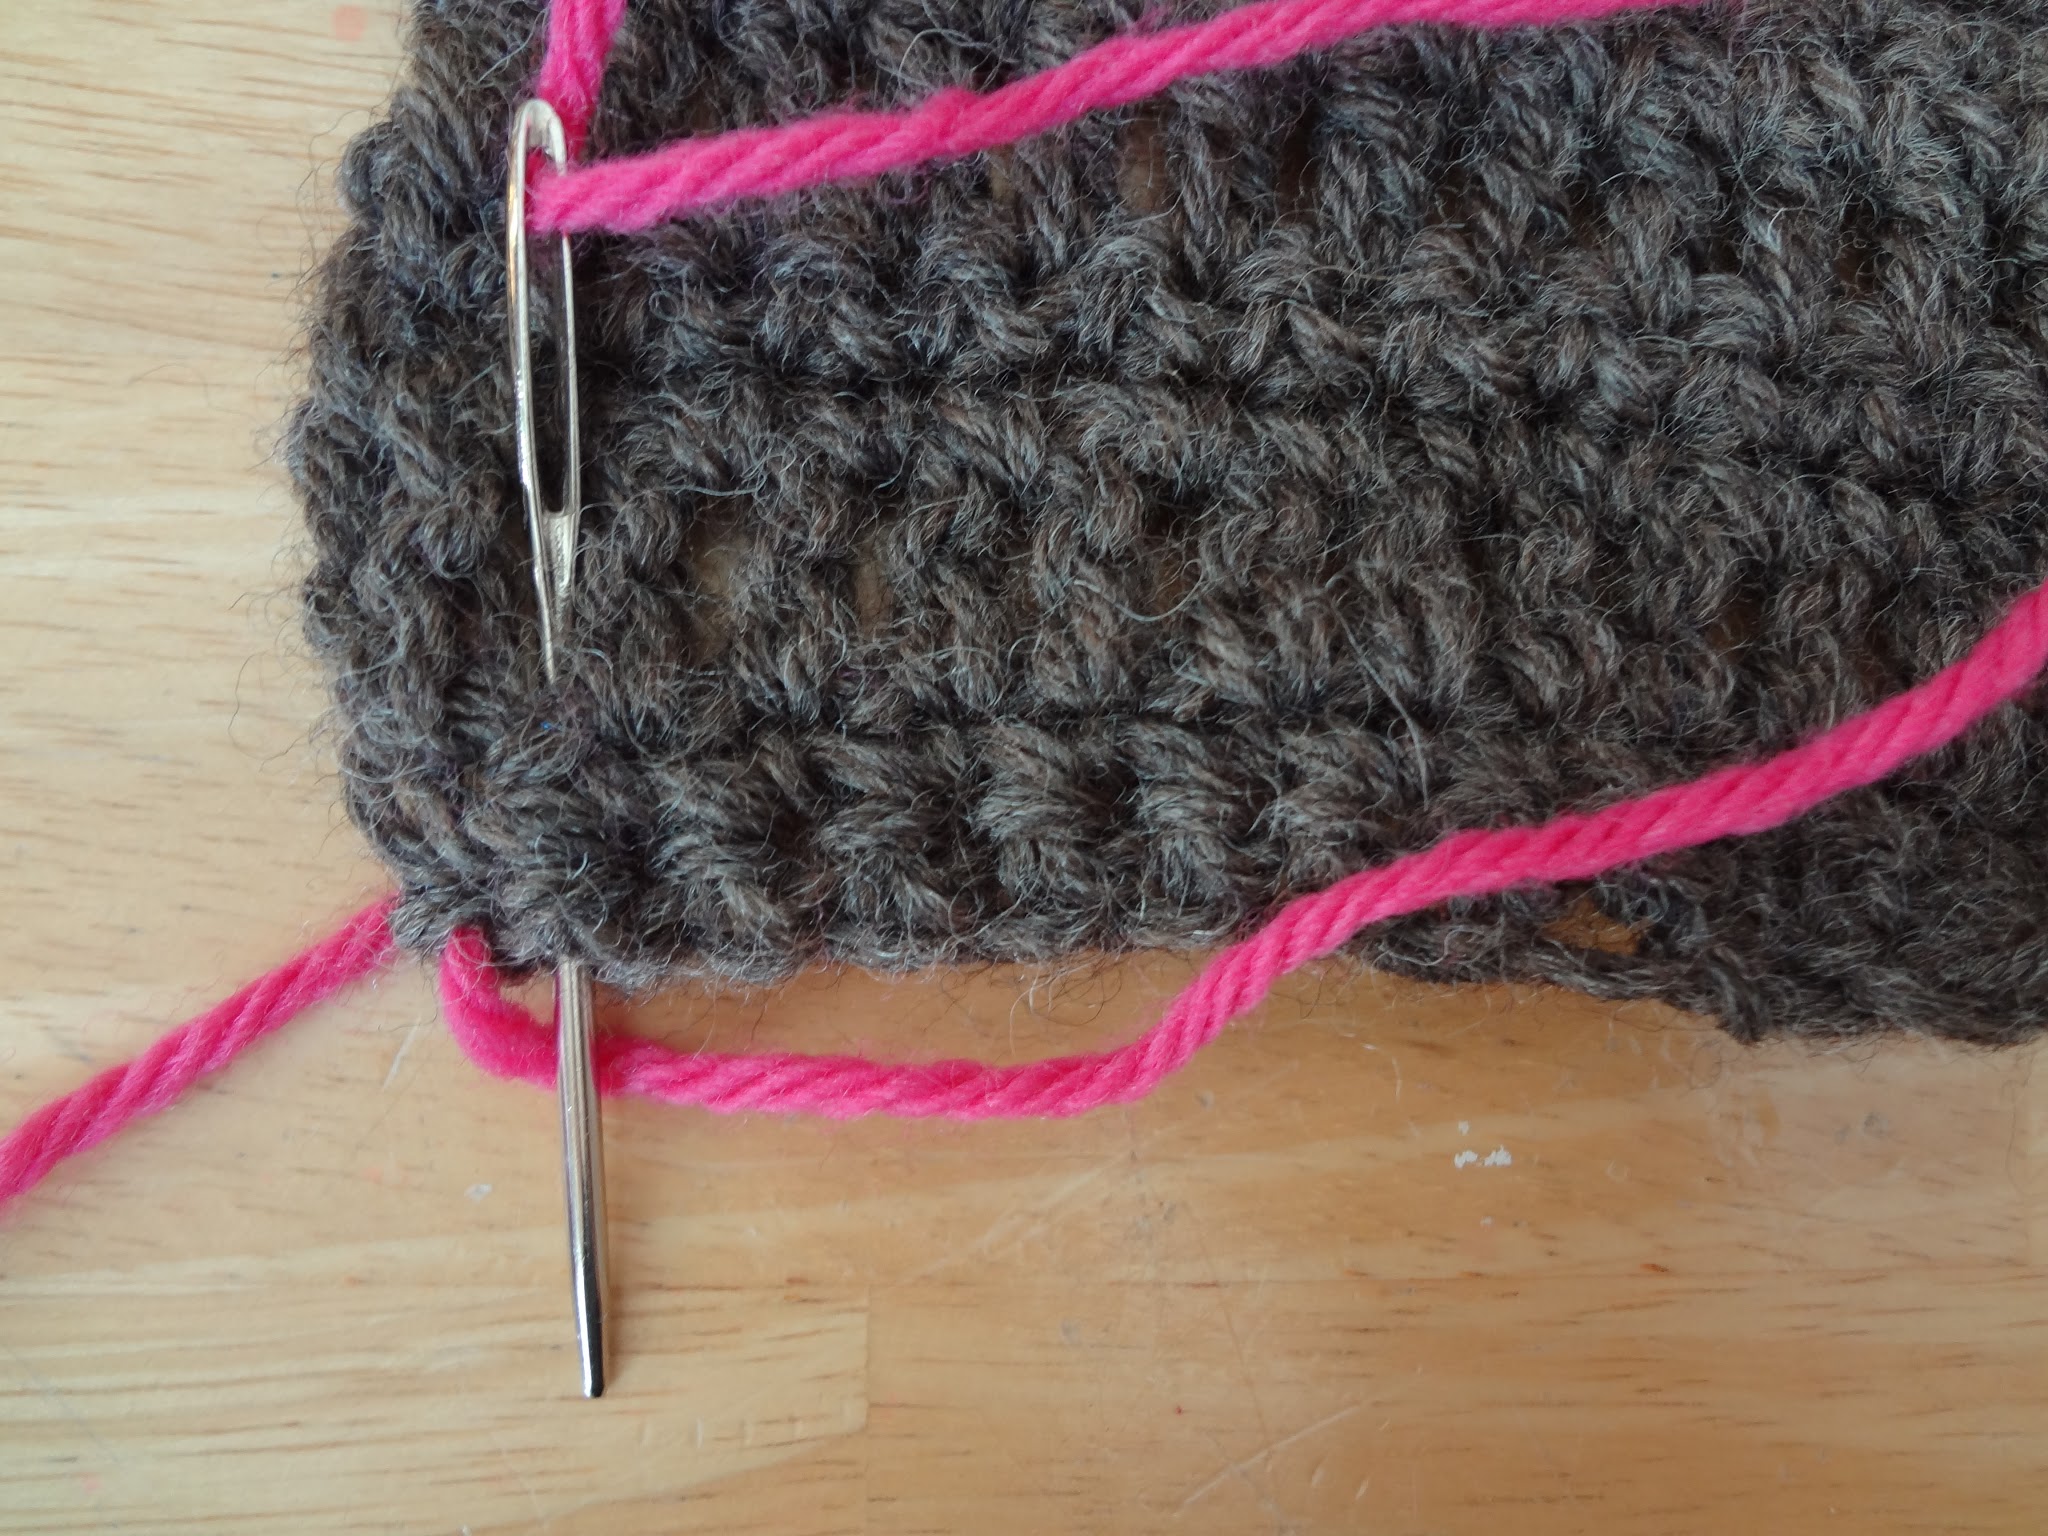
Thread your needle with a tail,
Working from left to right, bring the yarn up through from the back to the front as shown (you’ll want to pull enough yarn through to stitch the entire row across),
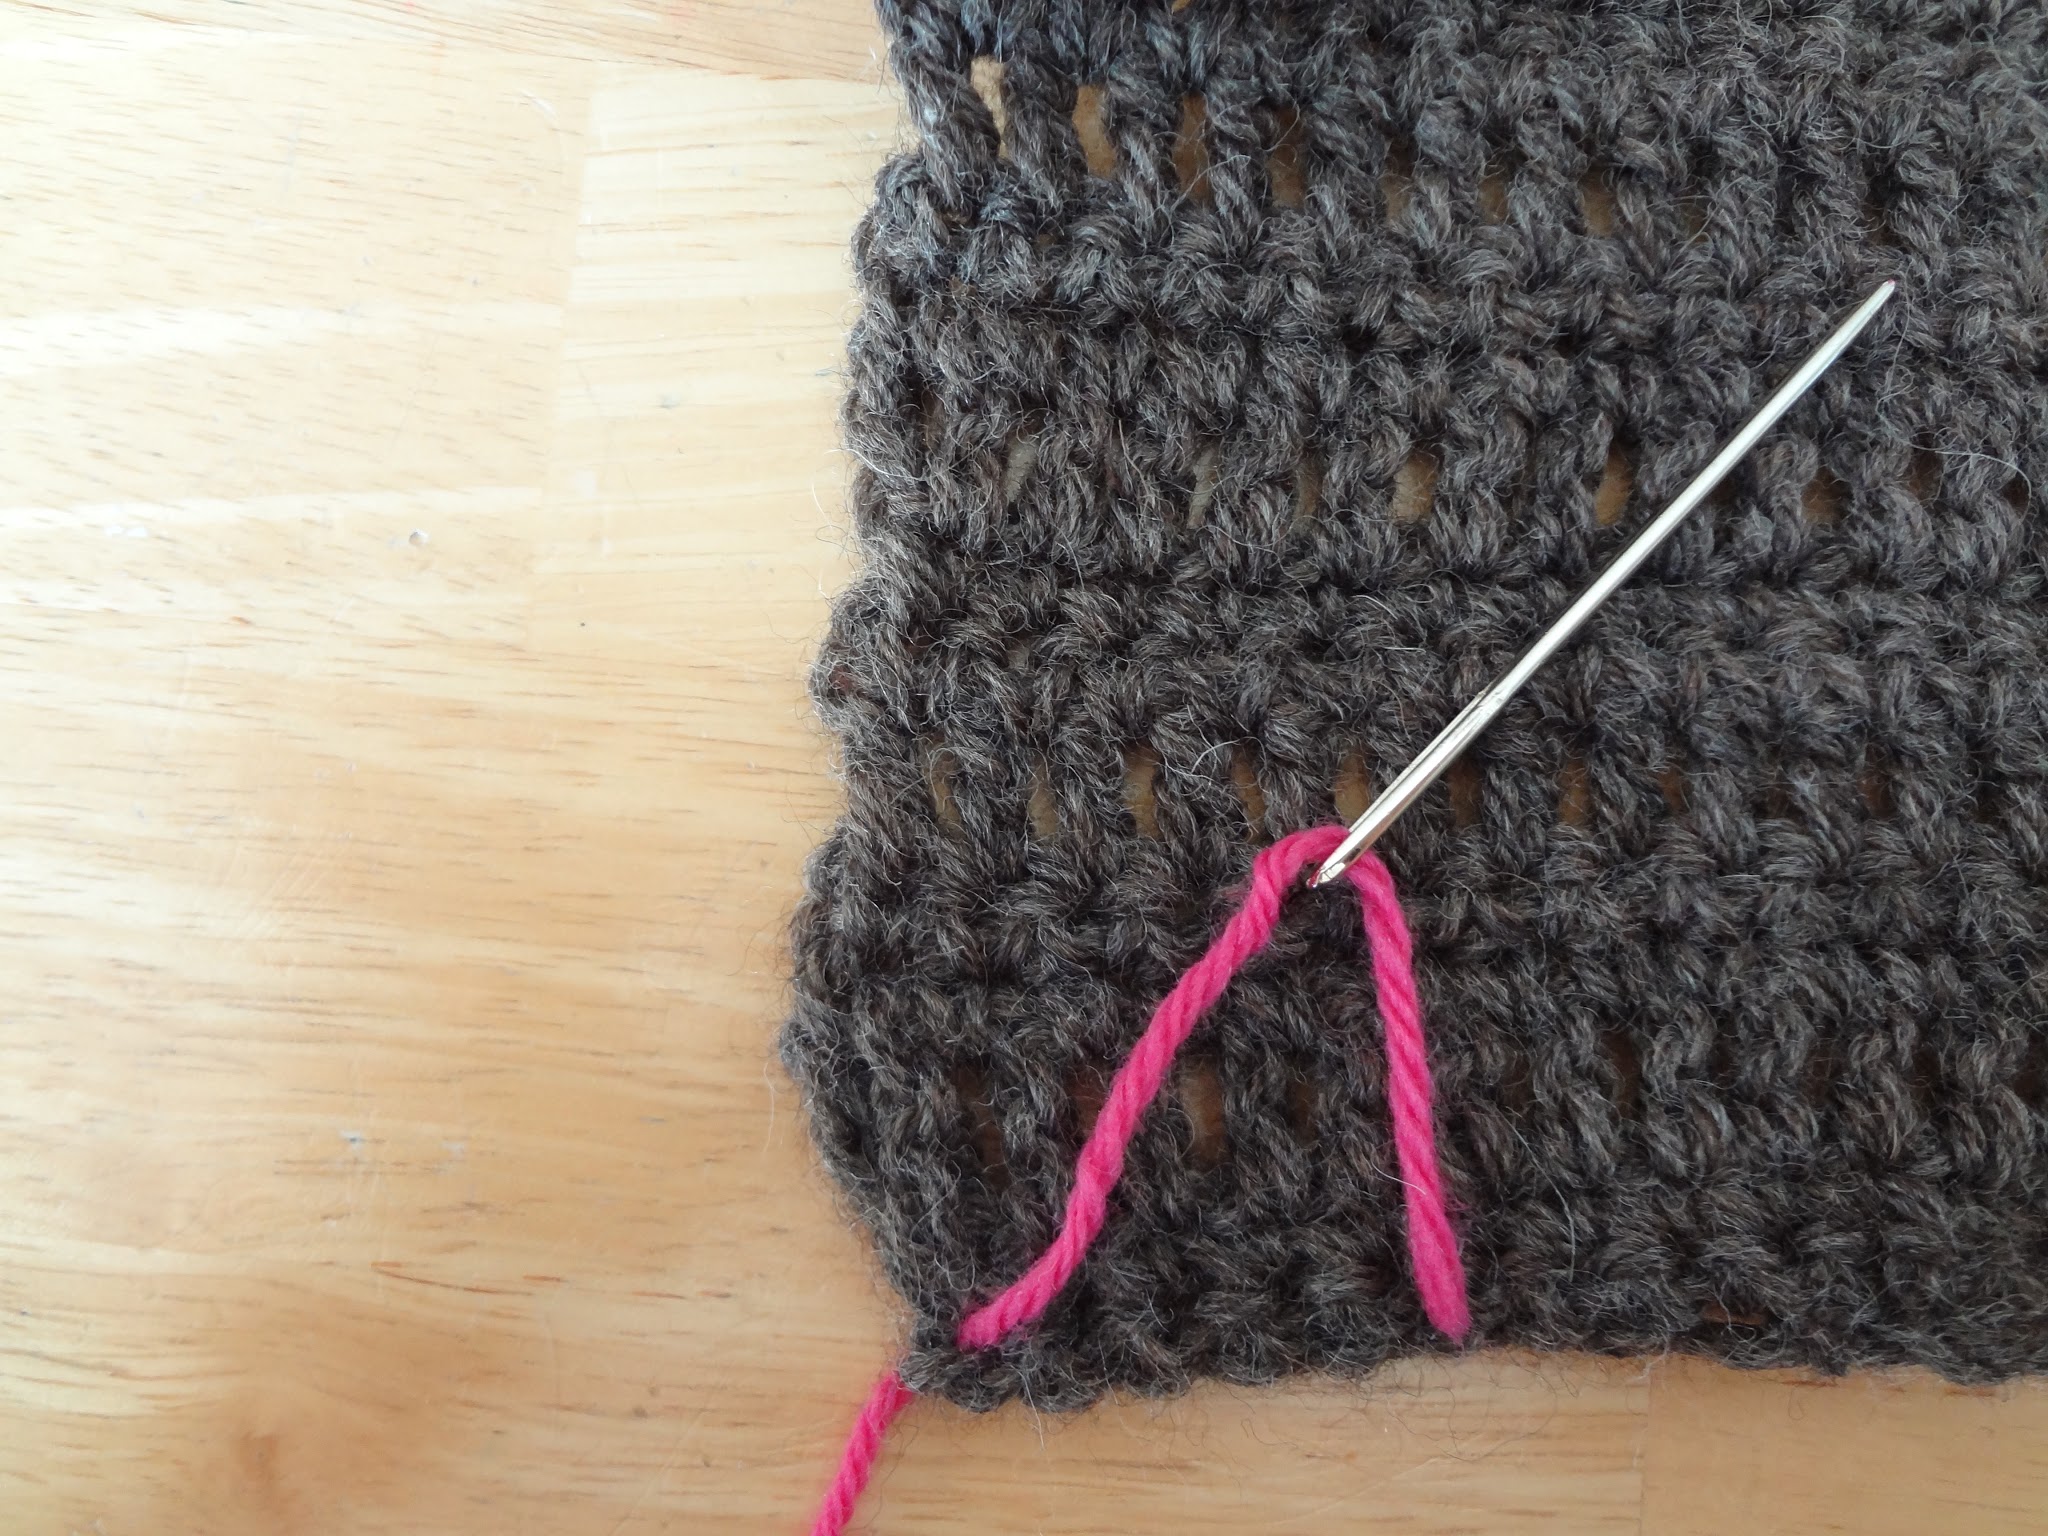
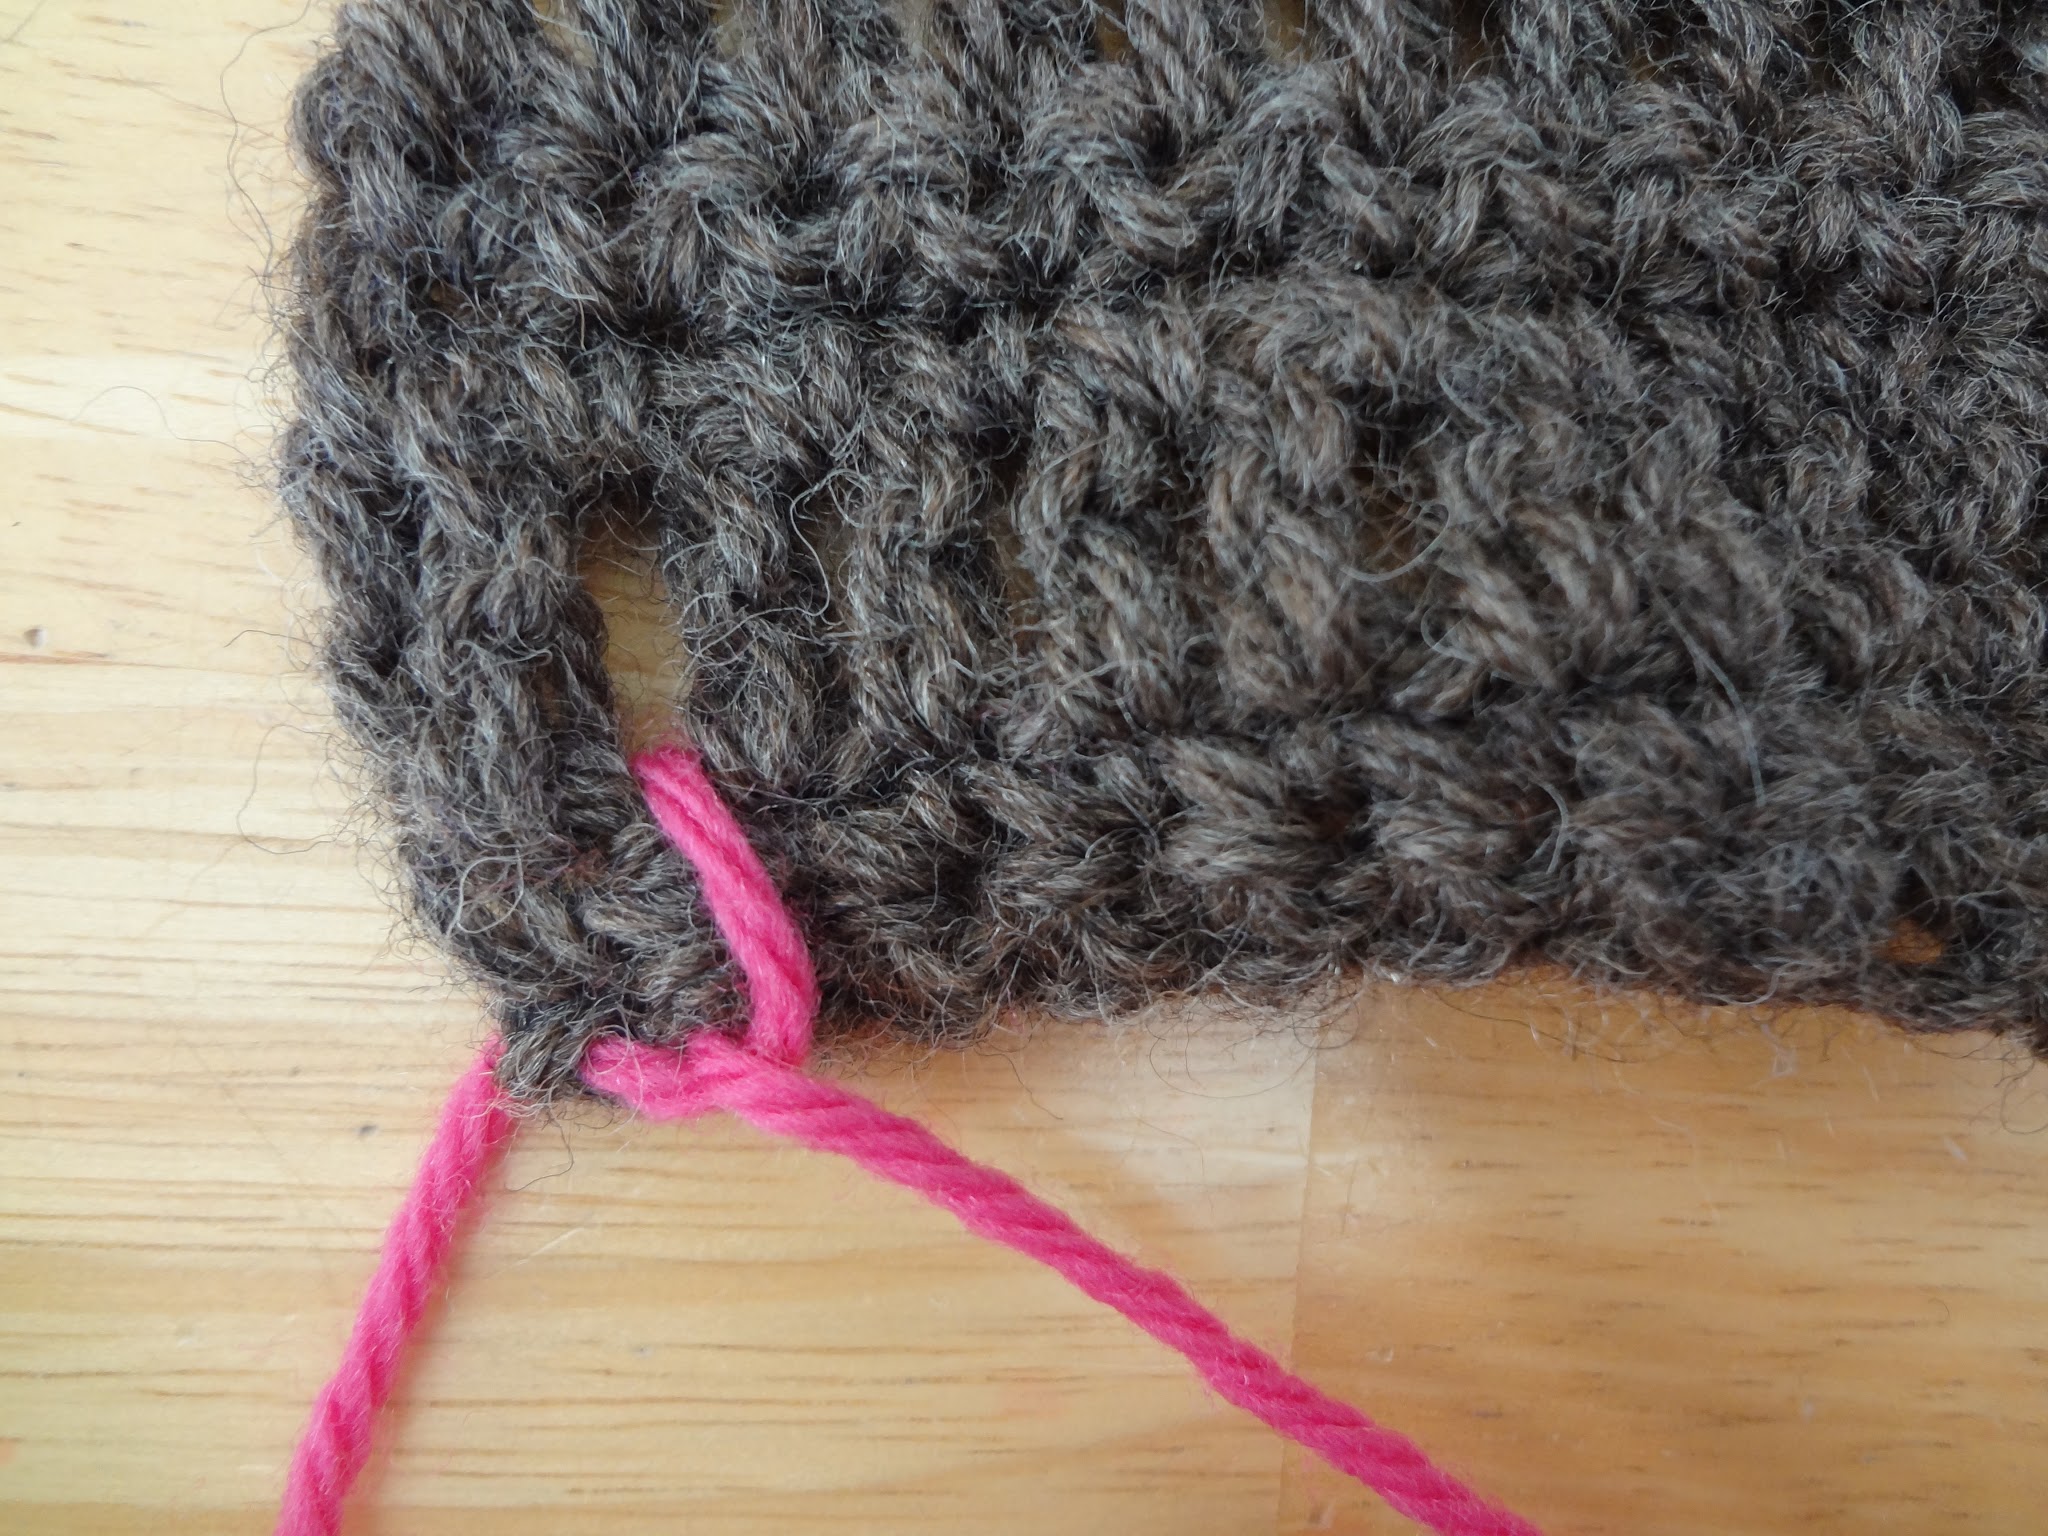
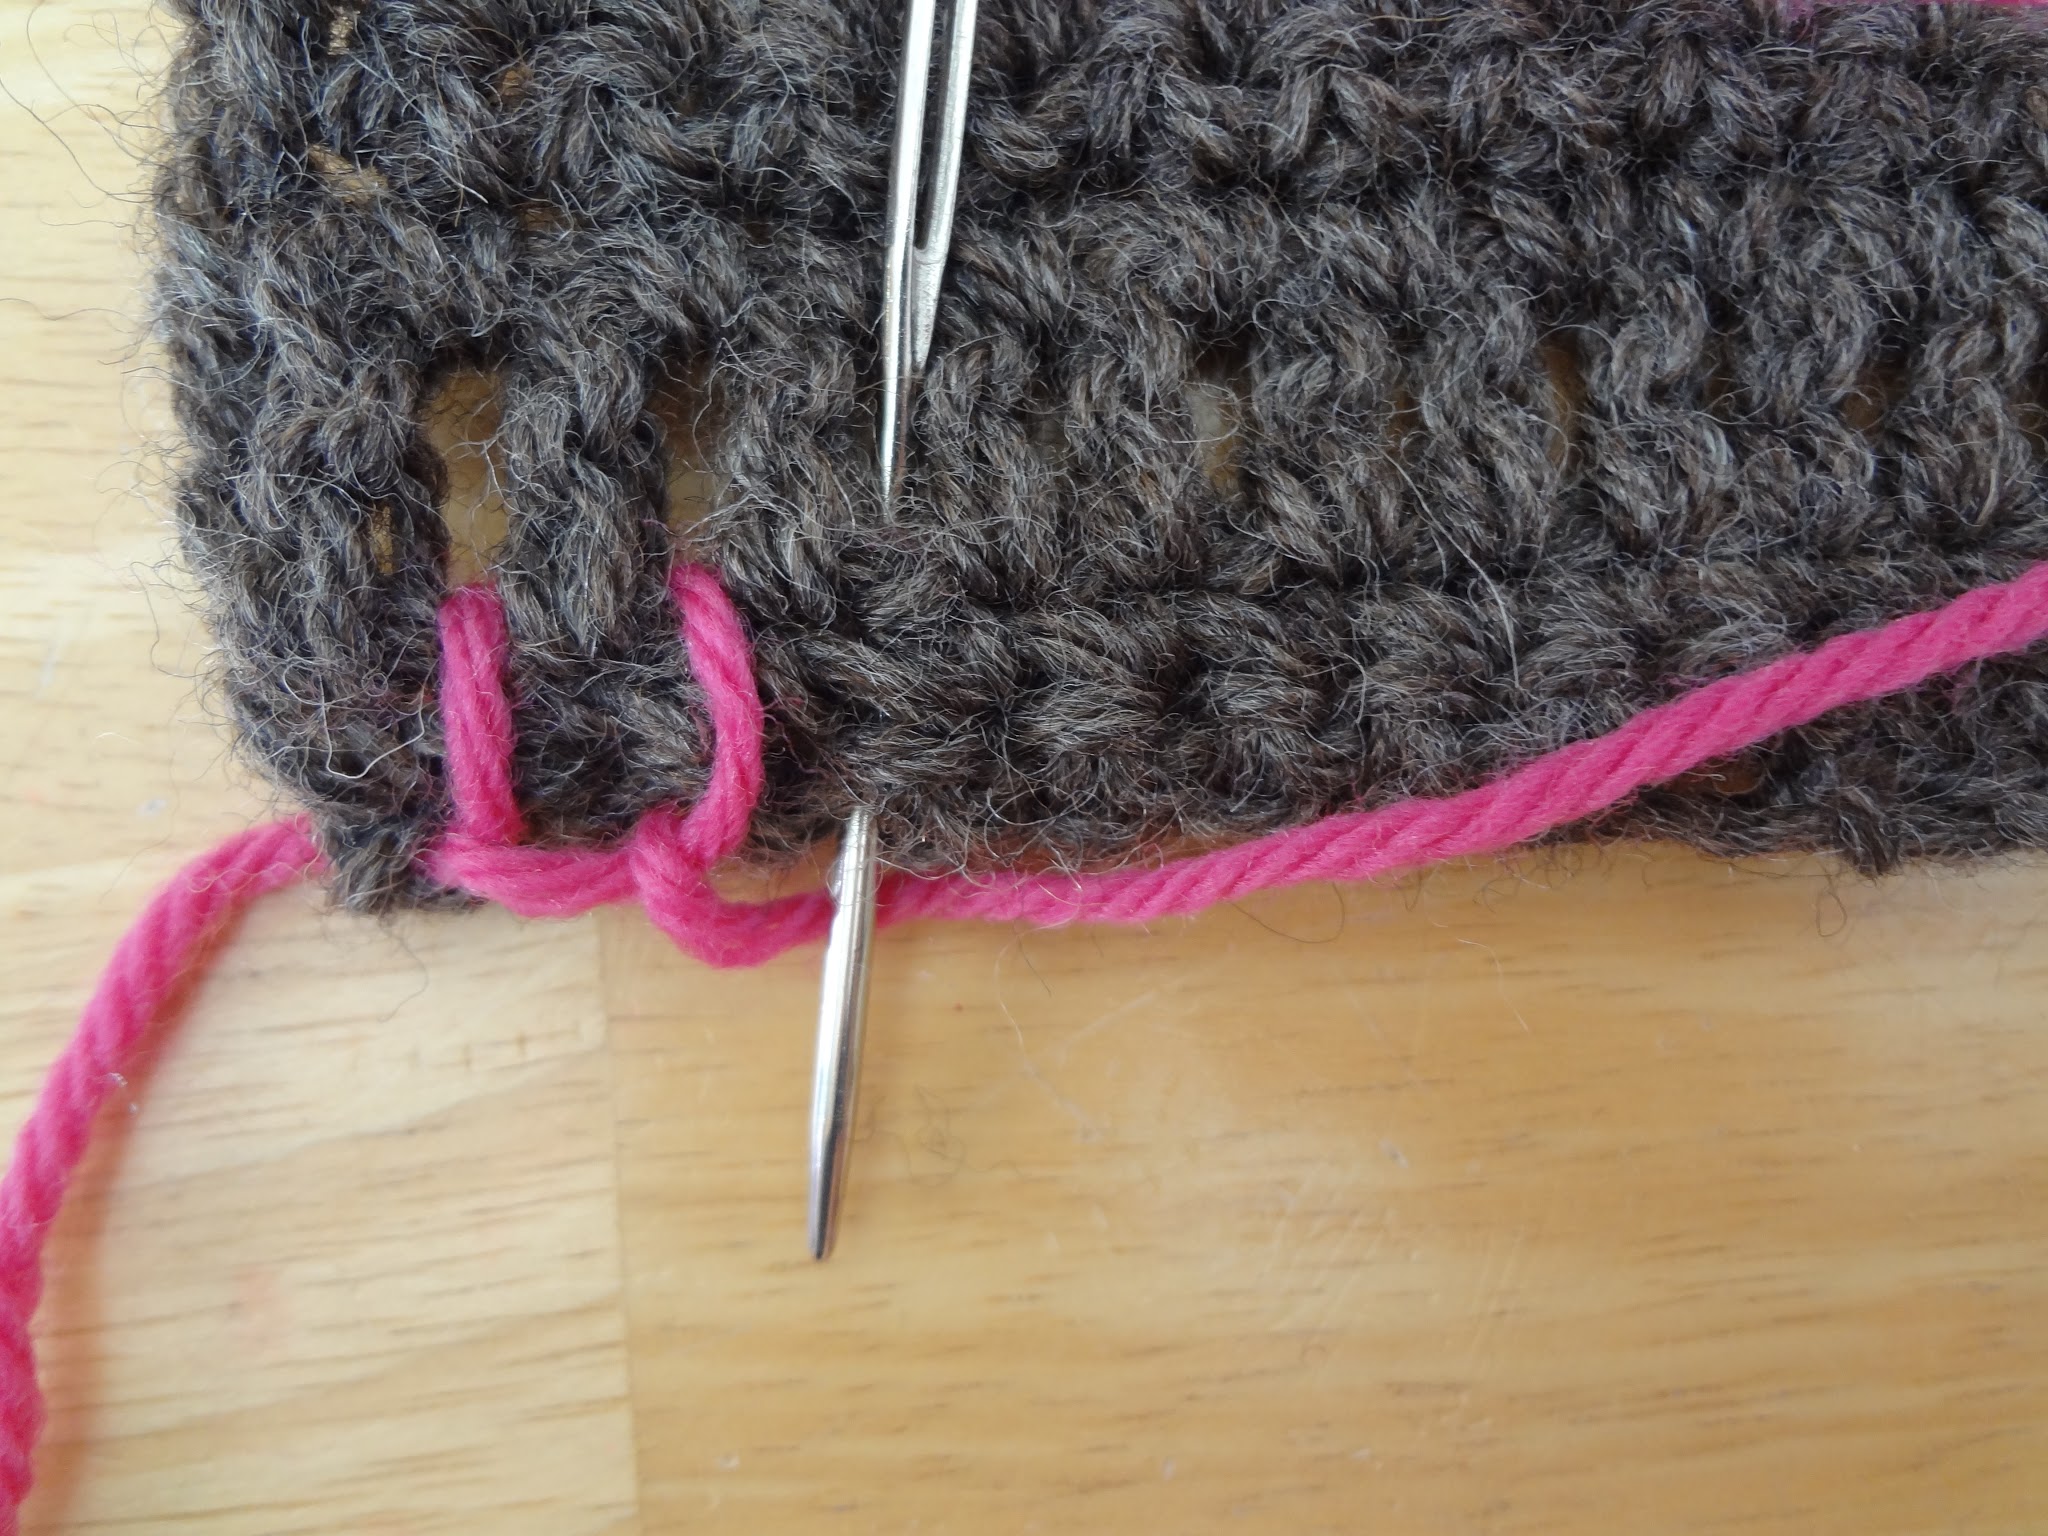
Next situate the needle as shown…in through the top, come under and back out of the bottom edge.
This is important…next thing you’ll want to do is make sure that the other end of the yarn loops around the bottom where the tip of the needle is.
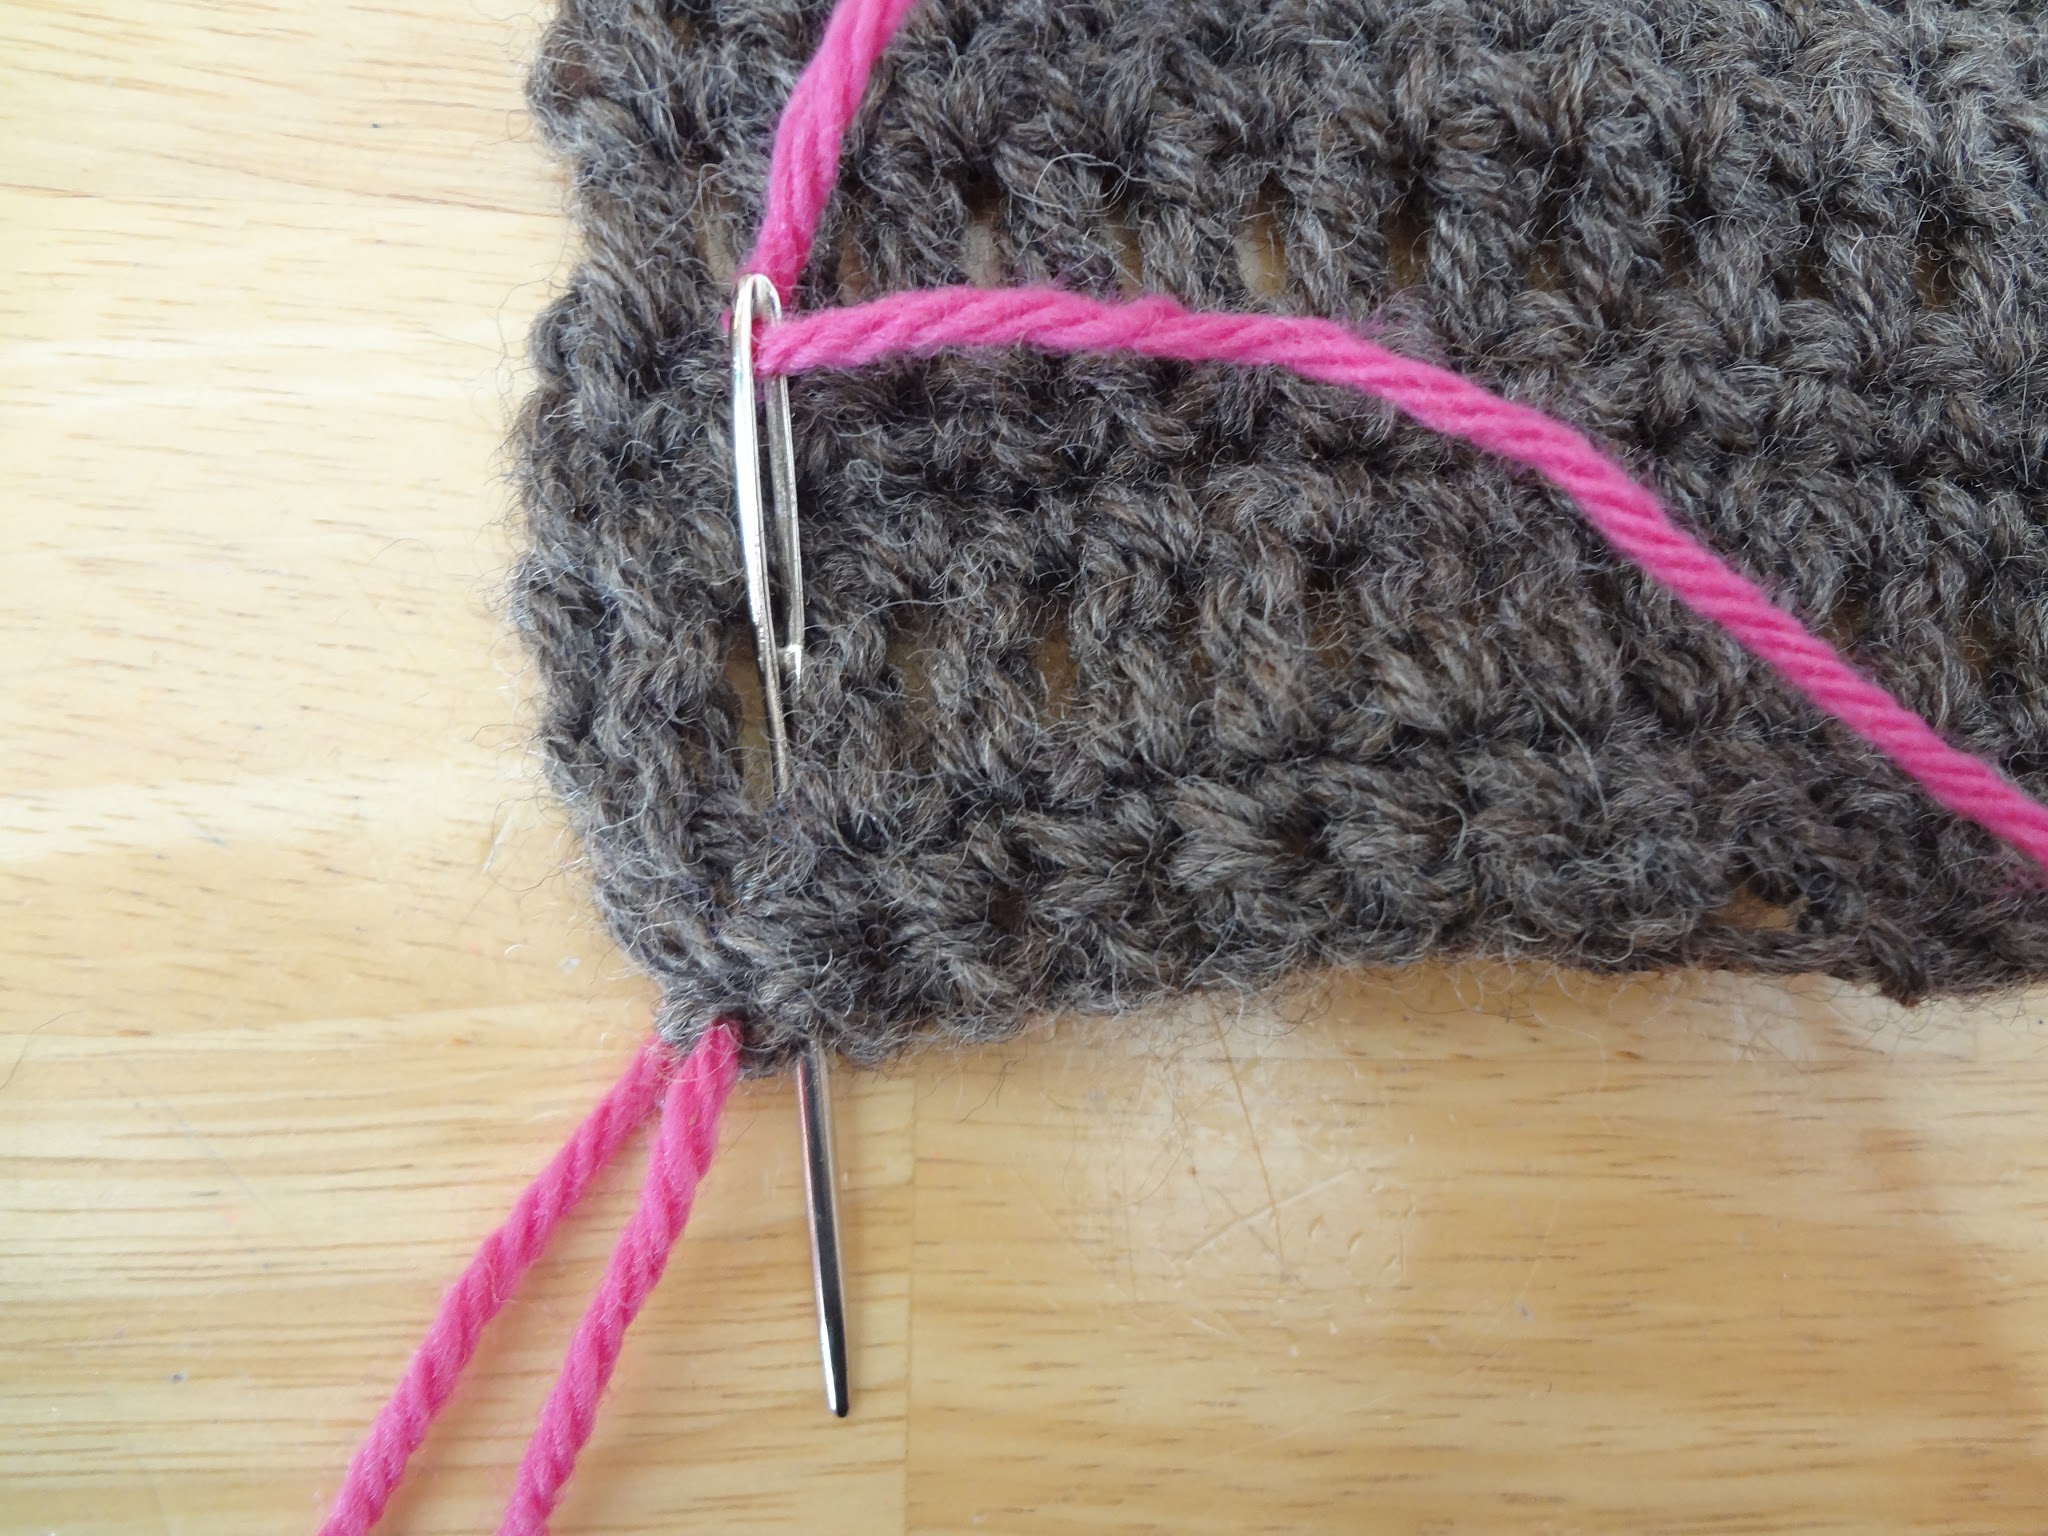
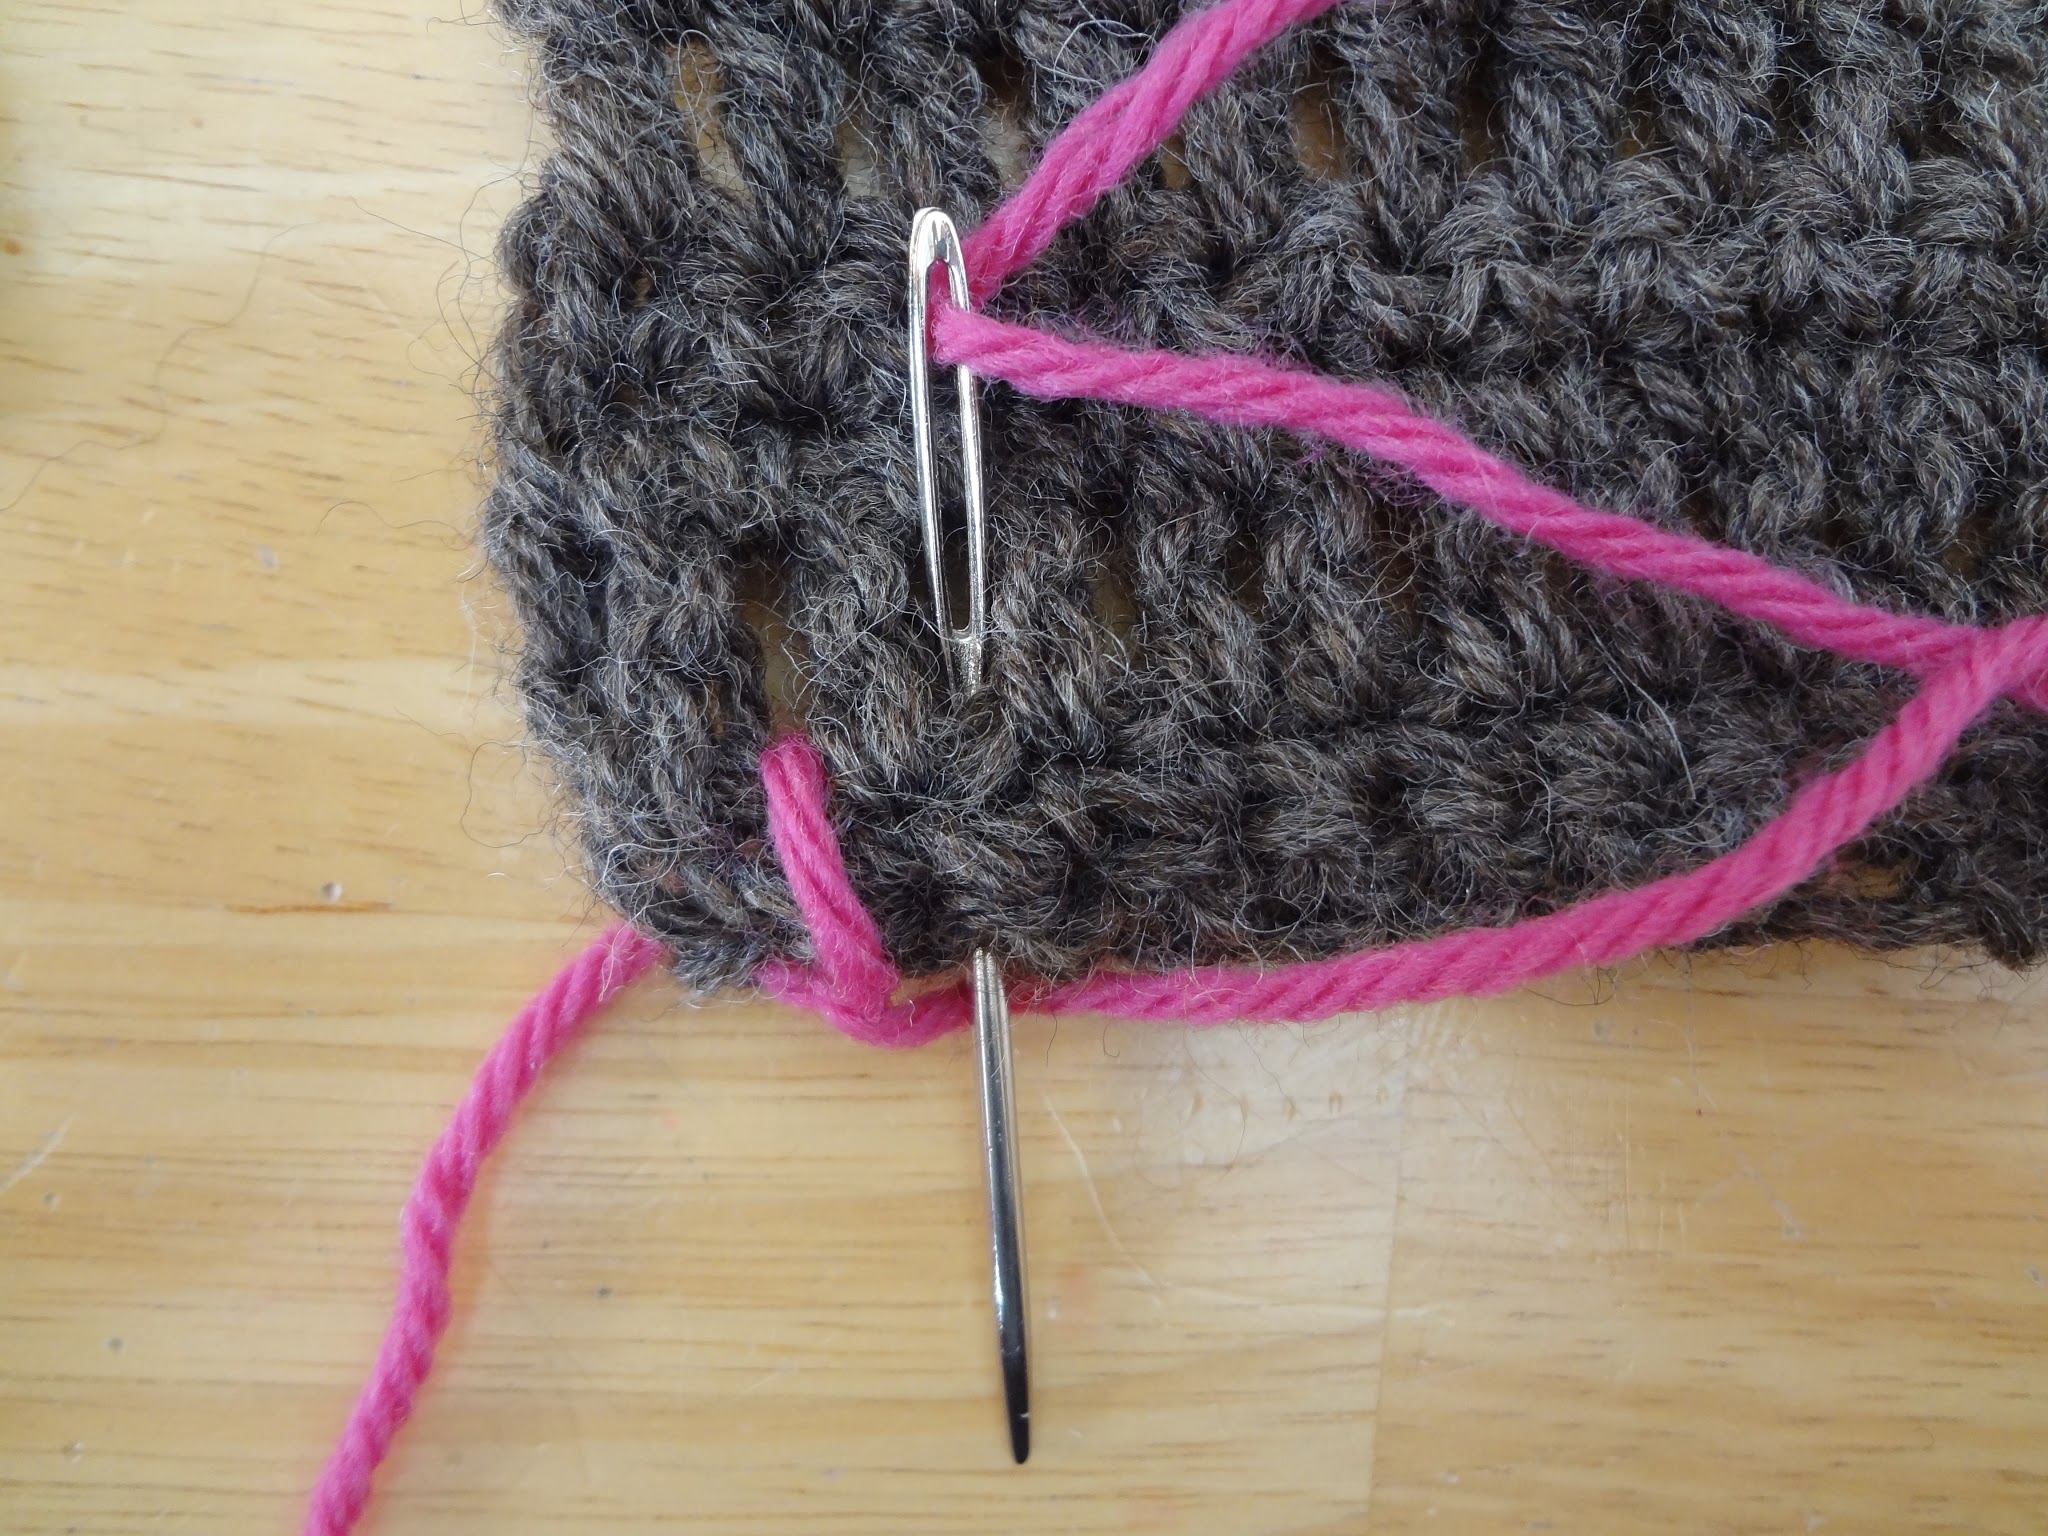
Now pull through and voila! Your first blanket stitch is complete.
Now repeat…in through the top, out through the bottom, loop around the bottom…
and pull through.
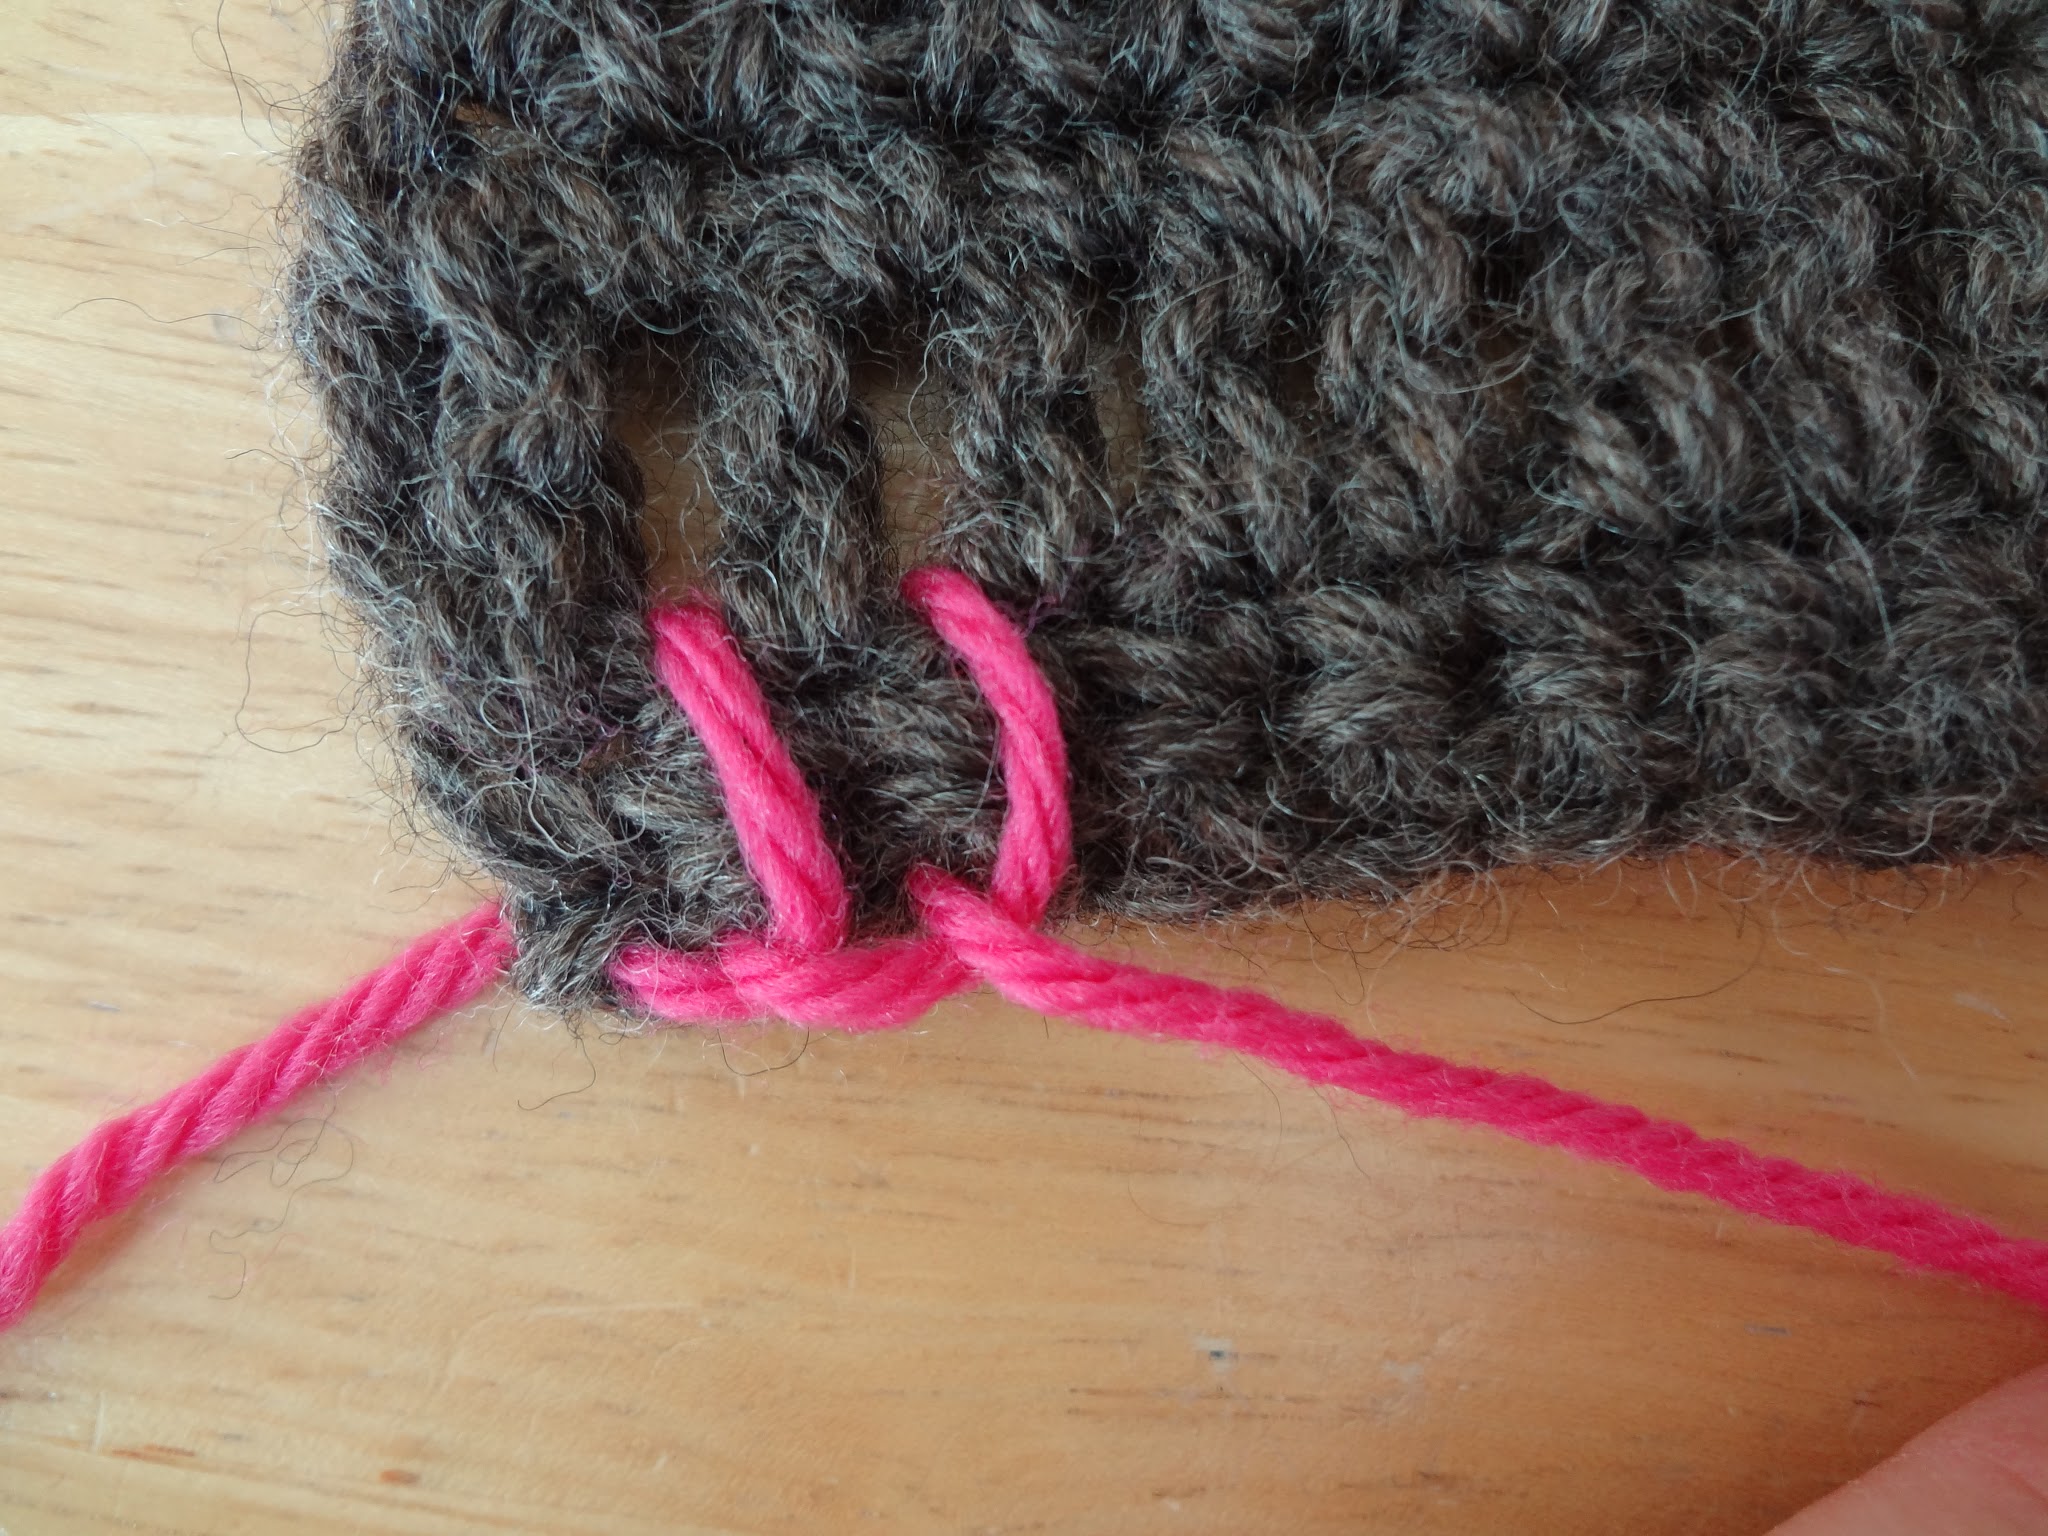
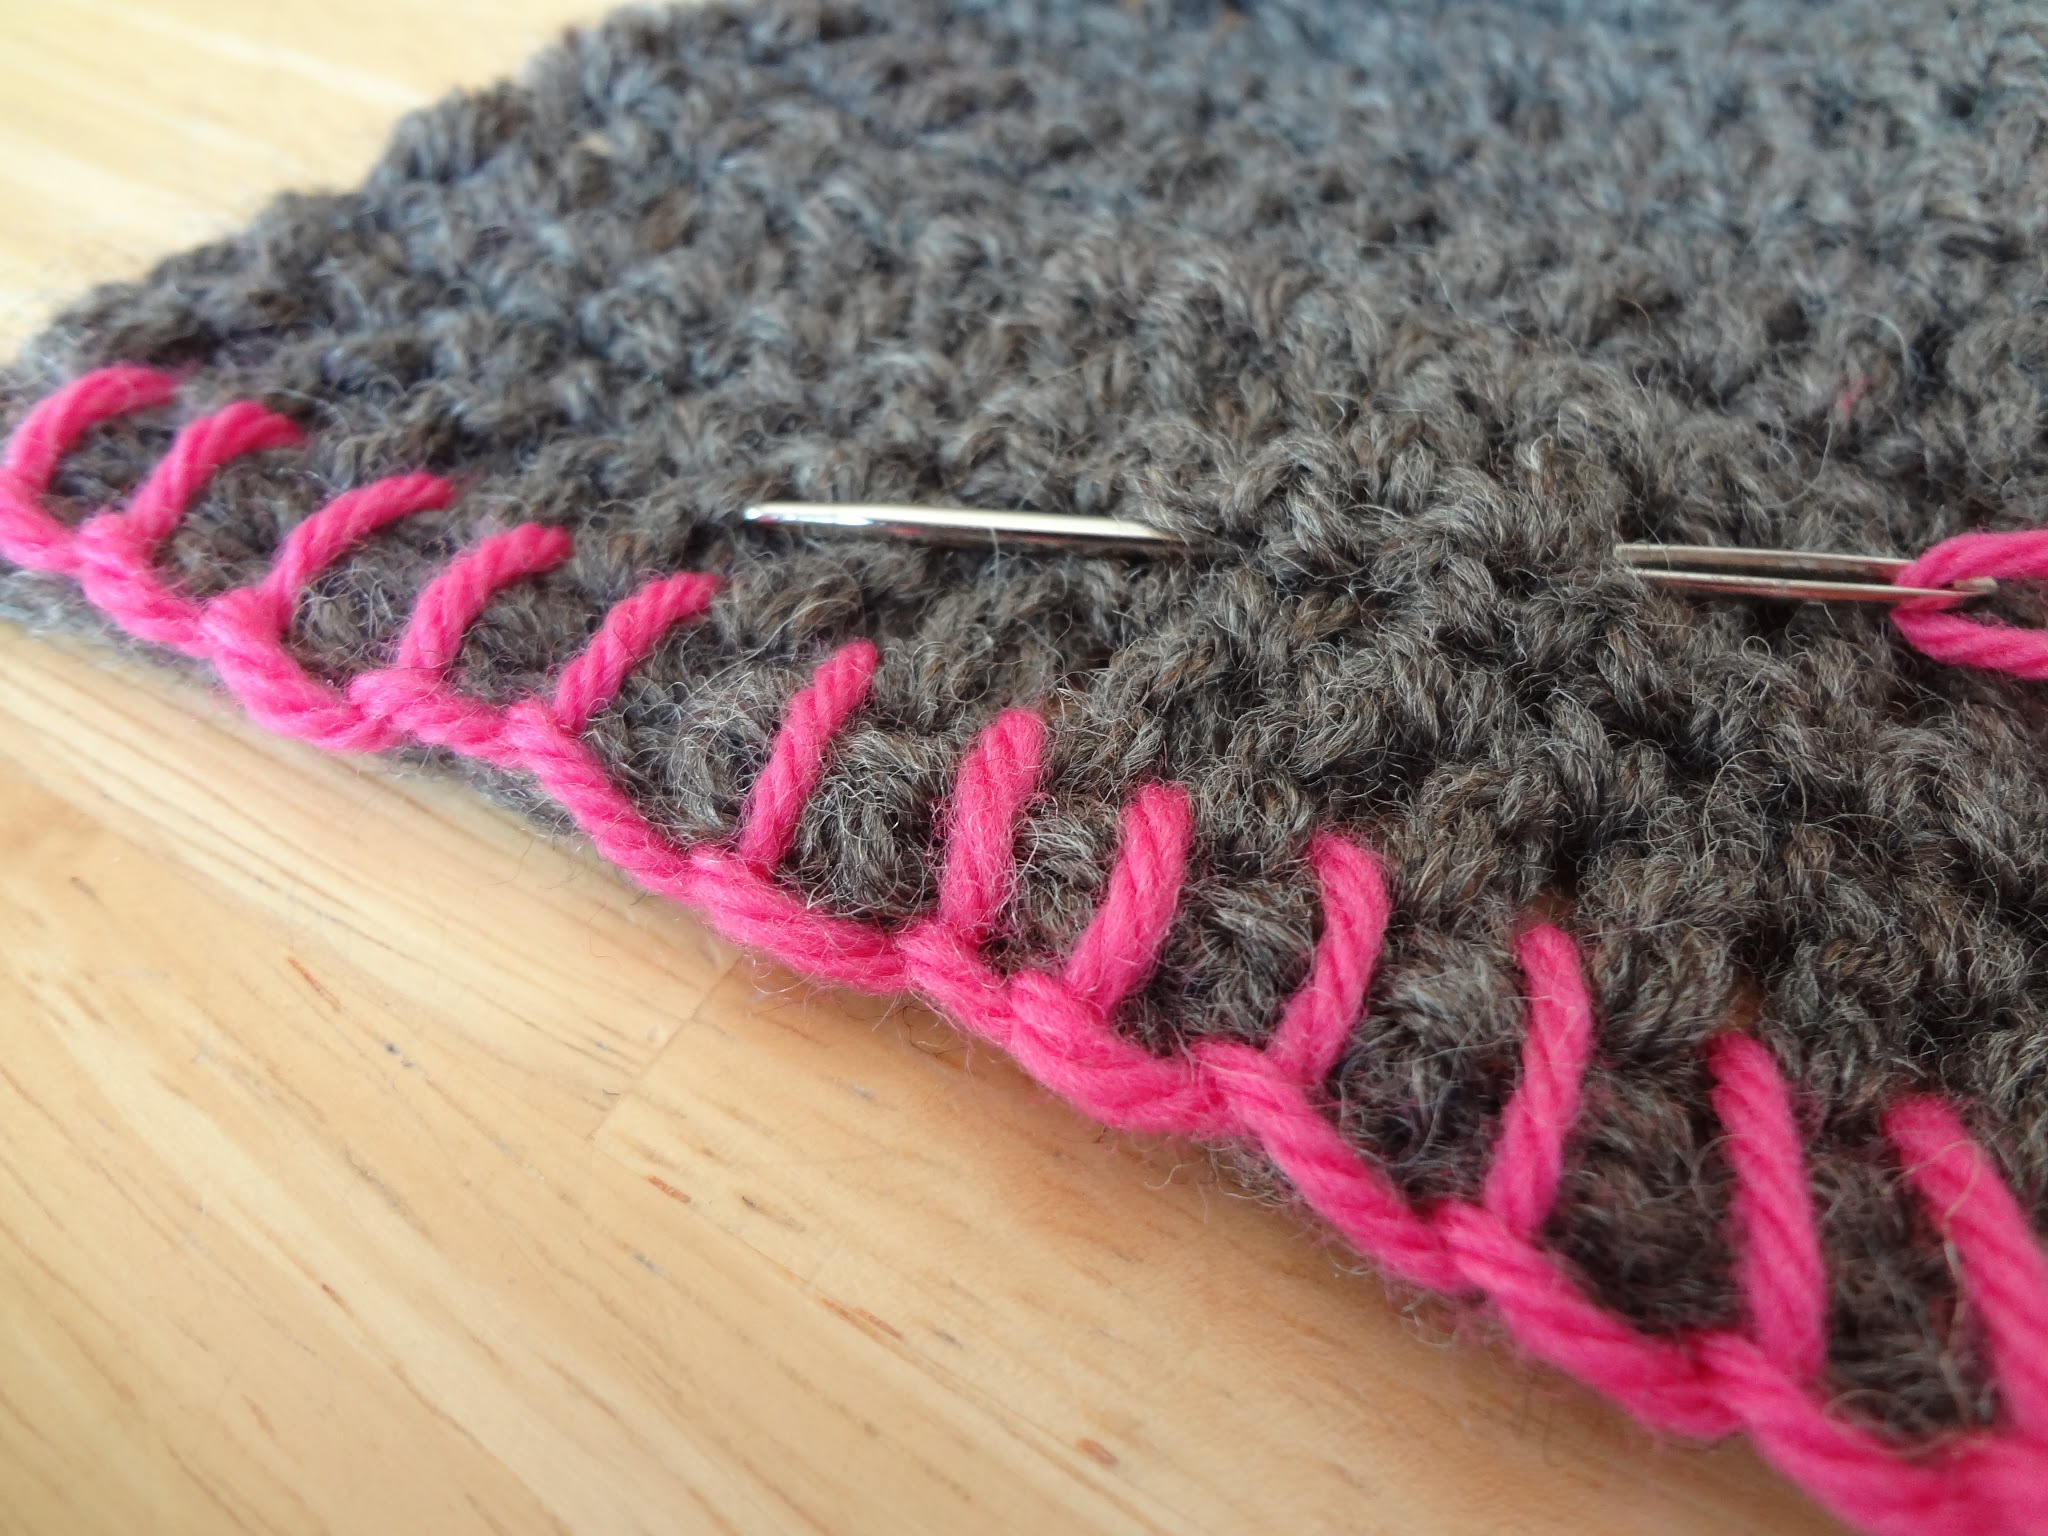
Now just keep going in this manner,
Here we’re about halfway through…
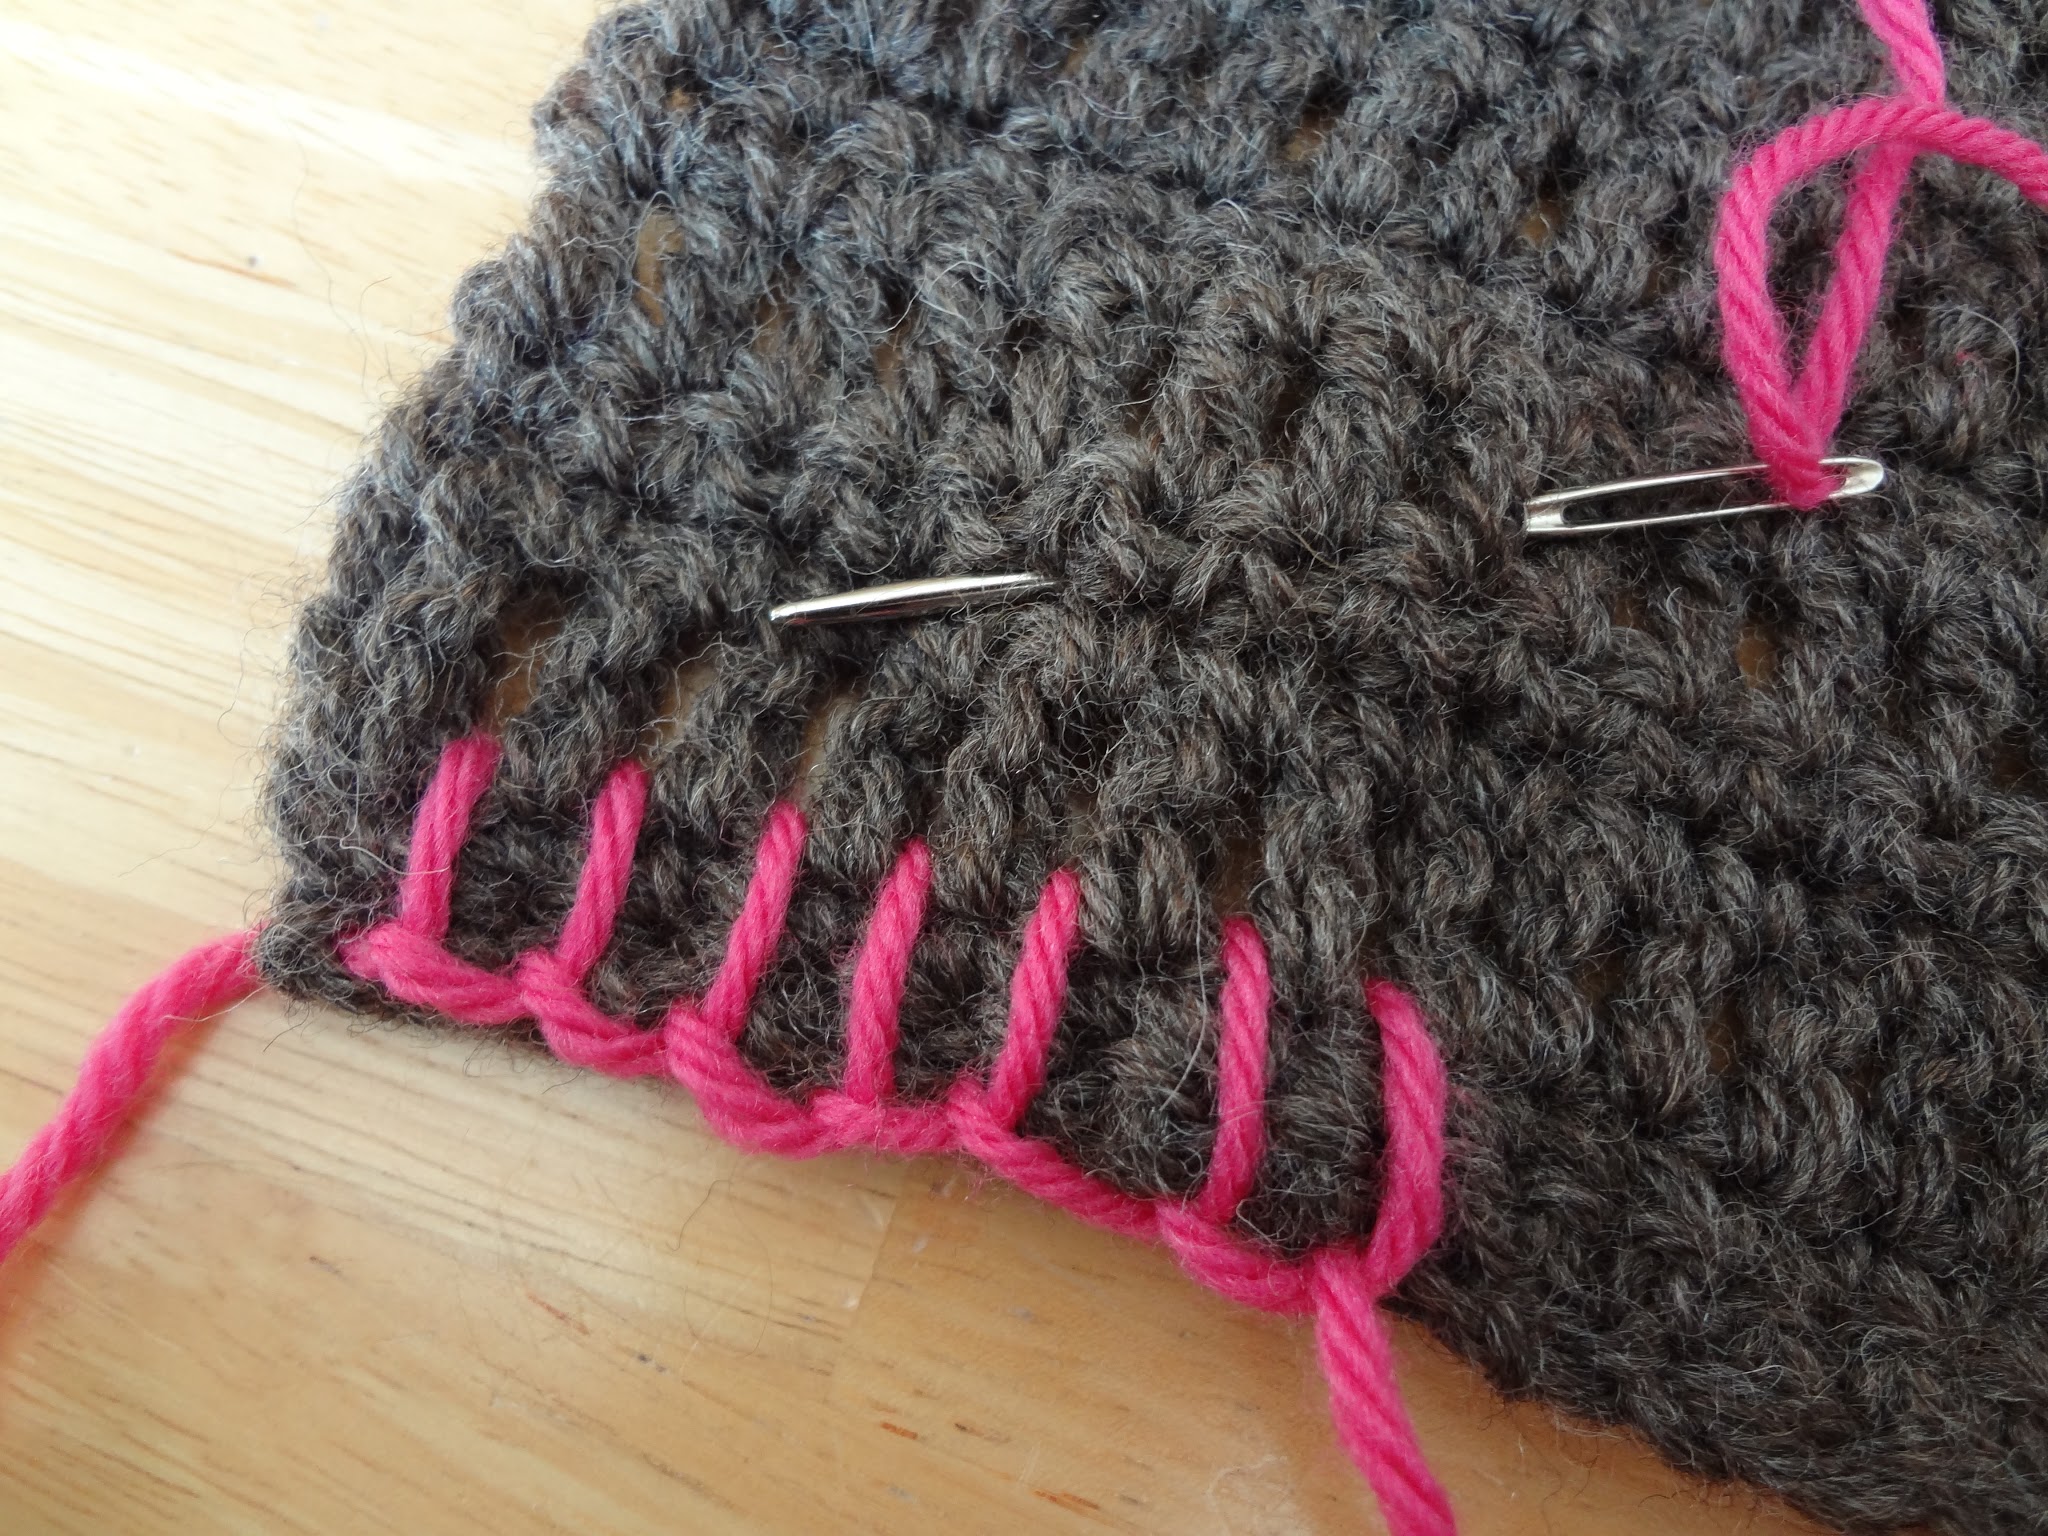
…and all finished! Try experimenting with different heights and widths too. You can even do this in the same row, it all depends on how you situate your needle.
Happy stitching to you!
)


I'll have to give this a try on the next blanket I make. Thanks.
Lovely tutorial. I love Blanket stitch. A tip if you want yours to look really even is to make the gap between the stitches the same distance as the height of the stitch. So actually you are making 3 sides to a square.
That is a great tip…thank you for sharing!
Awesome Jennifer, you rock!
This comment has been removed by a blog administrator.
This was exactly what I needed to finish some knitted doll clothes. Found a "ruffled" yarn and this made it look like lace.
Just perfect…though not certain my 3 yo granddaughter will appreciate!