
A crochet granny hexagon is so fun and pretty to make. Instead of a four sided square, these are constructed in a very similar way, but with six sides. You can make yours as big as you want by simply adding more rounds. If you love traditional granny squares, but are ready for something just a little different, grab your hook and let’s go!
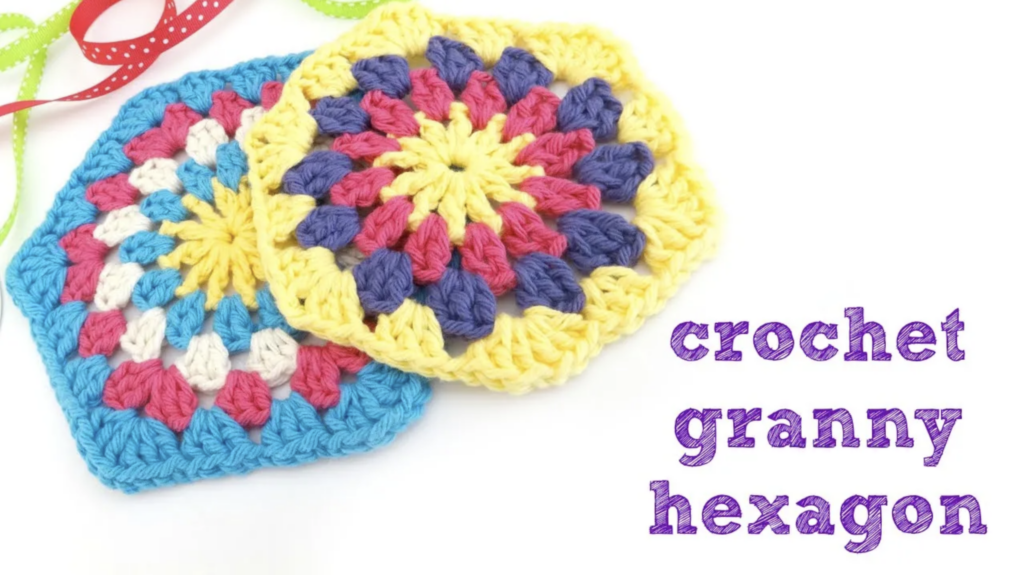
For the hexagons shown above, I used an H (5.0 mm) hook and some cotton yarn I had on hand.
Round 1:
- Begin by working a chain 4 and join to form a ring with a slip stitch in the furthest ring from the hook,
- Chain four (this counts as a dc),
- Then work a double crochet in the center of the ring and chain 1,
- Now work a double crochet then a chain 1 ten more times into the center of the circle, for a total of 12 “spokes”
- Join with a slip stitch to close the round.
Round 2:
- Tie on a new color and bring up a loop.
- Note: If you want to make the next round in the same color, simply slip stitch until you reach a ch 1 space and then keep going.
- Chain 4,
- Work a double crochet in the same space,
- Chain 1, then work two double crochet in the next (chain 1) space,
- Keep doing this all the way around (working 2 dc, then a chain 1 in each space),
- Join to close the round with a slip stitch,
Round 3:
- Tie on the next color and bring up a loop.
- Draw yarn through and chain 4,
- Work 2 double crochet in the same space, then chain 1,
- In the next space, work three double crochet, then chain 1,
- Keep doing this all the way around the circle…3 dc, then a chain 1 in each space),
- Join with a slip stitch to close,
Round 4:
- Now for the most fun part…this is the round where our circle transforms into a hexagon…
- Tie on a new color and bring up a loop.
- Chain 4, and in the first space work 2 dc, chain 1, then 3 dc all in the same space. This will make our first hexagon corner.
- To work a hexagon side, chain 1, then work 3 dc in next space.
- Then onto the next corner, chain 1, then work 3 dc, chain 1, 3 dc,
- Keep working this sequence, working a corner of two “clusters” and a side of 1 cluster (each cluster being separated by a chain 1).
- Join with a slip stitch to close.
Round 5 (and beyond):
- To continue to work more rounds of your hexagon,
- Tie on a new color into one of the corners and chain 4,
- Work the corner the same way as before,
- There will be two sides of this round, so work the two sides with a cluster in each,
- and a corner again,
- Keep going all the way around in this sequence, and join to close the round with a slip stitch at the end of the round.
In the picture above, you can see the two finished hexagons. The one on the left is 5 rounds, the one on the right is 4 rounds.
Watch a video on how to make a crochet granny hexagon stitch by stitch:
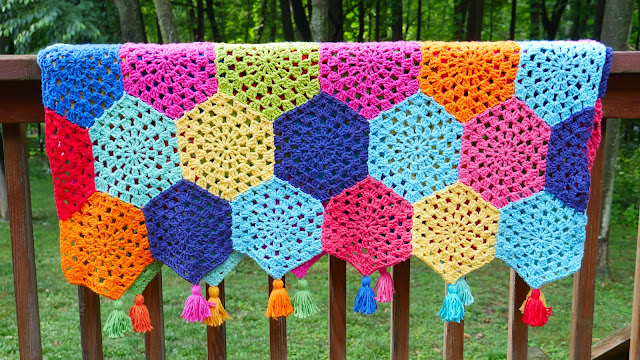
Ready to try a fun granny hexagon project? Check out my Summer of Love Throw! Full of bright happy colors and full video tutorials to guide you through every step of the way!


I follow your blog and love it. Is there any way you could show us (with pictures) how you join or tie on, when you change to a different color of yarn. Do you tie on and cut it really close??? I never see where it is because you are so good and of course I want to learn how. Thanks so much.
Debbie
Thanks so much for your kind comment and question! When I change colors, I cut and crochet the ends into the next round. I like doing that best rather than weaving in all the ends at the end. Hope that helps!
Great tutorial! Thanks for sharing! Have a great weekend.
You are so welcome and thanks!
Thx for the tutorial. Made my first hexagon. I love the granny stitch and this is sooooo magic…circle becomes hex! MO
http://moisbloggingit.blogspot.ca/
Love it and the pink purse you made too!
can you tell me what kind of yarn you used for this? the brand? great tutorial!
All of the colors used are Peaches n' Creme…I used a couple of colors I had on hand. Thanks too! 🙂
I did it, so pleased, very clear instructions as have been trying to crochet for ages. First hexagon not very neat but after I have done a few more it will get easier and will make a lovely blanket. Hurray.
Awesome! I love that feeling of trying something new…good for you!!
Thanks so much for the instructions & pictures that I can follow. Our church has a crochet ministry, we make & give to Hospice & Nursing homes, thanks again. I will be starting it this week.
What a wonderful gesture, keep up the great work you are doing for others who need it. 🙂
Do u have a tutorial on how to make it up into a blanket plz …
I don't currently, but will definitely add it to my to-do list! 🙂
complimenti per i tuoi lavori, brava ciao.
Hi,
I followed your hexagon granny square to make a blanket for my baby granddaughter. However, I'm having problems finding a half hexagon to close up the piquet edges as I want it straight so I can continue to crochet around the edging to make it bigger. I've seen a half hexagon pattern by someone else but it doesn't fit this pattern due to the other being a small granny square. Any help would be appreciated. Many thanks Lorraine (in the UK) xx