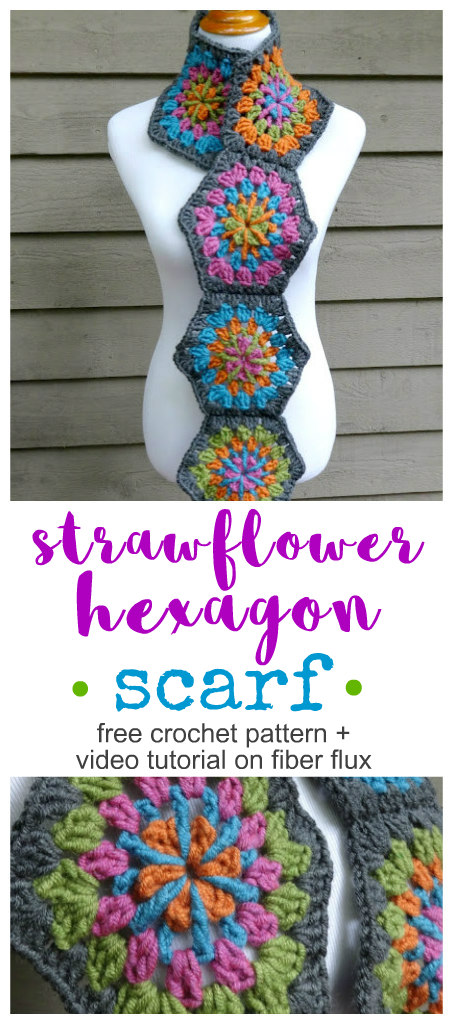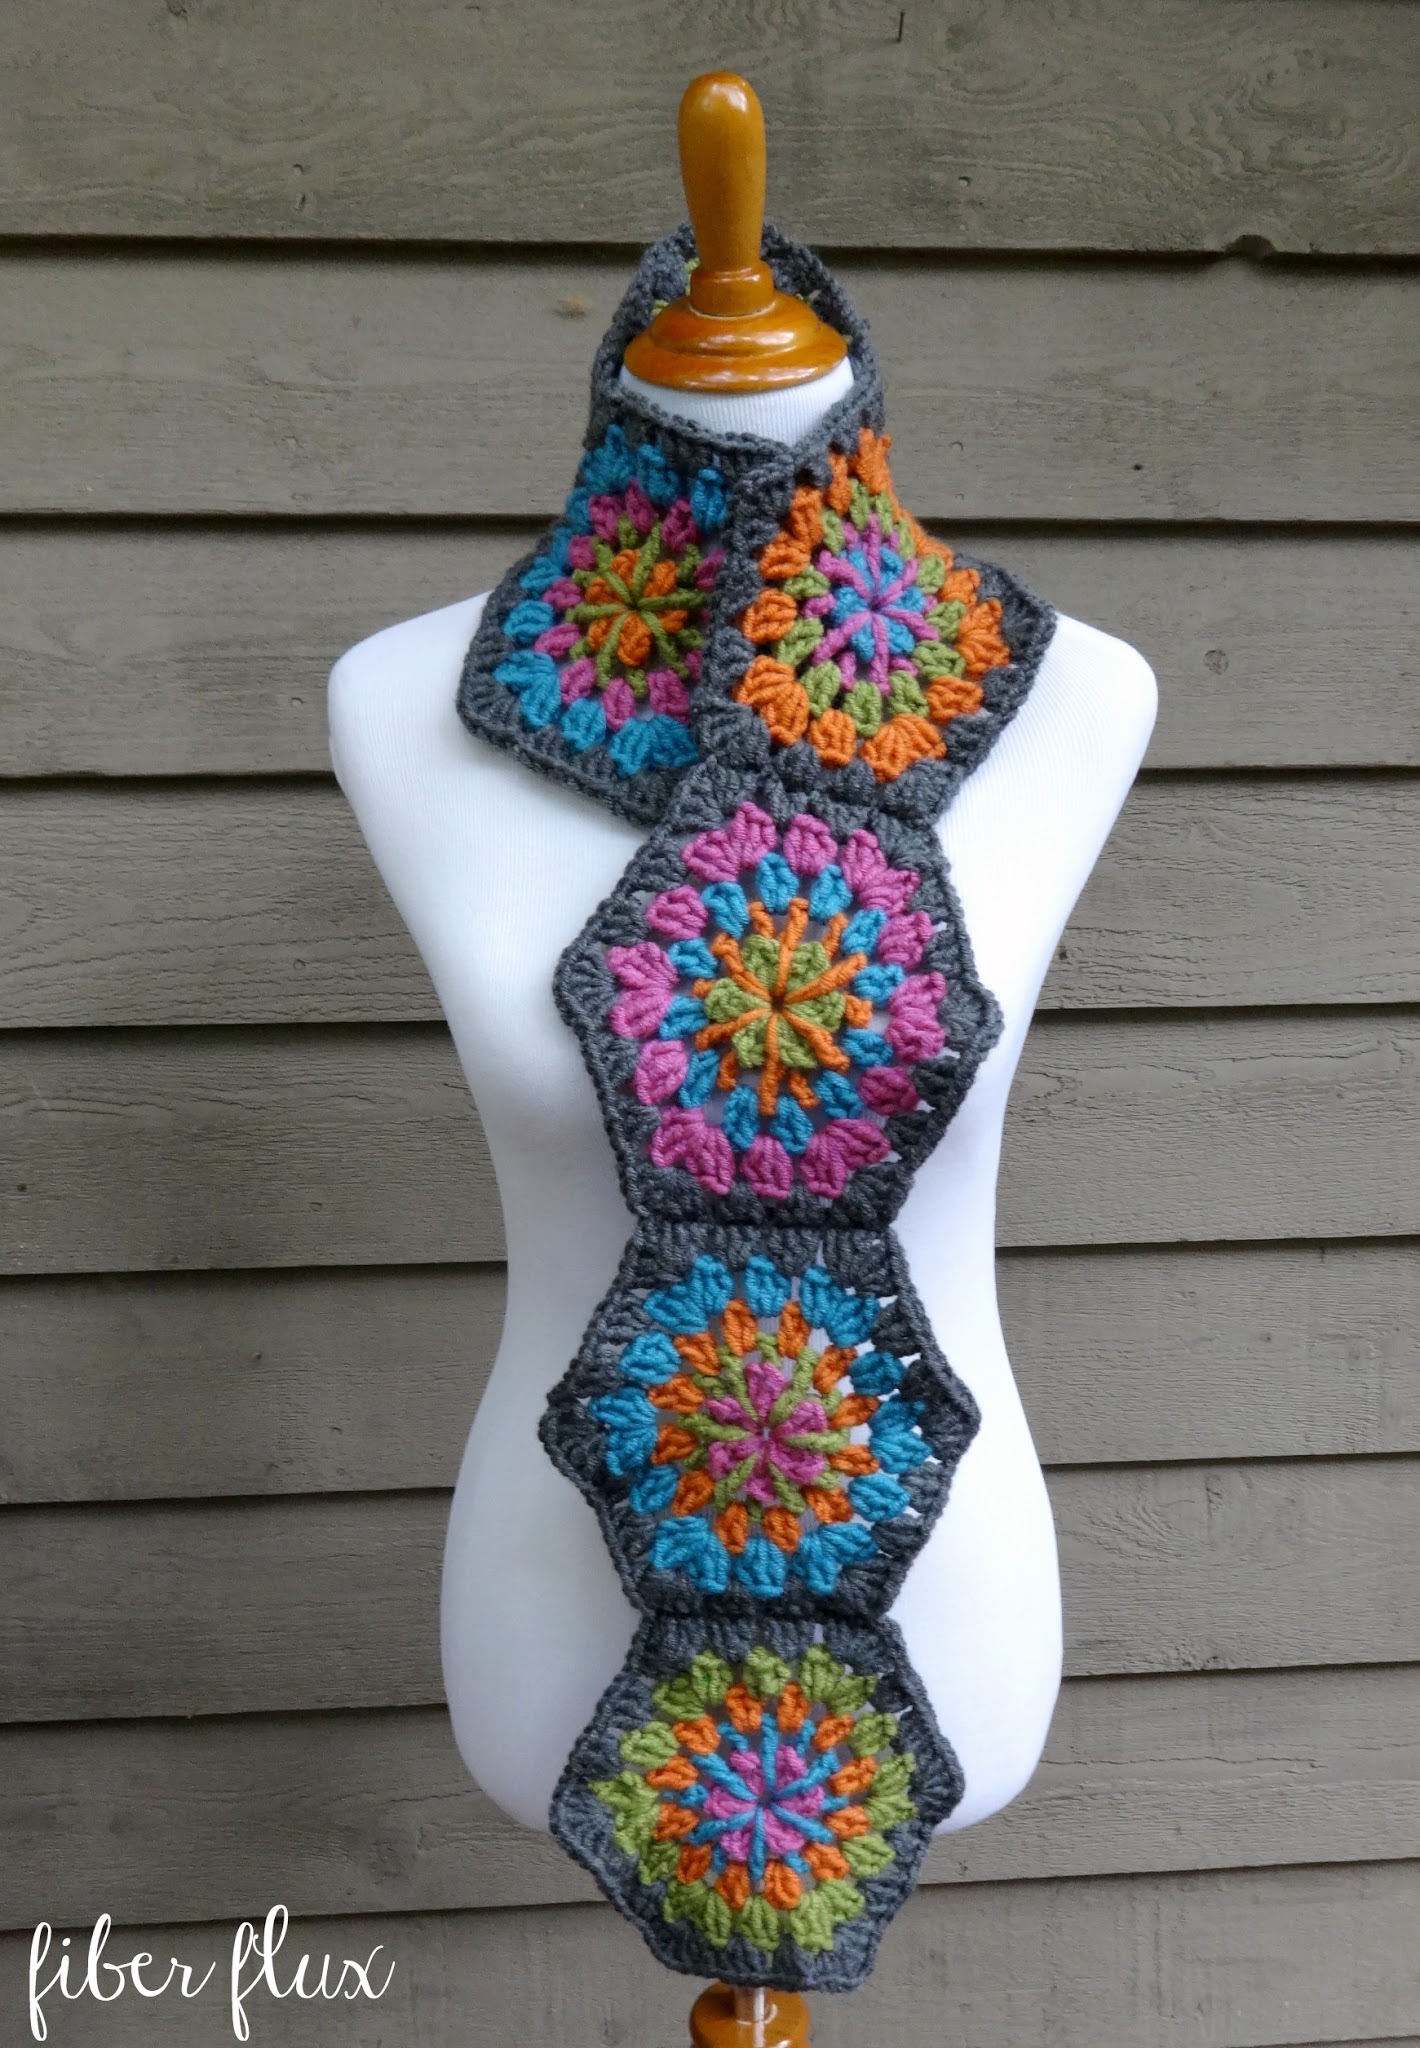
The Strawflower Crochet Hexagon Scarf is a fabulously colorful scarf, complimented by elegant charcoal. It is amazingly cozy and can be customized in any color combination you like. Make your scarf any size desired by simply adding more hexagons to get the perfect size for you!
Watch the full video tutorial on how to crochet the Strawflower Crochet Hexagon Scarf stitch by stitch:
Materials:
- 5 Colors of Lion Brand Lion’s Pride Woolspun (Colors pictured: “Pumpkin” “Aquamarine” “Avocado” “Charcoal” and “Orchid”) Note: If you need to substitute yarn, look for a yarn that recommends a 6.5 mm hook on the yarn label)
- K (6.5 mm) Crochet Hook
- Tapestry Needle
- Scissors
Sizing:
- Each hexagon is 7.5 inches across from point to point. Make as many hexagons as you like for desired length.
Tutorial Links:
- Chain (ch)
- Double Crochet (dc)
- Back Post Double Crochet (bpdc)
- Slip Stitch (sl st)
- Weave In Ends As You Go
Instructions for Hexagons:
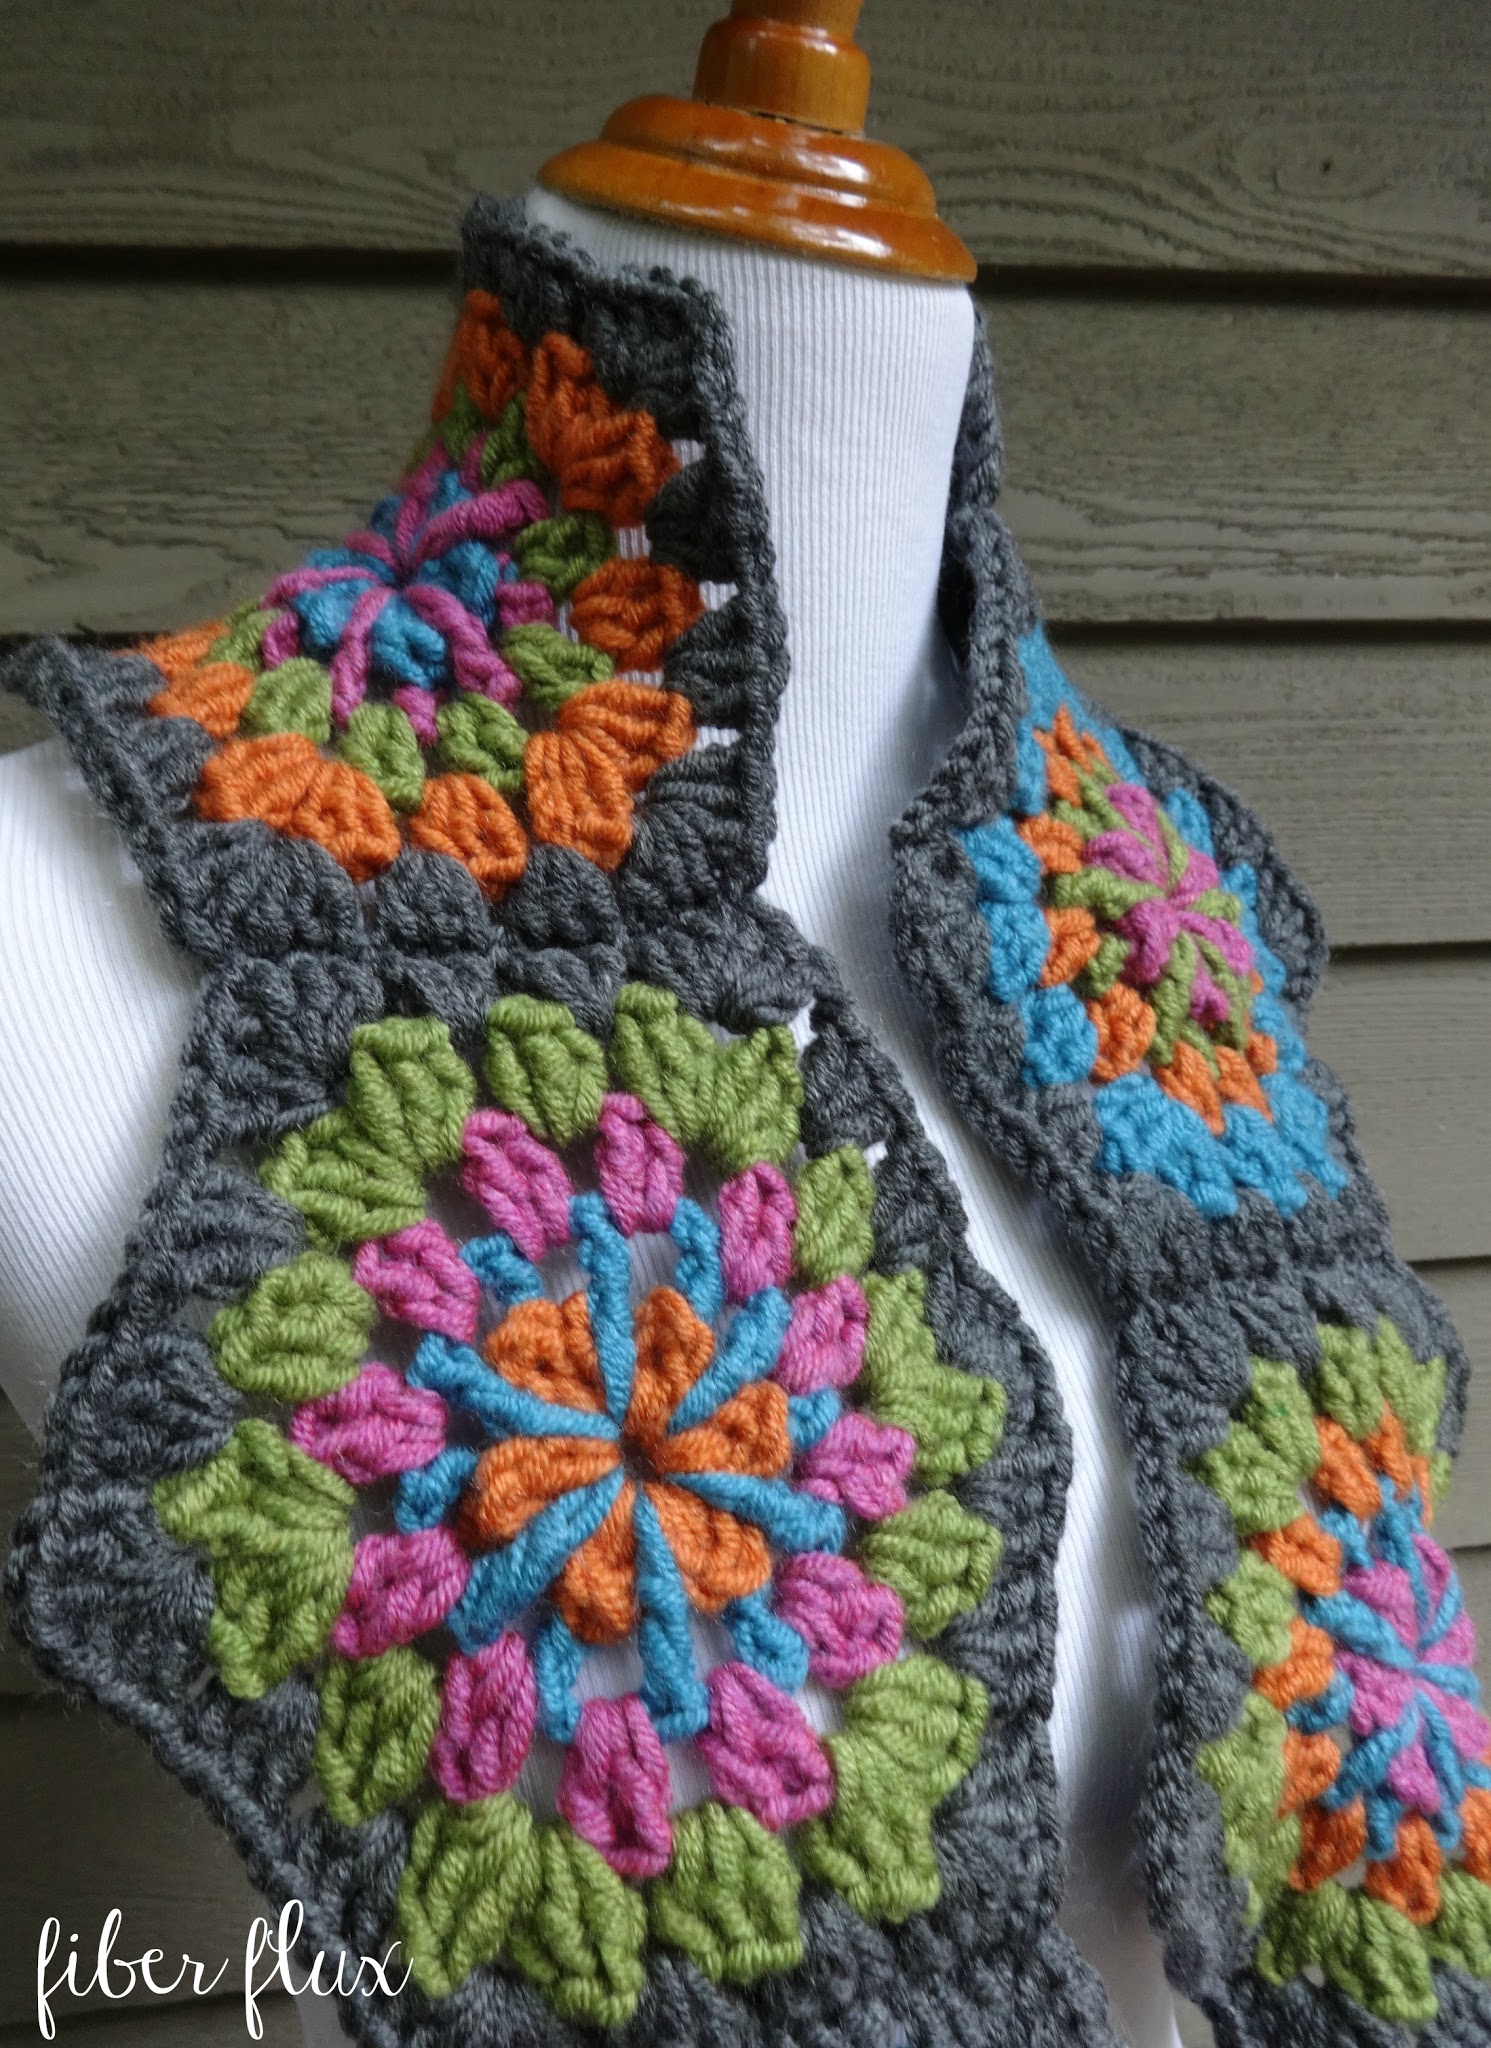
Note: Make as many as needed for desired length. Each round is crocheted in a different color. When working with multi-colored projects, it is helpful to weave the ends as you go. I mixed up the colors for the first four rounds, then worked the last round in charcoal for each one of the hexagons.
Ch 4, join with a sl st in the furthest ch from hook to form ring.
Round 1:
- Chain 3, then work 2 dc, then a sl st into the center of the ring.
- Work *(3 dc, sl st) five times for a total of 6 petals.
- Join with a sl st to close round.
Round 2:
- Begin a new color by tying it onto the back loops at the top of one of the petals.
- Insert your hook (same place at the top of petal) as if to work a back post stitch and ch 3 (working it this way will make the chain look more consistent with the other stitches).
- Chain 1, then in the next space (in between petals) work a tr into the center of the ring.
- Ch 1, then work a bpdc into the center most dc of the next petal.
- Continue in this manner around the circle, working a tr, ch 1 into the center of the ring (in between petals), then a bpdc, ch 1 in center dc of each petal.
- Join to close round with a sl st.
Round 3:
- Tie on the next color into any space and ch 3.
- In that same space, work a dc, ch 1. Work 2 dc, ch 1 in each space around.
- Join to close round with a sl st.
Round 4:
- Start with a new color into any space and ch 3.
- In the same space, work 2 dc, ch 1, 3 dc, ch 1 (this will create first corner of the hexagon).
- Next space after that, work 3 dc, ch 1 (this will create the first side of the hexagon).
- In the next space that follows, work 3 dc, ch 1, 3 dc, ch 1 to make the next corner.
- Work 3 dc, ch 1 to work the next side.
- Continue in this manner, working corner, side, corner, side, etc until you have a total of 6 corners and 6 sides.
- Join to close round with a sl st.
Round 5:
- Tie on a new color into any space and ch 3.
- In the same space, work 2 dc, ch 1, 3 dc, ch 1 (this will create first corner of the hexagon).
- Next space after that, work 3 dc, ch 1 (this will create the first side of the hexagon.
- Next, work 3 dc, ch 1 to make the next side.
- Last, work 3 dc, ch 1, 3 dc, ch 1 to make the next corner.
- Continue in this manner, working corner, side, side, corner, side, side, etc.
- Join to close round with a sl st.
Fasten off and weave in ends.
Note: To add rounds to the hexagon, simply repeat round 5, adding an additional side (in between the corners) for each round worked.

Finishing & Assembly:
- Line up hexagons with their flat sides touching, with right side of each hexagon facing upward to get the order you like best (I tried to make sure the ones that looked very similar to one another color-wise were spread out).
- Starting with the first two hexagons, sandwich them together with the right side of hexagons facing inward.
- Tie yarn into upper left corner space of both hexagons and chain 1.
- Turn and work a slip stitch seam in each stitch across until the next corner space is reached.
- Work a sl st in the corner space and fasten off.
- Weave in any ends and repeat with the remaining hexagons until all are joined to form the scarf.
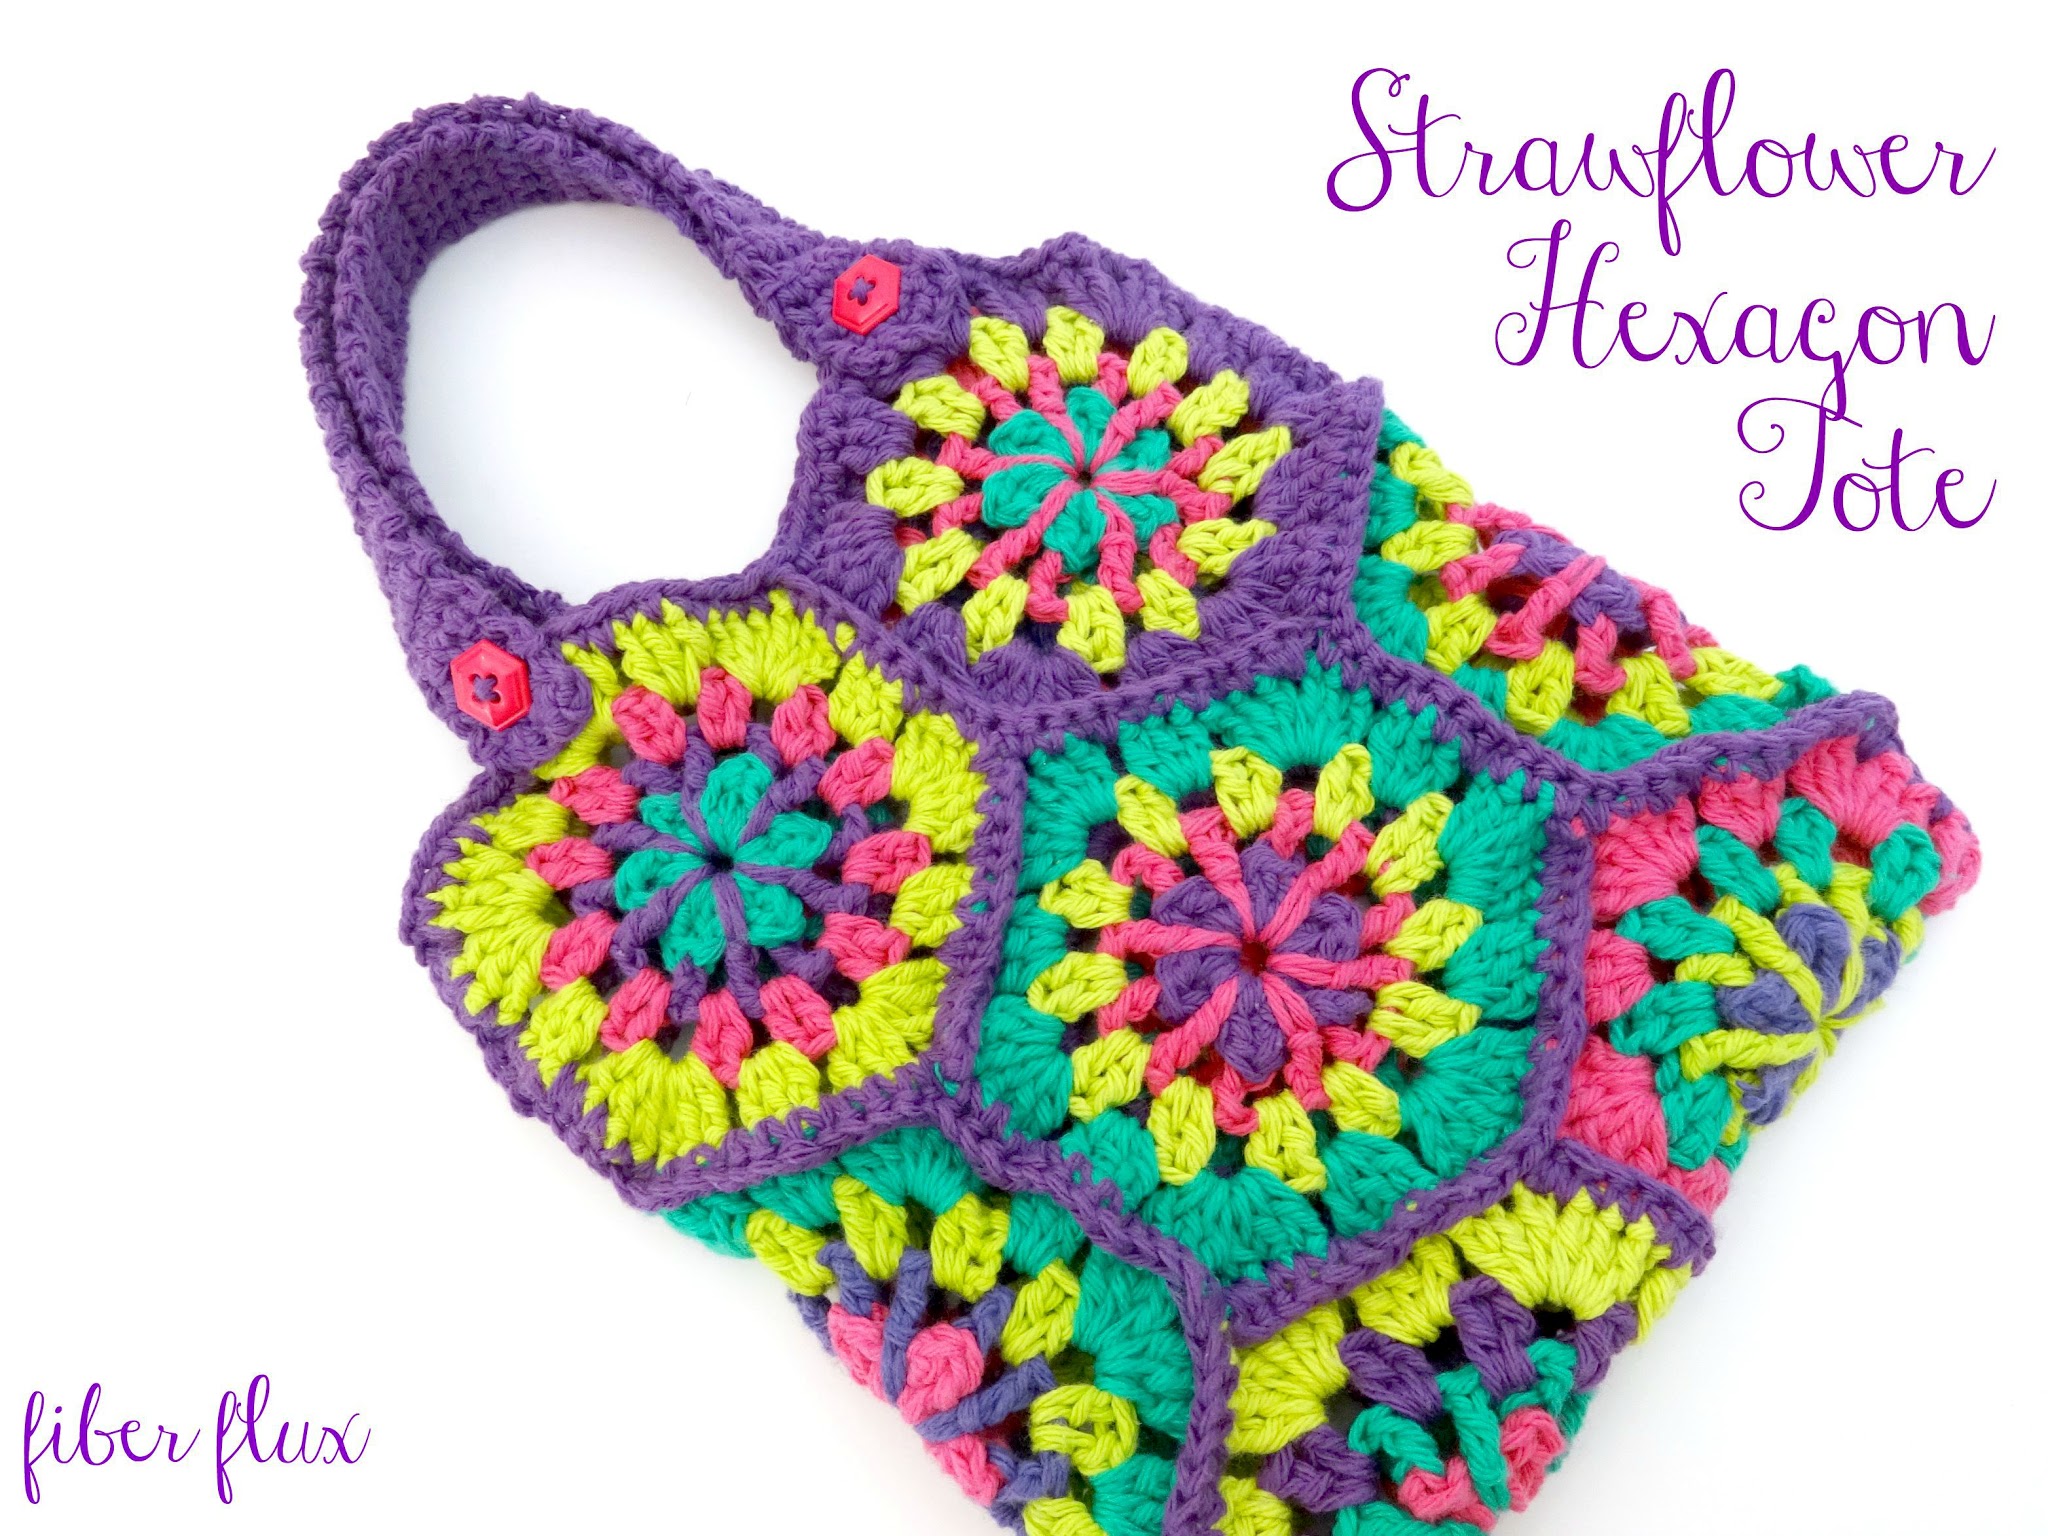
If you liked making the Strawflower Crochet Hexagon Scarf, try the Strawflower Hexagon Tote too!
Love making crochet scarves? Check out my crochet scarf pattern library!