
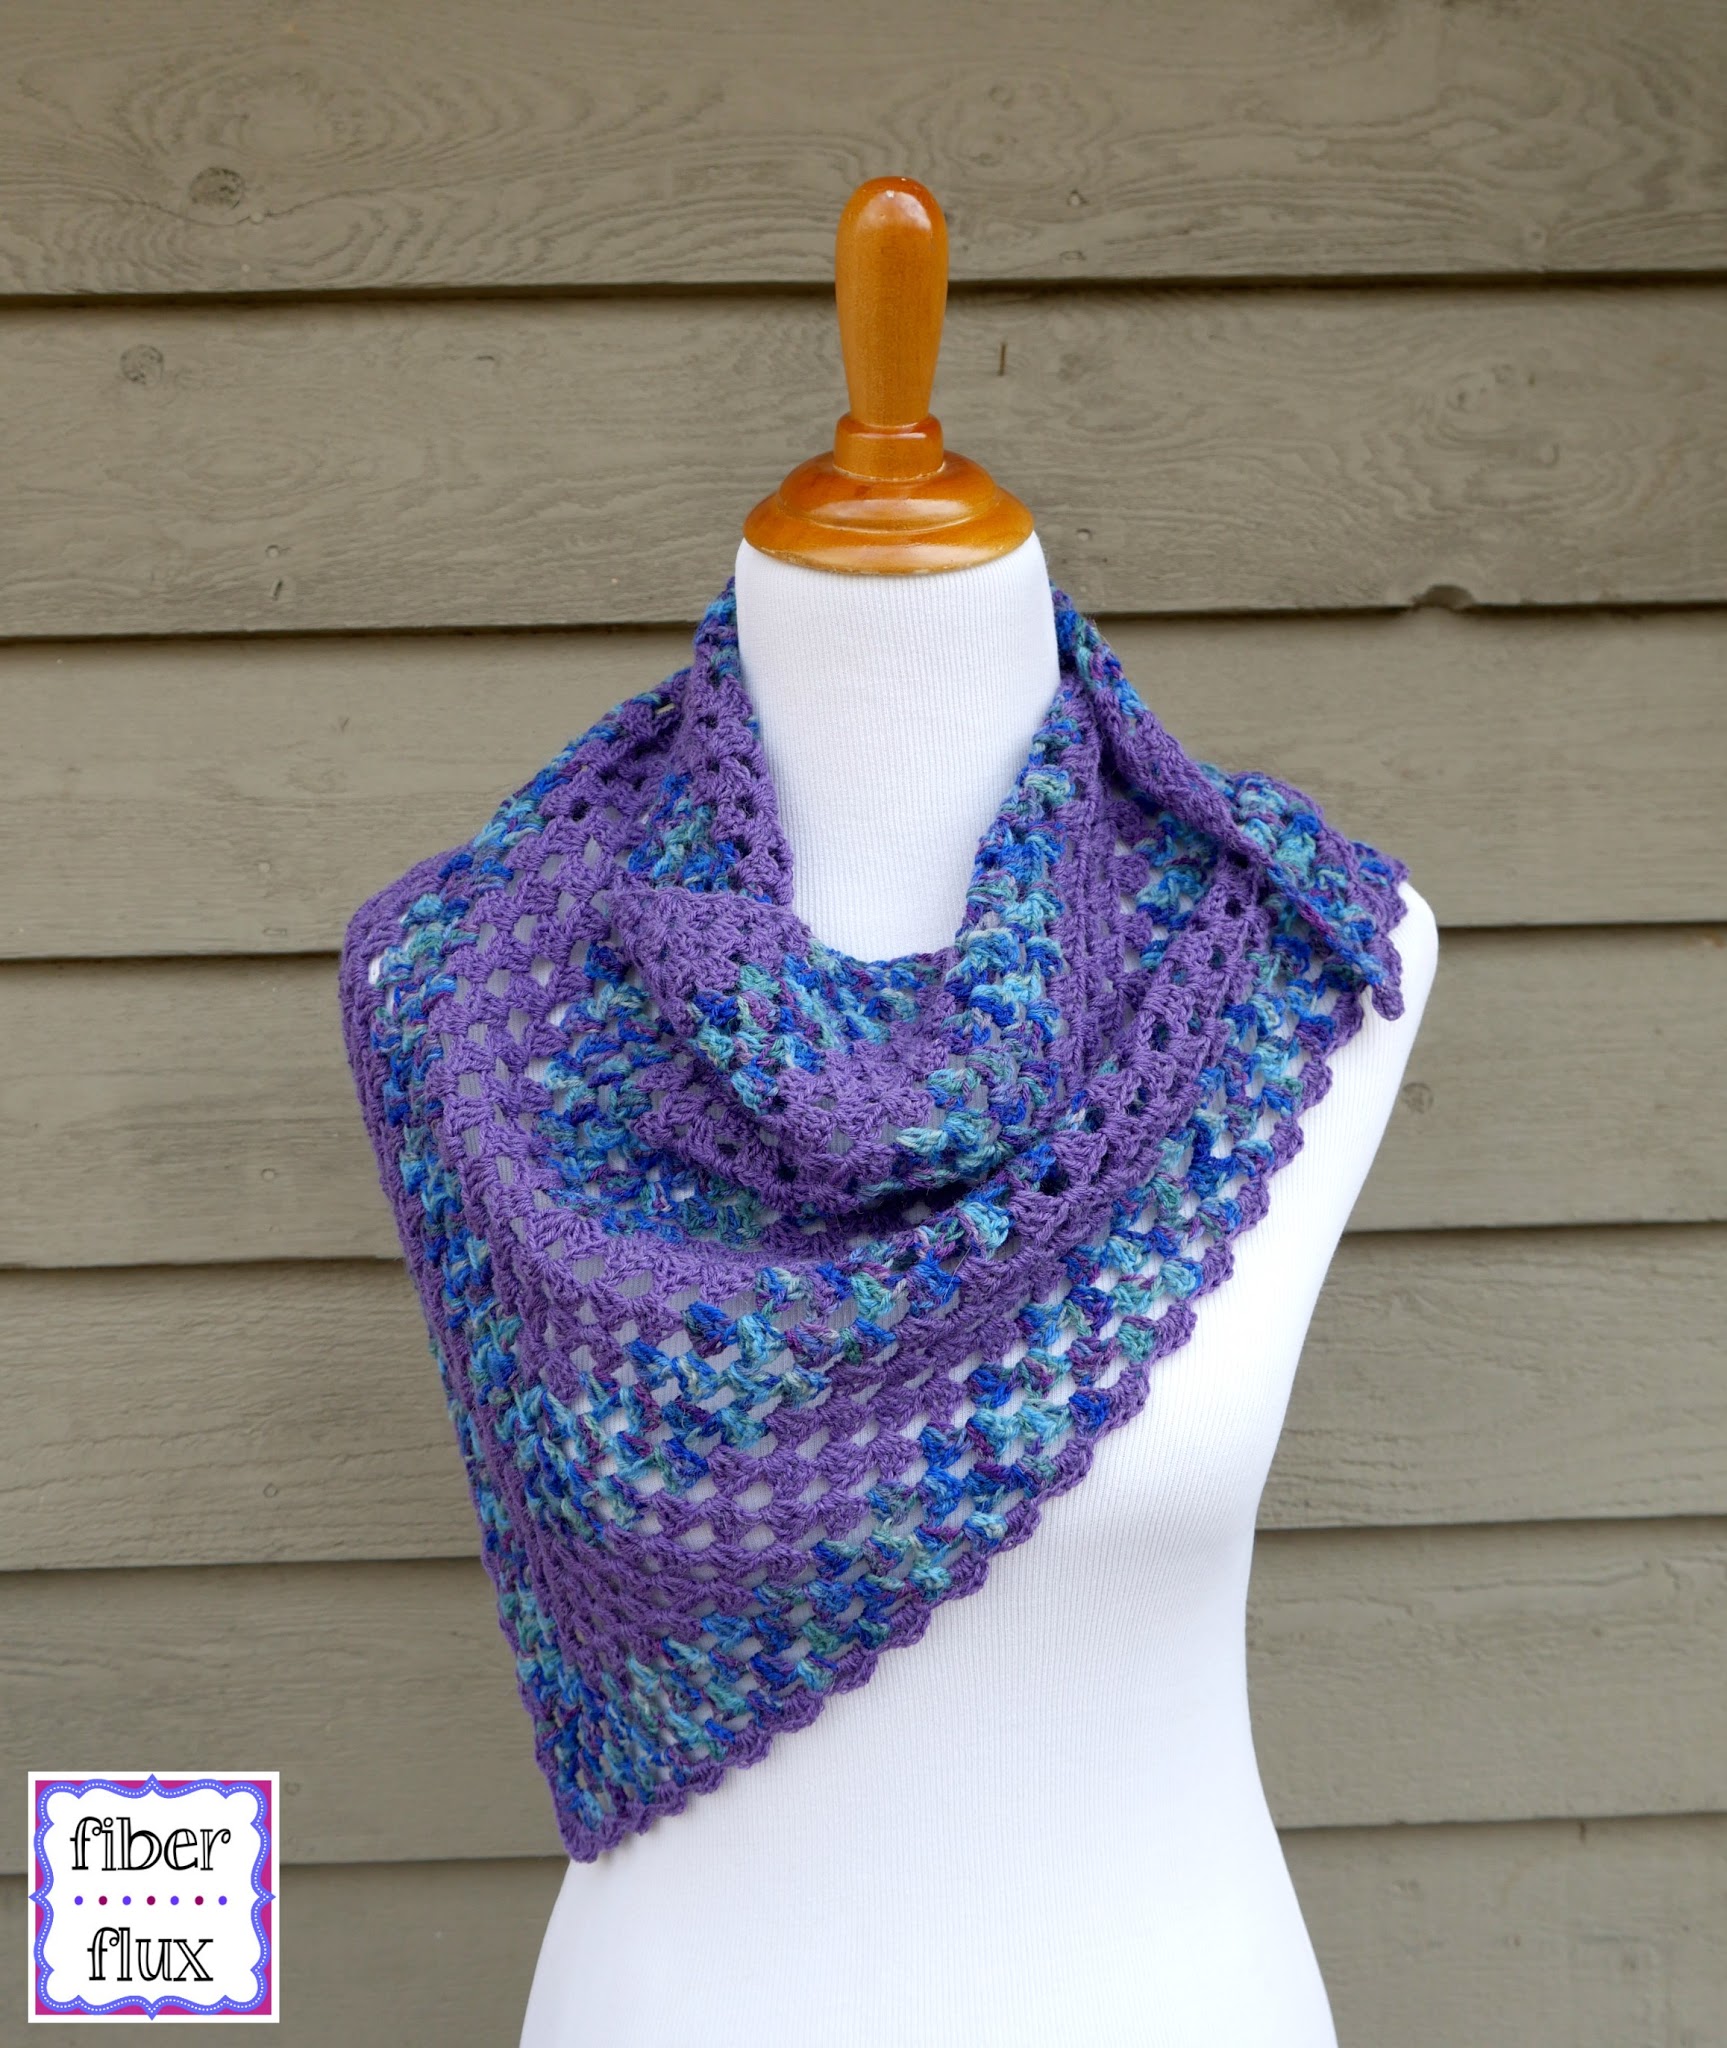
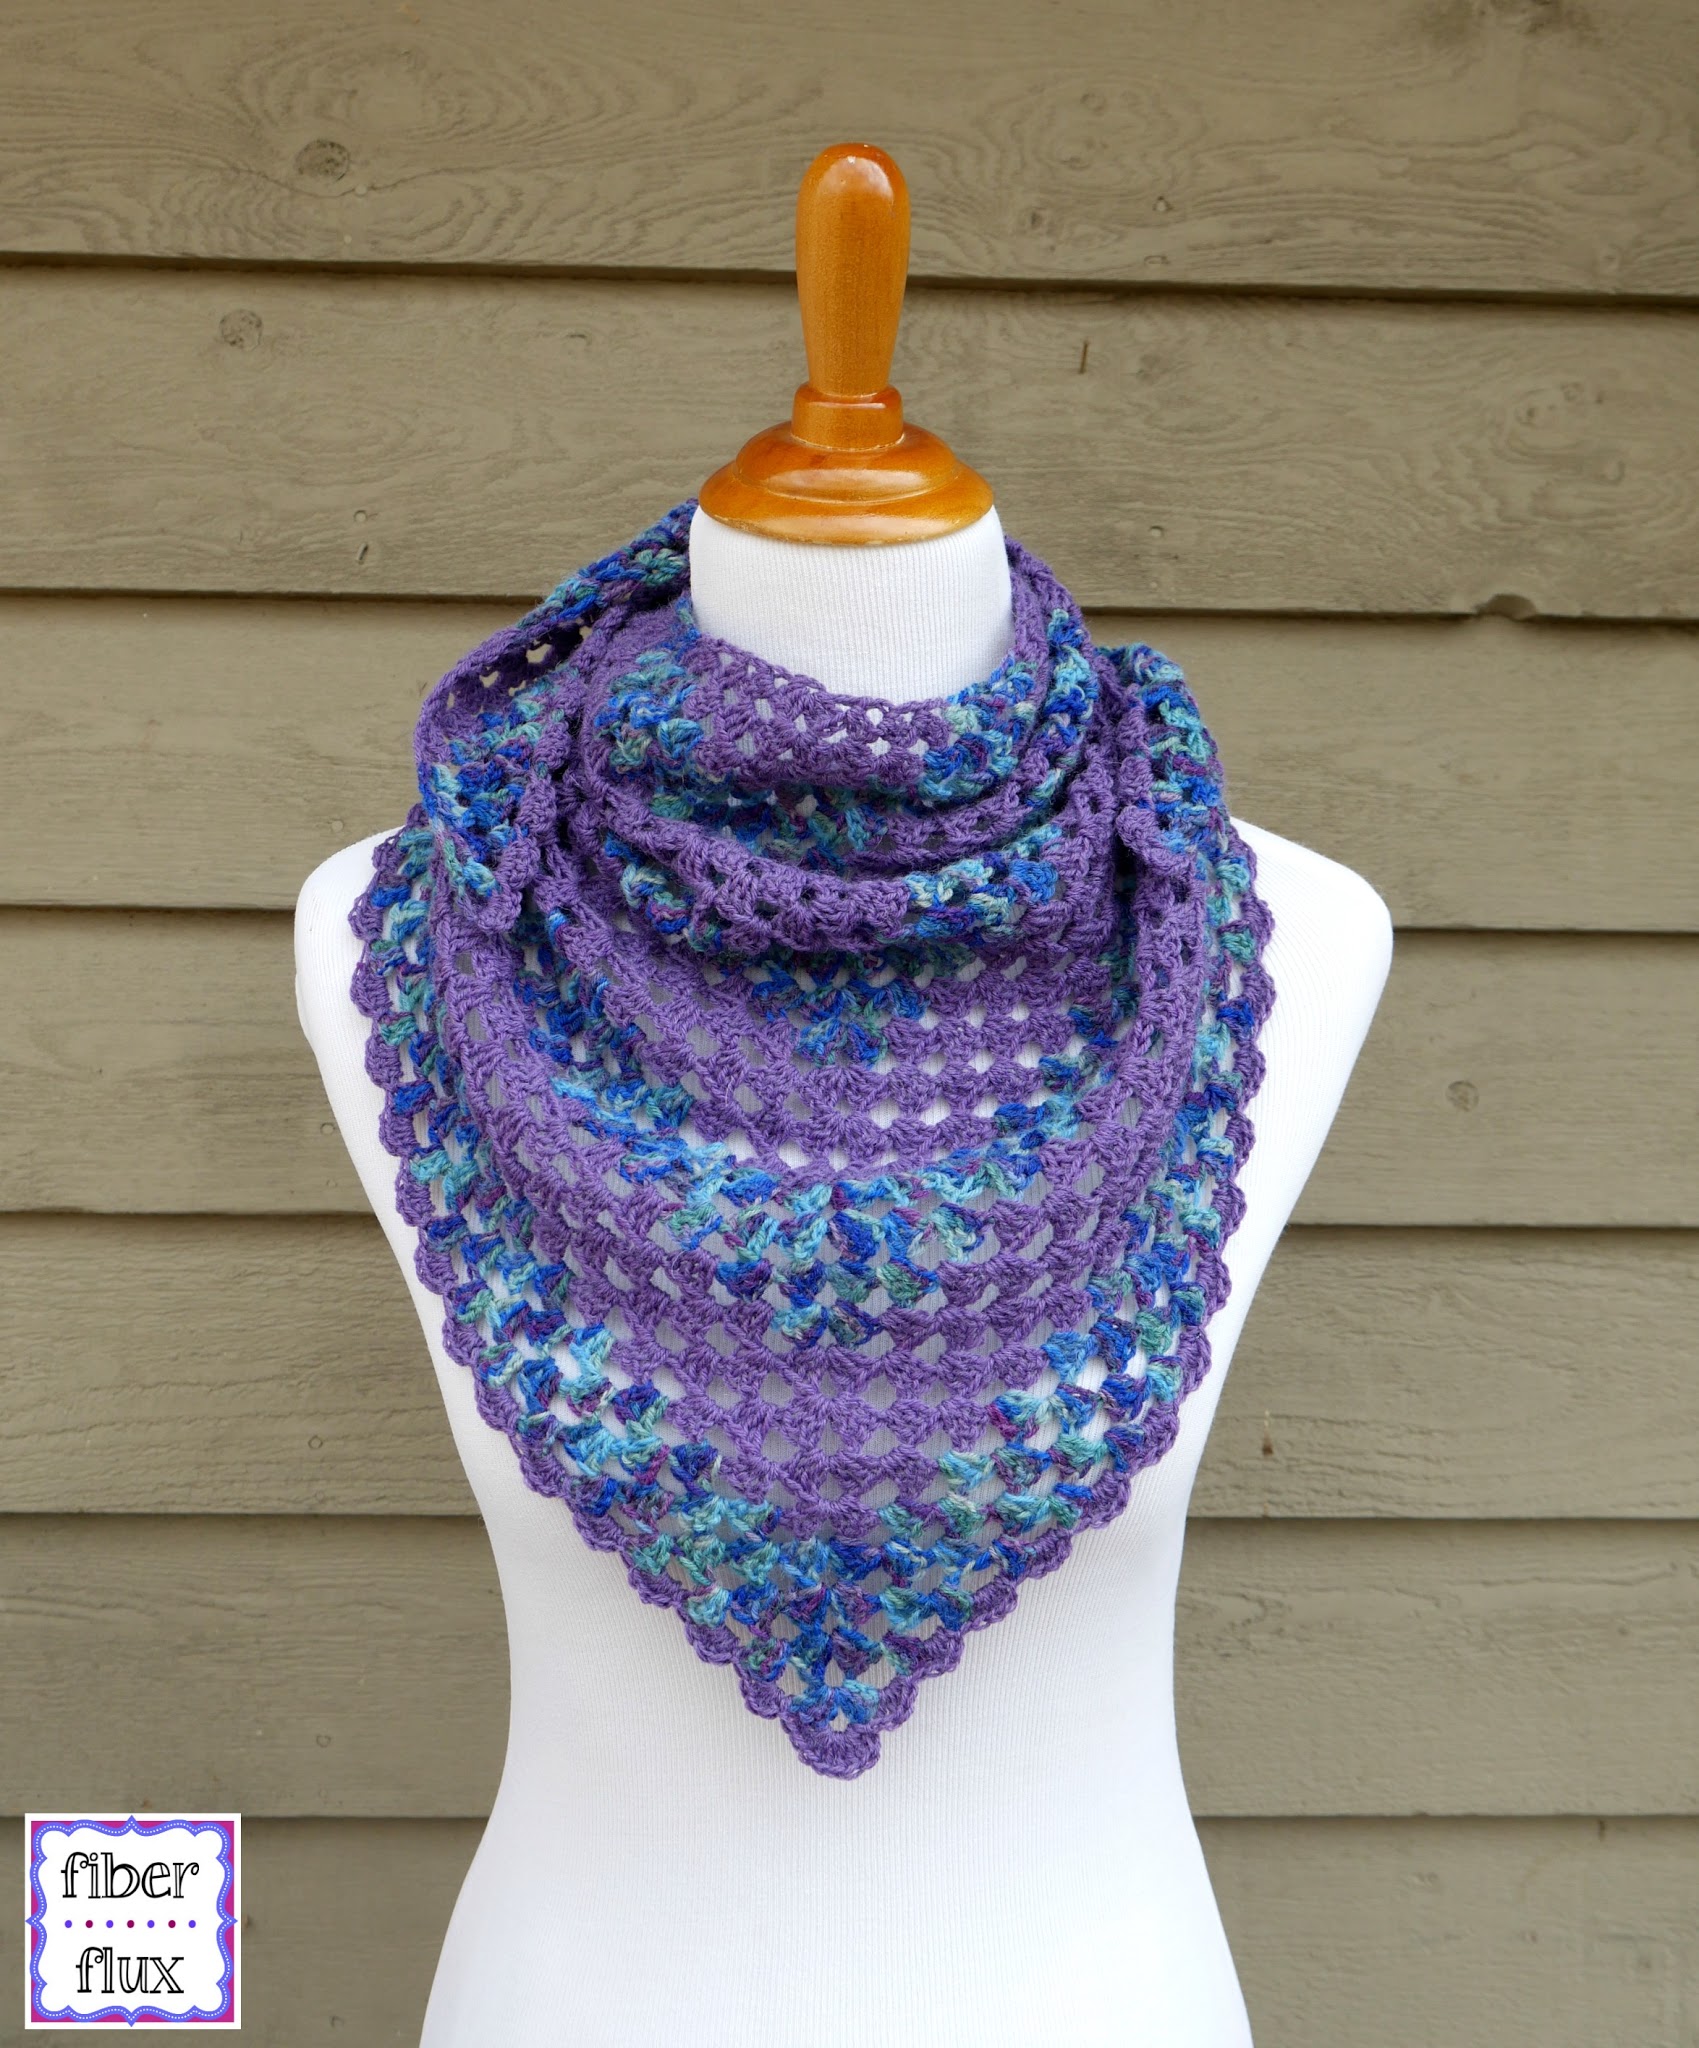
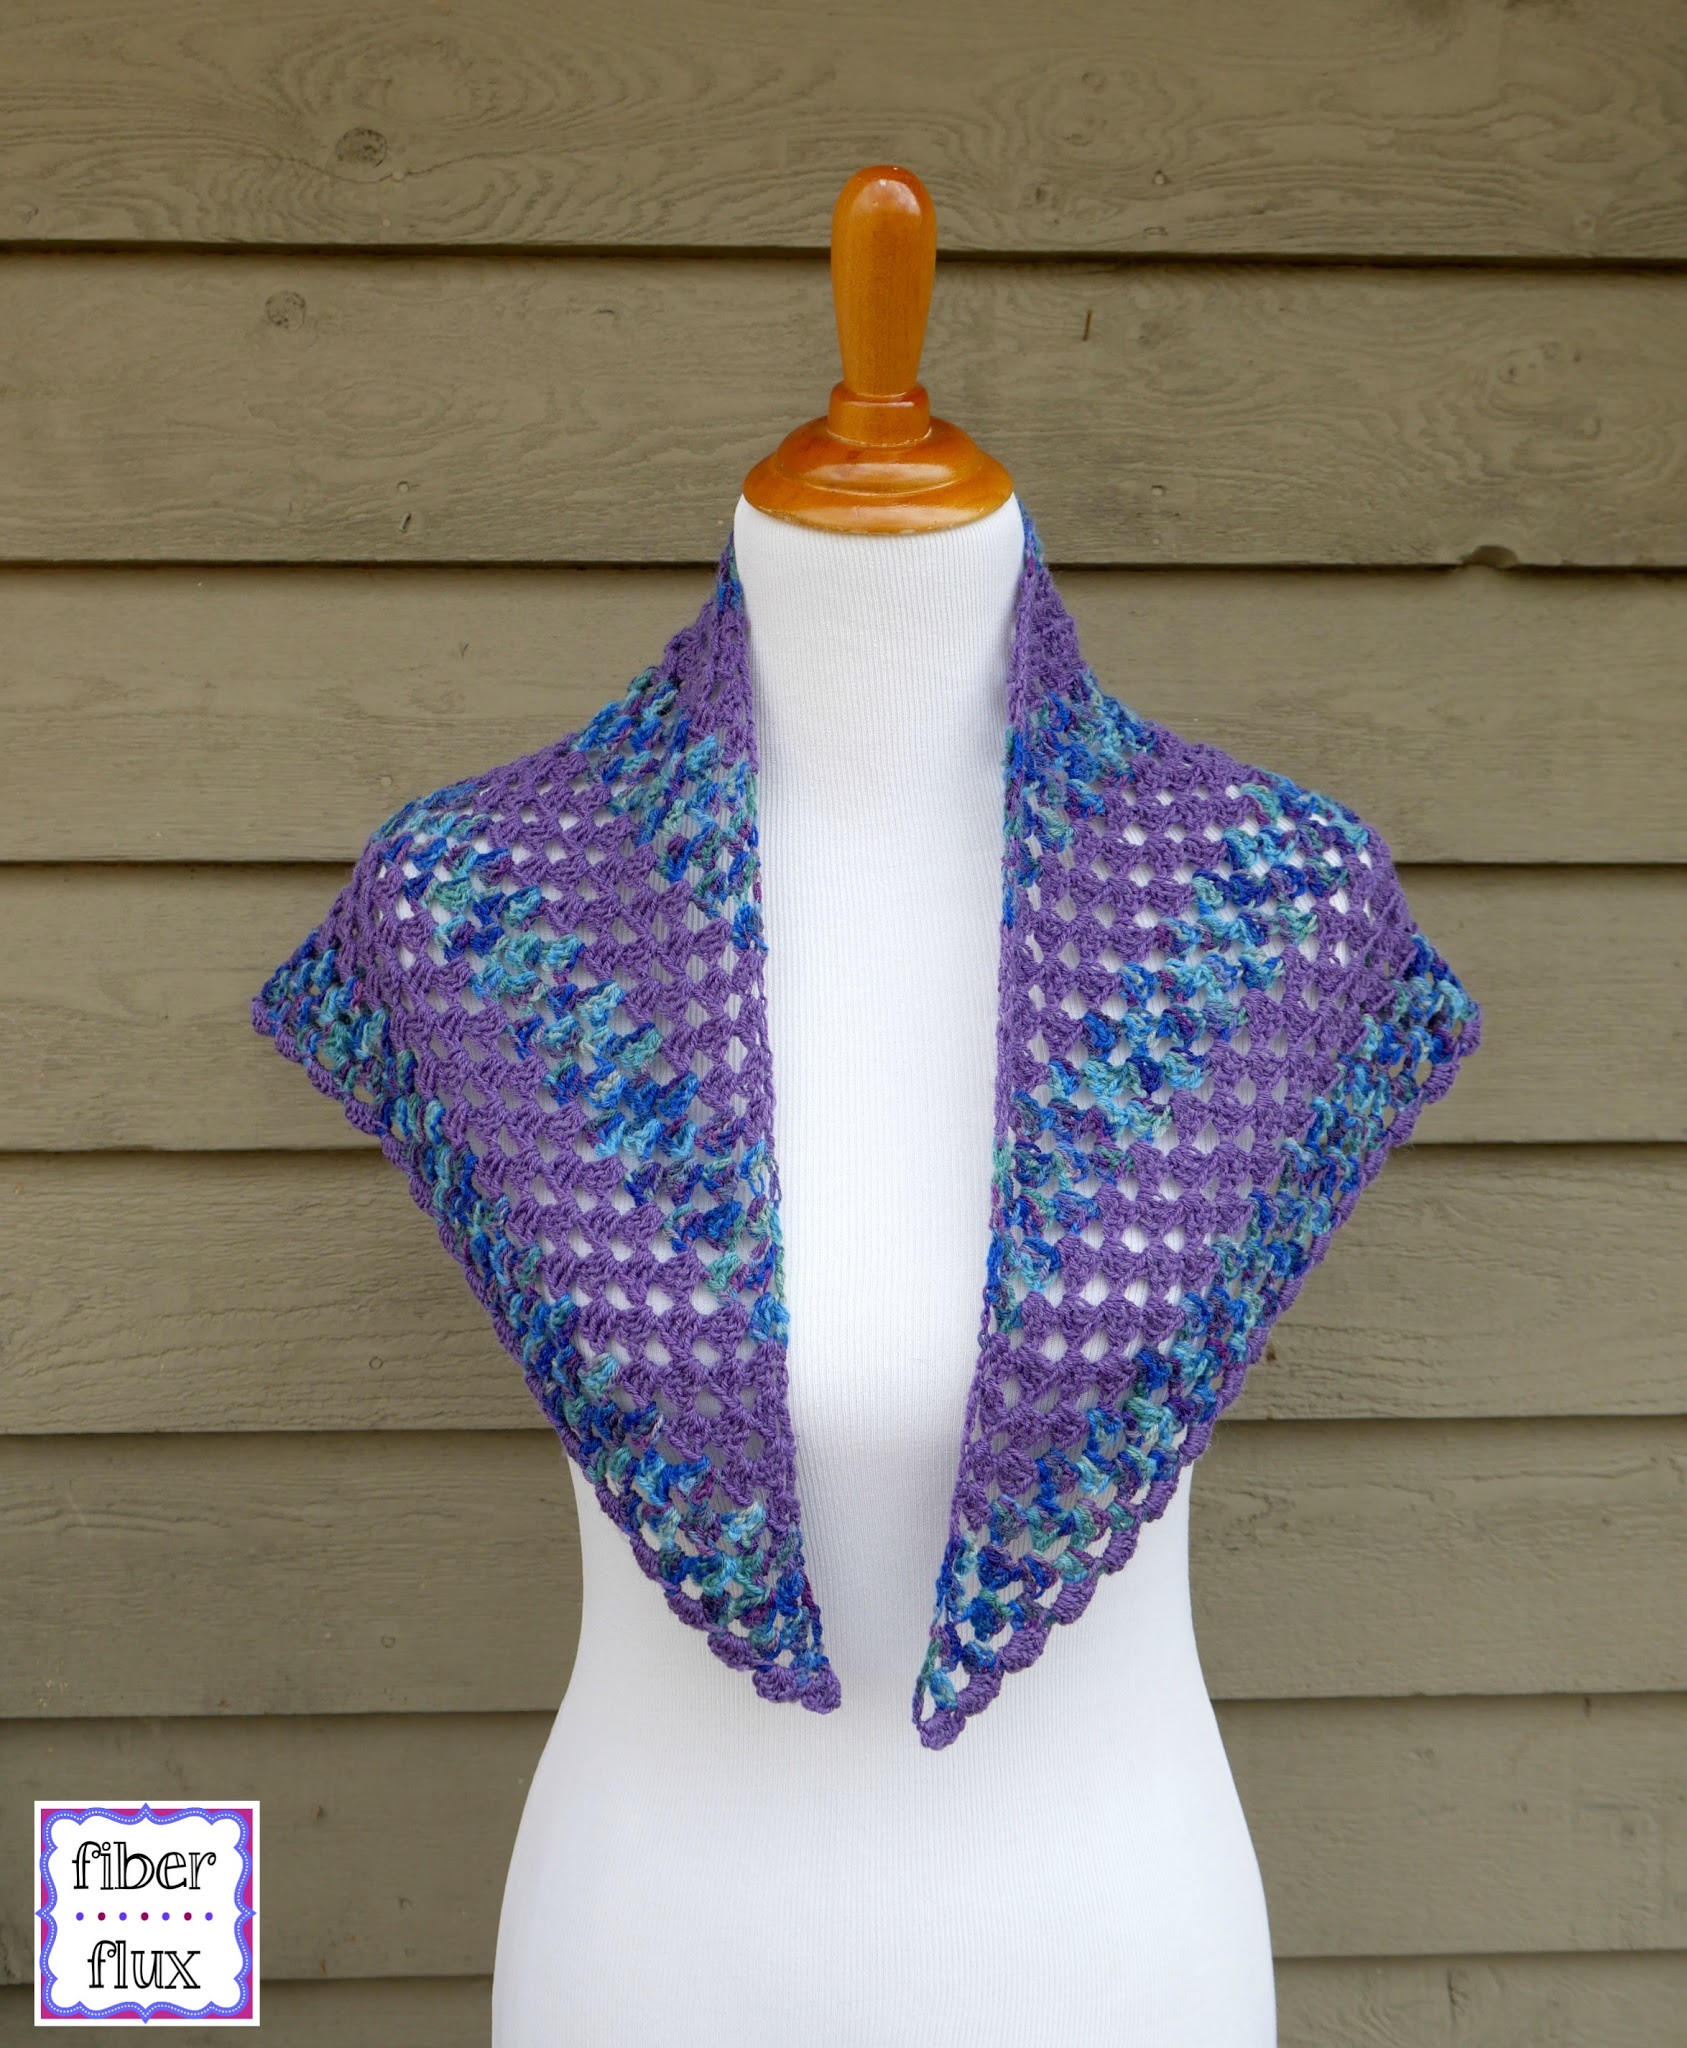
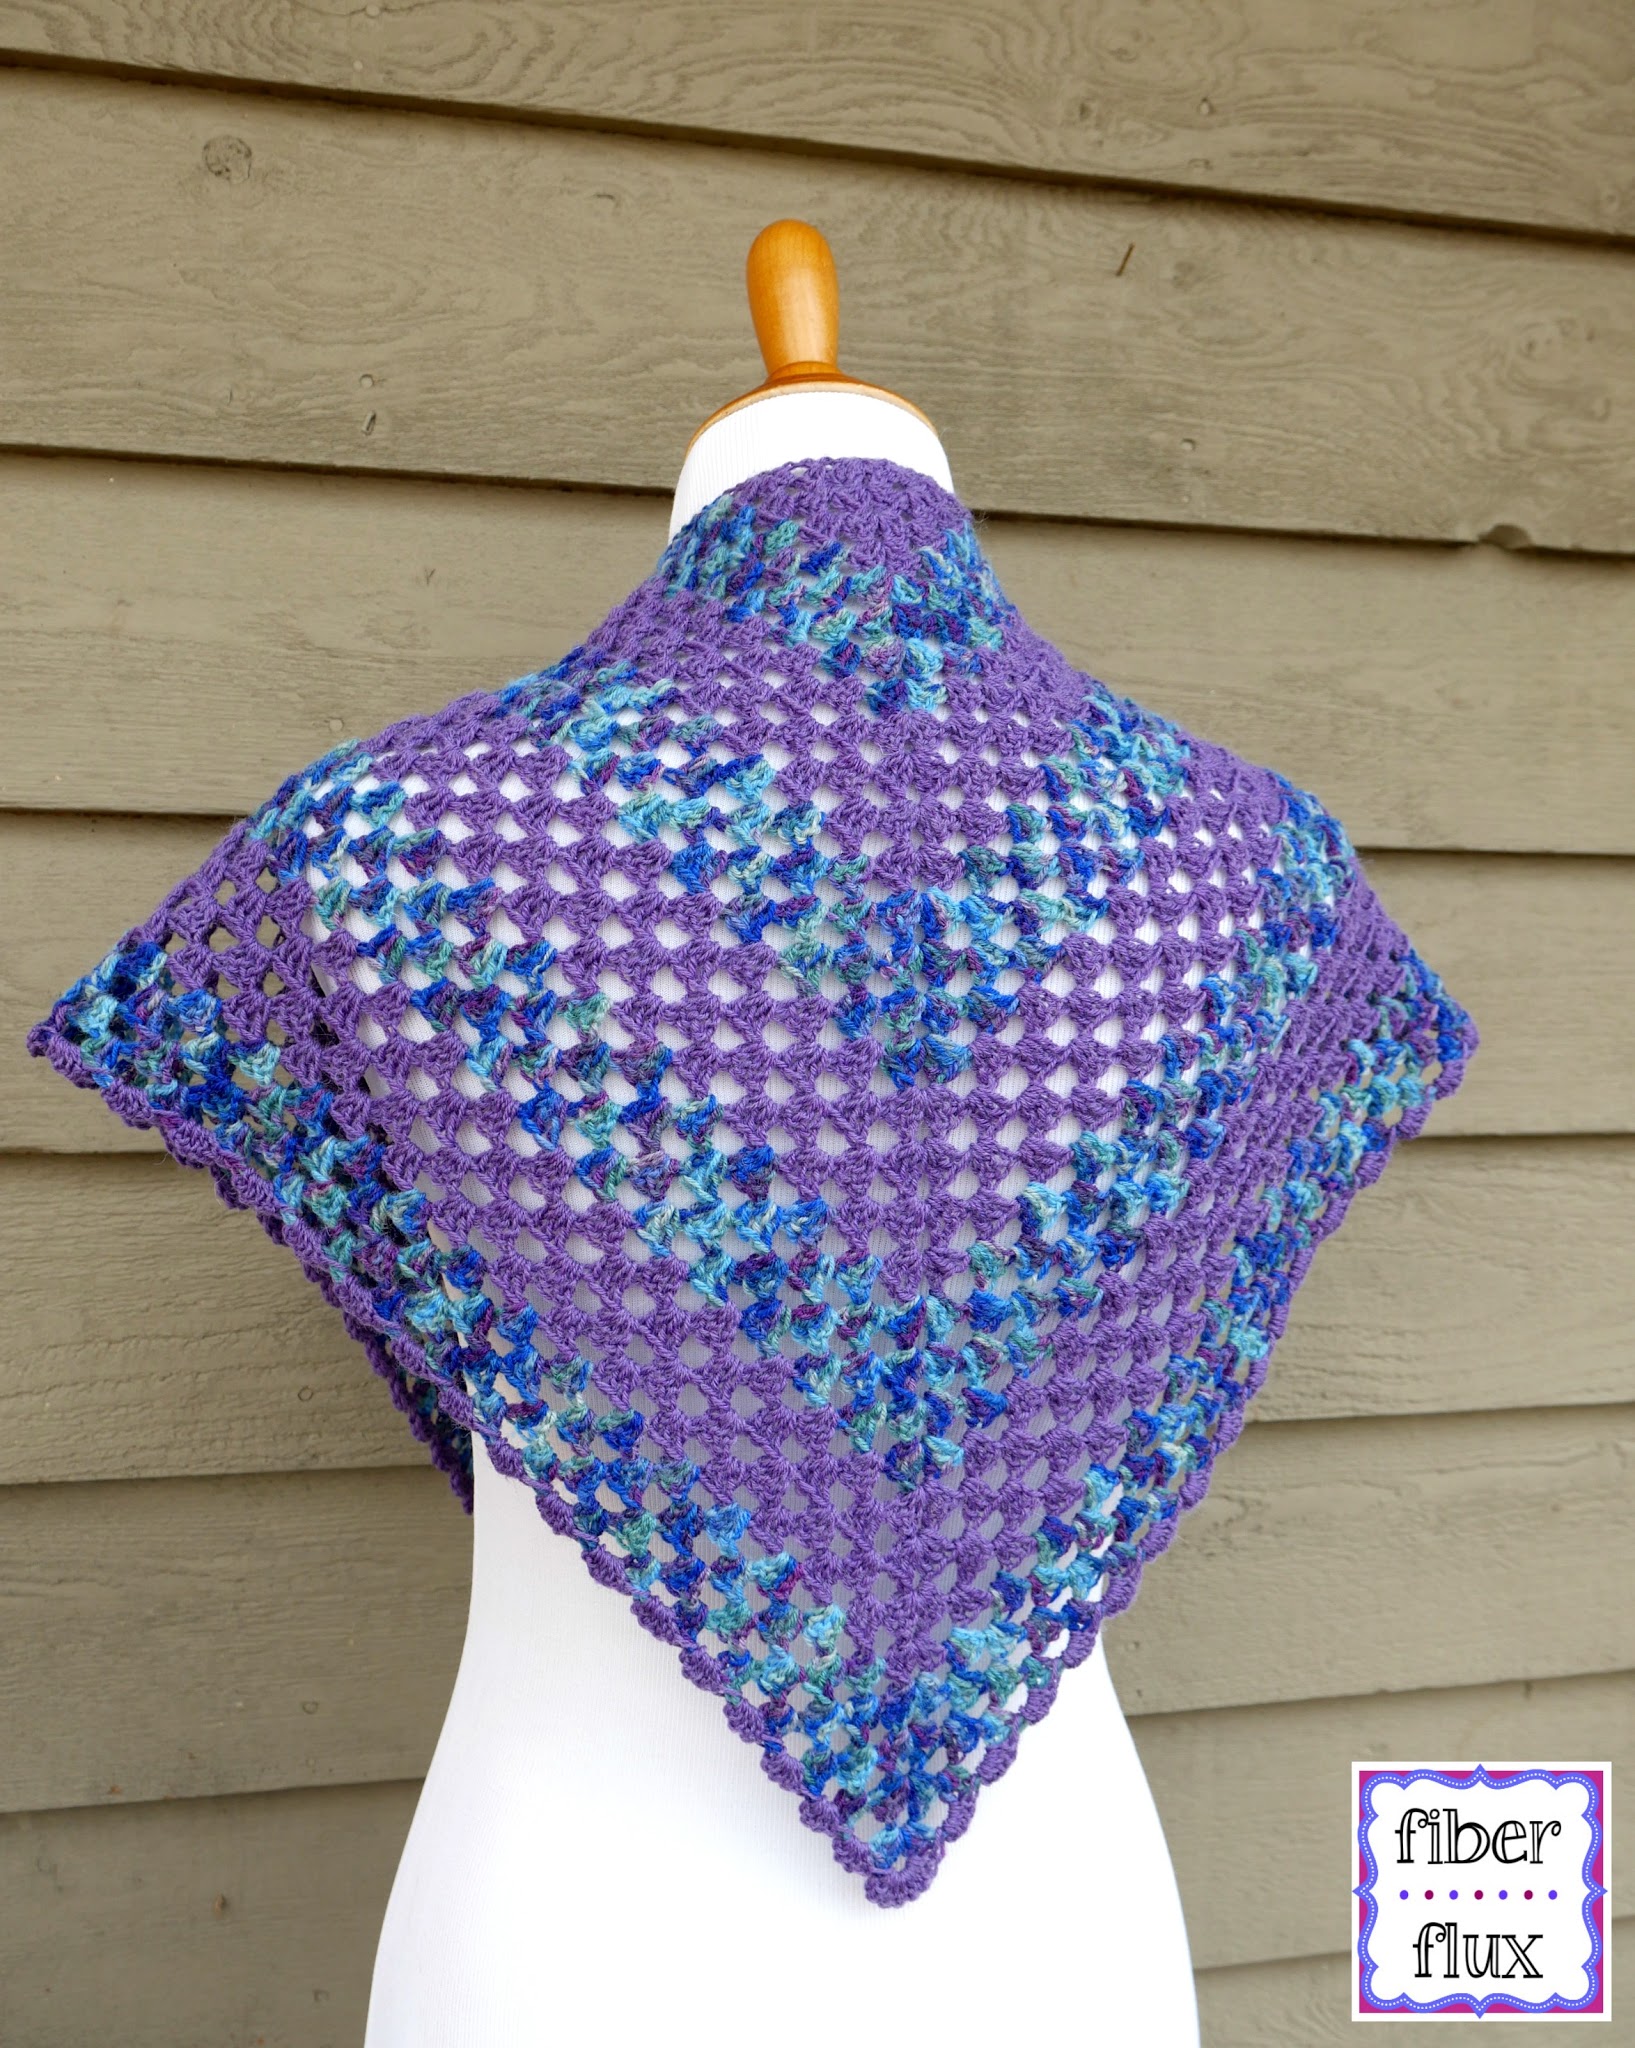
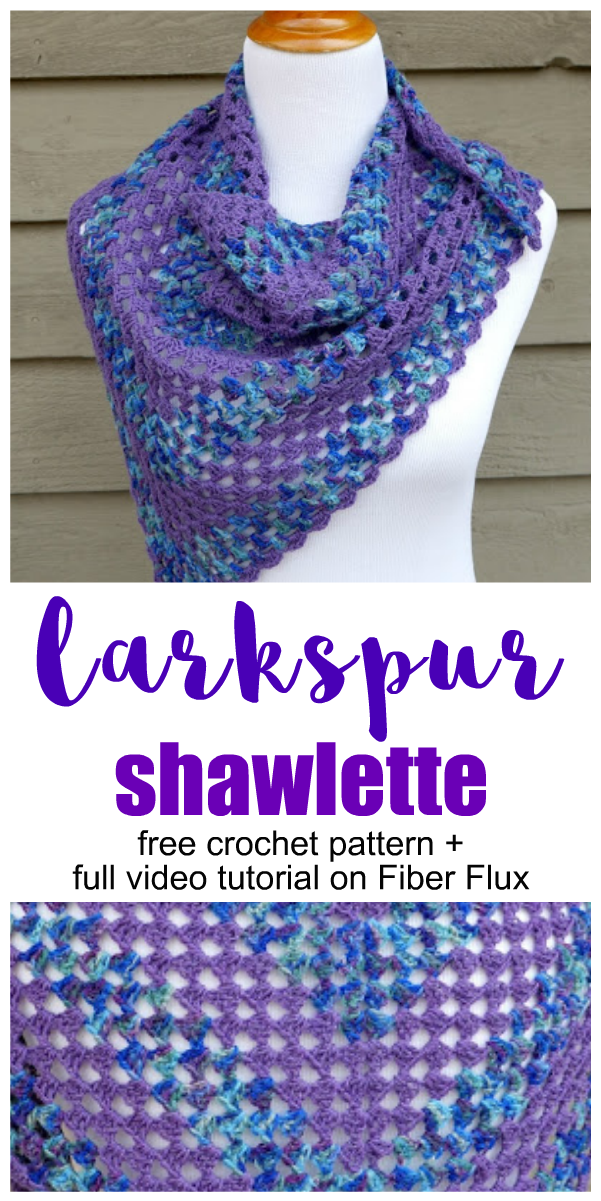
The Larkspur Shawlette is a pretty little accessory that is perfect for warmer weather when you just need a little something extra. Using alternating rows of variegated and solid colors makes a fun piece that is interesting to work up. A simple granny triangle construction with a pretty and simple scallop makes this piece fun for beginners and seasoned crocheters alike!
Larkspur Shawlette
By Jennifer Dickerson
👉Get the ad-free crochet pattern PDF from my shop here!👈
Watch a full video tutorial on how to crochet this shawlette:
(Can’t see the video? Click here)
Click the button below to add this project to your Ravelry queue:

Let’s connect!


Abbreviations and Tutorial Links:
Materials:
- 4.0 mm G crochet hook
- 460 yards of sock yarn of your choice (yarn used in the piece pictured is Adriafil’s Calzasocks, 1 skein “Violet” and 1 skein “Multi-Purple” Each skein is 230 yards for a total of 460 yards. Feel free to use your favorite sock yarn, there are so many gorgeous choices out there!
- Tapestry Needle
- Scissors
Sizing:
- 41 inches across the top triangle edge
- 30 inches along each side triangle side
Shawlette Instructions:
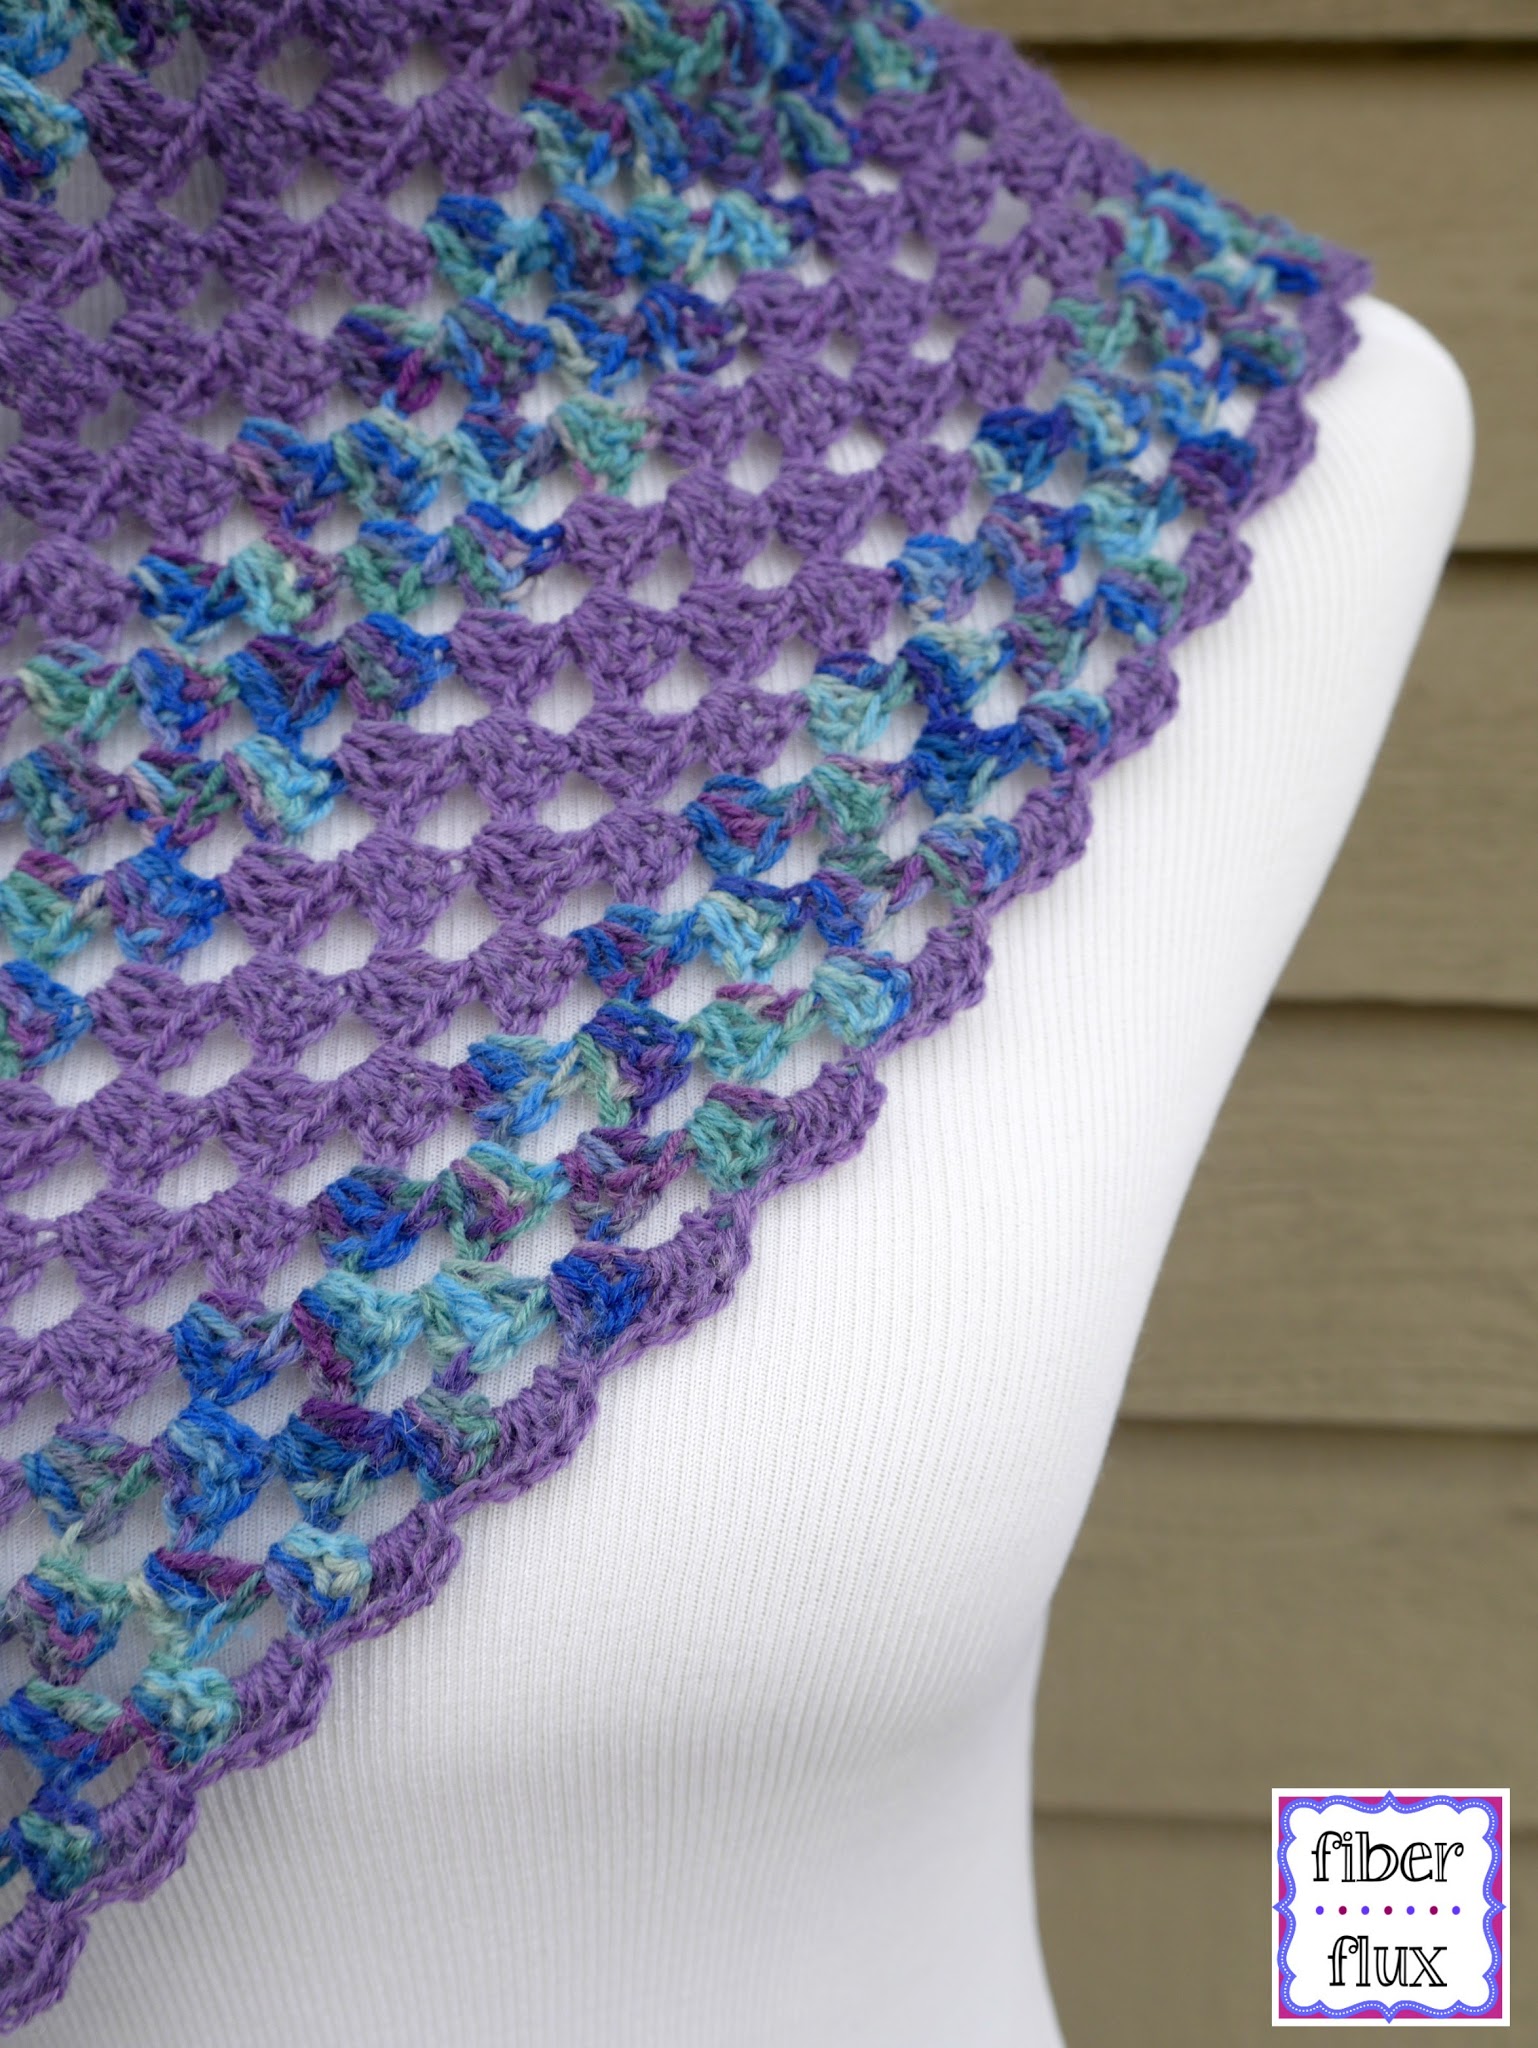
Note: To make the shawl as shown, work 4 rows of each color.
Ch 4, then in the ch furthest from the hook sl st to form ring.
Row 1: Ch 4 (counts as a dc, ch 1), the work (3 dc, ch 2, 3 dc) in center of ring, the work (ch 1, dc) in the ring.
Row 2: Ch 4 (counts as a dc, ch 1), the work 2 dc in the ch 1 space from the previous row, then ch 1. Work (3 dc, ch 2, 3 dc) in the ch 2 space (top corner peak) from the previous row, then ch 1. Work 2 dc, ch 1 in the ch 1 space from the previous row, then a dc in the third ch of the turning chain.
Row 2: Ch 4, 2 dc in first ch-1 sp, ch 1, (3 dc, ch 2, 3 dc) in ch-2 space, ch 1, 2 dc in ch 1 sp, ch 1, dc in last dc (which is the 3rd ch of the turning ch-4.)
Row 3: Ch 4, 2 dc in first ch-1 sp, ch 1, 3 dc in next ch-1 space, ch 1, (3 dc, ch 2, 3 dc) in ch-2 space, ch 1, 3 dc in next ch-1 space, ch 1, 2 dc in ch 1 sp, ch 1, dc in last dc.
Row 4: Ch 4, 2 dc in first ch-1 sp, (ch 1, 3 dc) in each of the next 2 ch-1 spaces, ch 1, (3 dc, ch 2, 3 dc) in ch-2 space, (ch 1, 3 dc) in each of the next 2 ch-1 spaces, ch 1, 2 dc in ch 1 sp, ch 1, dc in last dc.
Repeat row 4, adding a (3-dc in a ch- 1 sp) on each side for each row until triangle is desired size. Row 2: Ch 4, 2 dc in first ch-1 sp, ch 1, (3 dc, ch 2, 3 dc) in ch-2 space, ch 1, 2 dc in ch 1 sp, ch 1, dc in last dc (which is the 3rd ch of the turning ch-4.)
Row 3: Ch 4 (counts as a dc, ch 1), then work 2 dc, ch 1 in the ch 1 space. Work 3 dc, ch 1 in the chain 1 space. Work (3 dc, ch 2, 3 dc) in the chain 2 space (top corner peak). Ch 1, then 3 dc in the ch 1 space, then ch 1, then 2 dc in the ch 1 space, then ch 1, then a dc in the last dc.
Row 4: Ch 4 (counts as a dc, ch 1). Work 2 dc in the ch 1 space, then work (3 dc, ch 1) in each of the the next ch 1 spaces, then ch 1. Work (3 dc, ch 2, 3 dc) in the ch 2 space (top corner peak), then work (ch 1, 3 dc) in each of the next ch spaces, then ch 1. Work 2 dc in the last ch space, ch 1, then a dc in the last dc.
Repeat row 4 until shawlette is as large as you’d like it to be, switching colors as often as you like (shawlette shown is worked in 4 rows of each color before switching). Fasten off and proceed to edging instructions below.
Note: As you repeat row 4, each side will have a (3 dc, ch 1) added to each row on both sides as the shawlette grows in width and height.
Edging Instructions:
Tie new edging color on and ch 3. Turn piece and work 3 dc, sl st in the first space. *Work 4 dc, sl st in the next space. Rpt from * to top peak/point (corner) of triangle. When you reach the top peak, work 8 dc, sl st in the ch 2 space of the peak/point. *Work 4 dc, sl st in the next space. Repeat in each space from * to end of row and fasten off.
Finishing & Assembly:
Weave in any ends that remain. Block if desired (shawl shown in photos has been wet blocked). Click below for a full video tutorial on how to block your items:
(Can’t see the video? Click here)
Happy crocheting lovelies!
For more fun projects and pretty patterns, be sure to follow Fiber Flux on Google+, Facebook, Twitter, and Pinterest for the latest updates!


Love it! I added it to my wish list and am flagging this post. I think this just might have to be my next crochet project!
Love, love, love the color combo.
If I win the yarn, I would make one of Fiber Flux's scarves. It's hard to choose cause I love them all!