
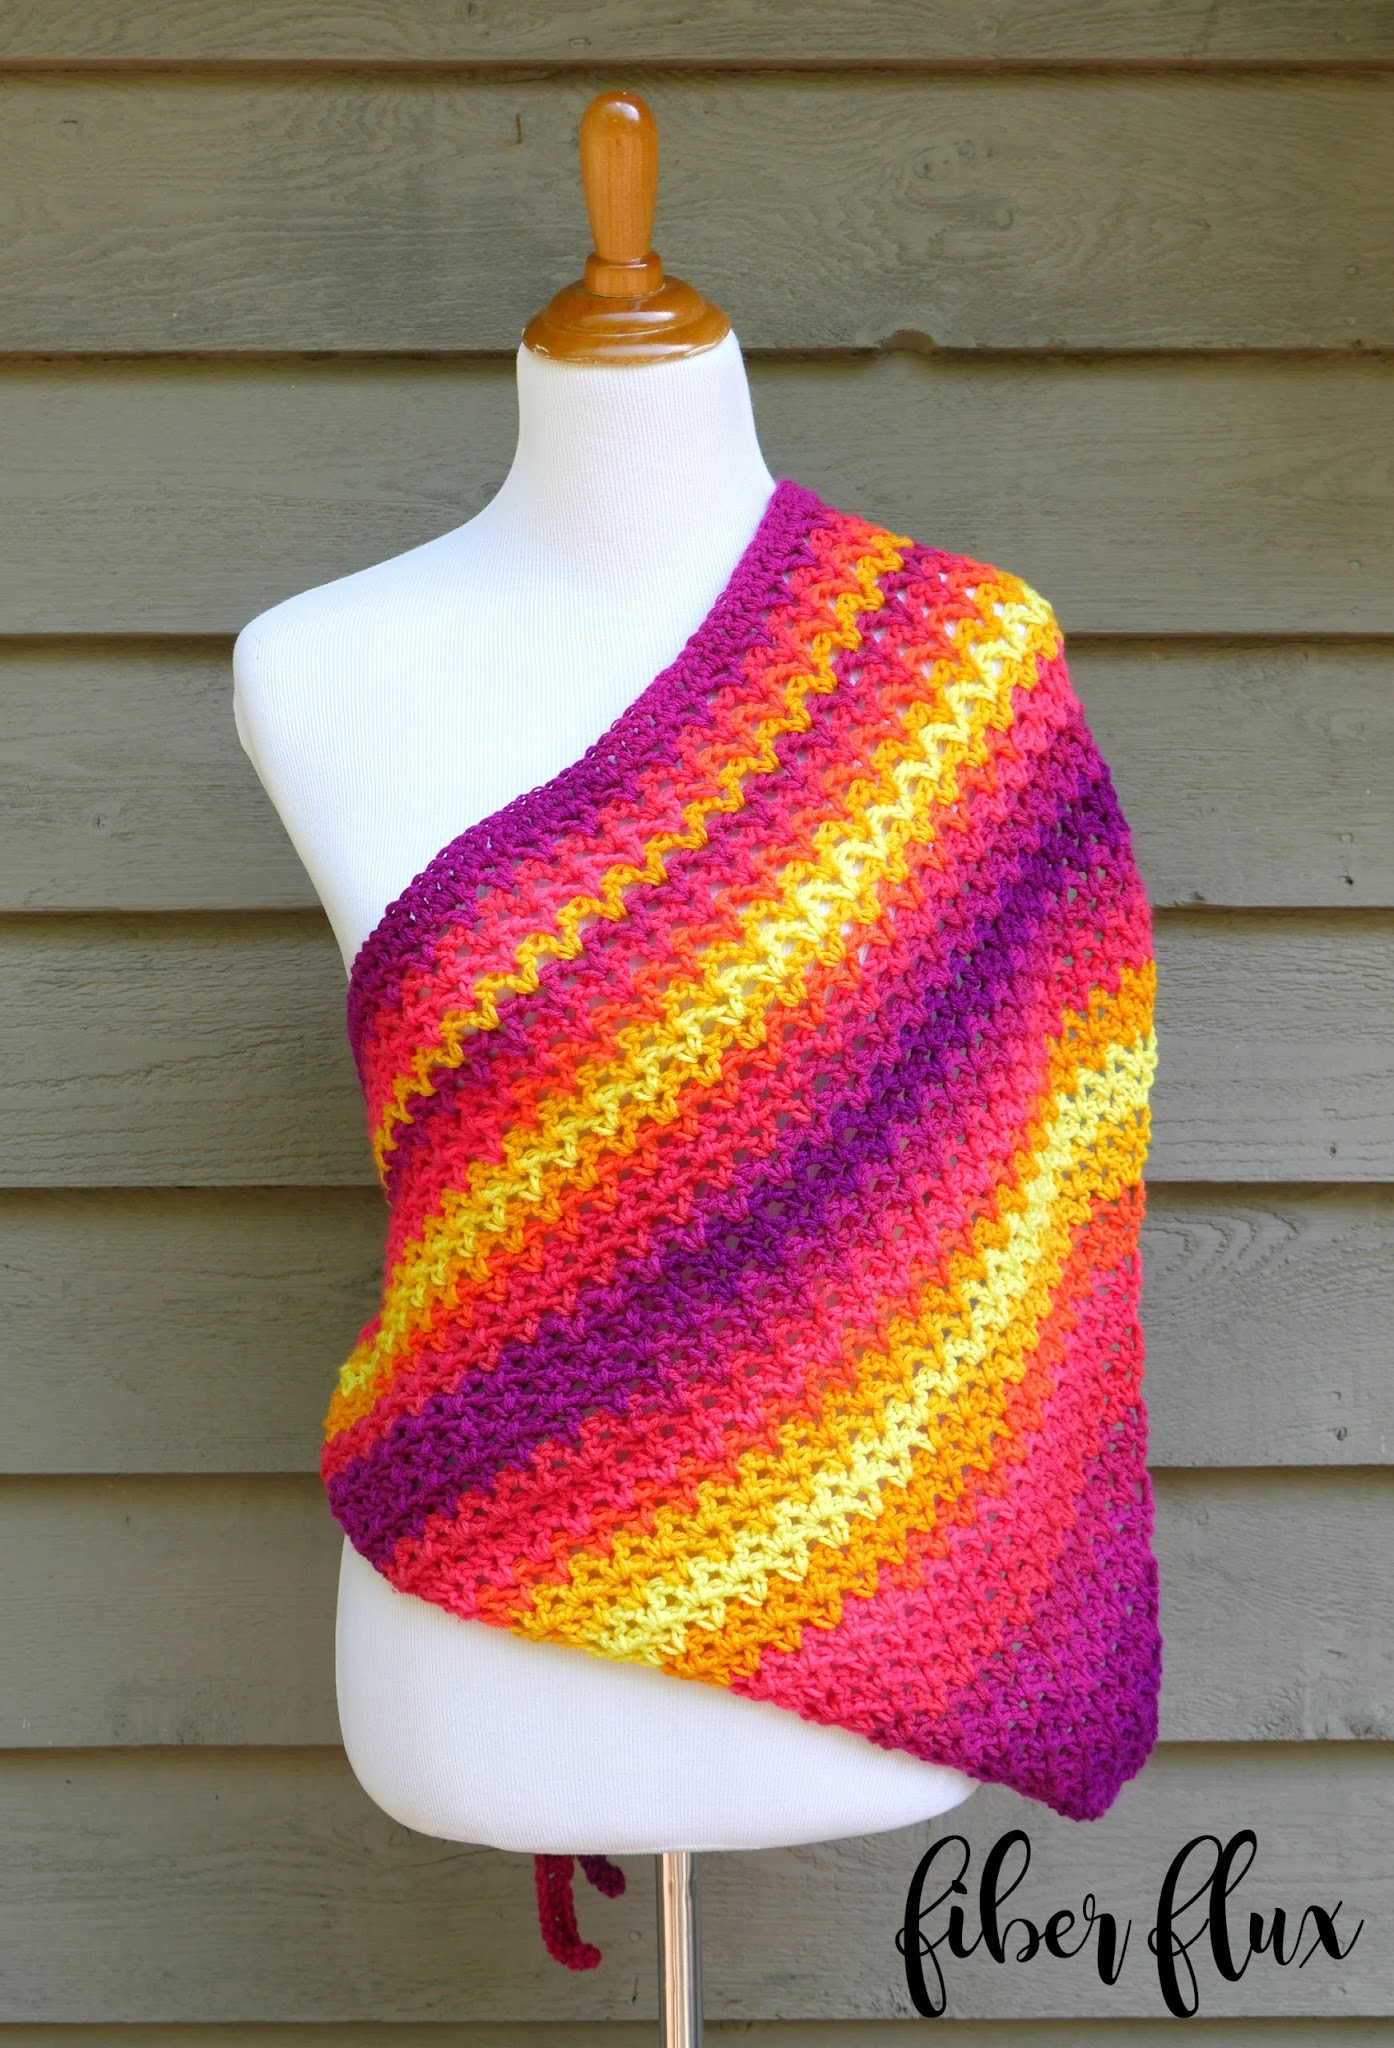
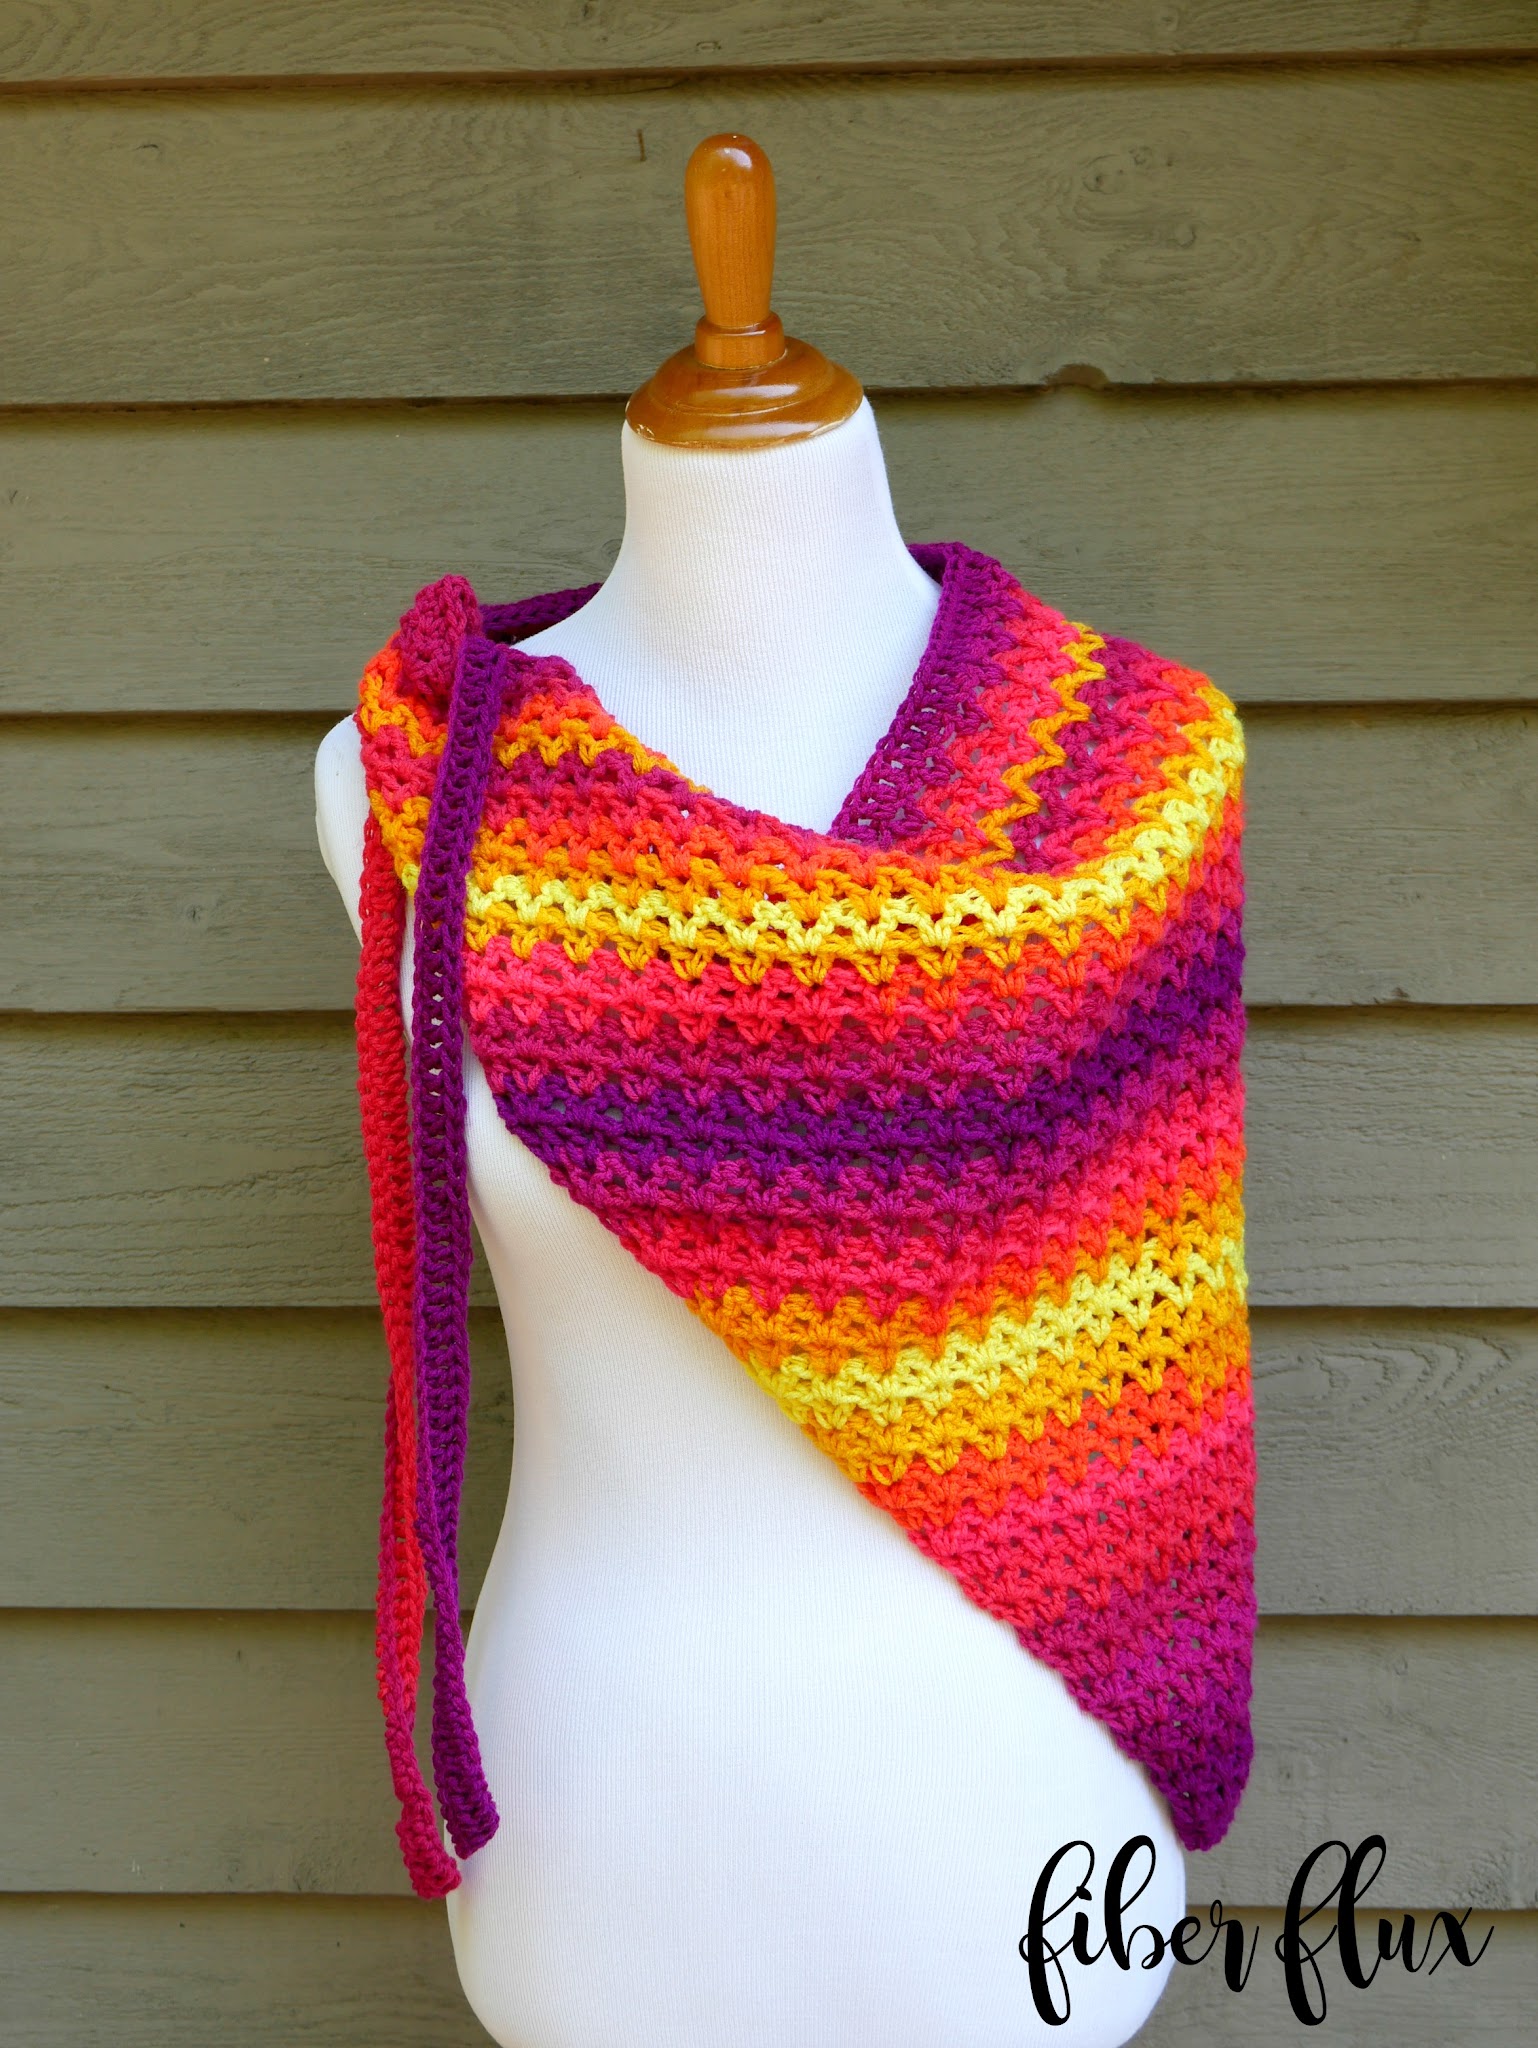
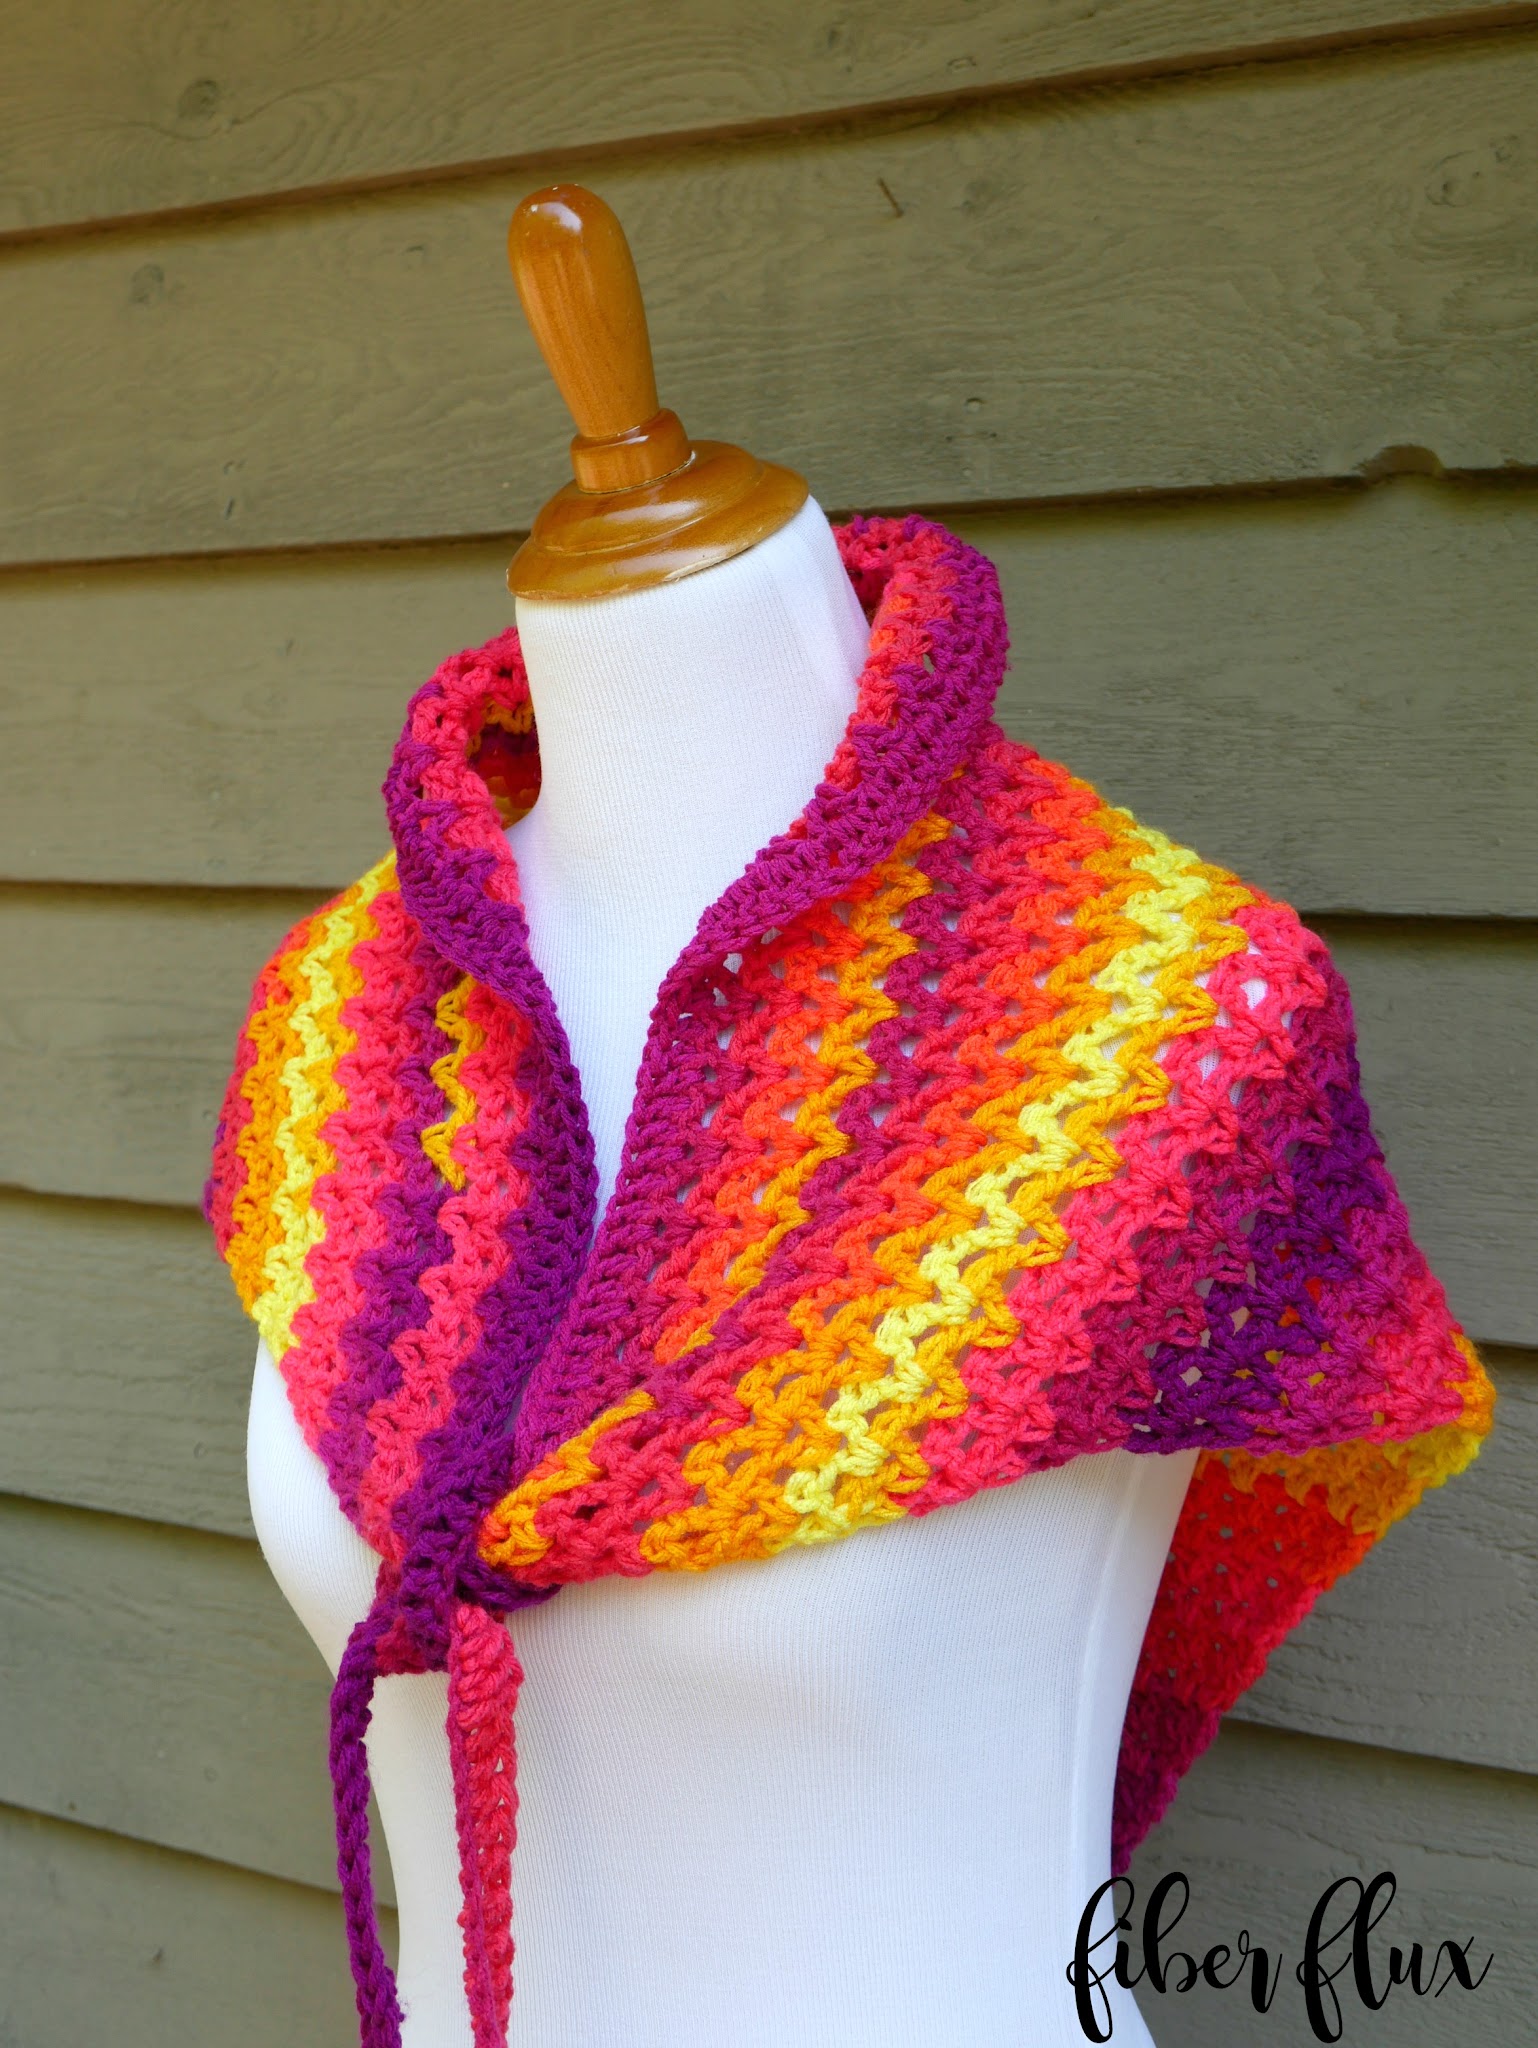
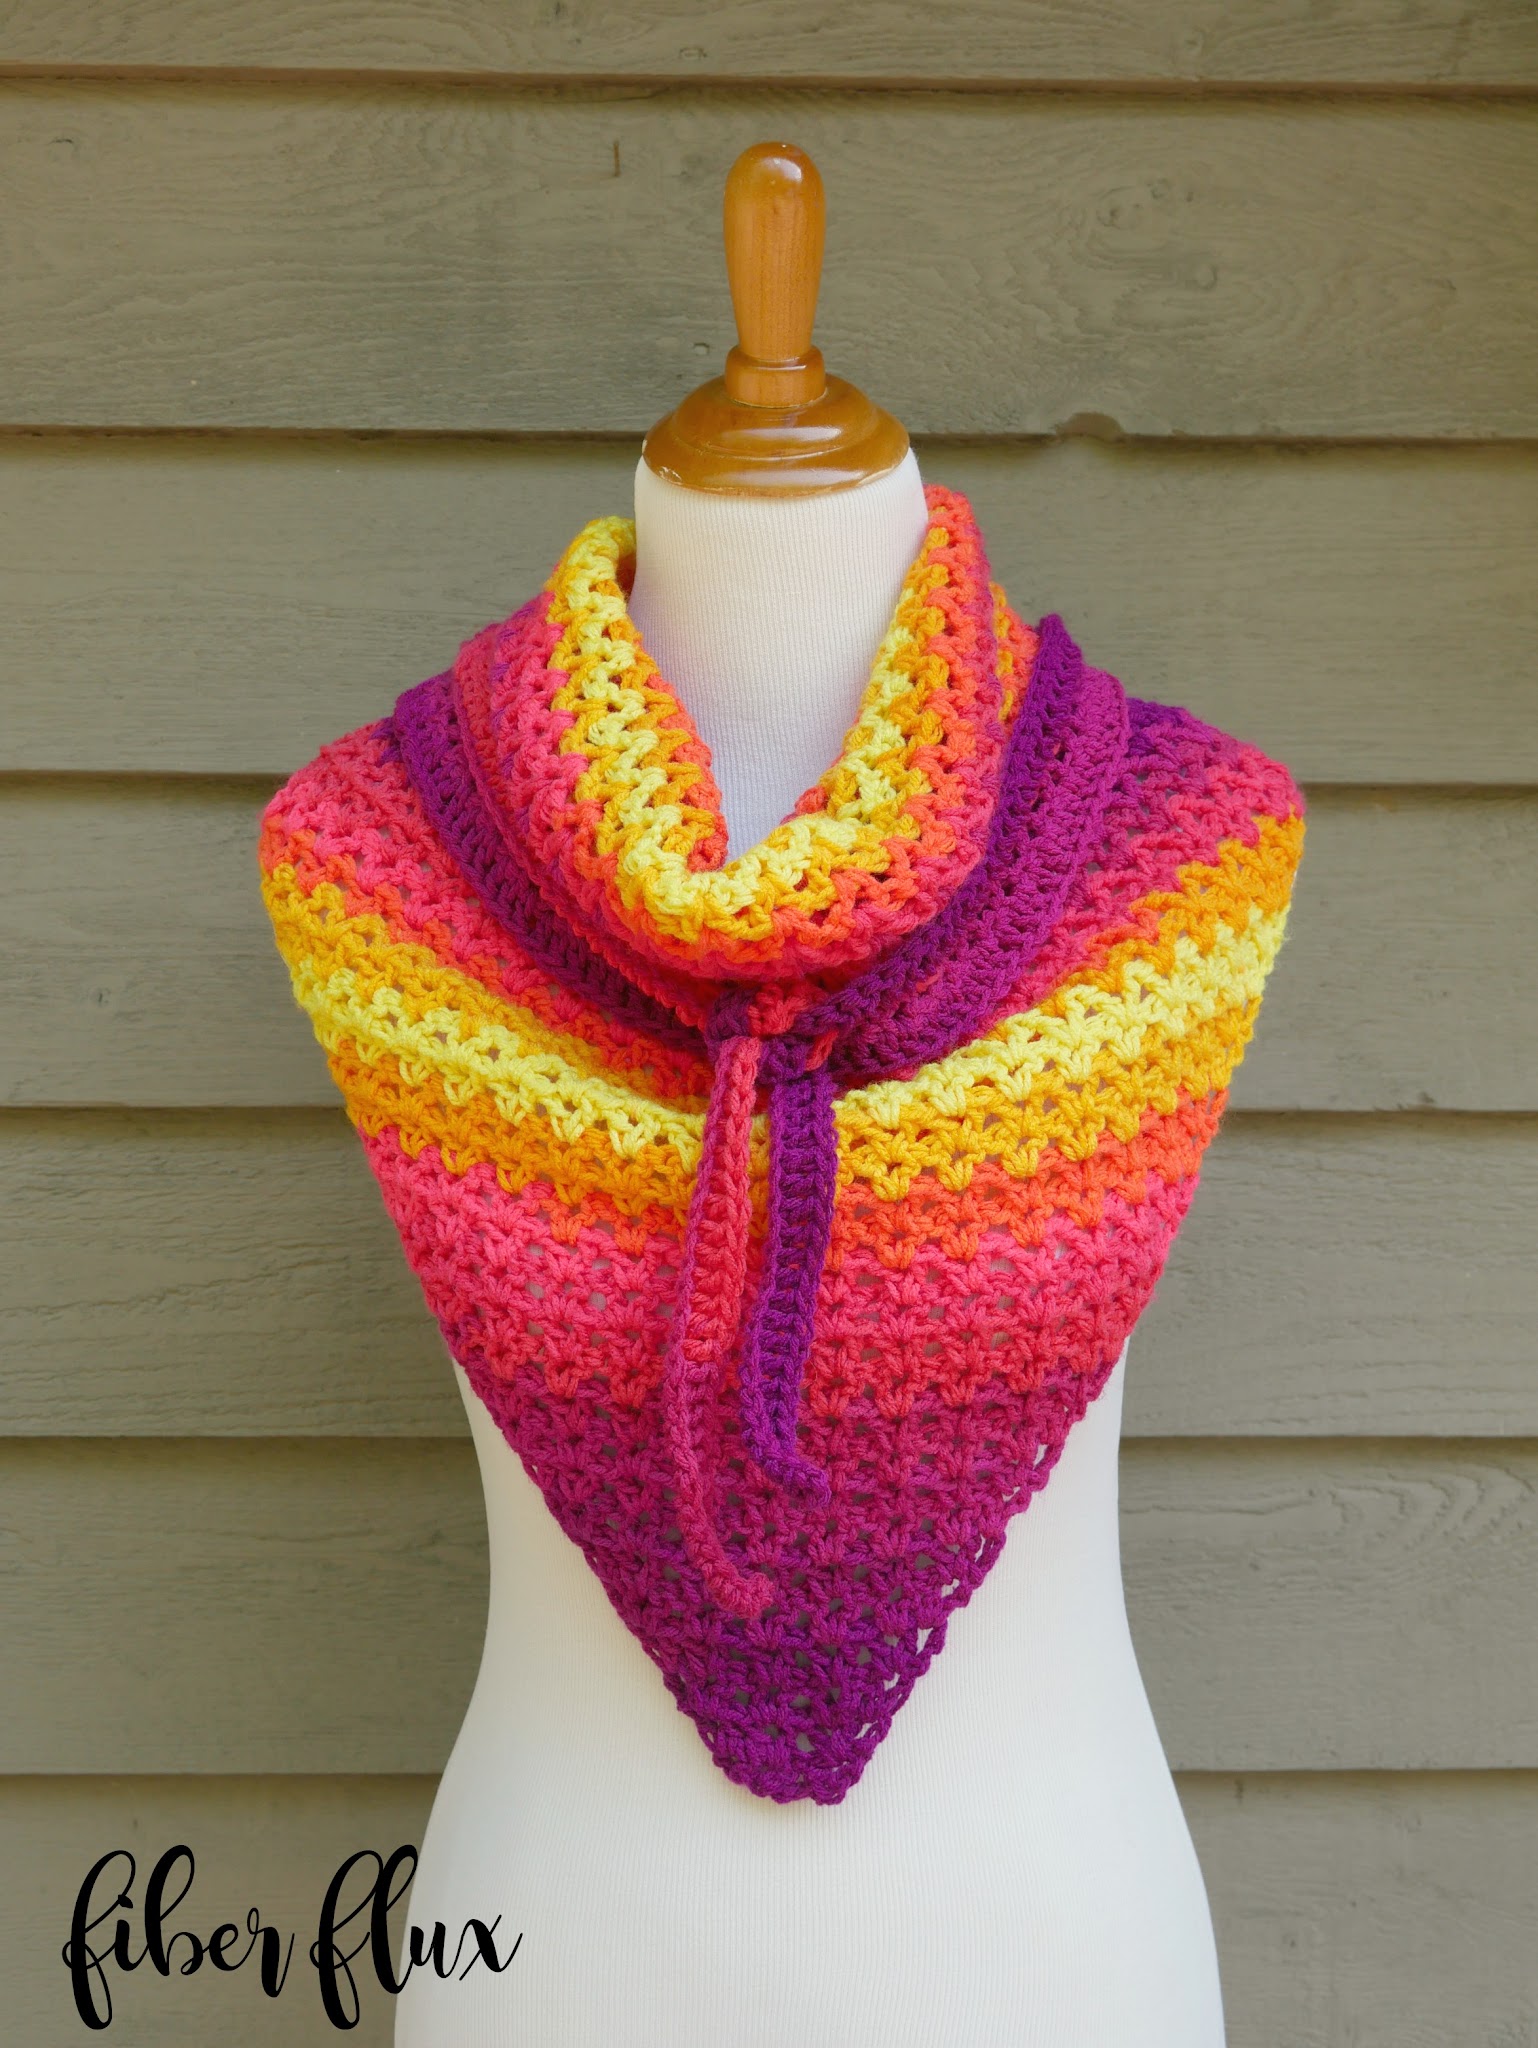
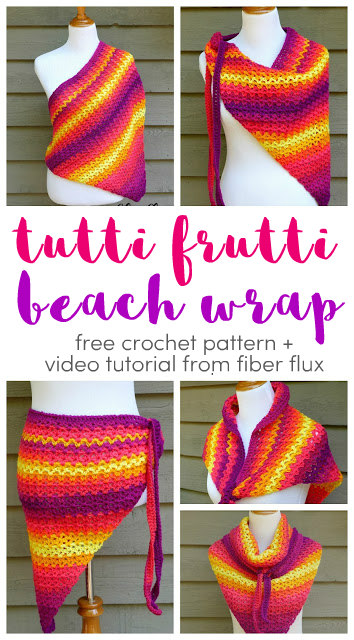
The Tutti Frutti Beach Wrap is the perfect project to welcome summer! This wrap is so much fun to stitch up and uses basic stitches to make it a breeze too! Try a self striping yarn like I did to give it a fun twist. This wrap is very versatile too…wear it around the waist with a swimsuit, wrap it around the shoulders for a cool night, or even one shoulder for a dramatic statement! Scroll down to see the many ways to style your wrap!
👉Get the ad-free crochet pattern PDF from my shop here!👈
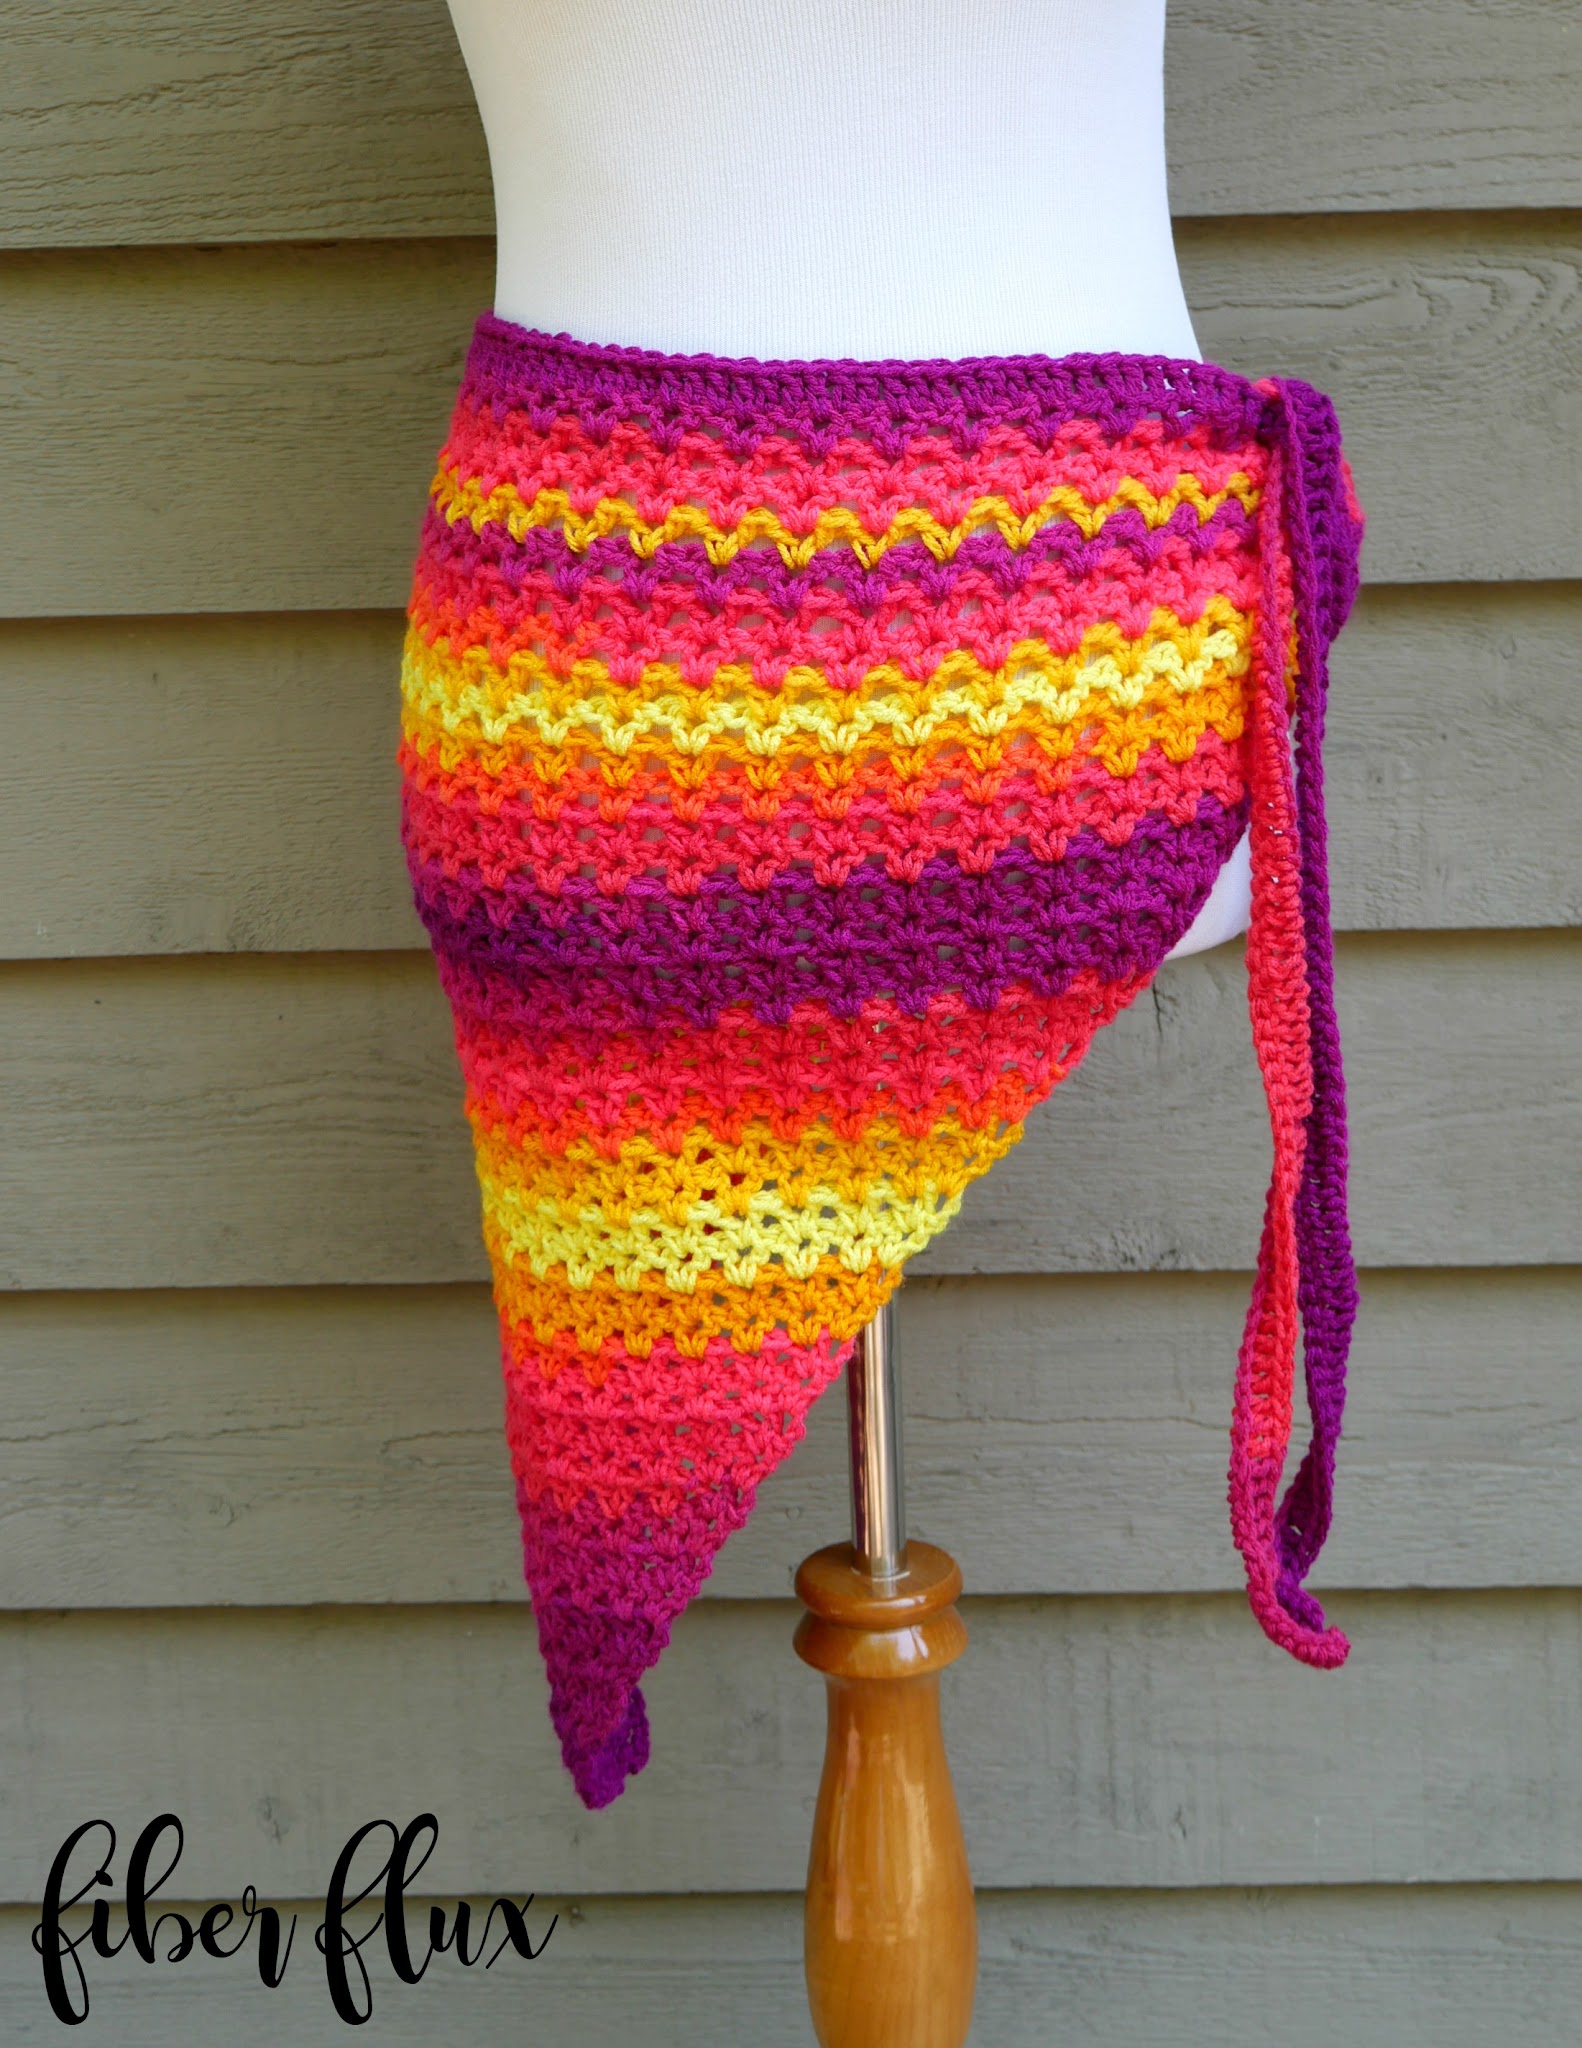
Tutti Frutti Beach Wrap
By Jennifer Dickerson
Click the button below to add this project to your Ravelry queue:

Click below to watch a full video tutorial on how to make this project:
(Can’t see the video? Click here!)
Materials:
-
5.5mm I crochet hook
-
2 balls of Super Saver Stripe by Red Heart in “Fruity Stripe”
-
Tapestry Needle
-
Scissors
-
Ruler or Tape Measure
Learn more about Super Saver Stripes here:
(Can’t see the video? Click here!)
Sizing:
-
42 inches across the top of the triangle only.
-
34 inches long along each side of the triangle.
-
Each tie is 18 inches long.
Abbreviations and Tutorial Links:
Triangle Instructions:
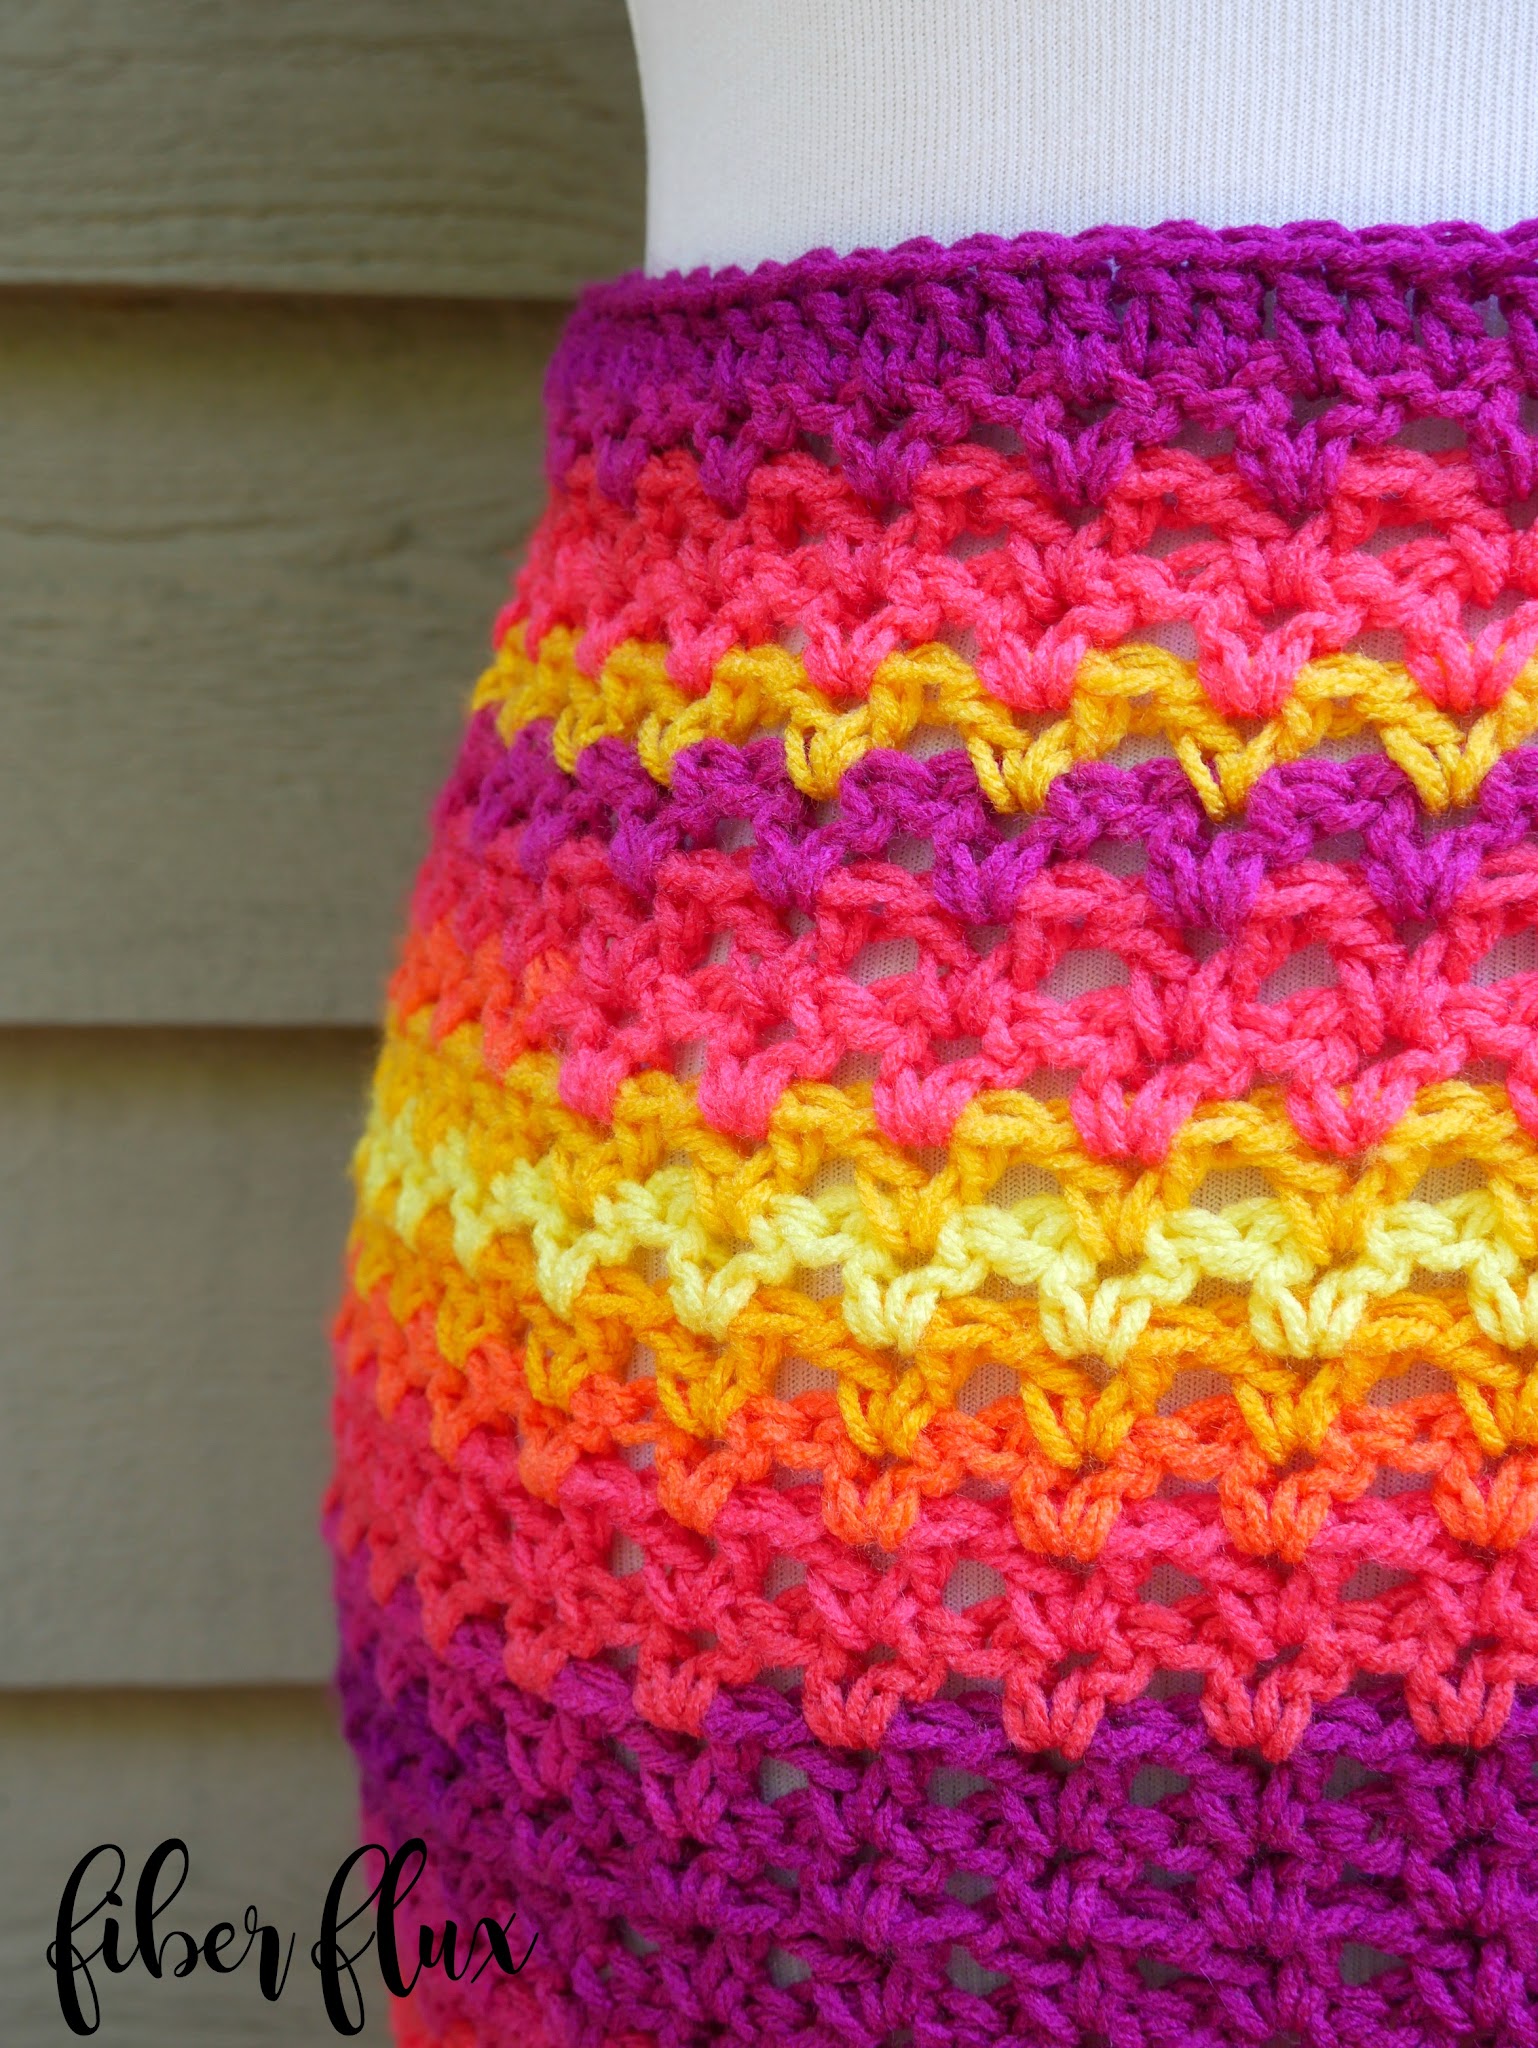
Row 1: Chain 7. In 4th chain from hook (dc, ch 1, dc) all in the same chain. Skip two chains, and in the next chain (the last chain), work (dc, ch 1, dc) all in the same chain.
Row 2: Chain 3 and turn. Work (dc, ch 1, dc) in each of the chain 1 spaces from the previous row (center of each “V”). At the end of the row, finish with a (dc, ch 1, dc) in the turning chain space.
Repeat row 2 until your wrap has a length of 42 inches across the top edge OR desired width/height. Note: As your triangle grows in width, it will also grow in height as well. Do not fasten off yarn and continue below to the tie section of the instructions.
Top Tie of Wrap:
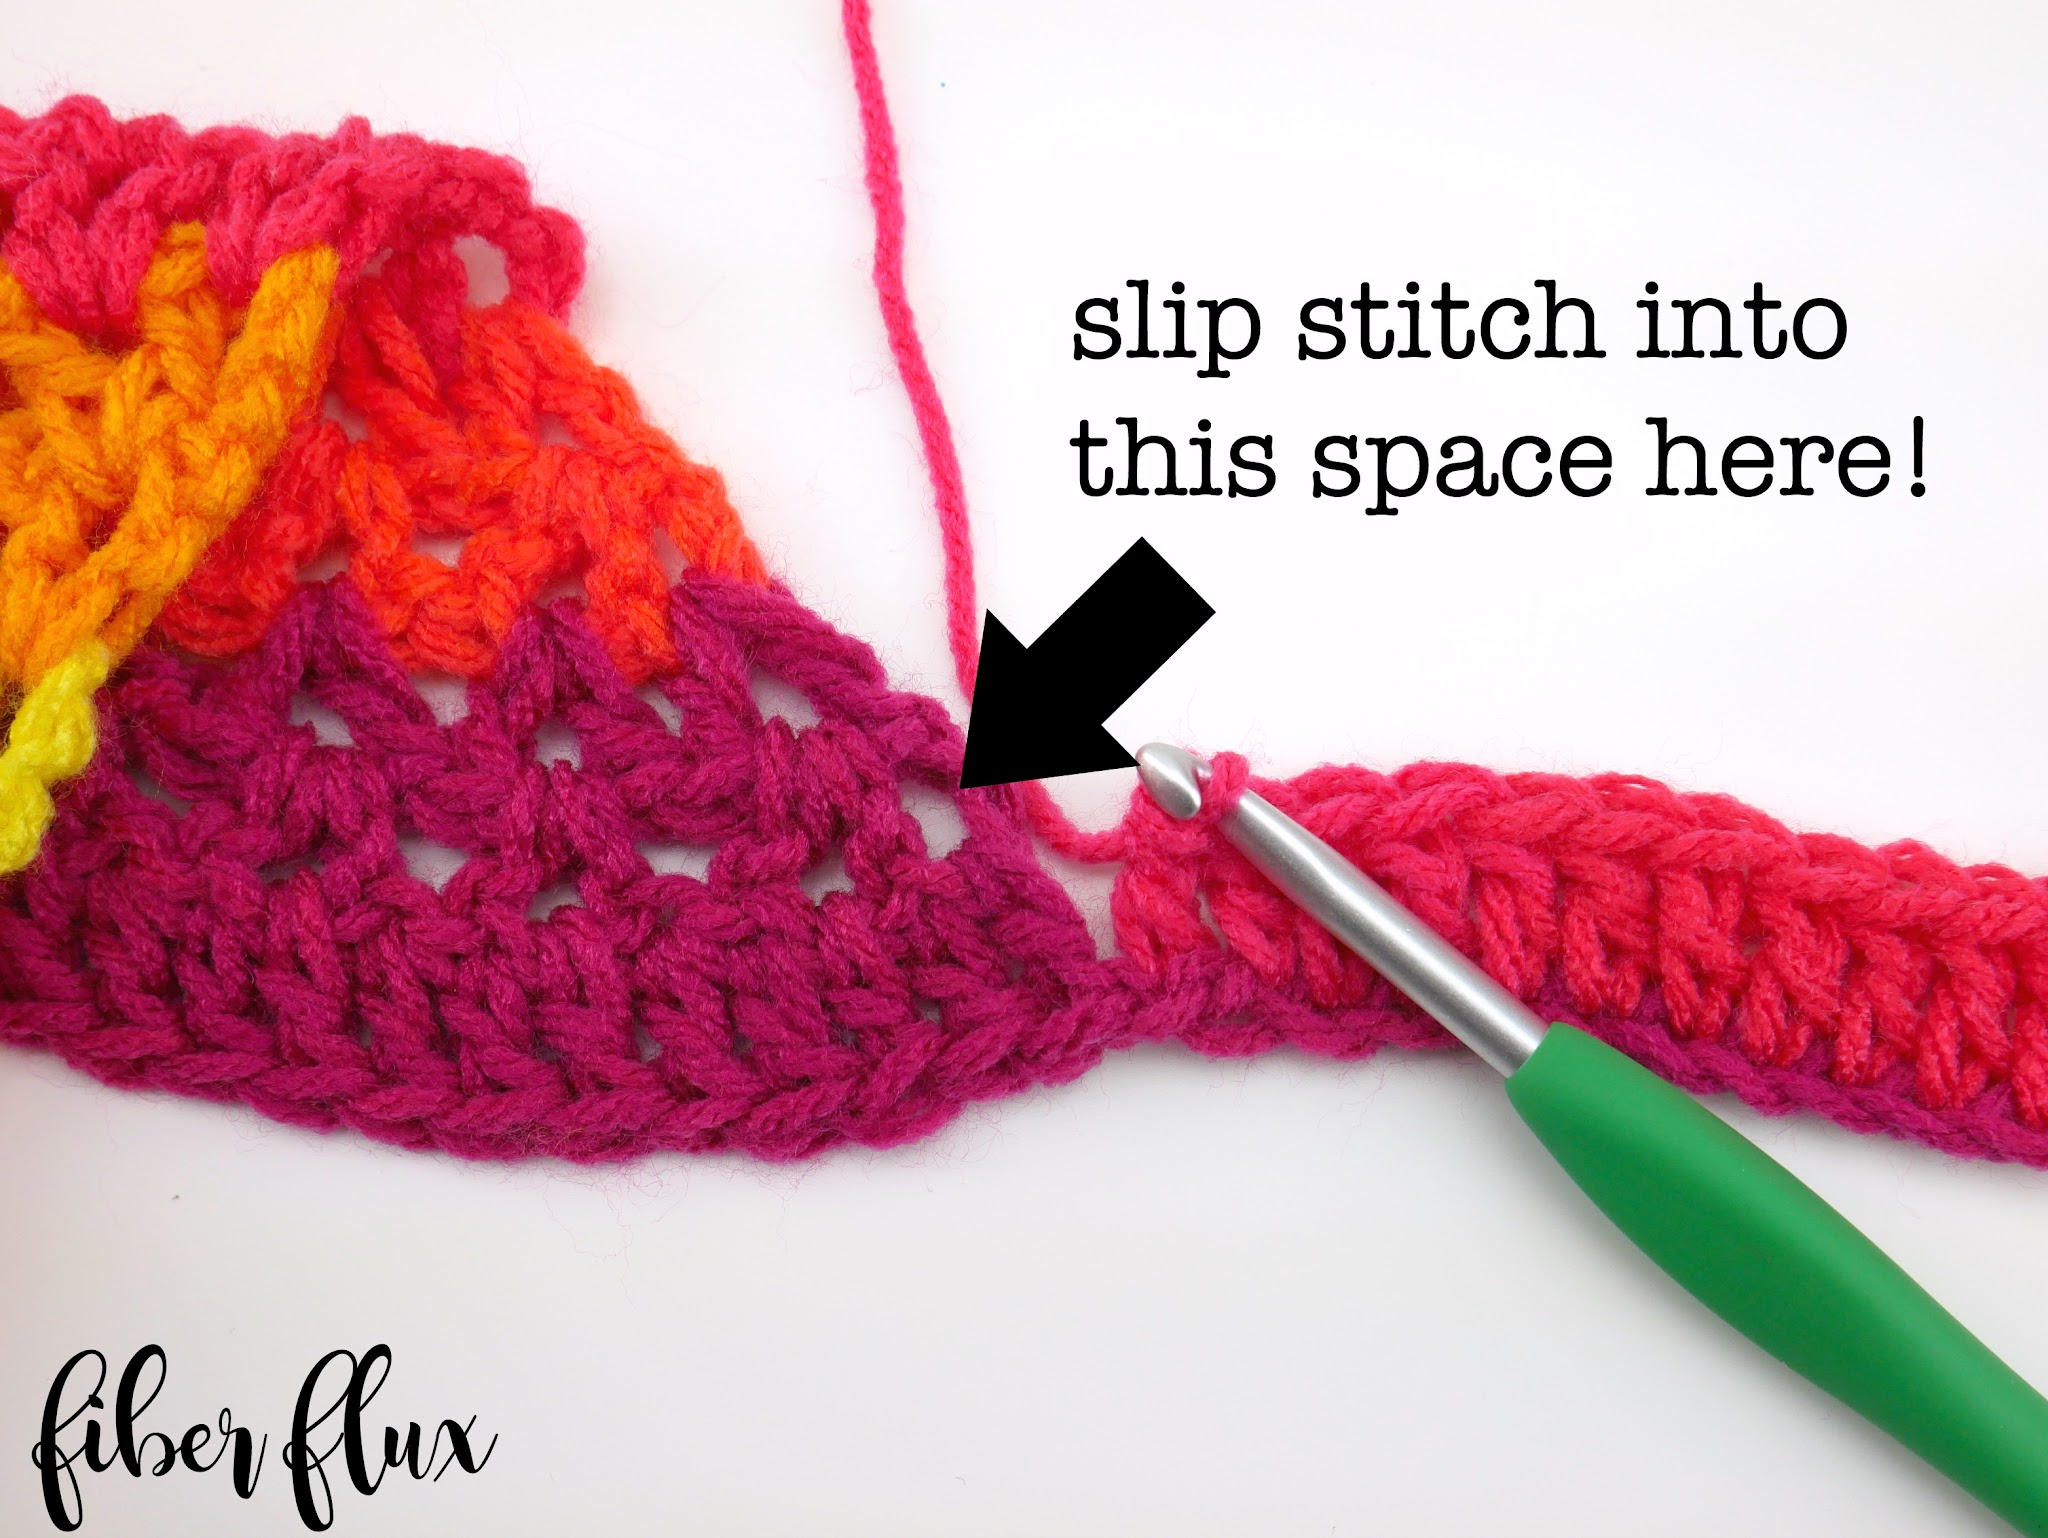
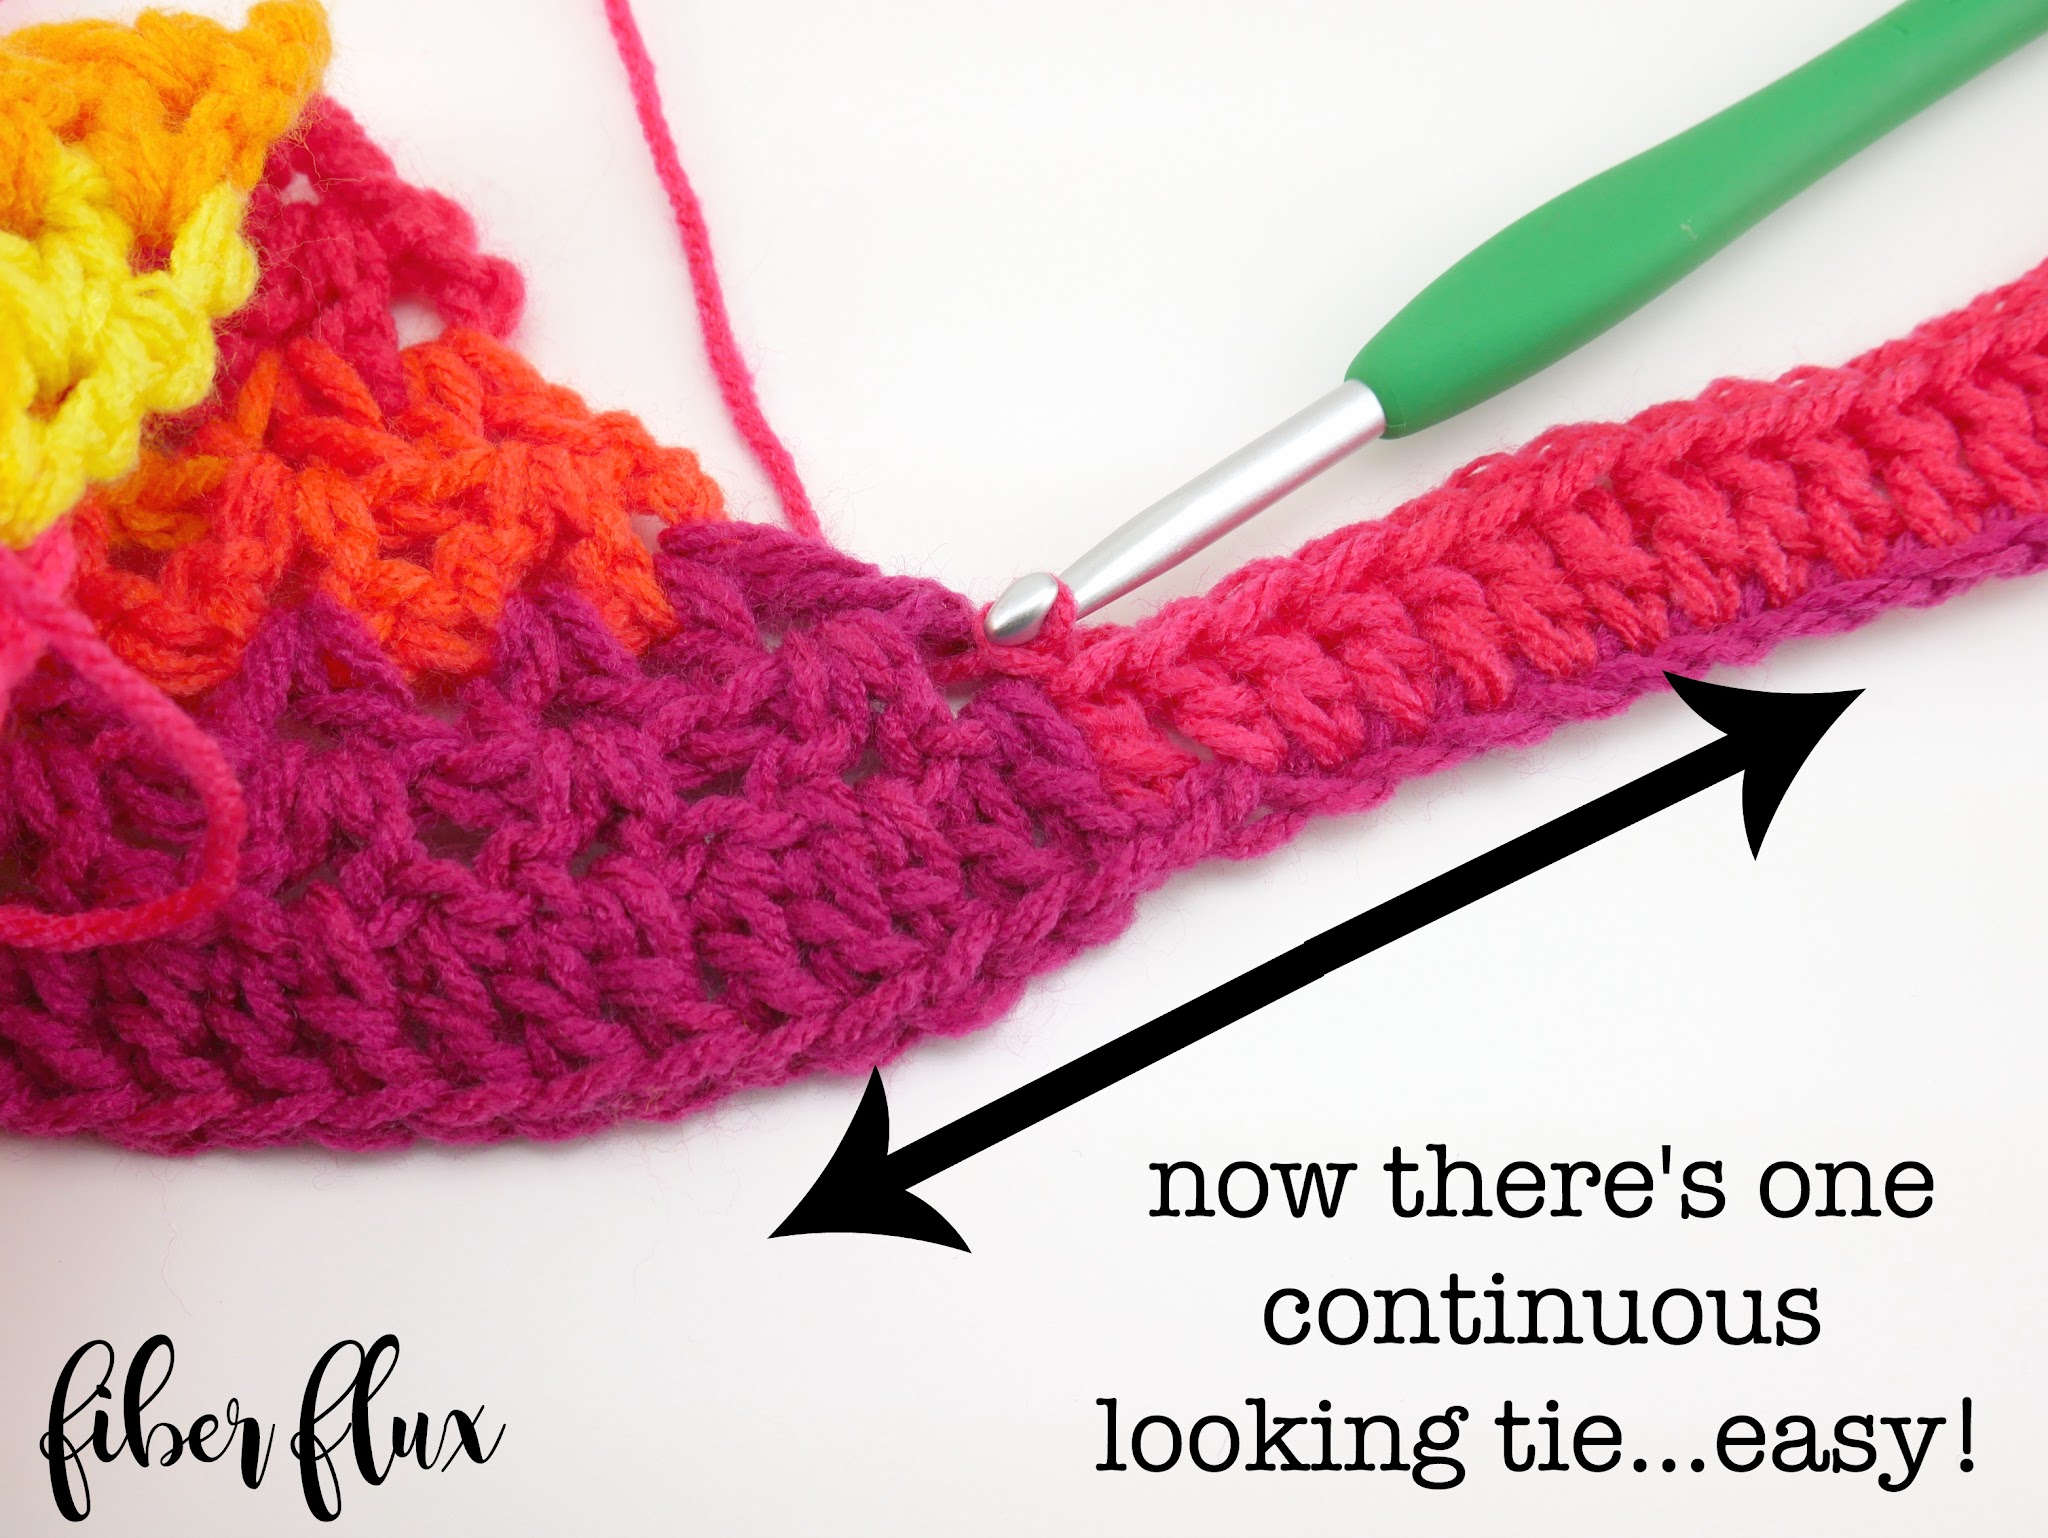
After completing the last stitch of the final V-stitch row of the triangle, ch 65 (approximately 18 inches). In the 4th ch from the hook, work a dc. Work a dc in each chain until you work back to the triangle again. *Work a dc in the first stitch, then a dc in the ch 1 space (center of the v), then a dc in the next st. Continue across and work dc stitches in this manner across the v-stitch portion of the top edge of the triangle. When you reach the end of the top edge of the triangle, ch 65. Work a dc in the 4th ch from the hook and work a dc in each chain. When you reach the triangle again at the end of the chains, it will look like this:
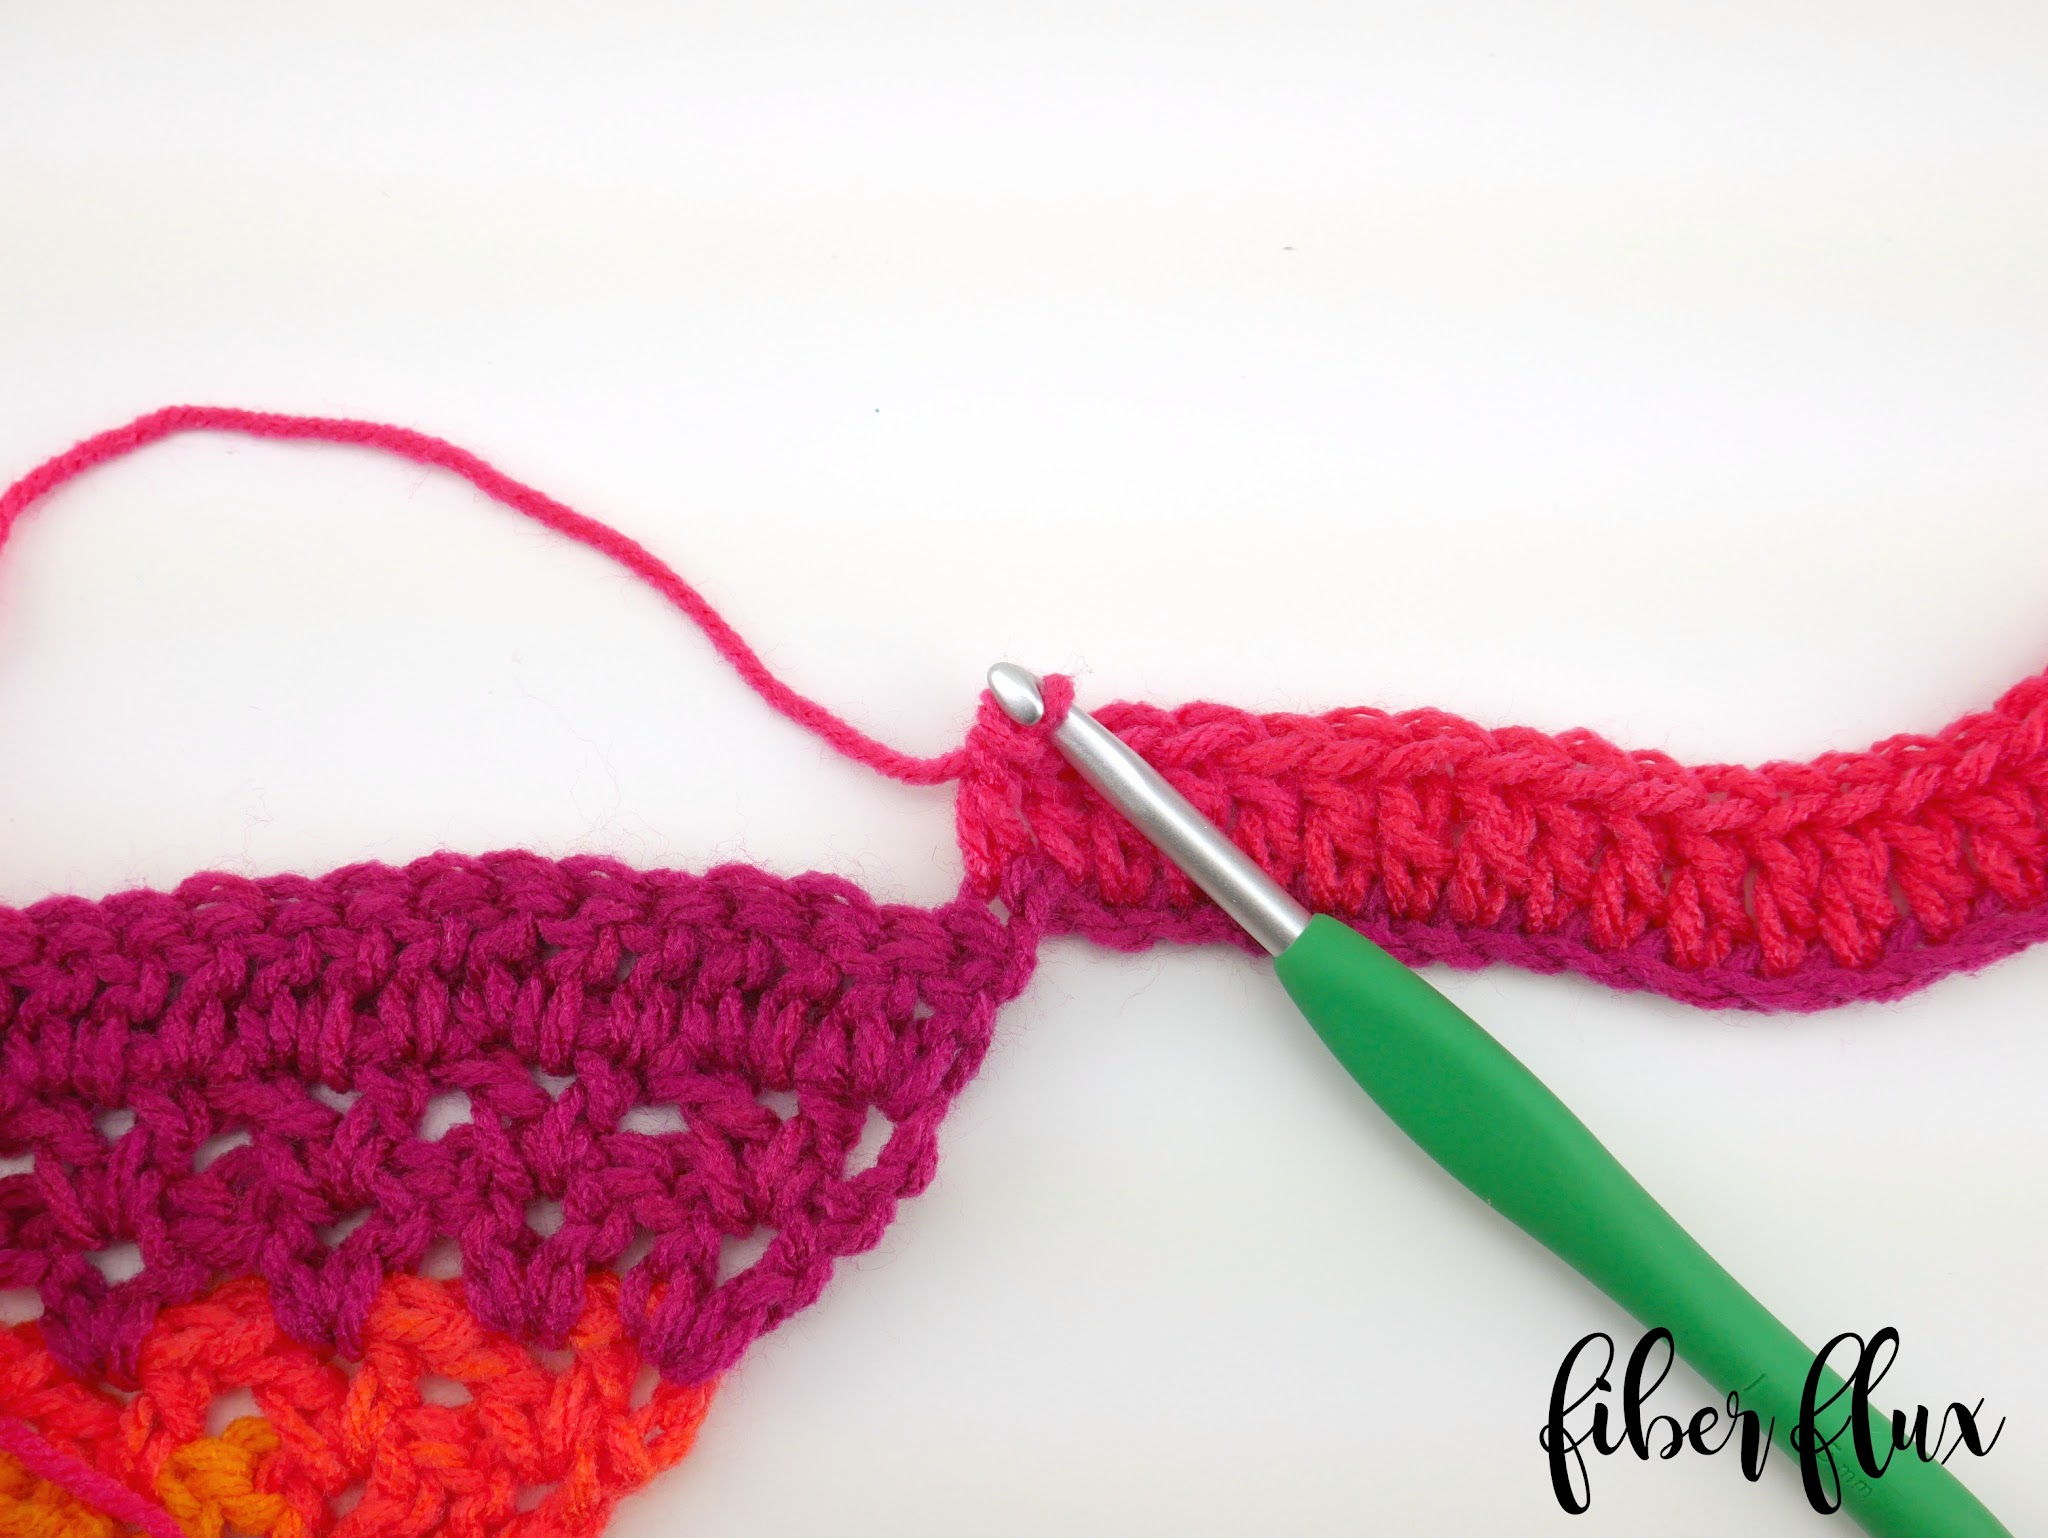
To avoid the “stair step look” simply flip the triangle over so it looks like this (see below), then slip stitch into the space where the arrow is pointing:
Now it looks like one continuous tie, and looks identical to the other side! To see this in action, check out the video, where I’ll show you step by step.
Weave in any ends and you’re finished! Happy crocheting lovelies!

© Jennifer Dickerson 2017
For more fun projects and pretty patterns, be sure to follow Fiber Flux on Google+, Facebook, Twitter, and Pinterest for the latest updates!

Visit the Fiber Flux Yarn Shop…lovely yarn & great prices!


 (Affiliate links, enjoy these awesome products and thanks as always for your support!)


About what size person will this fit? I have a 16 yr old niece and wondering if I need to stop at 38-40" on the width.
Also where do you find the body mannequin for displaying and photographing your pieces?
This comment has been removed by a blog administrator.
This comment has been removed by a blog administrator.