
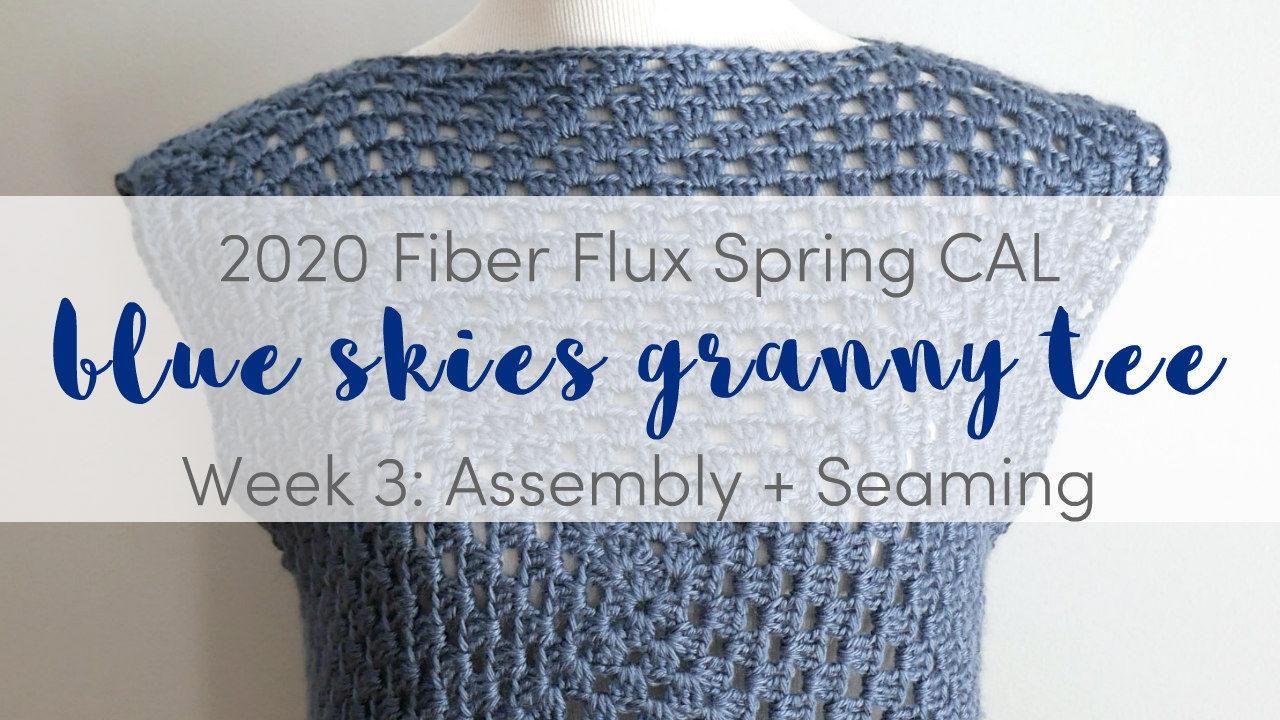
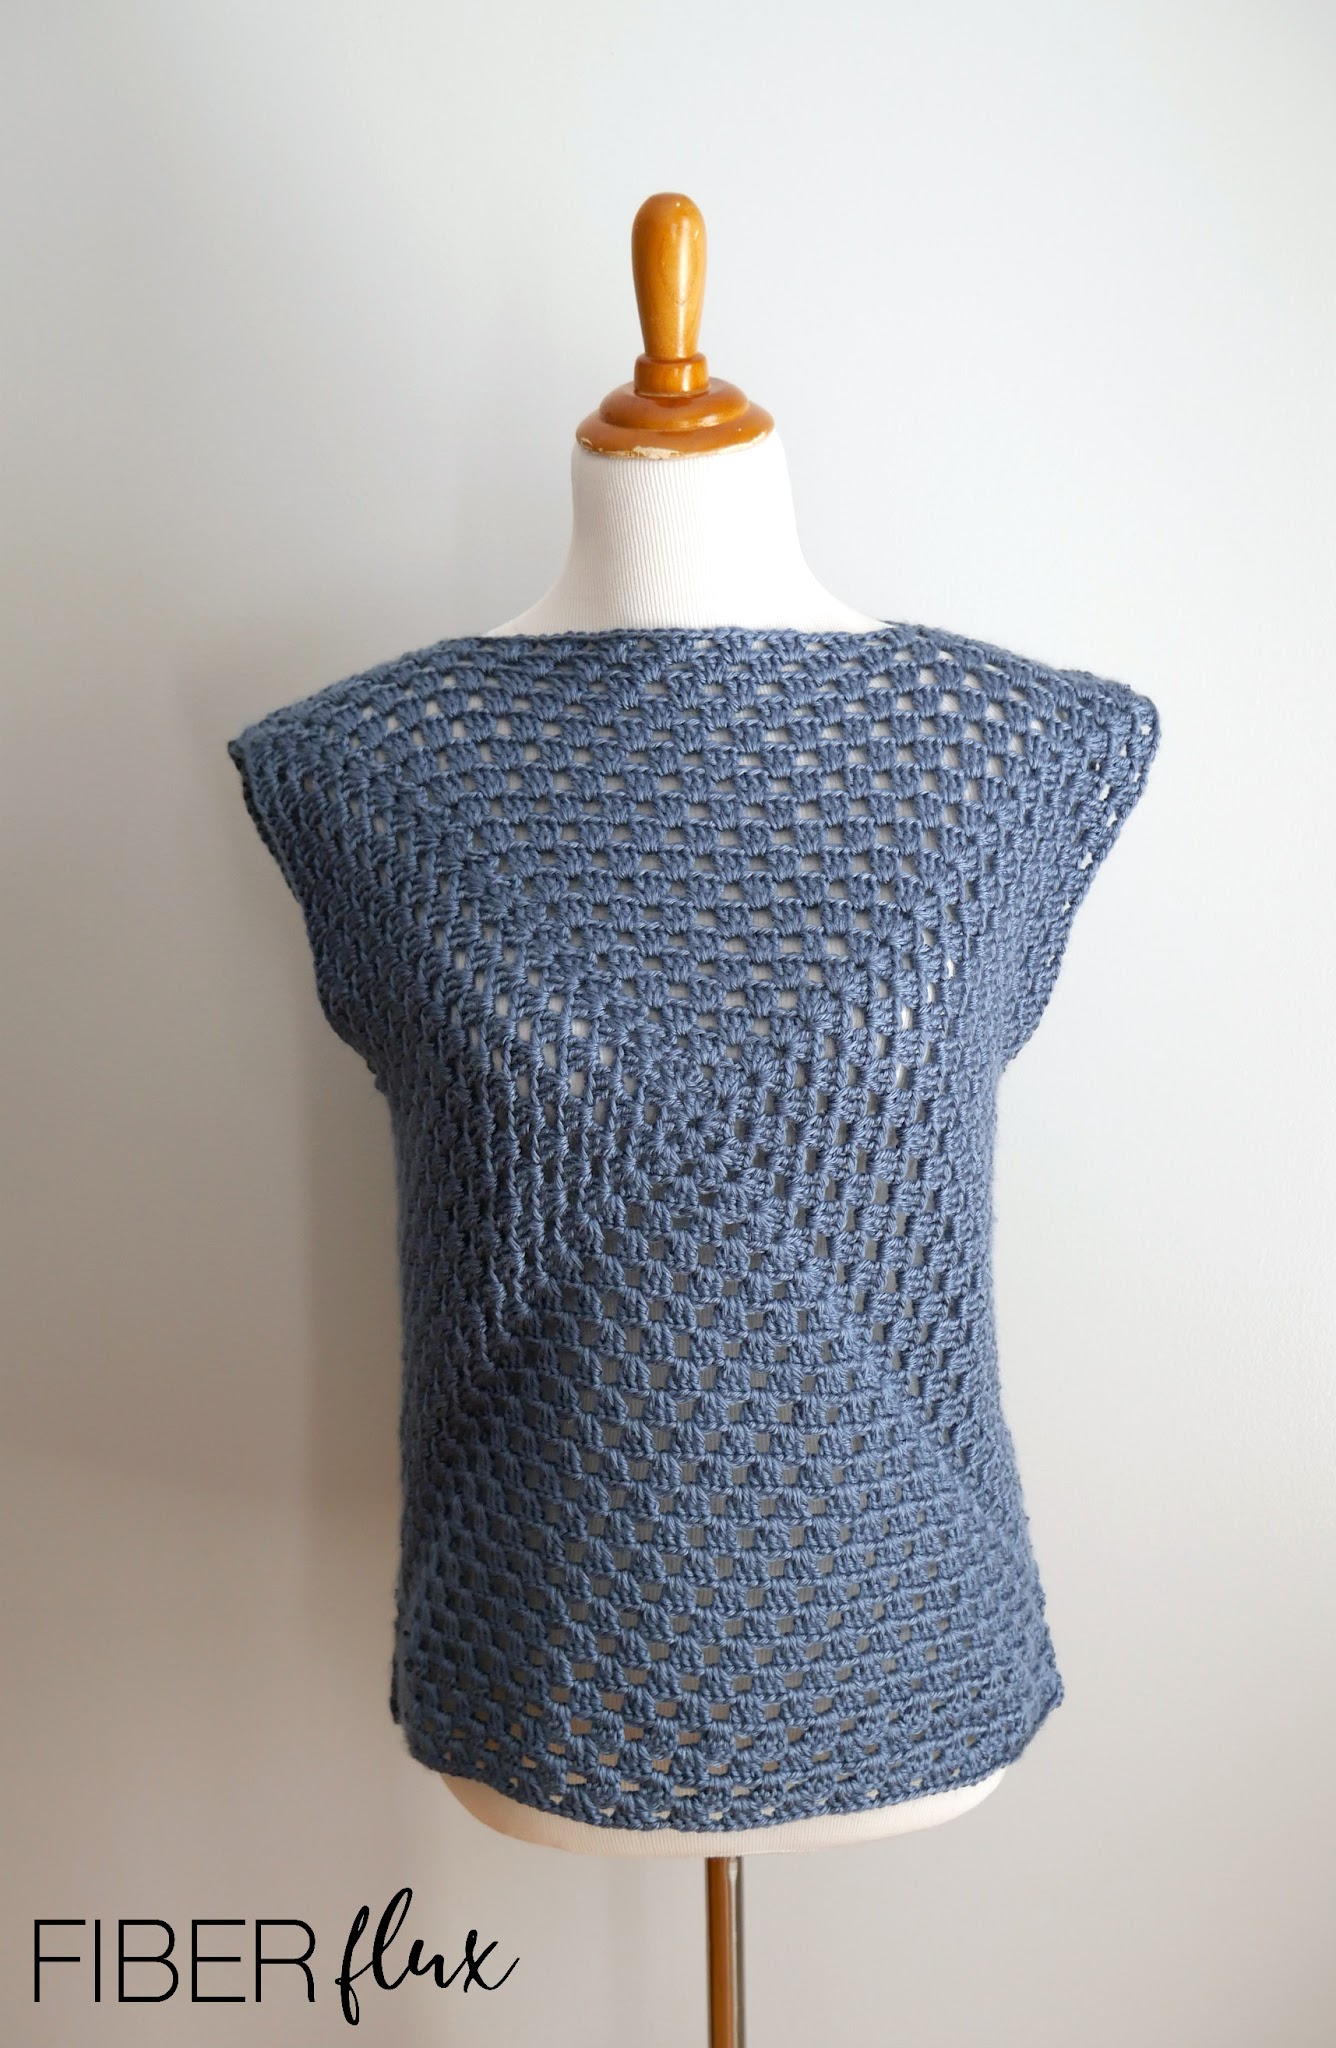
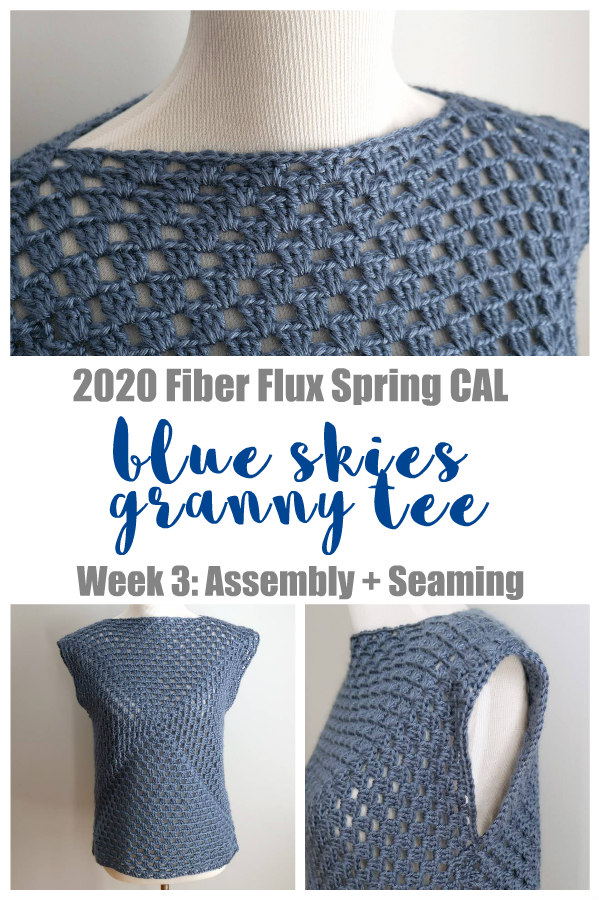
Welcome to the 2020 Fiber Flux Spring Crochet Along…hooray! Today is week 3 of the CAL and we’re working hard on the gorgeous Blue Skies Granny Tee! This project is a fabulous garment for the warmer months ahead!
Here’s what we’ll be doing today:
- Lining up granny squares properly to prepare for seaming and assembly
- Seaming up the shoulders of the tee to create the neck hole
- Seaming up the sides of the tee to create the armholes
- Schedule of the CAL
- Where to connect with other makers
The CAL will be divided over the next few weeks, so we’ll tackle each part bit by bit. Scroll down for the schedule with actual dates and what we’ll be doing on each day/week.
Check out this week’s video here:
*This is a self-paced project, so definitely go at the speed you feel most comfortable. The instructional videos and posts will be up forever and you will always be able to go back and watch again and again!
Add this project to your Ravelry queue by clicking on the button below:

Today we’ll be focusing on assembling and seaming up our granny squares. It is super simple, just two seams on each shoulder, then two seams up the sides. Be sure to check out the video to walk you through the entire tutorial and here’s a few tips before we begin:
- When you’re sandwiching everything together to seam, try clipping your pieces together…you can use clothes pins, chip clips, even hair clips! Another good way to hold your pieces together while seaming is a series of stitch markers too.
- Be sure the eye of you needle is large enough to accommodate the yarn you are using.
- When weaving in ends, only weave the color of the tail into the corresponding color section.
- Try to make you finish work as neat as possible to show off your gorgeous crochet work!
Assembly + Seaming Instructions:
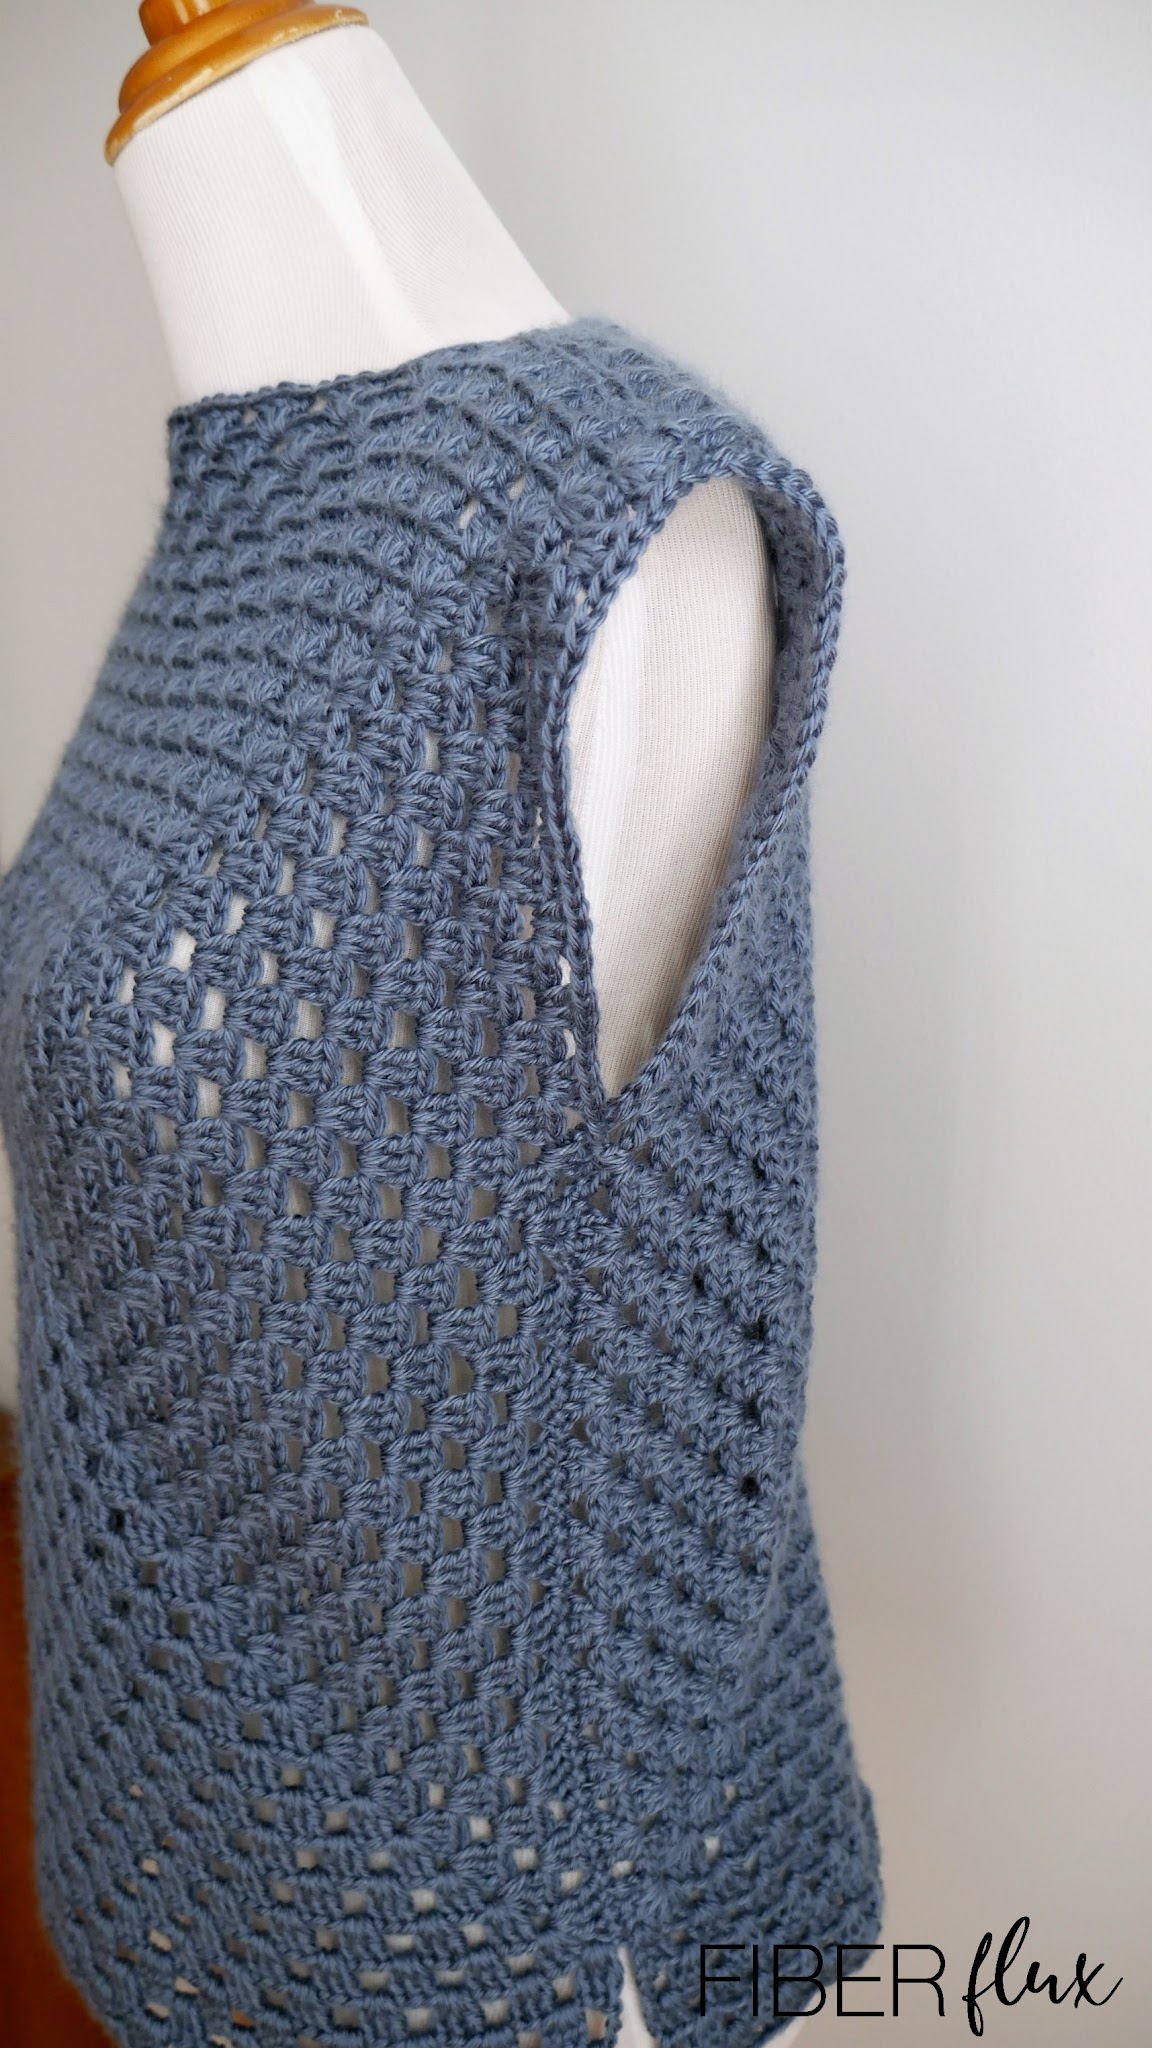
- Sandwich granny squares together with right sides (the side that faced you as you crocheted them) facing inward.
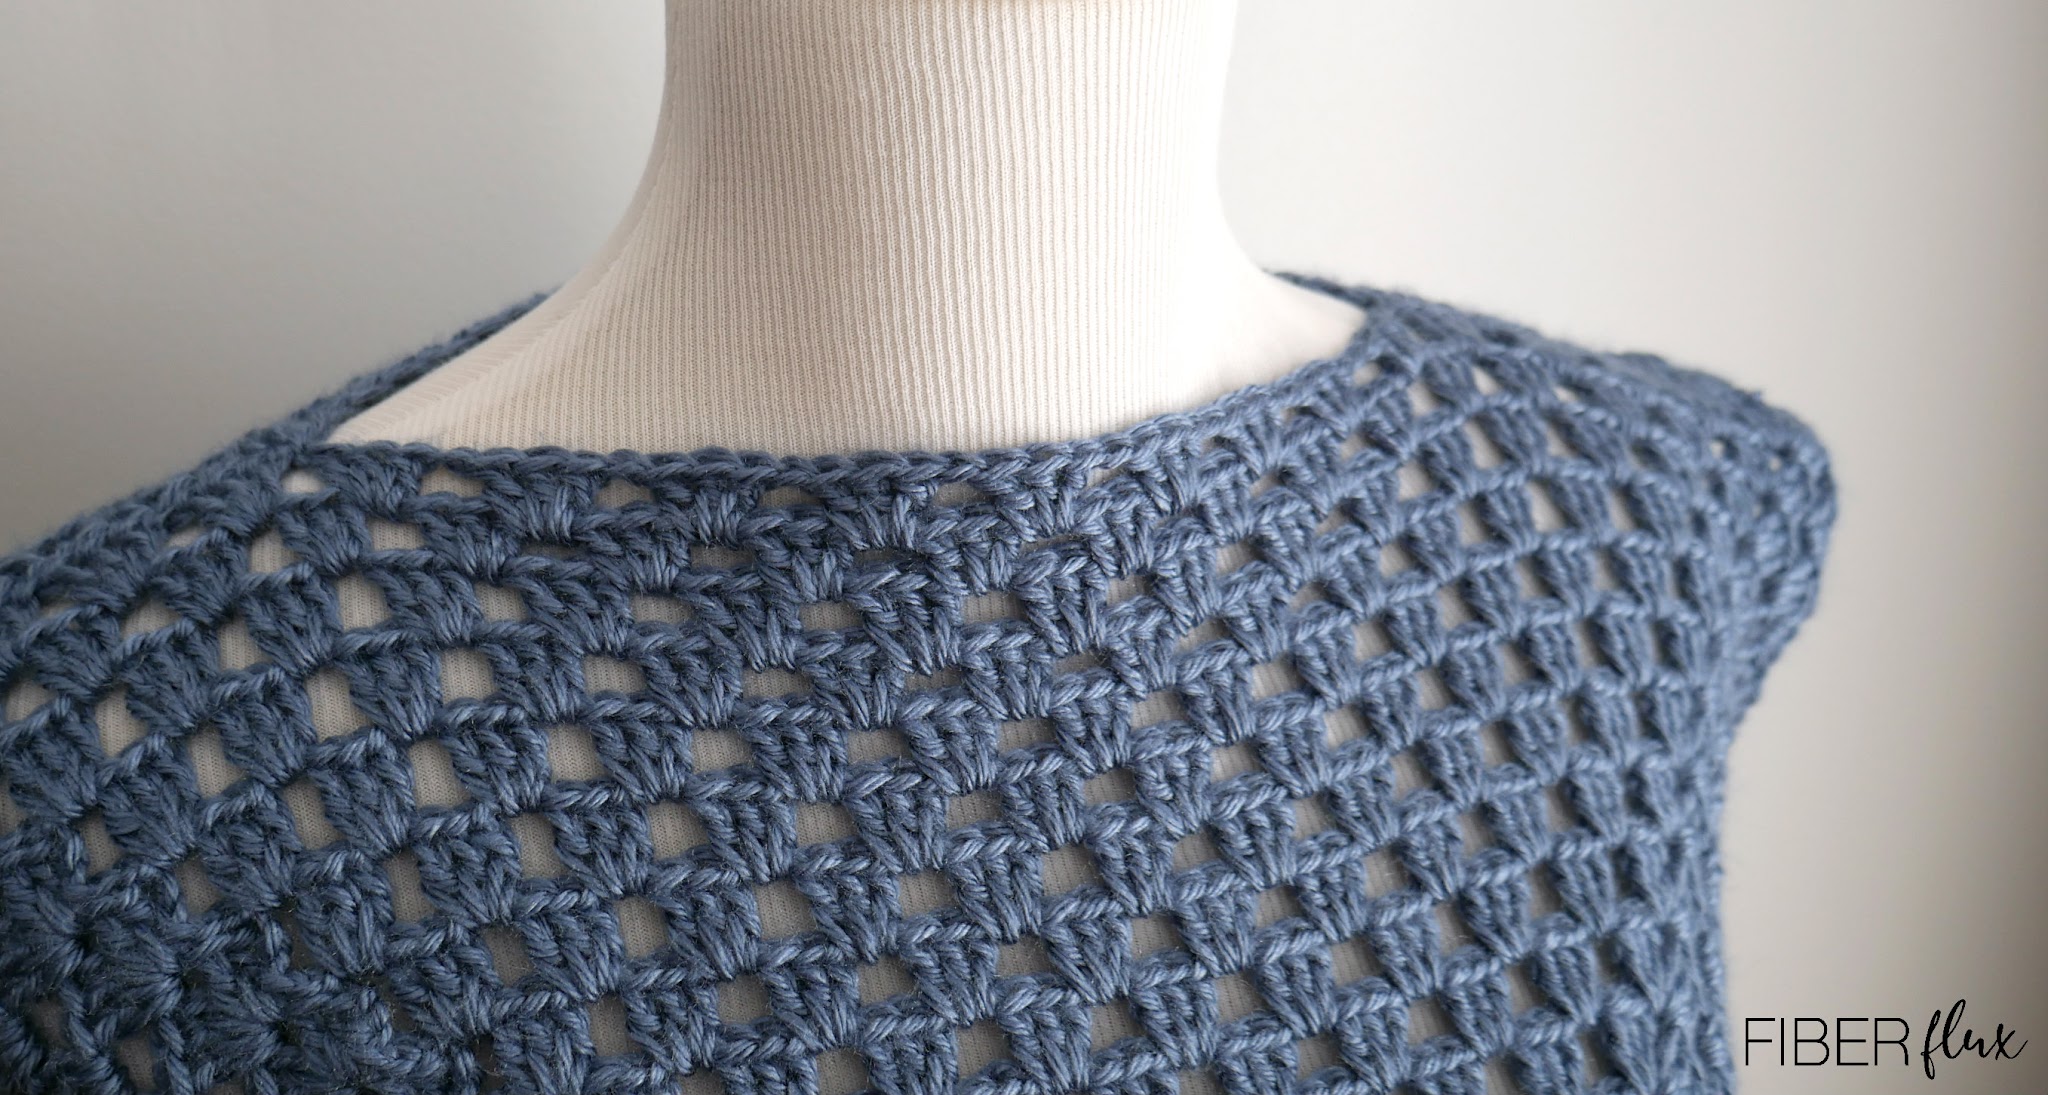
- Line up squares carefully and seam tops of the two granny squares as shown:
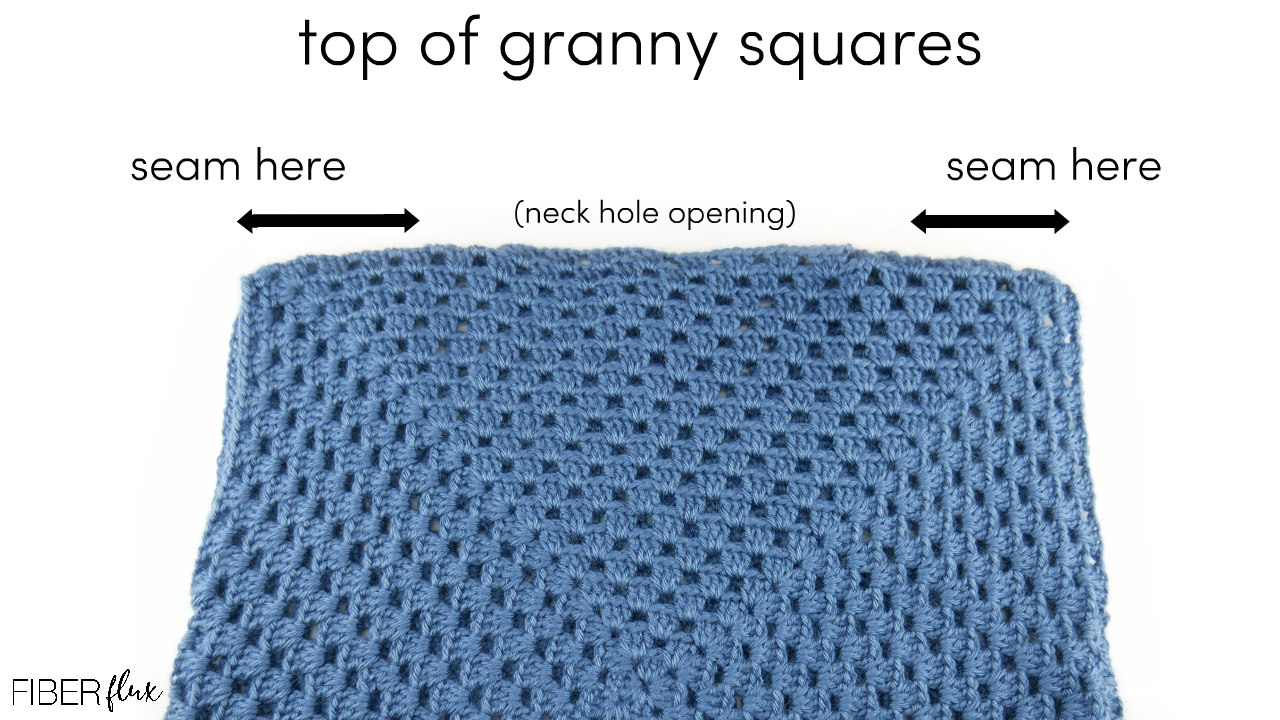
- Be sure that your head can comfortably fit through neck hole opening.
- Next, seam the sides as shown:
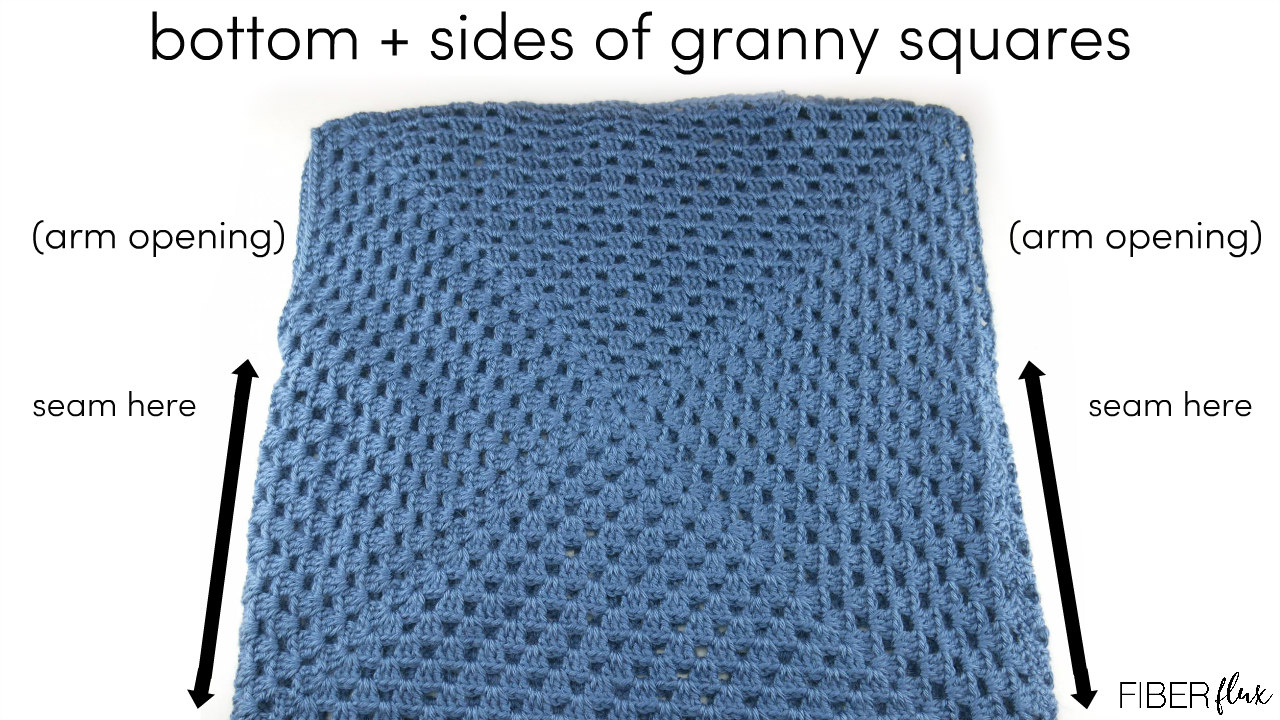
- Be sure your arms can comfortably fit through arm holes. Also, be sure the arm hole is not too large either, you’ll want a comfortable fit without the underarm gaping open and looking loose. I ended up throwing a few extra stitches in mine to close it up a bit.
- Weave in any ends that remain.
- Turn the tee right side out and try on again to check out the fit.
- All done! Join us next week to extend the length into a tunic style.
Here’s our CAL schedule below for easy reference:

- Tuesday April 7: Introduction to the CAL, the project, sizing, yarn, and supplies needed.
- Tuesday April 14: The granny squares
- Tuesday April 21 (that’s today!): Assembly & Seaming
- Tuesday April 28: Bottom extension & finish work
- Tuesday May 5: The BIG reveal!
Last part…let’s connect! You can connect at any of the social media platforms below, and don’t forget to use the hashtag #fiberfluxcal


Also we have two special communities for our CAL makers! Each has a welcome area/thread, so please hop on and introduce yourself. You can get info, ask questions, help each other, see what everyone is doing, and show off your work too!
Click HERE to join the Facebook group!

Click HERE to visit and join the Ravelry group!
Also, don’t forget to use the hashtag, #fiberfluxcal to share your work on social media!
I can’t wait to see all of your gorgeous projects…please share those pictures and above enjoy, take some time to relax with your hook, and have fun!

© Jennifer Dickerson 2020
For more fun projects and pretty patterns, be sure to follow Fiber Flux on Facebook, Instagram, Twitter, and Pinterest for the latest updates!

