

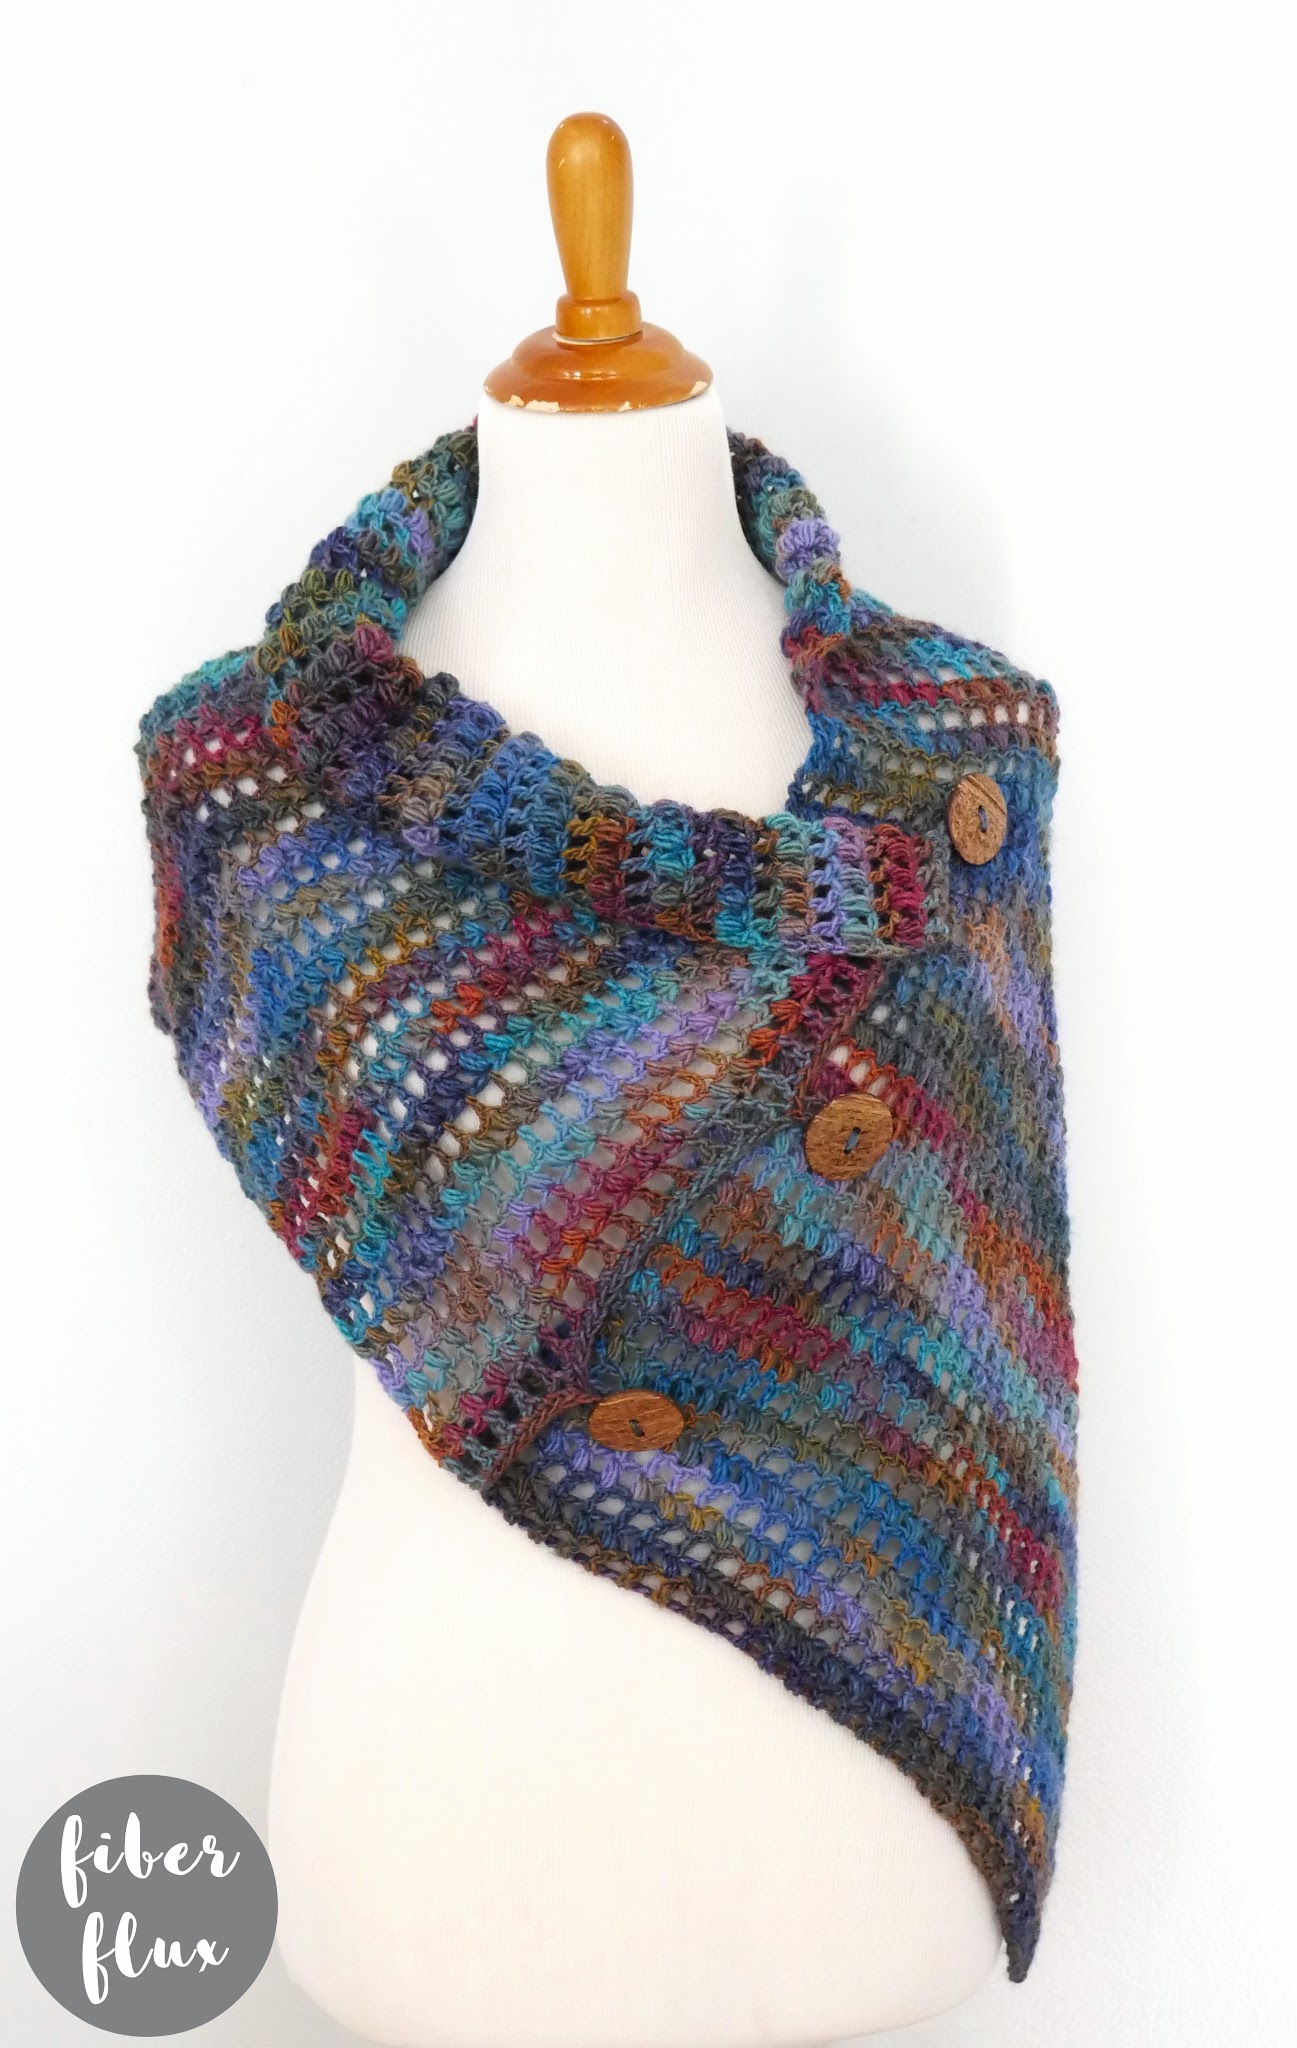
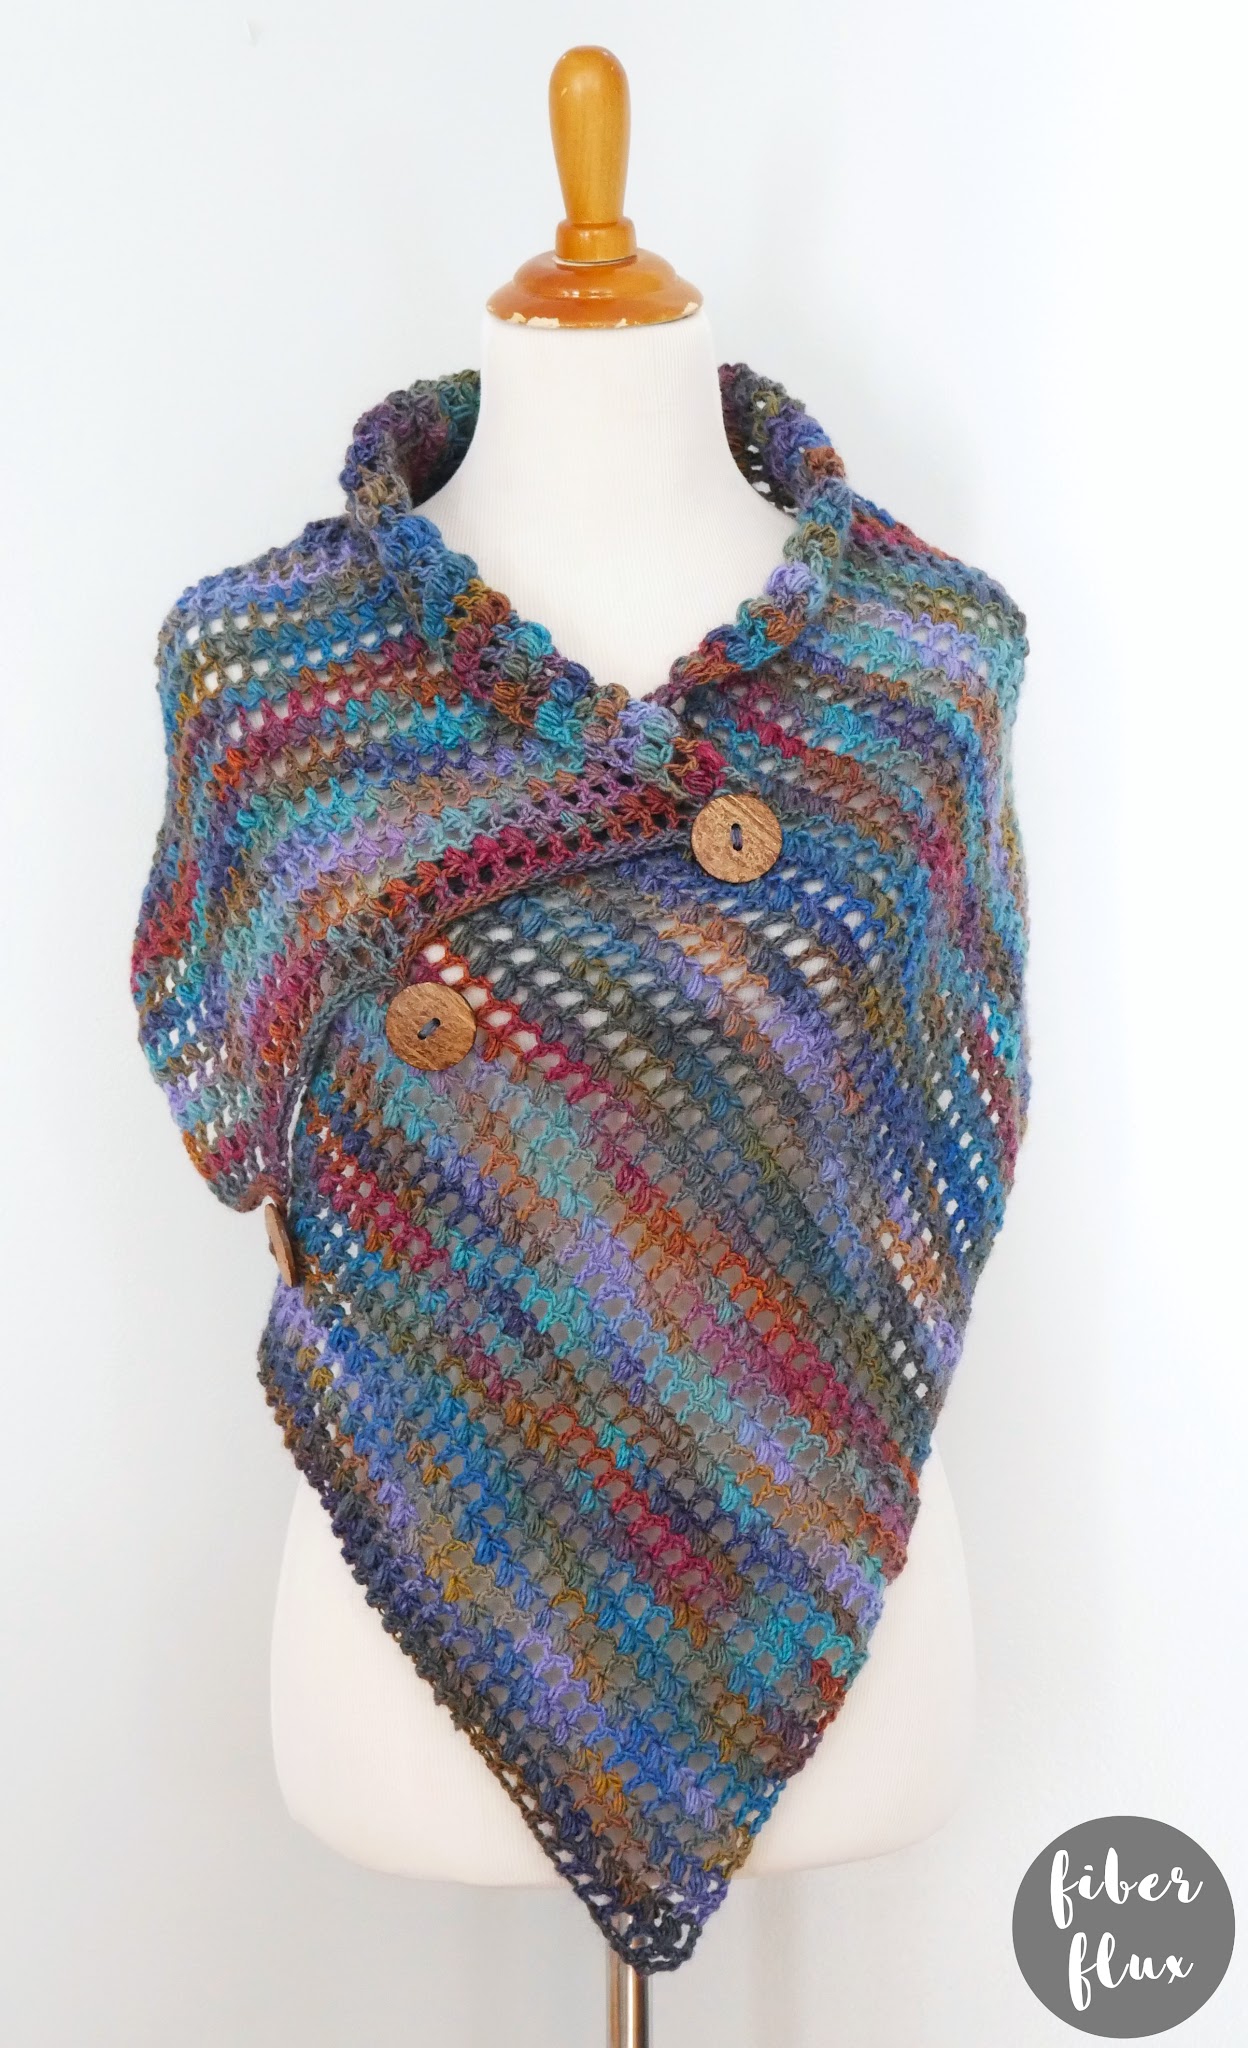
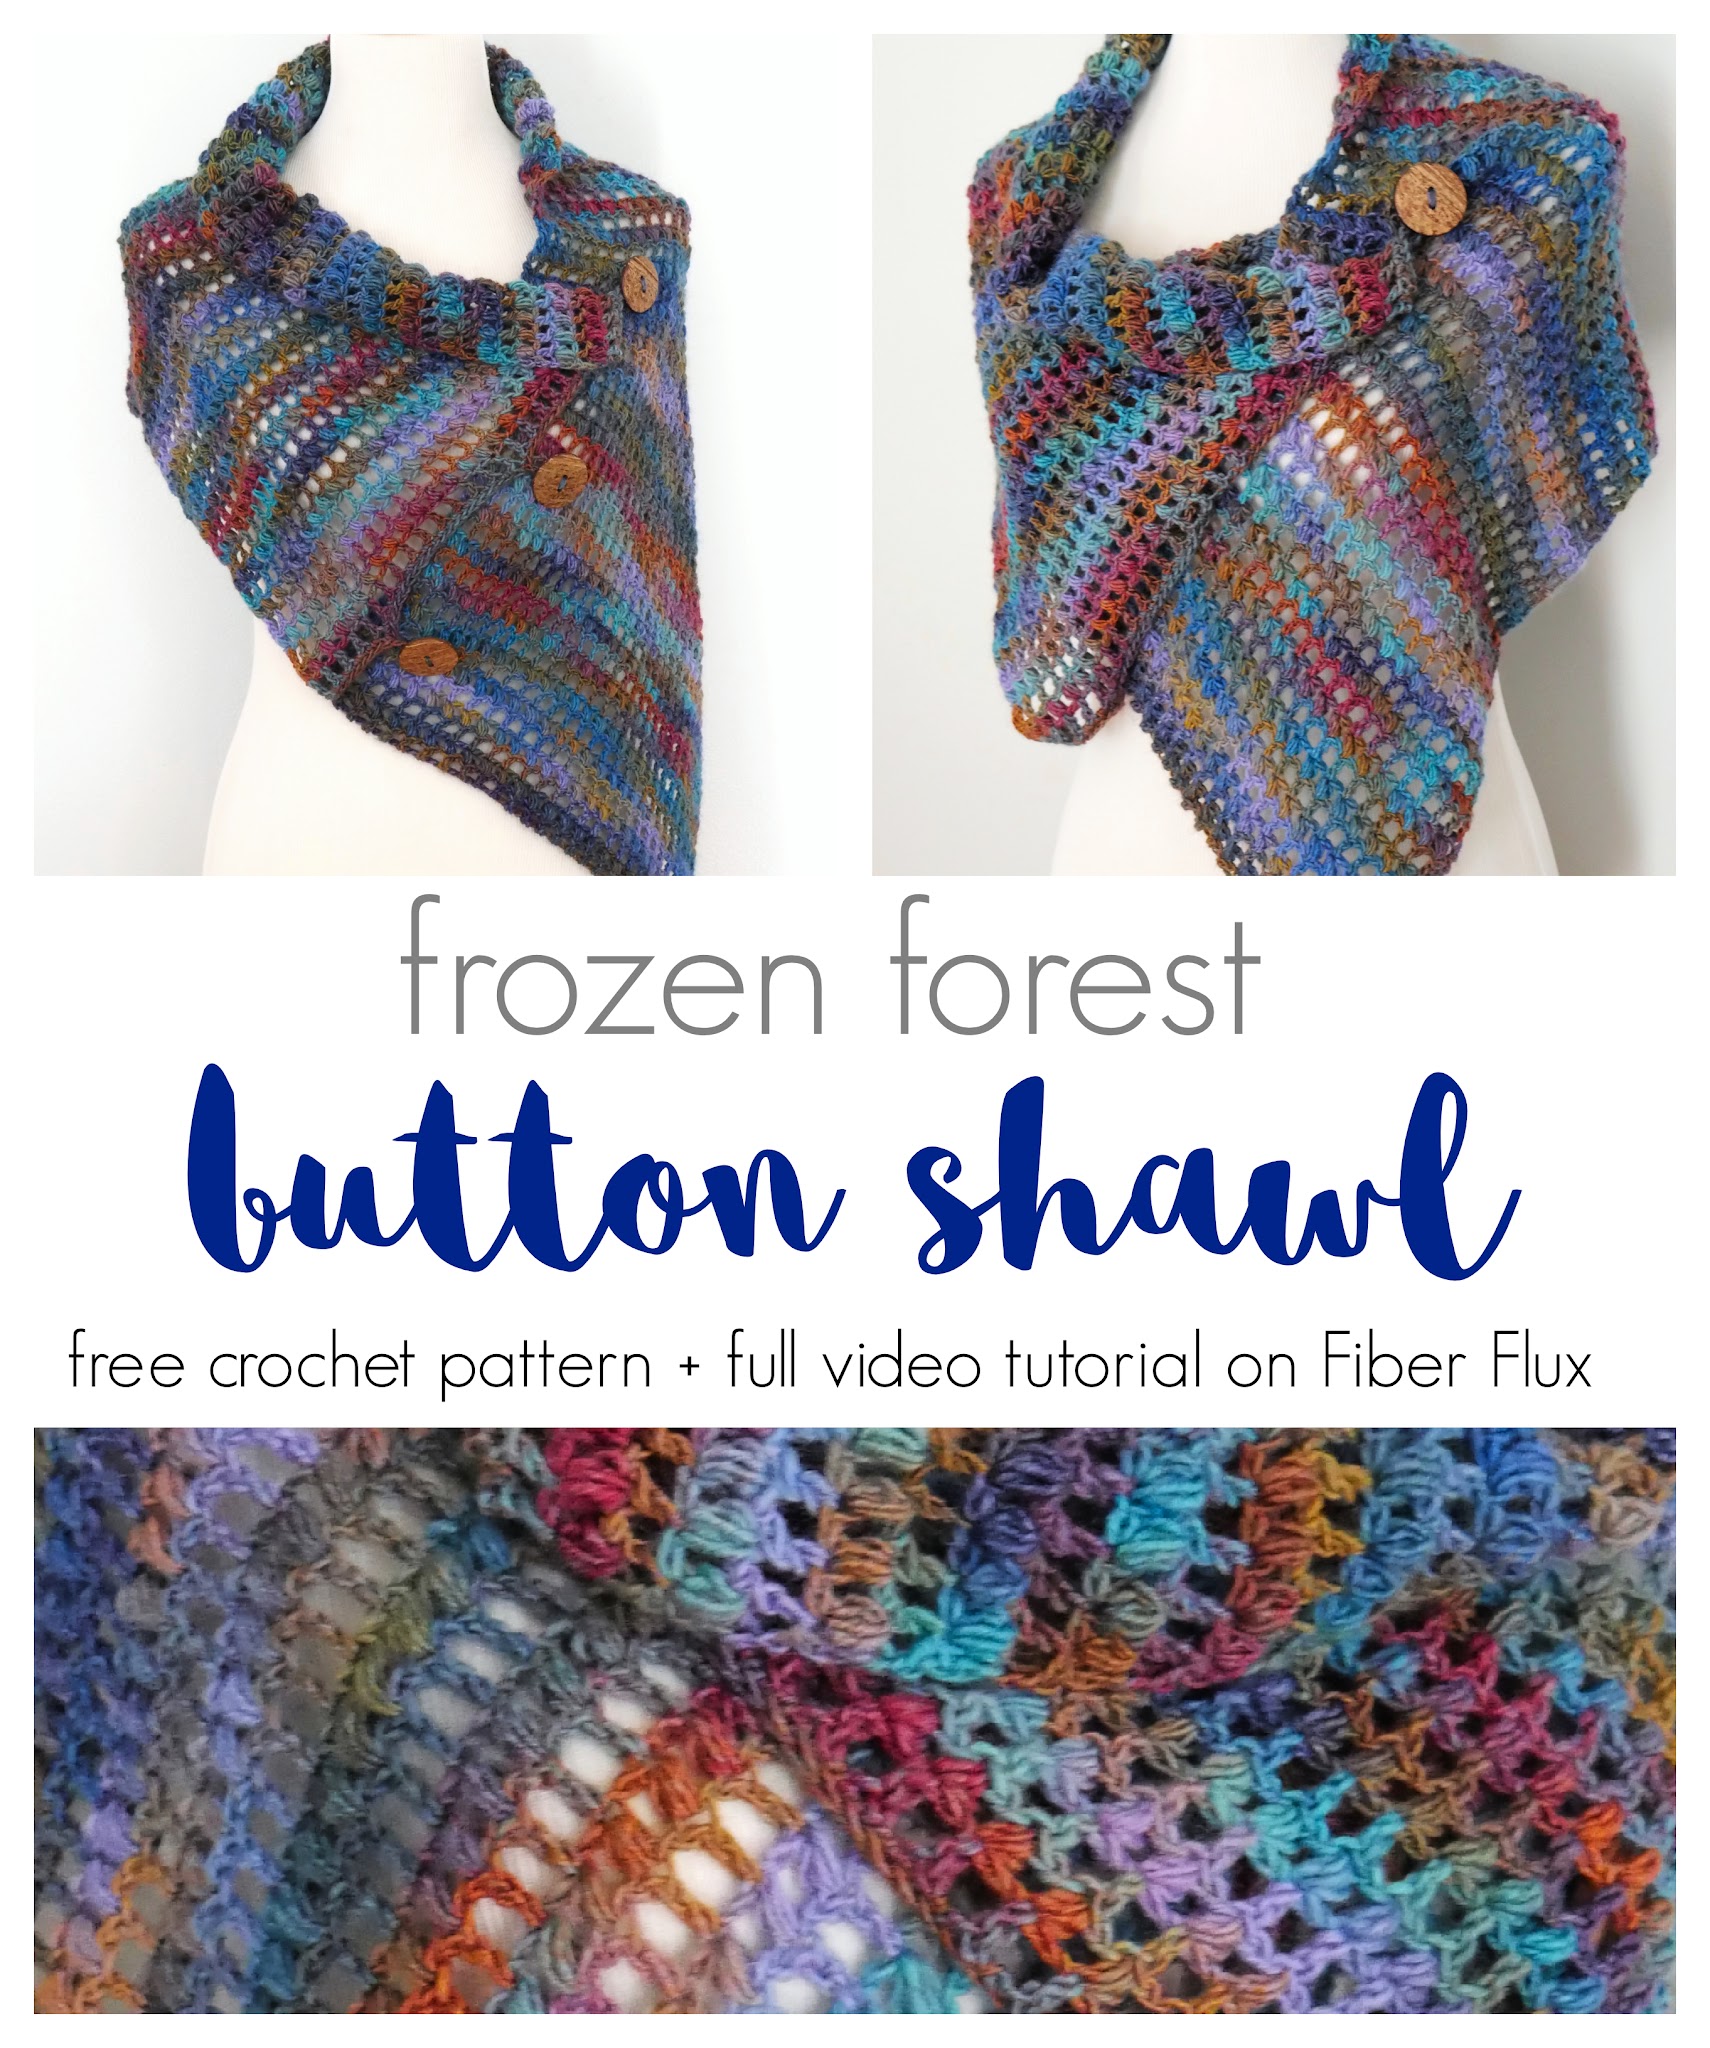
The Frozen Forest Button Shawl is a lovely wrap to crochet that features three pretty buttons that not only keep it in place but gives it several ways to style it too! Textured puff stitches are fun to crochet and give it great texture too!
👉Get the ad free pattern PDF from my shop here!👈
Click below to watch a full video tutorial on how to make this project:
(Can’t see the video? Click here!)
Love video tutorials? Subscribe to the Fiber Flux YouTube channel for more stitchy fun!
Materials:
- 5.0 mm H crochet hook
- 750 yards of worsted/#4 weight yarn (I used a little less than one 1 cake of Winter Glow by Hobbii in #22 “Teal/Blue/Curry/Turqouise”)
- Three-1.5 inch buttons (you can use other sizes if you like, you just may need to adjust your button loops)
- Tapestry Needle
- Scissors
- Tape measure
- Removable stitch markers
Sizing (when unbuttoned):
- 16 inches wide
- 35 inches long
Pattern Notes:
- Stitch sequence is a multiple of 2 + 4.
- To make a puff stitch, wrap yarn around hook and draw up a loop (3 loops on your hook), wrap yarn around hook and draw up another loop (5 loops on your hook), wrap yarn around hook and draw up a loop (7 loops on your hook). Wrap yarn around hook one more time and bring it through all 7 loops on your hook.
Instructions:
Ch 64
Row 1: In the fourth ch from the hook, work a (dc, ch 1. *Skip 1 ch and in the next ch, work a (dc, ch 1). Repeat from * until you have two chains left. Skip the second to last ch and in the last ch, work 1 dc.
Row 2: Chain 3 and turn. Work a (puff stitch, ch 1) into each dc from previous row. Work a dc in the top of the turning ch.
Row 3: Chain 3 and turn. Work a (dc, ch 1) in the top stitch of each puff from previous row. Work a dc in the top of the turning ch.
Repeat rows 2 and 3 until the shawl measures about 45 inches long. Do not fasten off and move to the next section.
Button Loop Row:
Using three removable stitch markers, mark three stitches all an equal distance from one another.
Ch 1 and turn. Work a single crochet in each stitch and space across until you get to the first stitch marker, then in the stitch with the marker, work (sc, ch 10, sc). Depending on your button size, you may need to adjust the number of chains to accommodate your button. Experiment a little for the best fit!
With a matching piece of yarn, sew buttons as shown below:
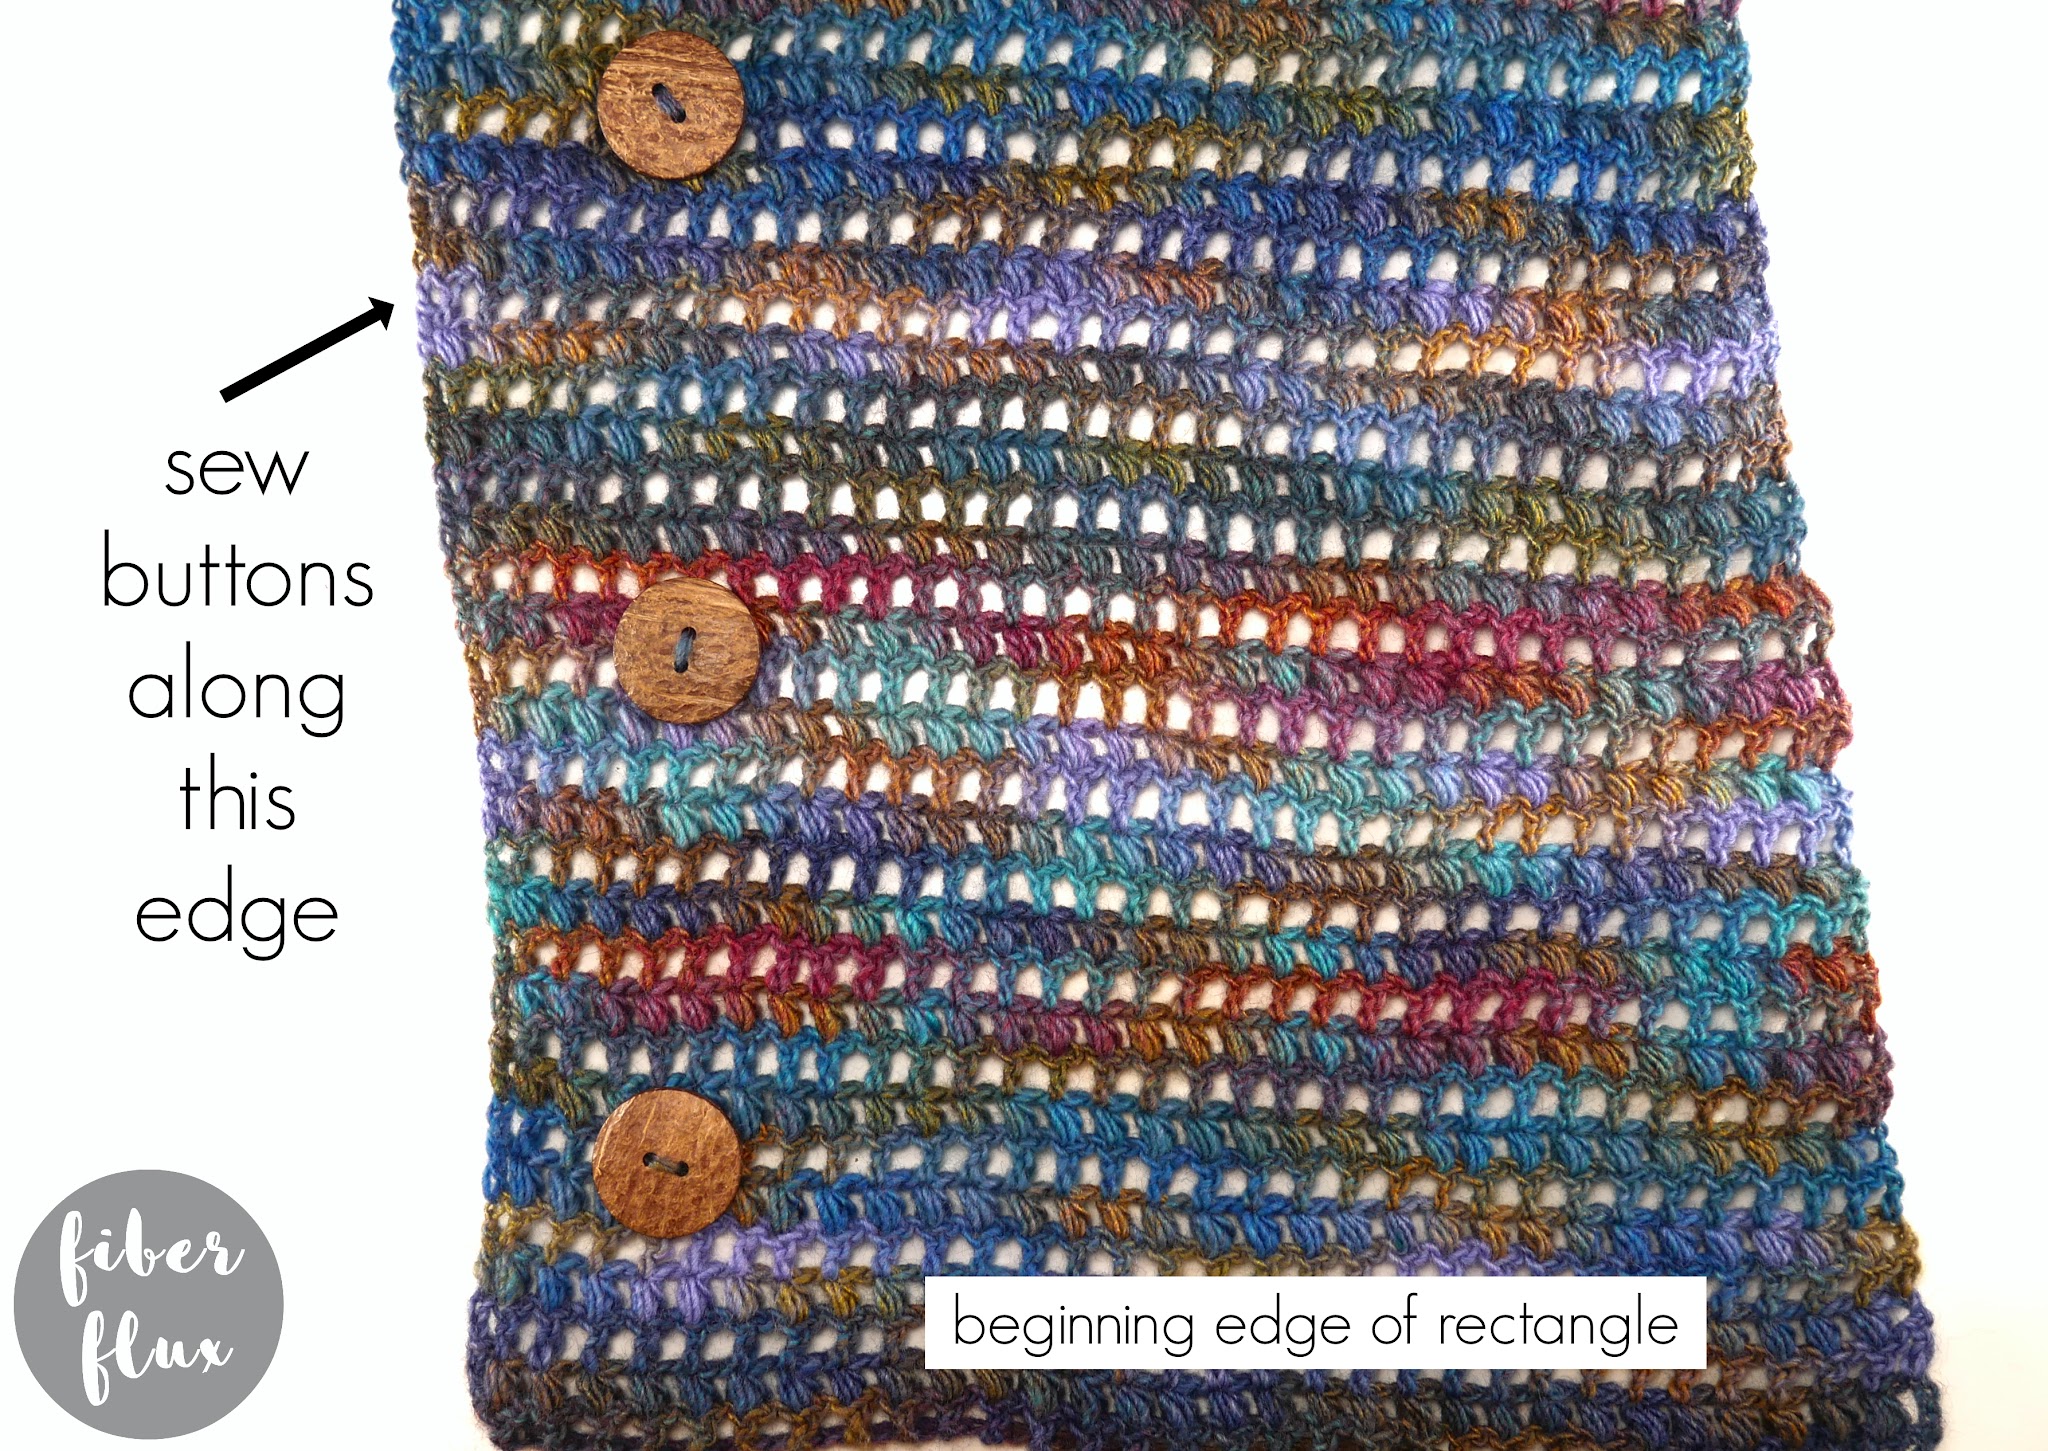
Be sure to take them in a little bit from the edge to minimize gaps where it comes together when wearing. Button it up and it’s ready to wear!

![]()
![]()
![]()

![]()
![]()


© Fiber Flux LLC 2023

